※下記はTellus開発環境(JupyterNotebook)内での処理になります。衛星データのダウンロードなど、サービス外への持ち出しは規約違反となります。
概要
JupyterNote上でタイル座標を取得して作業できるよう、IPython.display.HTMLでタイル座標取得ツールをJupterNoteに埋め込んでみました。
これに合わせて、数値関係をコピペできるようタイル座標取得ツールを修正し、つばめタイル画像の取得・結合を関数化しました。
つばめタイル画像の取得・結合関数の定義
タイル画像とシーンID取得のコードを関数化しました。
import requests
import io
from PIL import Image
def concat_h(im1, im2):
    dst = Image.new('RGB', (im1.width + im2.width, im1.height))
    dst.paste(im1, (0, 0))
    dst.paste(im2, (im1.width, 0))
    return dst
def concat_v(im1, im2):
    dst = Image.new('RGB', (im1.width, im1.height + im2.height))
    dst.paste(im1, (0, 0))
    dst.paste(im2, (0, im1.height))
    return dst
def getTubameImg(token,id,zoom,min_v,max_v,min_h,max_h):
    headers = { 'Authorization': 'Bearer %s' % token }
    img = None
    for item_v in range(min_v,max_v):
        img_h = None
        for item_h in range(min_h,max_h):
            url = 'https://gisapi.tellusxdp.com/tsubame/'+id+'/'+str(zoom)+'/'+str(item_h)+'/'+str(item_v)+'.png'
            req = requests.get(url,headers=headers)
            if(req.status_code == 200):
                img_bin = io.BytesIO(req.content)
                if(img_h is None):
                    img_h = Image.open(img_bin)
                else:
                    img_h=concat_h(img_h,Image.open(io.BytesIO(req.content)))
            else:
                print(req.text)
        if(img is None):
            img=img_h
        else:
            img=concat_v(img,img_h)
    return img
def getTubameScene(token,area):
    url = 'https://gisapi.tellusxdp.com/api/v1/tsubame/scene'
    payload = area
    headers = { 'Authorization': 'Bearer %s' % token }
    return requests.get( url, params=payload, headers=headers)
タイル画像取得ツールの埋め込み
IPython.display.HTMLを使い、JupterNoteにiframeでタイル座標取得ツールを埋め込みました。
from IPython.display import HTML
HTML(r'<iframe width="960" height="480" src="https://tellus-map-test.herokuapp.com/" frameborder="0"></iframe>')
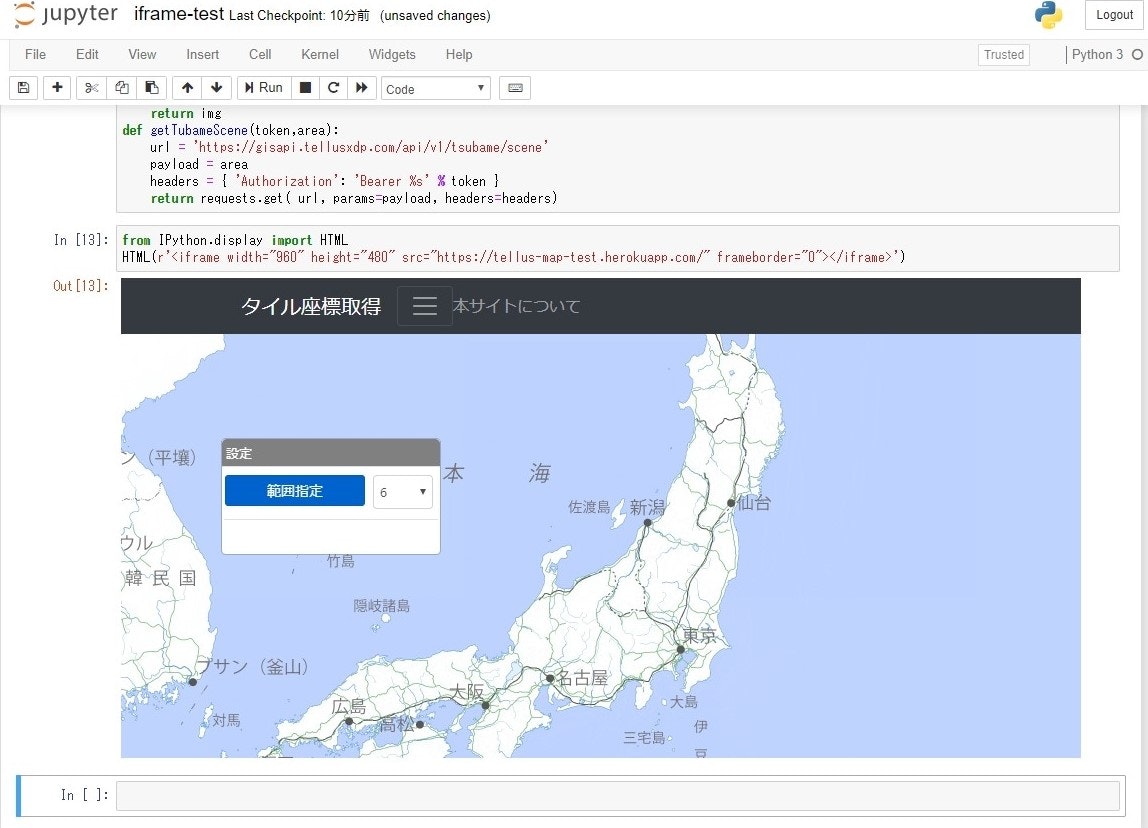
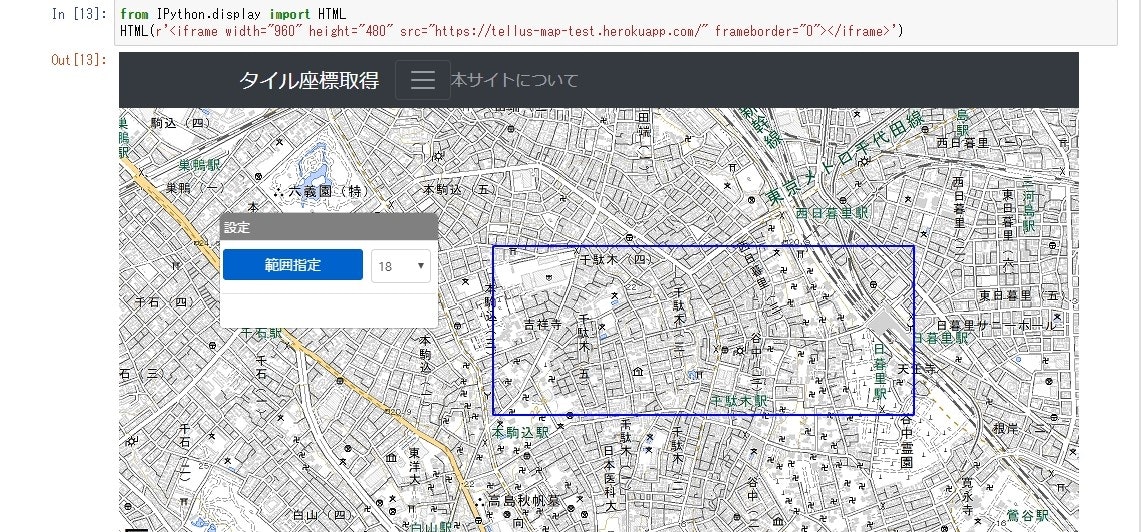
ズームレベルを設定してエリアを指定すると、ダイアログで緯度経度の範囲とタイル座標の最小値、最大値が表示されます。
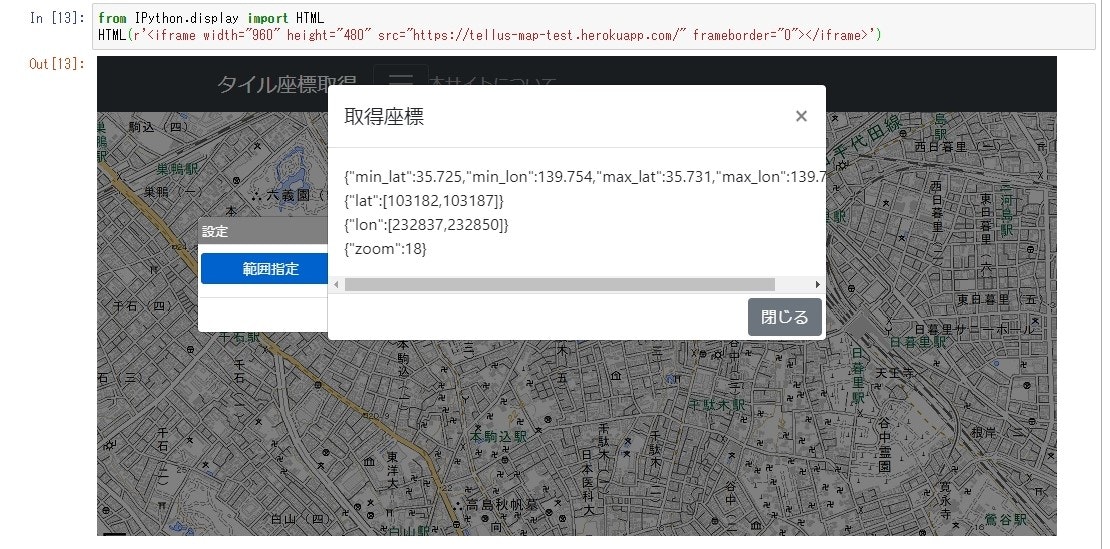
ダイアログから緯度経度範囲をコピペし、getTubameScene関数でシーンID情報を取得します。
token = 'アクセストークン'
res=getTubameScene(token,{"min_lat":35.725,"min_lon":139.754,"max_lat":35.731,"max_lon":139.772})
print(res.text)
ダイアログからズームレベルとタイル座標をコピペし、getTubameImg関数でつばめのタイル画像を取得・結合します。
import matplotlib.pyplot as plt
id="Time0200563078_Num02_SCENE47_RSVLAT1"
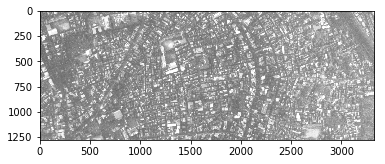
img=getTubameImg(token,id,18,103182,103187,232837,232850,)
plt.imshow(img)
タイル座標取得ツールで指定した範囲のつばめタイル画像が取得できました。
最後に
前回、タイル座標関係がストレスだったのですが、少しスッキリしました。