はじめに
apollo-server + prisma + MySQL を使って、GraphQLサーバを構築する手順をまとめました。
apollo-server とは
https://www.apollographql.com/docs/
prisma とは
https://www.prisma.io/docs/concepts/overview/what-is-prisma
全体の手順
前提として Node.js が必須です。以降の手順は npm で作業していますが、お好みで yarn 等をご利用ください。
まずは apollo-server のみで GraphQLサーバを構築した後、prisma を使って MySQL と連携し、さらに両者を連携させて行きます。
apollo-server の構築
公式の Get started の通りの手順で簡単に作成できてしまいます。
https://www.apollographql.com/docs/apollo-server/getting-started
この手順で各ファイルは以下の通りになるはずです。
※上記URLではTypeScriptをお勧めしているので、こちらも利用します。
{
  "name": "graphql-server-example",
  "version": "1.0.0",
  "description": "",
  "main": "index.js",
  "type": "module",
  "scripts": {
    "compile": "tsc",
    "start": "npm run compile && node ./dist/index.js"
  },
  "keywords": [],
  "author": "",
  "license": "ISC",
  "dependencies": {
    "@apollo/server": "^4.0.4",
    "graphql": "^16.6.0"
  },
  "devDependencies": {
    "@types/node": "^18.11.7",
    "typescript": "^4.8.4"
  }
}
{
  "compilerOptions": {
    "rootDirs": ["src"],
    "outDir": "dist",
    "lib": ["es2020"],
    "target": "es2020",
    "module": "esnext",
    "moduleResolution": "node",
    "esModuleInterop": true,
    "types": ["node"]
  }
}
import { ApolloServer } from '@apollo/server';
import { startStandaloneServer } from '@apollo/server/standalone';

// GraphQLサーバで利用するデータ形式(=スキーマ)を定義します。
const typeDefs = `
  # データソースのデータ形式です。
  type Book {
    title: String
    author: String
  }

  # 利用するクエリが返すデータ形式を定義します。
  # この場合、booksは0件以上のBookデータの配列を表します。
  type Query {
    books: [Book]
  }
`;

// データセットです。
// 今回は安価に作成するため、定数で定義します。
const books = [
  {
    title: 'The Awakening',
    author: 'Kate Chopin',
  },
  {
    title: 'City of Glass',
    author: 'Paul Auster',
  },
];

// クエリ実行時、どのようなデータを返すか設定(リゾルバ)をします。
// この場合、上記のデータセットをそのまま返します。
const resolvers = {
  Query: {
    books: () => books,
  },
};

// スキーマとリゾルバを指定し、apollo-server起動準備をします。
const server = new ApolloServer({
  typeDefs,
  resolvers,
});

// apollo-serverをポート番号:4000で起動します。
const { url } = await startStandaloneServer(server, {
  listen: { port: 4000 },
});

console.log(`🚀  Server ready at: ${url}`);
公式の通り、以下を起動し
% npm start
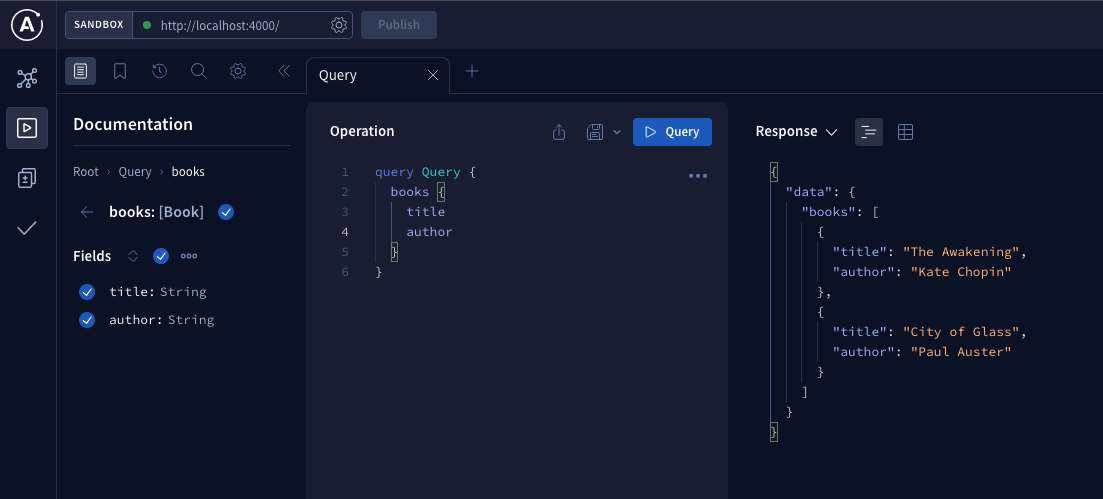
http://localhost:4000/ にアクセスすると以下のような、GraphQLサーバにクエリを投げることができる画面(Apollo Sandbox)が表示されます。

prisma と MySQL の連携
※ MySQL の構築については本投稿では説明しません。他の方が Docker 等で構築する手順を投稿しておりますので、そちらを参考にしてください。
※今回は既に MySQL にあるテーブルを元に schema.prisma を作成(prisma db pull)します。
テーブルやレコードは以下で準備しておきます。
CREATE TABLE `test` (
  `id` bigint unsigned NOT NULL AUTO_INCREMENT,
  `name` varchar(255) NOT NULL COMMENT '名前',
  `created_at` datetime NOT NULL DEFAULT CURRENT_TIMESTAMP COMMENT '日時',
  PRIMARY KEY (`id`)
) ENGINE=InnoDB COMMENT='テスト';

INSERT INTO `test` (`id`, `name`) VALUES ('1', 'テスト1');
INSERT INTO `test` (`id`, `name`) VALUES ('2', 'テスト2');
INSERT INTO `test` (`id`, `name`) VALUES ('3', 'テスト3');
次に、prismaクライアント と prisma CLI をインストールします。
インストール後、 prisma のセットアップ(init)します。
https://www.prisma.io/docs/concepts/overview/what-is-prisma
https://www.prisma.io/docs/reference/api-reference/command-reference
% npm install @prisma/client prisma
% npx prisma init
次に、 prisma/schema.prisma と .env を MySQL に繋げるよう編集します。
https://www.prisma.io/docs/concepts/database-connectors/mysql
DATABASE_URL="mysql://USER:PASSWORD@HOST:PORT/DATABASE"
generator client {
  provider = "prisma-client-js"
}

datasource db {
  provider = "mysql"
  url      = env("DATABASE_URL")
}
次に、 MySQL からテーブルの情報を取得し、 prisma の generate コマンドを実行します。
% npx prisma db pull
% npx prisma generate
次に、apollo-server に連携するため、 src/index.ts を以下の通り編集します。
https://www.prisma.io/apollo
https://www.prisma.io/docs/concepts/components/prisma-client/crud
import { ApolloServer } from '@apollo/server';
import { startStandaloneServer } from '@apollo/server/standalone';
import { PrismaClient } from '@prisma/client';

// prismaの利用
const prisma = new PrismaClient();

const typeDefs = `
  # 上記SQLで作成したテーブルの定義
  type Test {
    id: Int
    name: String
    created_at: String
  }

  type Query {
    Test: [Test]
  }
`;

// testテーブルのレコードを返す
const resolvers = {
  Query: {
    Test: () => prisma.test.findMany()
  },
};

const server = new ApolloServer({
  typeDefs,
  resolvers,
});

const { url } = await startStandaloneServer(server, {
  listen: { port: 4000 },
});

console.log(`🚀  Server ready at: ${url}`);
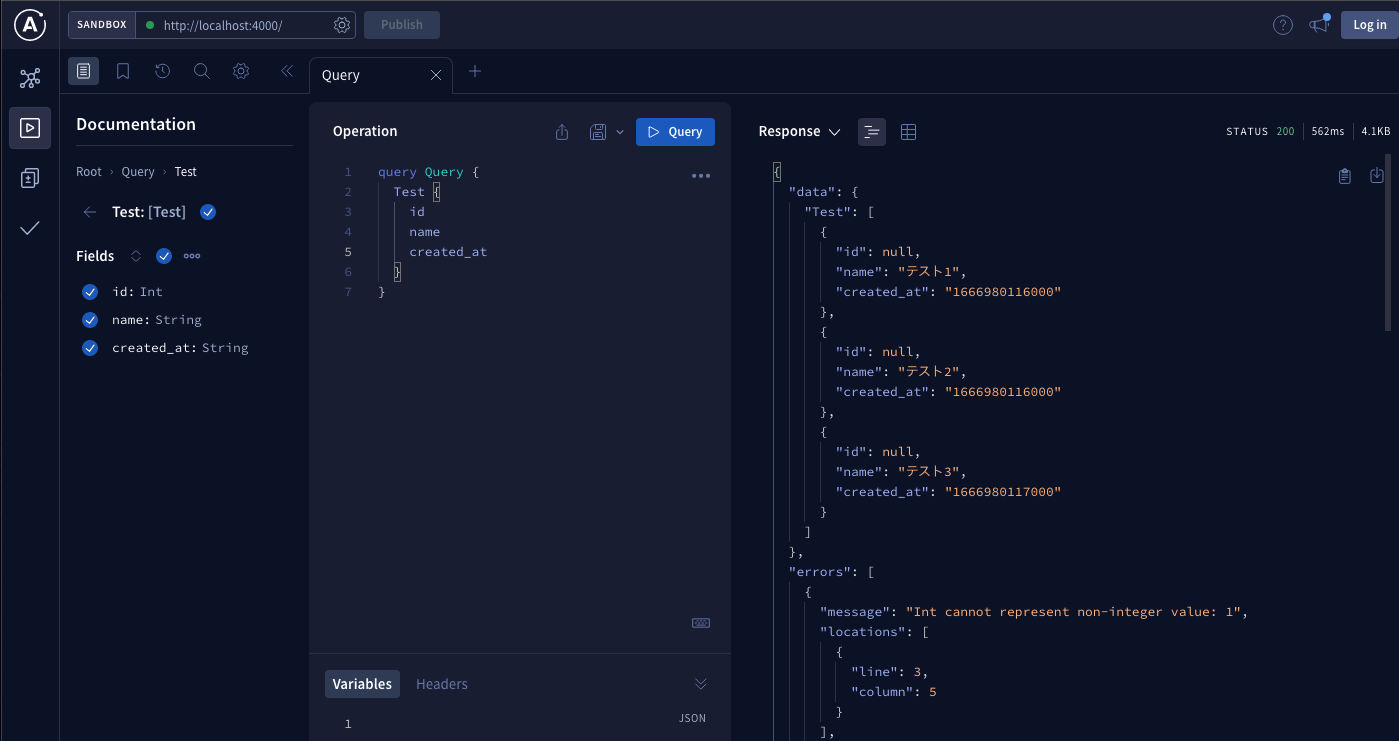
これで再び、 apollo-server を起動すると、
% npm start
上手く取れてると思いきや、一部エラーが発生してしまいます。
実は GraphQL ではデフォルトでは以下の型(Scalar types)しか準備されておらず、
MySQL の BigInt や DateTime を上手く取得できません。
https://www.apollographql.com/docs/apollo-server/schema/schema#scalar-types
そこで必要になるのが custom scalar で、
https://www.apollographql.com/docs/apollo-server/schema/custom-scalars
これらをいい感じにまとめてくれている graphql-scalars を今回は利用します。
https://www.the-guild.dev/graphql/scalars/docs
https://www.the-guild.dev/graphql/scalars/docs/usage/apollo-server
graphql-scalars の導入
今回はさまざまな custom scalar を提供している graphql-scalars の導入します。
https://www.the-guild.dev/graphql/scalars/docs
使い方はこちら
https://www.the-guild.dev/graphql/scalars/docs/usage/apollo-server
以上に沿って、 src/index.ts を以下の通り編集します。
import { ApolloServer } from '@apollo/server';
import { startStandaloneServer } from '@apollo/server/standalone';
import { PrismaClient } from '@prisma/client';
import {
  typeDefs as scalarTypeDefs,
  resolvers as scalarResolvers,
} from 'graphql-scalars';

const prisma = new PrismaClient();

const typeDefs = `
  type Test {
    id: BigInt
    name: String
    created_at: DateTime
  }

  type Query {
    Test: [Test]
  }
`;

const resolvers = {
  Query: {
    Test: () => prisma.test.findMany()
  },
};

const server = new ApolloServer({
  resolvers: {
    ...scalarResolvers,
    ...resolvers,
  },
  typeDefs: [
    ...scalarTypeDefs,
    typeDefs,
  ],
});

const { url } = await startStandaloneServer(server, {
  listen: { port: 4000 },
});

console.log(`🚀  Server ready at: ${url}`);
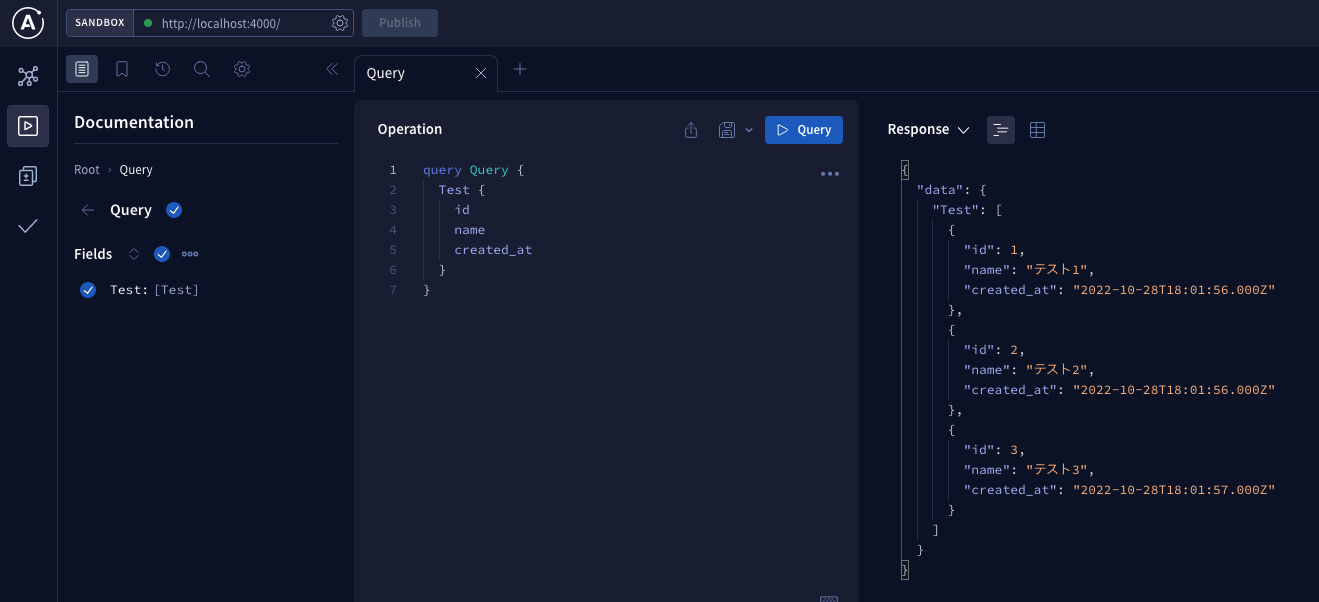
これで再び、 apollo-server を起動すると、
% npm start
今度は無事取得することができました。
が、日付項目がJSTでテーブルに保存しているにも関わらず、UTC形式かつ実際の時間にズレが生じています。
こちらは、 prisma が対応中ですが、あまり活発ではなさそうです…
https://github.com/prisma/prisma/discussions/4153
https://github.com/prisma/prisma/issues/3292
対応されるまでは、API呼び出し元で対応するしかなさそうです。
おわりに
以上の手順で既存のMySQLを使って、割と簡単にGraphQLサーバを構築することが分かりました。
今回紹介した内容以外にレコードの抽出条件を指定する、レコード登録更新削除を行う、がありますがこちらも公式ドキュメントに沿って対応すれば実現できそうです。

