概要
Power Automate Desktop(以下PAD)のInvoke web service(Webサービスを呼び出します)アクションを使ってQiita APIからデータを取得して空のExcelに書き込みます。APIとExcelを使った練習です。

注意
サイト様の仕様制限に従ってください。
今回はQiitaAPIを使用します。
https://qiita.com/api/v2/docs
利用制限
認証している状態ではユーザごとに1時間に1000回まで、認証していない状態ではIPアドレスごとに1時間に60回までリクエストを
受け付けます。
準備
未登録だと試すうちにとすぐ使用制限にかかると思いますので登録してAPIキーを取得します。
Qiita マイページで設定>アプリケーションと進みます。

アクセストークンの説明に適宜記入して発行します。

再表示できないのでメモ帳等にコピーしておいてください。
デモシナリオ
空のExcelにQiitaのタグとフォロワー数をAPIで取得して表を作成します。
今回作るフロー全体図です。

アクションの説明
- 取得したいタグのリストを作成します。
今回は直接PAD内に変数で作成してしまいます。
別のcsvやExcelファイルから取得してもよいですが手順が増えるため1行で済ませてしまいます。

%['PowerBI', 'PowerApps', 'PowerAutomate', 'PowerAutomateDesktop', 'PowerShell', 'PowerToys']%

Power関連のリストにしました。(;'∀')
2. Excelの列名をデーターテーブル形式で変数から作成してしまいます。
1と同様に別のcsvやExcelファイルから取得してもよいですが手順が増えるため1行で済ませてしまいます。
image.png
%{['TagName', 'TagCount', 'FollowerCount'] }%

ハードコードは賛否あるかもしれませが1,2の記述方法は覚えておいて損はないかと思います。
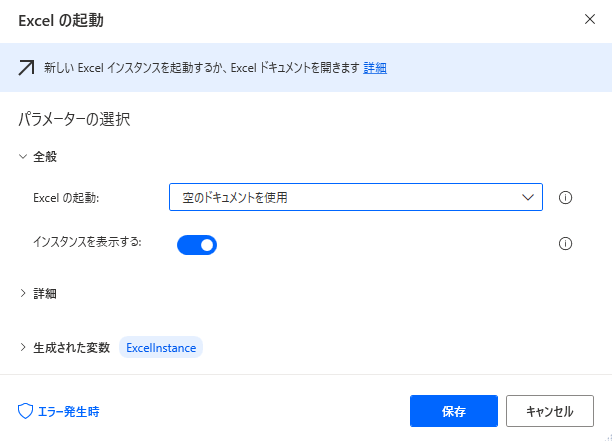
3. Excelの起動
空のまま作成します。
4. 後でショートカットを使用するので念のためウィンドウにフォーカスしておきます。

5. 列名を書き込みます。

6. TagListを1列目2行目~に書き込みます

7. Excelシートの列幅を整えて罫線を作成します。
ショートカットを使って1アクションで済ませてしまします。

{ALT}({O}{C}{A})
{ALT}(hba){Enter}
{Control}({Home})```
ショートカットについては色々試してみてください。
8. Excelに書き込み時の行カウンターをセットしておきます。
2行目からかきこみたいので2です。

9. For each
TagListからAPIで取得したいTagNameを順番に実行します。

9.Webサービスを呼び出します

URLに`https://qiita.com/api/v2/tags/%CurrentItem%`とします。
For eachで変化するように%CurrentItem%を指定しています。
取得なので取得したいのでメソッドは`GET`
応答とコンテンツタイプは`application/json`
カスタムヘッダーにAPIキーを書きます.
```Authorization: Bearer
取得したAPIキーを2行目に書いています
成功するとJSONでTAGの情報が返却されます。
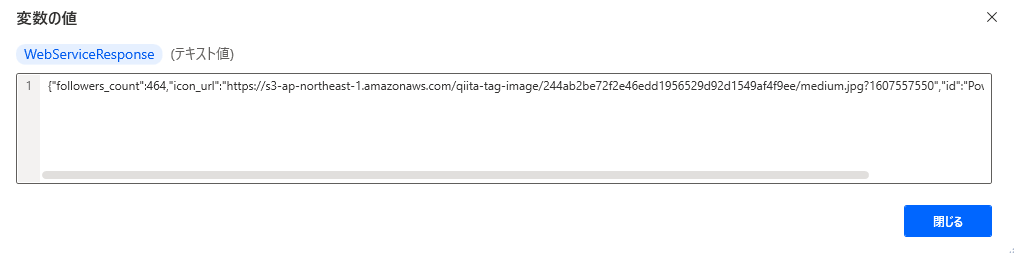
9. 返却されたJSONをカスタムオブジェクトに変換します
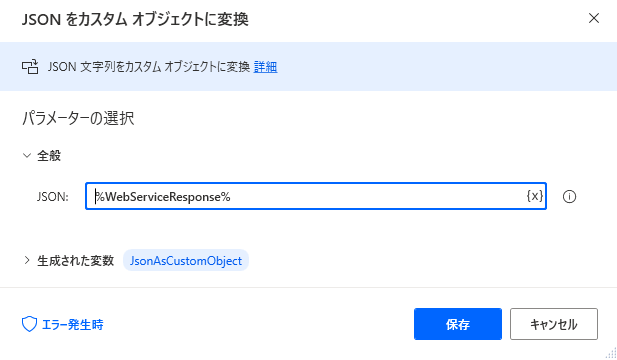
変換することで取得したJSONから値が読みだせます。
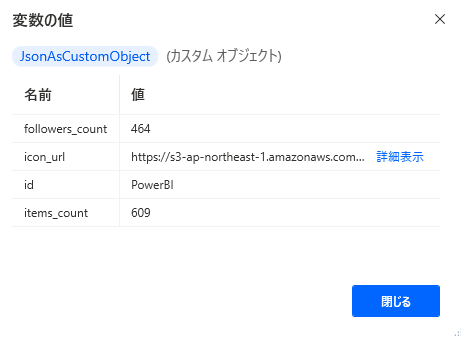
10. JsonAsCustomObjectからitems_countをExcelのTagCount列に書き込みます。

11. JsonAsCustomObjectからfollowers_countをExcelのFollowerCount列に書き込みます。

12. RowCountを1増やします

コード(APIキーは抜いてありますので取得したものを入れてください)
SET ColumnName TO {['TagName', 'TagCount', 'FollowerCount'] }
SET TagList TO ['PowerBI', 'PowerApps', 'PowerAutomate', 'PowerAutomateDesktop', 'PowerShell', 'PowerToys']
Excel.Launch Visible: True LoadAddInsAndMacros: False Instance=> ExcelInstance
UIAutomation.Windows.FocusByInstanceOrHandle WindowInstance: ExcelInstance
Excel.WriteCell Instance: ExcelInstance Value: ColumnName Column: 1 Row: 1
Excel.WriteCell Instance: ExcelInstance Value: TagList Column: 1 Row: 2
MouseAndKeyboard.SendKeys TextToSend: $'''{Control}({A})
{ALT}({O}{C}{A})
{ALT}(hba){Enter}
{Control}({Home})''' DelayBetweenKeystrokes: 10 SendTextAsHardwareKeys: False
SET RowCount TO 2
LOOP FOREACH CurrentItem IN TagList
    Web.InvokeWebService Url: $'''https://qiita.com/api/v2/tags/%CurrentItem%''' Method: Web.Method.GET Accept: $'''application/json''' ContentType: $'''application/json''' CustomHeaders: $'''Authorization: Bearer ここにAPIキー''' RequestBody: $'''%''%''' ConnectionTimeout: 30 FollowRedirection: True ClearCookies: False FailOnErrorStatus: False EncodeRequestBody: True UserAgent: $'''Mozilla/5.0 (Windows; U; Windows NT 5.1; en-US; rv:1.8.1.21) Gecko/20100312 Firefox/3.6''' Encoding: Web.Encoding.AutoDetect AcceptUntrustedCertificates: False ResponseHeaders=> WebServiceResponseHeaders Response=> WebServiceResponse StatusCode=> StatusCode
    Variables.ConvertJsonToCustomObject Json: WebServiceResponse CustomObject=> JsonAsCustomObject
    Excel.WriteCell Instance: ExcelInstance Value: JsonAsCustomObject.items_count Column: 2 Row: RowCount
    Excel.WriteCell Instance: ExcelInstance Value: JsonAsCustomObject.followers_count Column: 3 Row: RowCount
    Variables.IncreaseVariable Value: RowCount IncrementValue: 1 IncreasedValue=> RowCount
END
まとめ
PADからExcelとQiita APIを使った基礎的な練習です。
Webサービスを呼び出します(Invoke web service) アクションを使いました。
Qiitaに限らずAPIを使わせていただけるところはPADからでも何かできるかもしれません。
色々試していただければ幸いです。
リストとデータテーブルを変数で記述する方法を書きました。
Excelはショートカットでアクションにないコントーロールが多少できます。
ForEachで回してデータを取得してます。遅いです。(;'∀')
正直なところ今回の連携はPowerautomate、Dataverse、PowerBIの組み合わせの方がより実用的です。
それについては次の機会に書いてみます、
参考
Qiita API v2ドキュメント https://qiita.com/api/v2/docs
マウスとキーボード - Power Automate - Microsoft Docs https://docs.microsoft.com/ja-jp/power-automate/desktop-flows/actions-reference/mouseandkeyboard#sendkeys
Excel でよく使うようになったショートカット一覧 https://qiita.com/katzueno/items/34dd157676a42327787f