概要
Power Automate DesktopからAzure Cognitive Services Computer Vision API (v3.2) Readの使用方法です。
2021年7月10日Power Automate Desktop勉強会vol.3でLTに参加させていただきました。
この時はPythonスクリプトの実行アクションからComputer Vision API (v3.2) Readを使用しました。今回はPowerShellスクリプトの実行アクションからの使用方法を紹介します。勉強会では画像加工までおこないましたがOCR部分にフォーカスしています。
環境
- Windows 10 Pro 21H1
- Power Automate Desktop 2.12.171.21216
- Microsoft Azure Cognitive Services Computer Vision
注意事項等
- Microsoft Azureの試用および利用にはクレジットカード情報が必要です。
- 試用終了後もMicrosoft Azure Cognitive Services Computer VisionはFree tierとして30日間で5000Callsあります。
- 例外処理はしていません。
- コードはコピペ可能ですエンドポイントとキーを入れると試すことができます。
- 自己責任でお願いいたします。
- 2021年8月の情報です。
準備
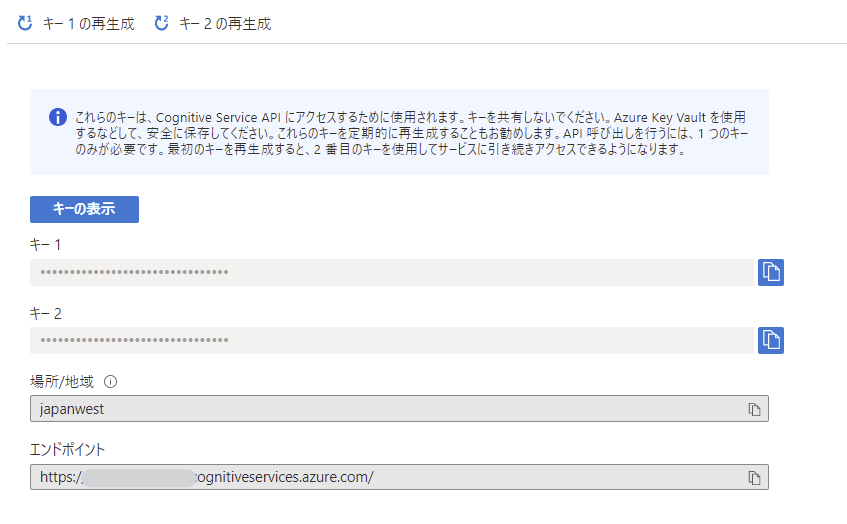
Computer Visionのリソースを作成してキーとエンドポイントを取得します。
Computer Vision API (v3.2) Readについて
- サポートされるイメージフォーマットはJPEG, PNG, BMP, PDFおよびTIFF。
- イメージサイズは50MBまで可能ですがfree tierでは4MBまでです。
- 50 x 50 pixels ~ 10000 x 10000 pixels。
- デスクトップからデータ送信する場合、Content-typeをapplication / octet-streamでBinary image dataとしてPOSTメソッドでリクエストします。
詳しくはリファレンスを参照ください。
フロー

要点
7.PowerShellスクリプトの実行アクション
$endpoint = "https://********.co********s.azure.com/" #Your Endpoint
$language = "ja"
$readingOrder = "natural"
$uri = "$endpoint/vision/v3.2/read/analyze?language=$language&readingOrder=$readingOrder"
$headers = @{
    "Accept"                    = "application/json"
    "Content-type"              = "application / octet-stream"
    "Ocp-Apim-Subscription-Key" = "******************" #Your Subscription Key
}

$fileBytes = [System.IO.File]::ReadAllBytes("%SelectedFile%")

$response = Invoke-WebRequest -Uri $uri -Method "POST" -Headers $headers -Body $fileBytes
$response | ConvertTo-Json
Invoke-WebRequestを使ってエンドポイントにイメージデータをPOSTします。
ヘッダーはハッシュテーブルで記述します。
[System.IO.File]::ReadAllBytes("ファイルパス")でファイルデータを読み込みます。
endpointとOcp-Apim-Subscription-Keyは適宜書き換えてください。
これらの値はダブルクォーテーションで囲む必要があります。
8.JSONをカスタムオブジェクトに変換アクション
返ってきたJSONに読み取り処理をしているOperation-Locationがありますのでカスタムオブジェクトにしておきます。
11.Webサービスを呼び出しますアクション
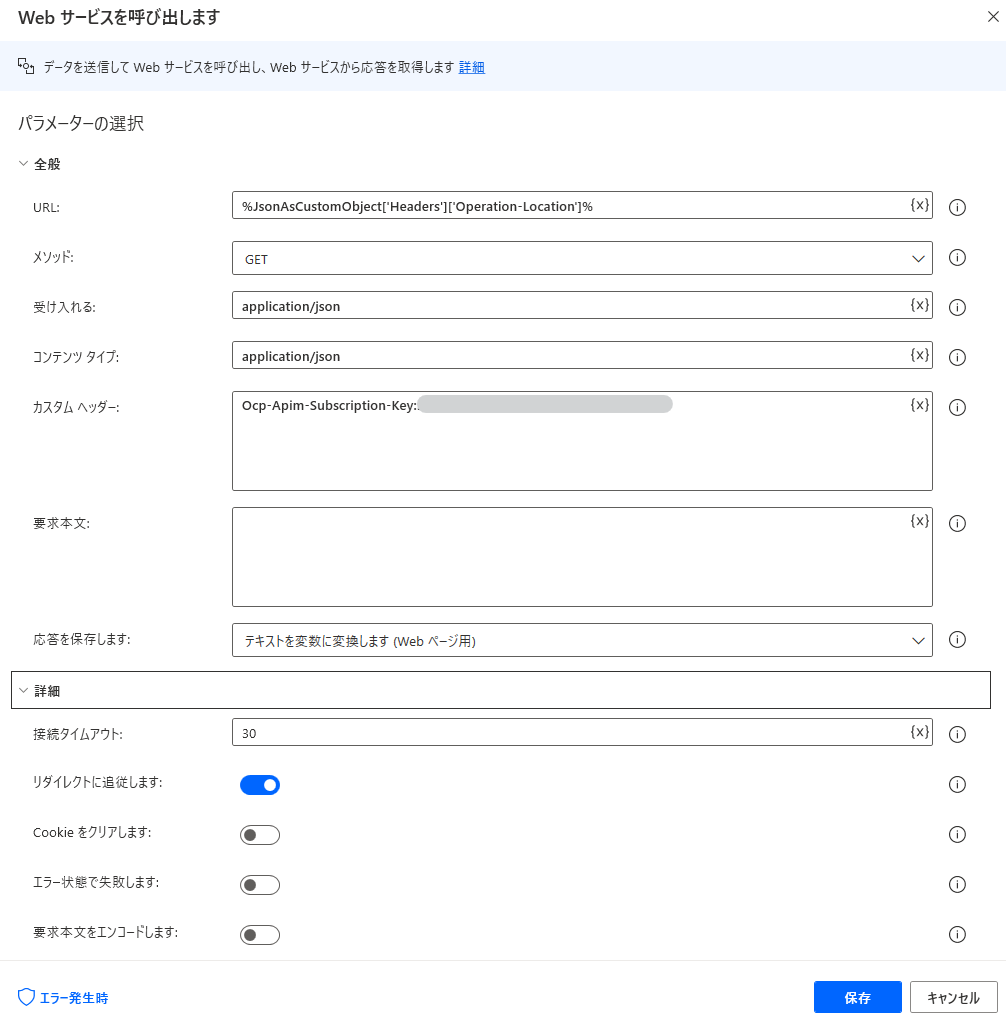
読み取り処理しているURL%JsonAsCustomObject['Headers']['Operation-Location']%にGETメソッドを投げて結果を取得します。
このとき、ファイルの大きさによってはすぐ処理されないので、返ってきたJSONのstatusを調べて判断します。statusがsucceededでない場合、サーバに負担をかけないように2秒待ってから、もう一度読み取り結果を取得しにいきます。10~16のフローで行っています。
キーはヘッダーに入れます。ここではダブルクォーテーションで囲む必要はありません。
19.For eachアクション
読み取り結果は次のようになっているのでパースします。

カスタムオブジェクトにしてあるのでFor eachアクションで%JsonAsCustomObject2['analyzeResult']['readResults'][0]['lines']%をループします。
20.項目をリストに追加アクション
%CurrentItem['text']%をリストに追加してまとめていきます。
コード
Folder.GetSpecialFolder SpecialFolder: Folder.SpecialFolder.DesktopDirectory SpecialFolderPath=> SpecialFolderPath
/# ##########################
ファイル選択とPOST
########################### /
Display.SelectFile Title: $'''ファイルを選択してください。''' InitialDirectory: SpecialFolderPath IsTopMost: False CheckIfFileExists: False SelectedFile=> SelectedFile ButtonPressed=> ButtonPressed
IF ButtonPressed = $'''Cancel''' THEN
    EXIT Code: 0
END
System.RunPowershellScript Script: $'''$endpoint = \"***********************************\" #Your Endpoint
$language = \"ja\"
$readingOrder = \"natural\"
$uri = \"$endpoint/vision/v3.2/read/analyze?language=$language&readingOrder=$readingOrder\"
$headers = @{
    \"Accept\"                    = \"application/json\"
    \"Content-type\"              = \"application/octet-stream\"
    \"Ocp-Apim-Subscription-Key\" = \"***************************\" #Your Subscription Key
}

$fileBytes = [System.IO.File]::ReadAllBytes(\"%SelectedFile%\")

$response = Invoke-WebRequest -Uri $uri -Method \"POST\" -Headers $headers -Body $fileBytes
$response | ConvertTo-Json''' ScriptOutput=> PowershellOutput ScriptError=> ScriptError
Variables.ConvertJsonToCustomObject Json: PowershellOutput CustomObject=> JsonAsCustomObject
/# ##########################
読み取り結果をGET
########################### /
LABEL ReadResult
Web.InvokeWebService Url: JsonAsCustomObject['Headers']['Operation-Location'] Method: Web.Method.Get Accept: $'''application/json''' ContentType: $'''application/json''' CustomHeaders: $'''Ocp-Apim-Subscription-Key:***************************''' ConnectionTimeout: 30 FollowRedirection: True ClearCookies: False FailOnErrorStatus: False EncodeRequestBody: False UserAgent: $'''Mozilla/5.0 (Windows; U; Windows NT 5.1; en-US; rv:1.8.1.21) Gecko/20100312 Firefox/3.6''' Encoding: Web.Encoding.AutoDetect AcceptUntrustedCertificates: False ResponseHeaders=> WebServiceResponseHeaders Response=> WebServiceResponse StatusCode=> StatusCode
Variables.ConvertJsonToCustomObject Json: WebServiceResponse CustomObject=> JsonAsCustomObject2
IF JsonAsCustomObject2['status'] <> $'''succeeded''' THEN
    WAIT 2
    GOTO ReadResult
END
/# ##########################
読み取り結果をパース
########################### /
Variables.CreateNewList List=> List
LOOP FOREACH CurrentItem IN JsonAsCustomObject2['analyzeResult']['readResults'][0]['lines']
    Variables.AddItemToList Item: CurrentItem['text'] List: List NewList=> List
END
Display.ShowMessage Title: $'''Power Automate Desktop''' Message: List Icon: Display.Icon.None Buttons: Display.Buttons.OK DefaultButton: Display.DefaultButton.Button1 IsTopMost: False ButtonPressed=> ButtonPressed2
まとめ
Computer Vision API (v3.2)は読み取り精度がかなりよいです。
外部モジュールをインストールする必要がないため、柔軟な対応が可能です。
読み取り結果には座標データが含まれているのでアイデア次第でいろいろできるとおもいます。
30日間で5000Calls試せるのはとてもありがたいです。
参考