概要
Macに標準インストールされているAutomatorとAzure Cognitive Services Computer Vision API Readを組み合わせてショートカットメニュー(コンテキストメニュー)にOCRアクションを作りました。私見ですがOCRを使いたい時ってそもそもめんどくさいからOCRをしたいわけで、別のアプリを立ち上げて読み込ませたり余分な手間を取りたくありません。なので常々、選択したファイルを右クリックのメニューから手軽にOCRできたらなぁと思っていました。最近、Macを使わせて頂く機会を得て、Automatorという自動化ツールがショートカットメニューにクイックアクションを作れることを知りました。読取精度が高いOCRサービスと組み合わせれば利便性の良い仕組みができるのではと考えたのがきっかけです。

画面録画では通知が録画されていませんが、実際の動作では処理終了時に通知されます。
検証環境
- macOs Montereyバージョン12.0.1
- MacBook Pro (13-inch, M1, 2020)
- PowerShell 7.2およびPython 3.8.9
- Azure Cognitive Services Computer Vision API (v3.2)Read
- Automator2.10
注意事項
- Microsoft Azureの試用および利用にはクレジットカード情報が必要です。
- 試用期間終了後もMicrosoft Azure Cognitive Services Computer Visionはfree tierとして30日間で5000Callが可能です。詳しくは公式ページを参照ください。
- ファイルサイズは50MBまで(free tierでは4MBまで)
- PowerShell用とPython用の2つスクリプトを用意しました。好みでお試しください。
- 2021年12月の情報です。
- 自己責任でお願いいたします。
公式サイト
準備
- PowerShellを使用される方はDocs「macOS への PowerShell のインストール」を参照ください。
- Pythonを使用される方は外部ライブラリpyperclipのインストールが必要です。
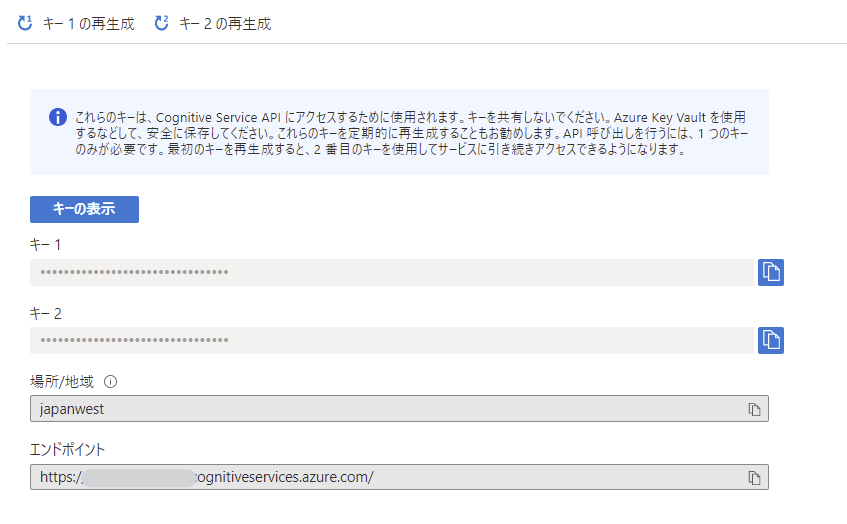
- Computer Visionのリソースを作成してキーとエンドポイントを取得しておきます。

ワークフローの解説
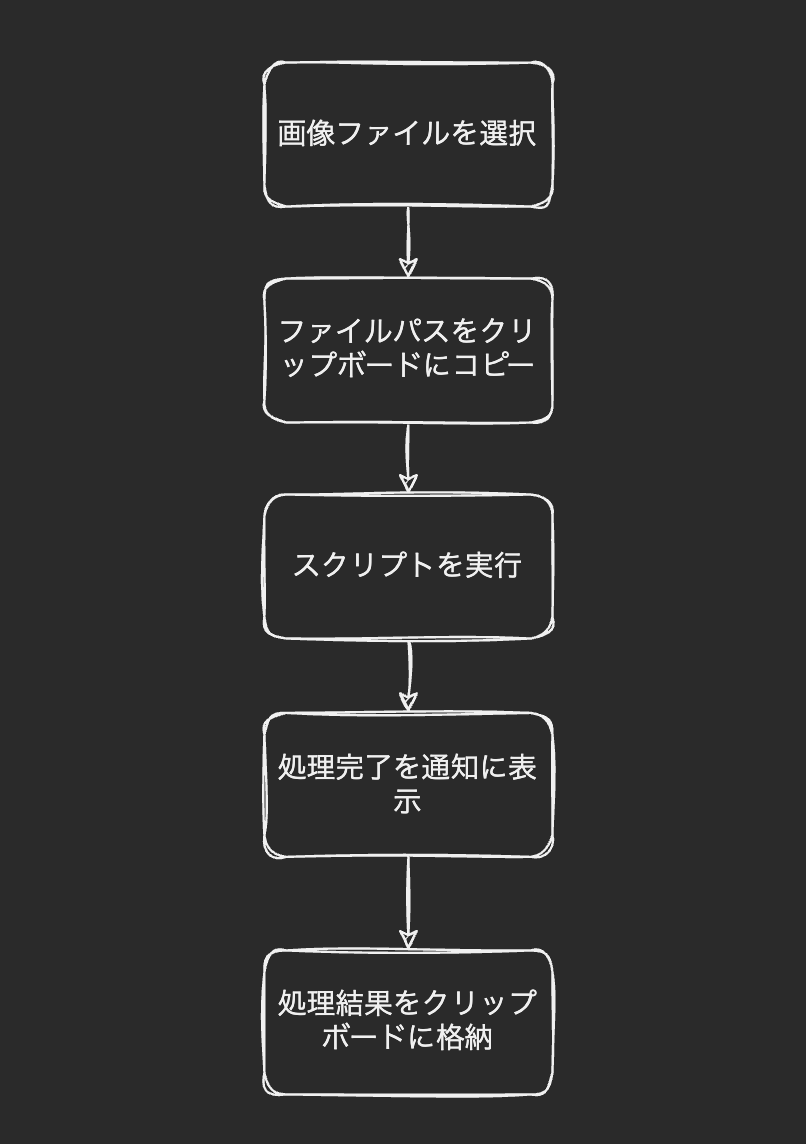
作成イメージ
OCRはスクリプトを実行して行い、その他の部分はAutomatorが担います。
Automatorワークフローの作成
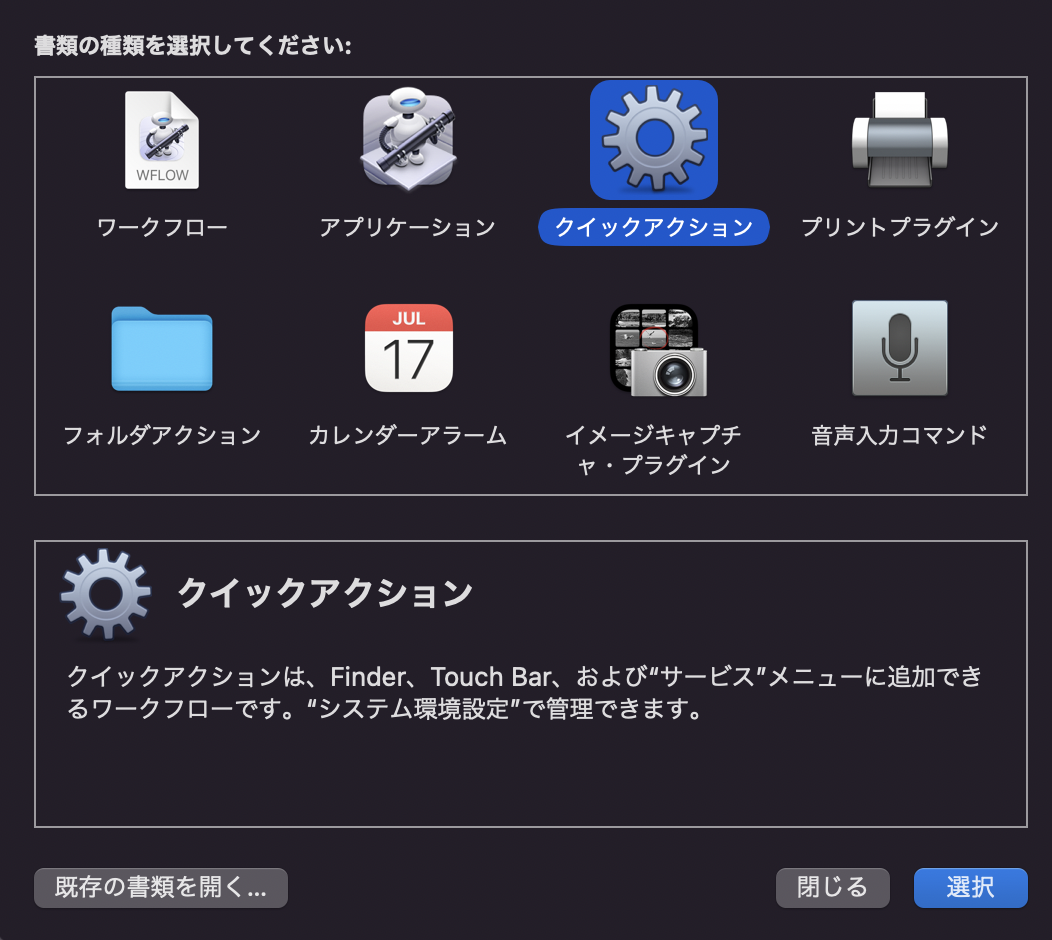
Automatorのワークフローは使いたいトリガーによって作成方法が選択できます。今回はショートカットメニューからトリガーしたいので「クイックアクション」で作成します。
- ライブラリーからアクションを選択しドラッグドロップで配置します。

- ワークファイルを受け取る現在の項目はイメージファイル、検索対象をFinderとします。pdfも対象にしたいときはワークファイルを受け取る現在の項目を「ファイルまたはフォルダー」にします。ただし対象外のファイルを選択した時もクイックメニューに作成したワークフローが表示されます。
- 「シェルスクリプトの実行」アクションはzshでスクリプト欄は空にします。後で作成するスクリプトのパスを書き込みます。

- 適宜名前を付けて保存しておきます。
Azure Cognitive Services Computer Vision API Readを利用するためのスクリプト作成
ざっくりした流れです。Visual Studio Codeなどのエディターでスクリプトファイルを作成し、/Users/ユーザー名/Library/Services/に保存します。ここはハマったポイントです。任意のディレクトリに保存したスクリプトをAutomatorから呼び出すとエラーになって動きませんでした。
またAutomatorでファイルパスをクリップボードに取得するクイックアクションを作成しておくと、スクリプト作成時にテストしやすいです。

Computer Vision API(v3.2) Readの仕様についてはリファレンスページを参考にしてください。
PowerShell
- endpointとkeyにAzureで準備した値を設定します。
- model versionは2021-09-30-previewを使用しています。
- サーバに負荷をかけないように2秒おきに10回までオペレーションロケーションにGETするように設定しています。
- イメージファイルの内容によりますが、読取が成功するまで2〜10秒程度かかリます。
- 作成したスクリプトファイルは
/Users/ユーザー名/Library/Services/に保存します。 - Automatorの「シェルスクリプトの実行」アクションから起動できるようにスクリプト欄を設定します。
/usr/local/bin/pwsh /Users/ユーザー名/Library/Services/ファイル名.ps1

PowerShellのパスはターミナルからwhich pwshを入力すると確認できます。
#############################
# オペレーションロケーションの取得#
#############################

# 変数の初期化
$endpoint = "https://********.cognitiveservices.azure.com" #********Your Endpoint
$key = "****************************"#*********Your Access Key
$language = "ja"
$readingOrder = "natural"
$modelVersion="2021-09-30-preview"
$uri = "$endpoint/vision/v3.2/read/analyze?language=$language&readingOrder=$readingOrder&model-version=$modelVersion"
$headers = @{
    "Accept"                    = "application/json"
    "Content-type"              = "application / octet-stream"
    "Ocp-Apim-Subscription-Key" = "$key"
}
$ocrUrl = ""
$readResponse = ""

# 画像パスをクリップボードから取得して画像をバイナリデータ化

$filePathFromSystem = Get-Clipboard

try {

    $fileBytes = [System.IO.File]::ReadAllBytes("$filePathFromSystem")
}
catch {
    Write-Output ("画像のパスを取得できません。ファイルを選択しなおしてください。" + $Error[0].Exception.Message)
    exit
}

# 画像データをエンドポイントにPOSTしヘッダーからオペレーションロケーションを取得

try {
    $response = Invoke-WebRequest -Uri $uri -Method "POST" -Headers $headers -Body $fileBytes
    $ocrUrl = $response.Headers.'Operation-Location'
}
catch {
    Write-Output ("Error:" + $Error[0].Exception.Message)
    exit
}

#############################
#      読み取り結果の取得      #
#############################
# リトライ回数初期化
$count = 0
# リトライまでの時間(秒)
$retryWaitTime = 2
# リトライの上限回数
$retryLimit = 10
# ヘッダーにキーを設定
$headers = @{"Ocp-Apim-Subscription-Key" = "$key" }

while ($readResponse.status -ne "succeeded") {

    Start-Sleep -s $retryWaitTime
    $count++

    if ($count -gt $retryLimit) {
        Write-Output "応答が長すぎます。タイムアウトしました。"
        exit
    }
    try {
        $readResponse = Invoke-RestMethod -Uri "$OcrUrl" -Method "GET" -Headers $headers
        Write-Output $readResponse.analyzeResult.readResults.lines.text
    }

    catch {
        Write-Output ("Error:" + $Error[0].Exception.Message)
        exit
    }
}
PowerShellスクリプトをAutomatorの「シェルスクリプトの実行アクション」から呼び出すと、日本語のファイル名が文字化けしてエラーになるかもしれません。その場合/Users/ユーザー名/.zshenvを作成してexport LANG=ja_JP.UTF-8を書き込むことで解決しました。次の記事が大変参考になりました感謝です!
Python
- pyファイルを作成し、
/Users/ユーザー名/Library/Servicesに保存します。 - Automatorの「シェルスクリプトの実行アクション」のスクリプト欄に設定します。
python3 /Users/ユーザー名/Library/Services/ファイル名.py - この場合デフォルトインストールされている/usr/bin/python3が呼び出されます。
- pyperclipが必要です。
import http.client
import time
import urllib.request
import urllib.parse
import urllib.error
import ast
import pyperclip

endpoint = '****************.cognitiveservices.azure.com'###your EndPoint
key = '***********************'### Your Key
language = 'ja'
readingOrder = 'natural'
modelVersion='2021-09-30-preview'


headers = {
    # Request headers
    'Content-Type': 'application/octet-stream',
    'Ocp-Apim-Subscription-Key': key,
}

filePath = pyperclip.paste()
body = open(filePath,'rb').read()

params = urllib.parse.urlencode({
    # Request parameters
    'language': language,
    'readingOrder': readingOrder,
    'modelVersion': modelVersion,
})

try:
    conn = http.client.HTTPSConnection(endpoint)
    conn.request("POST", "/vision/v3.2/read/analyze?%s" %
                 params, body, headers)
    response = conn.getresponse()
    process_location = response.headers['Operation-Location']
    conn.close()
except Exception as e:
    print("[Errno {0}] {1}".format(e.errno, e.strerror))
    exit()

status = ''
count = 0
limitcount = 10
header = {
    'Ocp-Apim-Subscription-Key': key,
}

while status != 'succeeded':

    time.sleep(2)
    count += 1
    if count >= limitcount:
        print("応答が長すぎます。タイムアウトしました。")
        exit()

    try:
        conn = http.client.HTTPSConnection(endpoint)
        conn.request("GET", url=process_location, headers=header)
        response = conn.getresponse()
        result = response.read().decode()
        result_dict = ast.literal_eval(result)
        conn.close()
        status = result_dict['status']
    except Exception as e:
        print("[Errno {0}] {1}".format(e.errno, e.strerror))
        exit()

for textline in result_dict['analyzeResult']['readResults'][0]['lines']:
    print(textline['text'])
まとめと雑感など
- ショートカットメニューからOCRを使えるのはとても便利です!
- MontereyはOS標準で画像OCRできますが残念ながら今のところ日本語は非対応です。(これはこれですごい)
- AutomatorとAzure Cognitive Services Computer Vision API Readと組み合わせることで日本語の読取精度と利便性の高い仕組みができました。
- 普段Windowsを利用していますがM1 MacでもPowerShellが使えるのはありがたいです。WindowsとMacを気軽に行き来できます。
- Automatorをはじめて知りましたが魅力的なツールでいろいろ利用できそうです。購入したアプリのアクションが追加されたりしておもしろいです。


