概要
Formsのファイルアップロード機能を用いてオンプレサイドのアプリにPower automate Desktopでデータ入力します。
FormsでアップロードされたファイルはOneDriveに格納されるのでこれを利用します。

テストの前提条件
Windows10pro 20H2
オンプレミスデータゲートウェイ 3000.68.15 December2020(R3)
Power Automate Desktop 2.2.20339.22608
M365
2020年12月の情報です。
注意事項
複数人でFormsを共有しPADでの処理を無人運用する場合はM365とpower Automate Per user plan with attended RPAに加え両方のUnattended Licenseが必要になると思われます。
詳細については最新の公式ドキュメントを参照してください。
少し古いですが日本語版はこちら
フローイメージ
1.UserはSwayサイトのFormsに必要事項とExcelデータをアップロード。
2.ExcelはOne Driveに保存されます。
3.PowerautomateがForms入力をトリガーにして起動。
4.必要な情報をオンプレミスデータゲートウェイを介してPower Automate Desktopに伝達します。
5.Power automate DeskTopはOne DriveのExcelデータを取得してオンプレのアプリケーションに処理をかけます。
本来は処理結果を入力をUserに返すようにしたほうがよいと思いますがそこまではやりません。
またオンプレのアプリケーションはレガシーな基幹システムなどが考えられますが今回は電卓(;'∀')で代用です。
Formsで入力フォームをつくる
1.ダミーの取引先コード入力欄
2.ファイルアップロード欄


ファイルの種類をExcelを選択します。


プレビューするとこのような感じです。
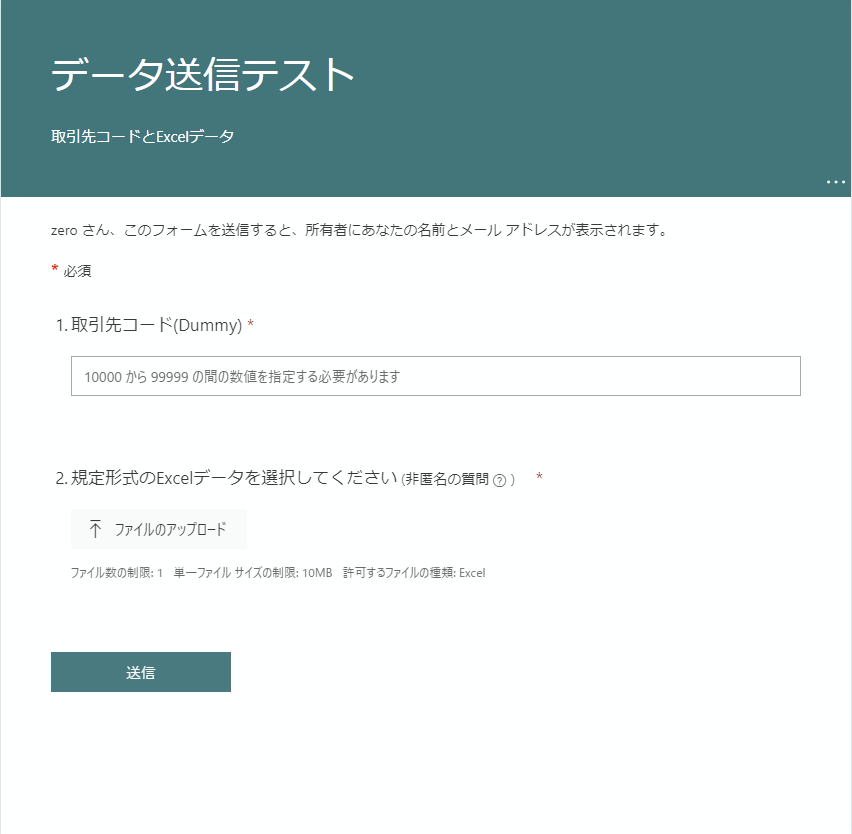
適当に入力して適当なデータをアップロードして一度だけテストしてください。
Power automate desktopフローをつくる
「Forms Cal Demo」という名前でフローを作成しています。
フローの細かな内容については解説しません。

コード空のフローにコピペで張り付けて内容確認が可能です。
ただし少し設定が必要です。
Excel.LaunchAndOpen Path: `` Visible: True ReadOnly: False LoadAddInsAndMacros: False Instance=> ExcelInstance
Excel.GetFirstFreeColumnRow Instance: ExcelInstance FirstFreeColumn=> FirstFreeColumn FirstFreeRow=> FirstFreeRow
Excel.ReadCells Instance: ExcelInstance StartColumn: 1 StartRow: 1 EndColumn: FirstFreeColumn - 1 EndRow: FirstFreeRow - 1 ReadAsText: False FirstLineIsHeader: True RangeValue=> ExcelData
Excel.Close Instance: ExcelInstance
System.RunApplication ApplicationPath: $'''calc''' WindowStyle: System.ProcessWindowStyle.Normal ProcessId=> AppProcessId
UIAutomation.Windows.GetForegroundWindow WindowTitle=> WindowTitle WindowInstance=> AutomationWindow
SET rowcount TO 0
LOOP WHILE (rowcount) <= (FirstFreeRow - 3)
    SET columncount TO 0
    LOOP WHILE (columncount) <= (FirstFreeColumn - 2)
        SET NewVar TO ExcelData[rowcount][columncount]
        IF NewVar = $'''%''%''' THEN
            SET NewVar TO 0
        END
        UIAutomation.Windows.FocusByInstanceOrHandle WindowInstance: AutomationWindow
        MouseAndKeyboard.SendKeys TextToSend: $'''%NewVar%+''' DelayBetweenKeystrokes: 5 SendTextAsHardwareKeys: False
        Variables.IncreaseVariable Value: columncount IncrementValue: 1 IncreasedValue=> columncount
    END
    Variables.IncreaseVariable Value: rowcount IncrementValue: 1 IncreasedValue=> rowcount
END
MouseAndKeyboard.BlockInput BlockIt: False
UIAutomation.DataExtraction.ExtractData Control: appmask['Window \'電卓\'']['Text \'表示は 0 です\''] ExtractedData=> DataFromWindow
UIAutomation.Windows.CloseByInstanceOrHandle WindowInstance: AutomationWindow
Text.RegexParse Text: DataFromWindow TextToFind: $'''\\d''' StartingPosition: 0 IgnoreCase: False OccurrencePositions=> Positions Matches=> Matches
Text.Join List: Matches Result=> JoinedText
Text.ToNumber Text: JoinedText Number=> TextAsNumber
Display.ShowMessage Title: $'''Forms to calc Demo''' Message: $'''取引先コード:%Tocode%
合計:%TextAsNumber%
受信データ:%filename%''' Icon: Display.Icon.None Buttons: Display.Buttons.OK DefaultButton: Display.DefaultButton.Button1 IsTopMost: False ButtonPressed=> ButtonPressed
コードを貼り付けると次ようなエラーが出ますので、
入力変数とOneDriveのExcelファイルへのパス設定、電卓ウインドウのUI要素取を行ってください。
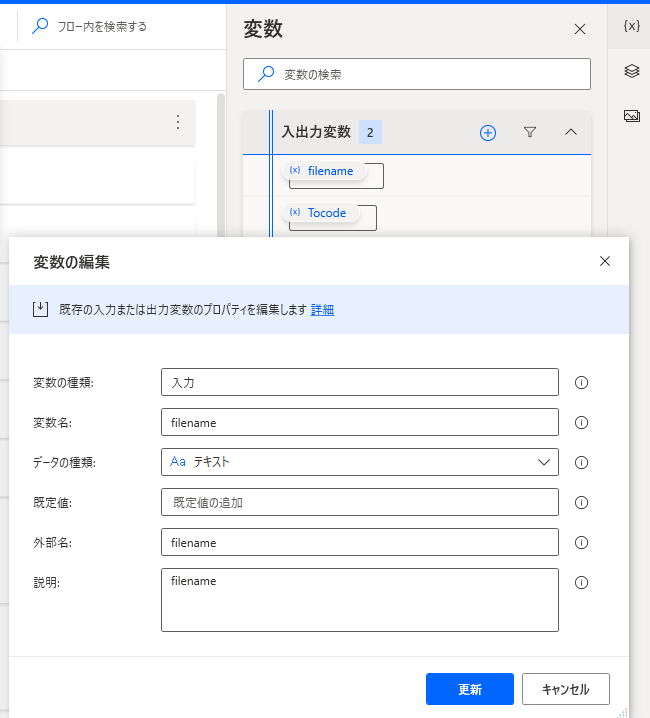
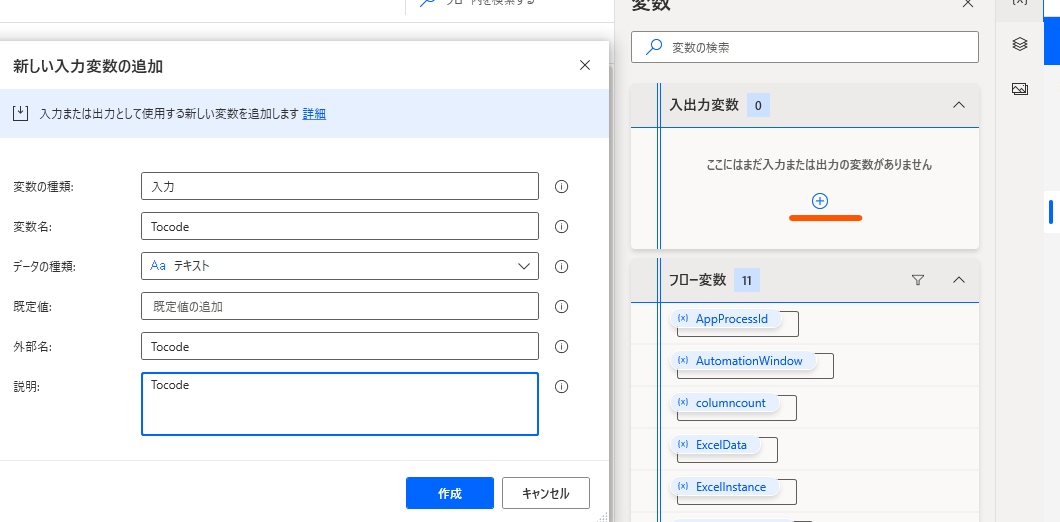
入出力変数を作成
filename
Tocode の2つの変数を作成します。
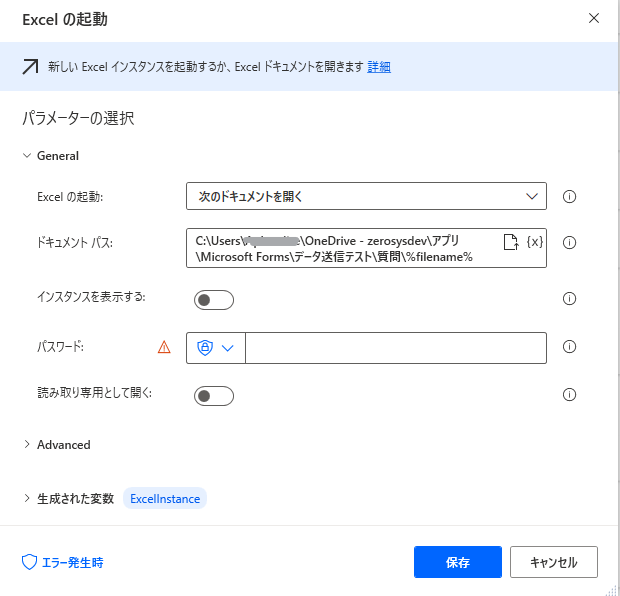
「Excelの起動」にOneDriveに保存されるExcelパスを登録します。
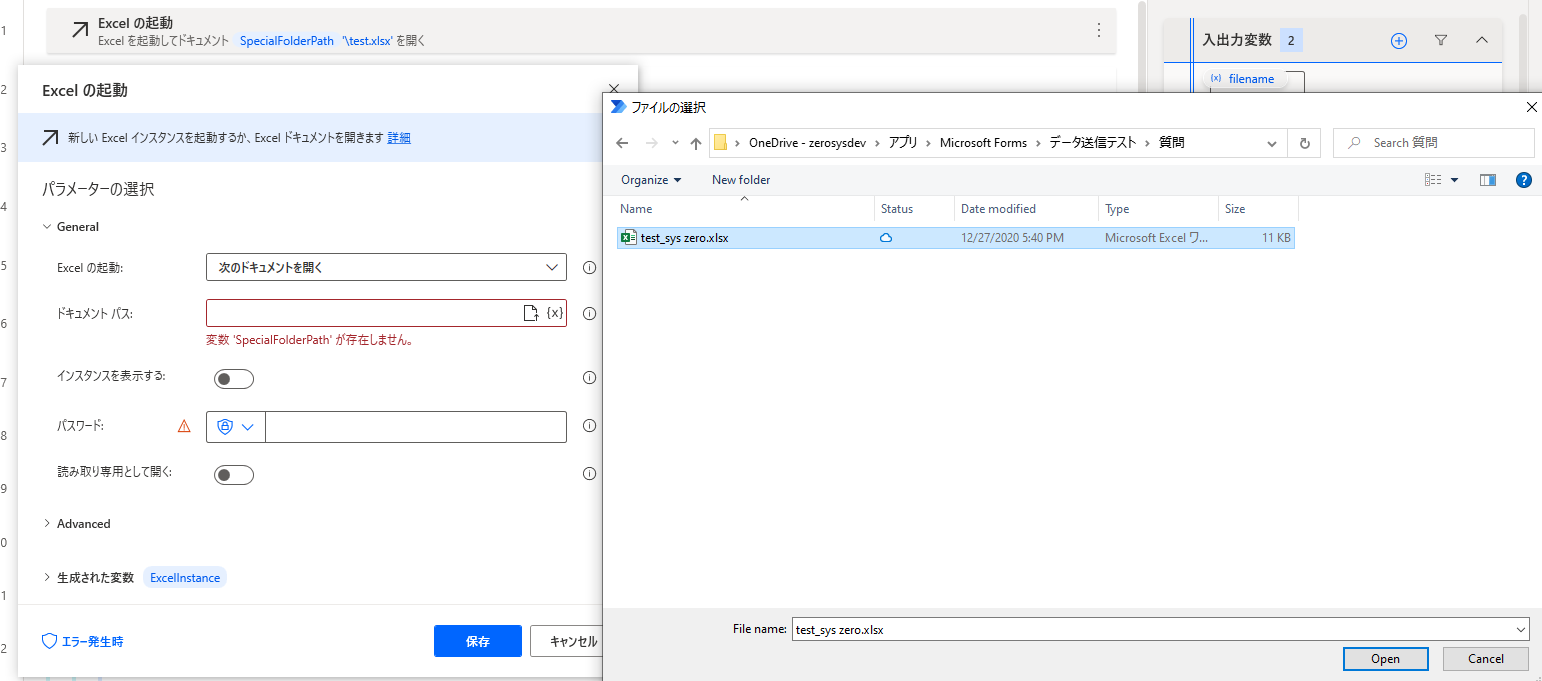
Formsで一度テストするとOneDriveにExcelファイルがはいっているのでとりあえず指定します。
ファイル名を入力変数%filename%で置き換えます
UI要素の追加
電卓を起動しておいて、この部分のUI要素をCtrl+左クリックして追加します。

このように出来ればOKです。

Power automateフローをつくる
1.自動化したクラウドフロー
新しい応答が送信されたとき

2.アクション追加
Formsで作った入力フォームを指定

{
    "type": "array",
    "items": {
        "type": "object",
        "properties": {
            "name": {
                "type": "string"
            },
            "link": {
                "type": "string"
            },
            "id": {
                "type": "string"
            },
            "type": {},
            "size": {
                "type": "integer"
            },
            "referenceId": {
                "type": "string"
            },
            "driveId": {
                "type": "string"
            },
            "status": {
                "type": "integer"
            },
            "uploadSessionUrl": {}
        },
        "required": [
            "name",
            "link",
            "id",
            "type",
            "size",
            "referenceId",
            "driveId",
            "status",
            "uploadSessionUrl"
        ]
    }
}
デスクトップフローからPower Automate Desktop で構築したフローを実行するを選択。
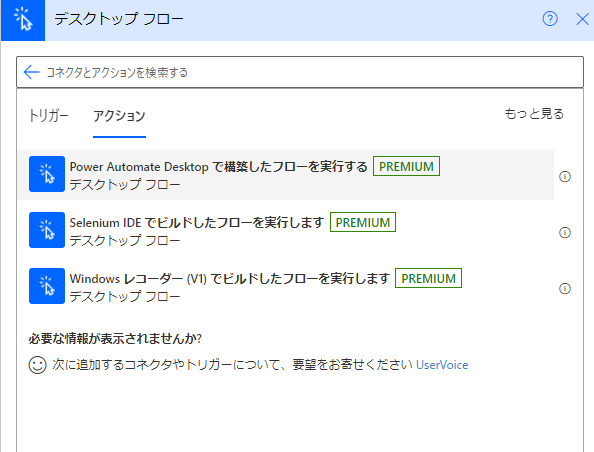

各項目を以下のように設定するとApply to Eachに勝手になりますが気にしません。

完成です

テスト
以下のテーブルをエクセルに貼って適当な名前で保存しておきます。(testdata.xlsxにしてます)
| a | b | c | d | e | f | g |
|---|---|---|---|---|---|---|
| 2628 | 2250 | 1841 | 2936 | 637 | 2889 | 439 |
| 769 | 512 | 59 | 380 | 2637 | ||
| 2267 | 270 | 1396 | 1871 | 2431 | ||
| 1228 | 1816 | 1507 | 1798 | 1984 | ||
| 2561 | 2411 | 930 | 2791 | 1434 | ||
| 2351 | 261 | 129 | 2434 | 2887 | ||
| 1162 | 408 | 698 | 2290 | |||
| 2631 | 1207 | 311 | 103 | 2317 | 2873 | 913 |
| 2906 | 500 | 1780 | 2890 | 603 | ||
| 1798 | 1615 | 2297 | 2110 | 1198 | 2050 |
Formsに適当に入力して先に保存したExcelデータをアップロードしてみます
電卓起動して動けば成功です。
まとめ
Formsにファイルのアップロード機能があることすら知らなかったのでPADとの連携を試してみました。
発展の可能性は色々感じました。
フロー自体は30分程度でできたのですが、ライセンスが事務のオッサンには理解するまでしんどかったです。
出来ちゃうからといって、やっていいかとは別ですし。
M365のUnattended Licenseとか存在すら知らなかったぞ。
Formsを共有すると複数人から入力作業ができそうですが、費用的には10人以内であればPower Automate Per user plan with attended RPAをそれぞれに買った方がよさそうです。
それぞれに買うならクラウドを経由する必要はなさそうですが、入力データをログを絡めて保存できるのでFrorms経由もありかもしれません。
人数が増えたり他の共有フローもあるということであればUnattended Licenseに移ればいいのかな。


