Amplifyを使ったシンプルな実装例が意外となかったので書いてみました。
コードは最小限で実装しているので分かりやすいと思います。
ソースコードはこちら
-
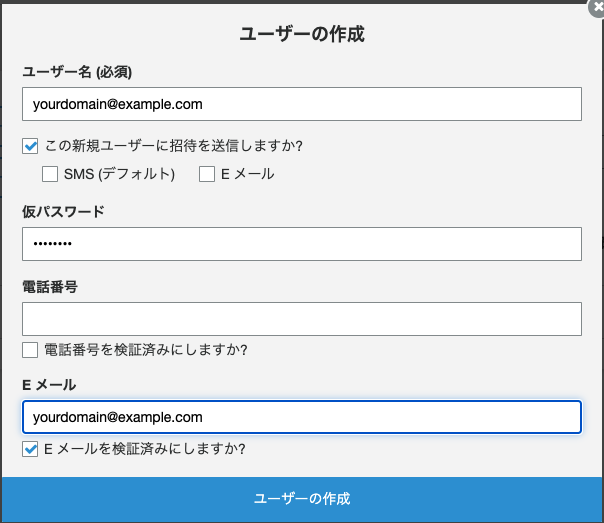
まずはAWSのコンソールからCognitoの設定を行います
-
次は左のメニューのアプリクライアントをクリックし、以下の設定 にてアプリクライアントの作成ボタンをクリックします
-
Awsコンソールの設定は以上です。続いてNuxtJSのアプリを作成します。
components/Tutorial.vue
<template>
  <div>
    email:<input v-model="email">
    pass:<input v-model="password" type="password">
    <button @click="login">ログイン</button>
  </div>
</template>

<script lang="ts">
import Vue from 'vue'
export default Vue.extend({
  data: () => ({
    email: '' as string,
    password: '' as string,
  }),
  head() {
    return {
      title: 'ログイン',
    }
  },
  methods: {
    login() {
      console.log(this.email)
      console.log(this.password)
    },
  },
})
</script>
- Amplifyのライブラリをインストールします
- 他の方の記事などではAmplify Coreを使ったやり方が多かったですが、ログインするだけならAmplify Authだけで十分です。
npm i @aws-amplify/auth
- 認証用のプラグインを作成します。
- userPoolIdなどは環境変数で指定することを推奨しますが、ここでは直接設定します。
% mkdir plugins
% touch plugins/amplify.ts
plugins/amplify.ts
import Auth from '@aws-amplify/auth';

export default () => {
  Auth.configure({
    Auth: {
      region: 'ap-northeast-1',
      userPoolId: 'AWSコンソール:ユーザープールの全般設定を確認',
      userPoolWebClientId: 'AWSコンソール:ユーザープールのアプリクライアントを確認',
    },
  })
}
- nuxt.config.jsにプラグインの設定を追記します
nuxt.config.js
  // Plugins to run before rendering page: https://go.nuxtjs.dev/config-plugins
  plugins: [
    '~/plugins/amplify'
  ],
- ログイン画面を改修します
components/Tutorial.vue
<template>
〜 省略(変更ナシ)〜
</template>

<script lang="ts">
import Vue from 'vue'
import Auth from '@aws-amplify/auth'

export default Vue.extend({
  〜 省略(変更ナシ)〜
  methods: {
    async login() {
      console.log(this.email)
      console.log(this.password)
      await Auth.signIn(this.email, this.password)
        .then(response => {
          console.log(response.signInUserSession.accessToken.jwtToken)
          console.log(response.signInUserSession.idToken.jwtToken)
        })
        .catch(() => {
          console.error('ログイン失敗')
        })
    },
  },
})
</script>
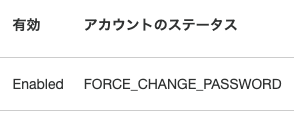
- 先ほど作成したユーザーはステータスがFORCE_CHANGE_PASSWORDになっているのでCLIでステータを変更します
- AWS CLIが入ってない方はbrewなどでインストールしてください。
% aws cognito-idp admin-initiate-auth \
--user-pool-id ユーザープールの全般設定を確認 \
--client-id ユーザープールのアプリクライアントを確認 \
--auth-flow ADMIN_NO_SRP_AUTH \
--auth-parameters \
USERNAME=ユーザー名,PASSWORD=AWSコンソールで指定した仮パスワード
- ターミナルにsessionが表示されるので続けて以下を実行します。
% aws cognito-idp admin-respond-to-auth-challenge \
--user-pool-id ユーザープールの全般設定を確認 \
--client-id ユーザープールのアプリクライアントを確認 \
--challenge-name NEW_PASSWORD_REQUIRED \
--challenge-responses 'NEW_PASSWORD=任意のパスワード,USERNAME=AWSコンソールで指定したユーザー名' \
--session "コンソールで表示されたセッションの値(実際はかなり長いです)"


