会員制のストアーを構築します。参考にした英語ドキュメントはこちらです。
https://help.shopify.com/en/themes/customization/access/create-members-only-store
この記事に加えて、特定会員のみ閲覧することができる商品ページとナビゲーションメニューを後半で構築してみます。
登録したユーザーのみが利用できるサイトを構築
1. アカウントの設定
管理画面から左メニューの「設定」→「チェックアウト」をクリック。
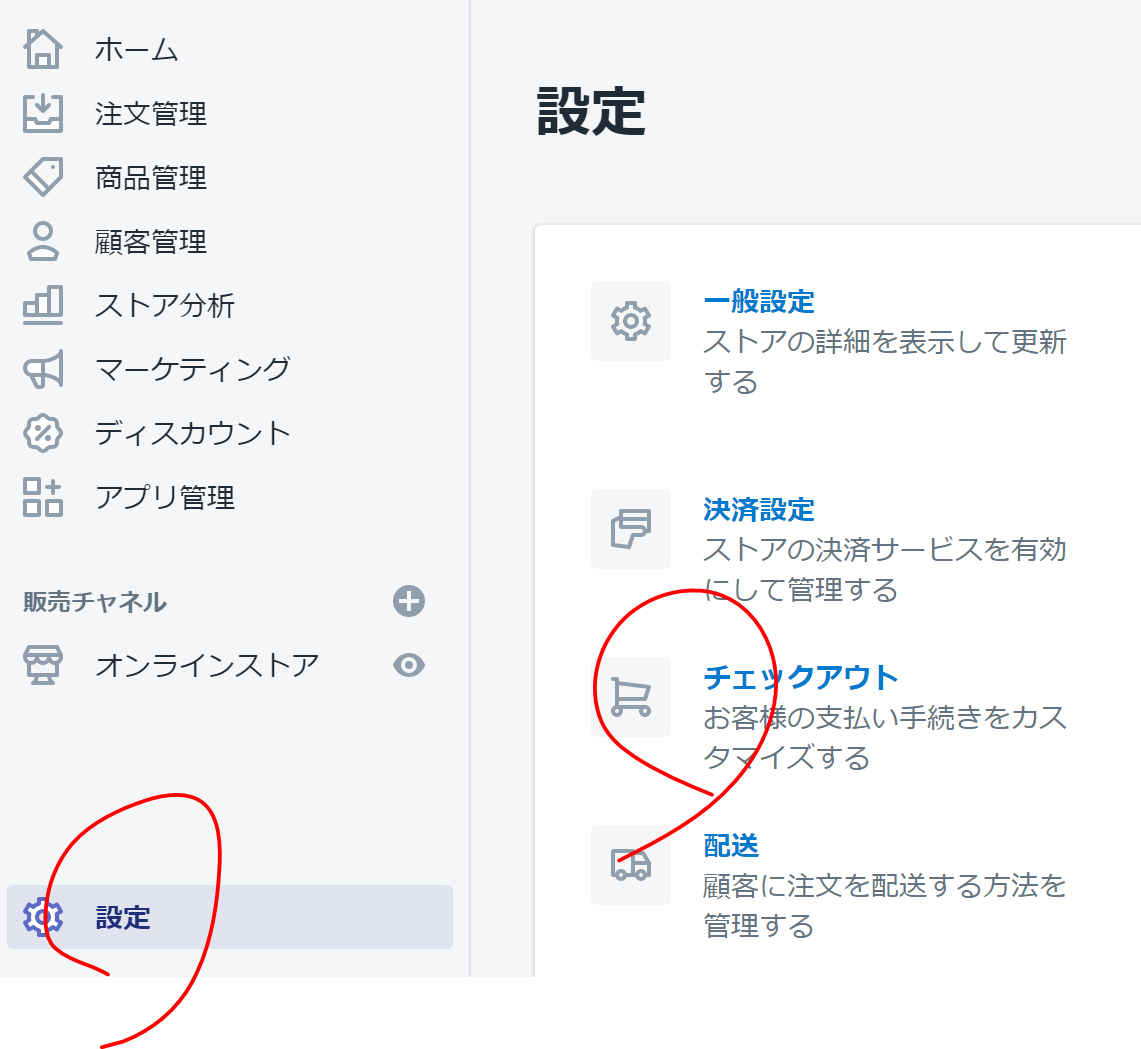
「顧客アカウント」/「アカウントを必要とする」を選択

2. theme.liquidを編集
{% unless customer %}
    {% if template contains 'customers' %}
        {% assign send_to_login = false %}
    {% else %}
        {% assign send_to_login = true %}
    {% endif %}
{% endunless %}

{% if send_to_login and request.path != "/challenge" %}
<meta content="0; url=/account/login?checkout_url=/" http-equiv="refresh" />
{% else %}
下記の図のように
の下に上記のコードを挿入します。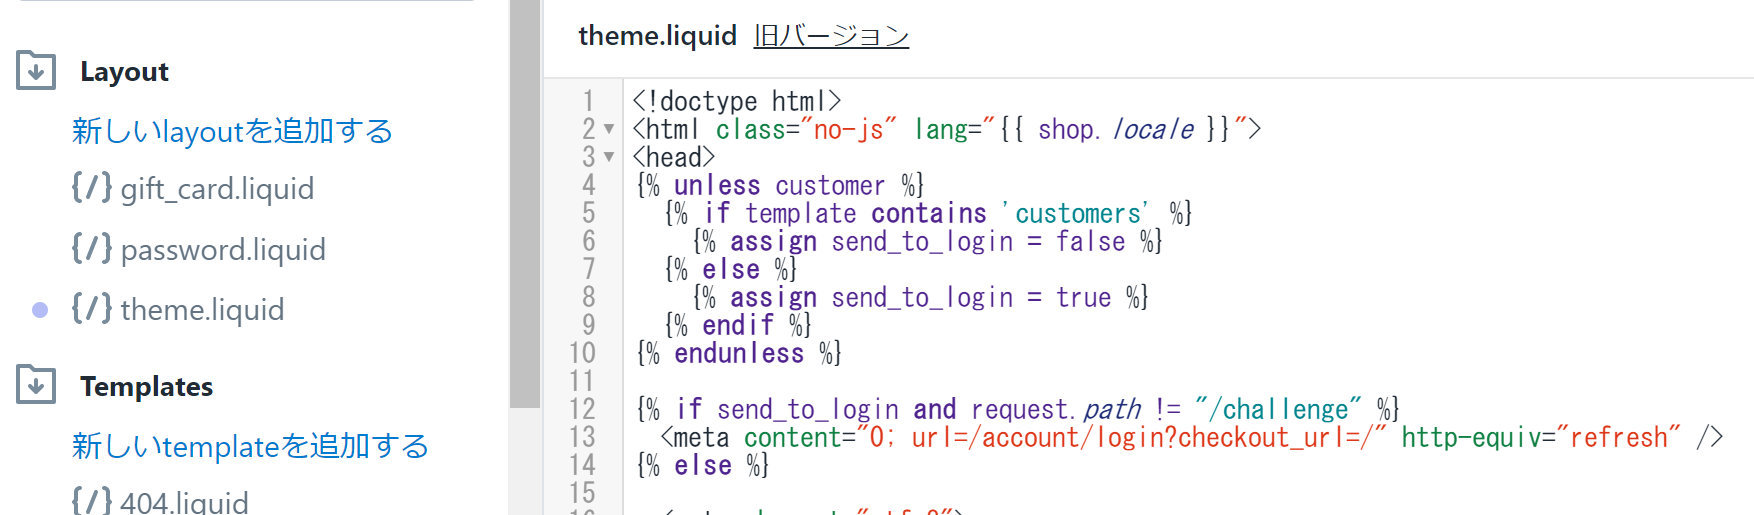
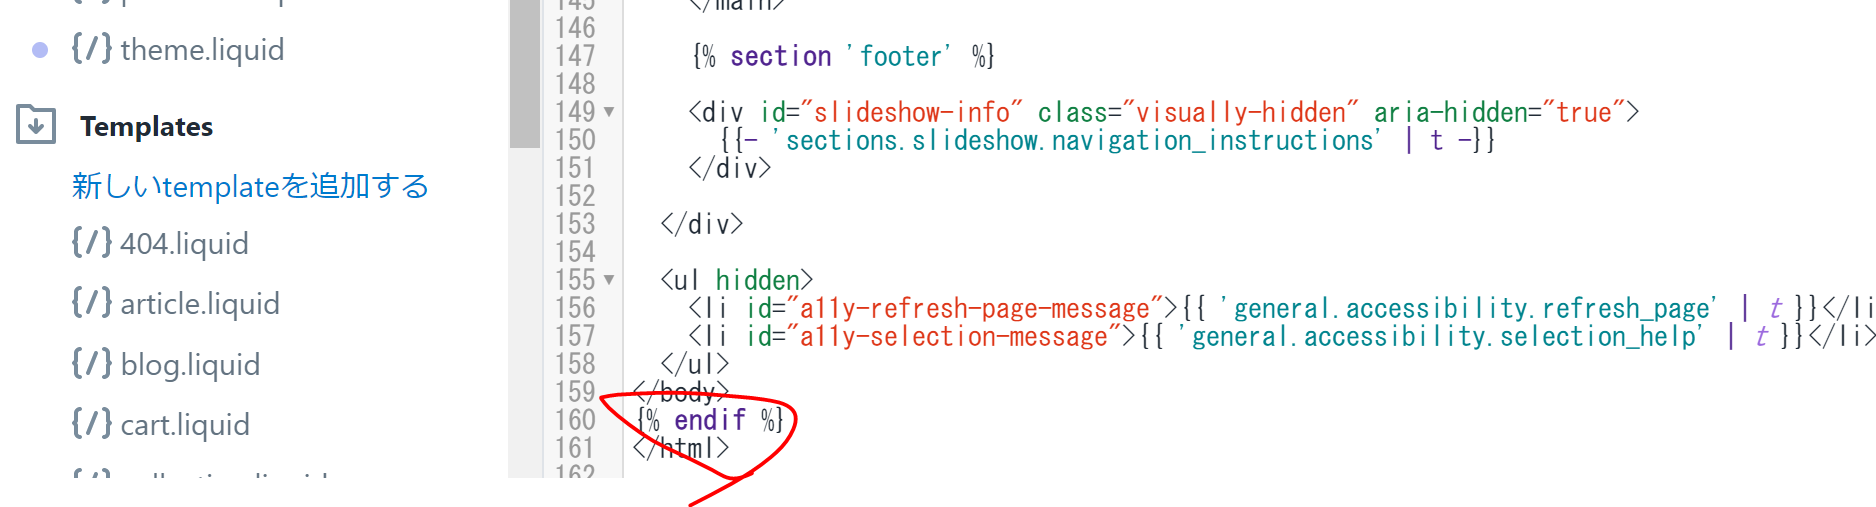
下記の図のようにの下に{% endif %}を挿入
ログイン後のページを指定
ログイン後のページを指定したい場合は下記のコードを編集してください。
<meta content="0; url=/account/login?checkout_url=/" http-equiv="refresh" />
コレクションページへ遷移したい場合は
<meta content="0; url=/account/login?checkout_url=/collections/all" http-equiv="refresh" />
特定の会員だけアクセスできるようにする
始めに紹介した方法だと、アカウントをもっていればアクセスできるようになっています。次は特定のユーザー(承認したユーザー)のみがアクセスできるようにします。
1. theme.liquidを編集
theme.liquid内の {{ content_for_layout }}を編集します。
{% if template contains 'members-only' %}
  {% if customer.tags contains 'members-only' %}
    {{ content_for_layout }}
  {% else %}
    {% include 'members-only-note' %}
  {% endif %}
{% else%}
  {{ content_for_layout }}
{% endif %}
1行ずつ解説します、
{% if template contains 'members-only' %}`
特定の会員に表示するテンプレートを members-onlyとします。もしテンプレートが members-onlyの時の処理を次に定義します。
{% if customer.tags contains 'members-only' %}
次にこのページを閲覧しているユーザーがmembers-onlyのタグを持っているか確認をします。members-onlyのタグを持っている場合は下記のラインでコンテンツを表示します。
{{ content_for_layout }}
もしmembers-onlyをもっていなければ、下記でsnippet内容を表示します(次のステップを参照)
{% include 'members-only-note' %}
2. snippetの追加
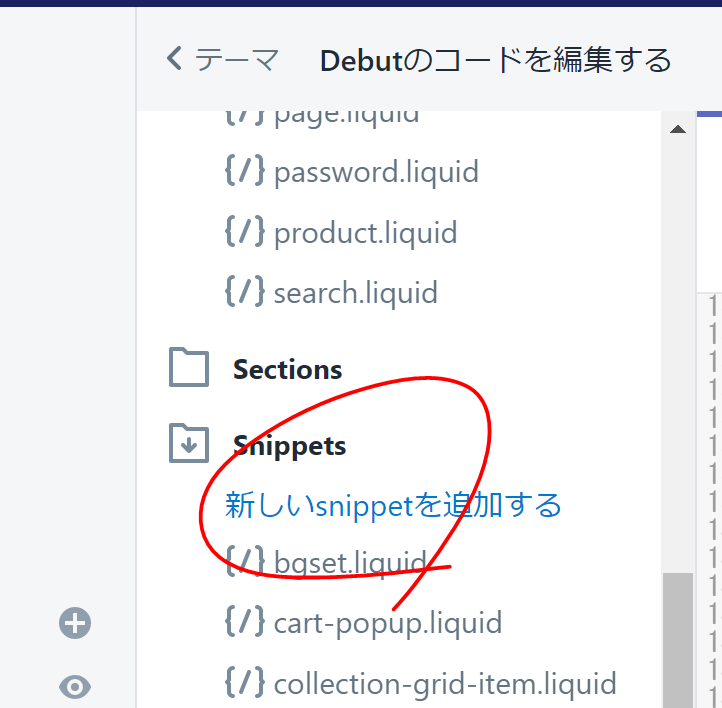
新しいスニペット「members-only-note」を追加します。
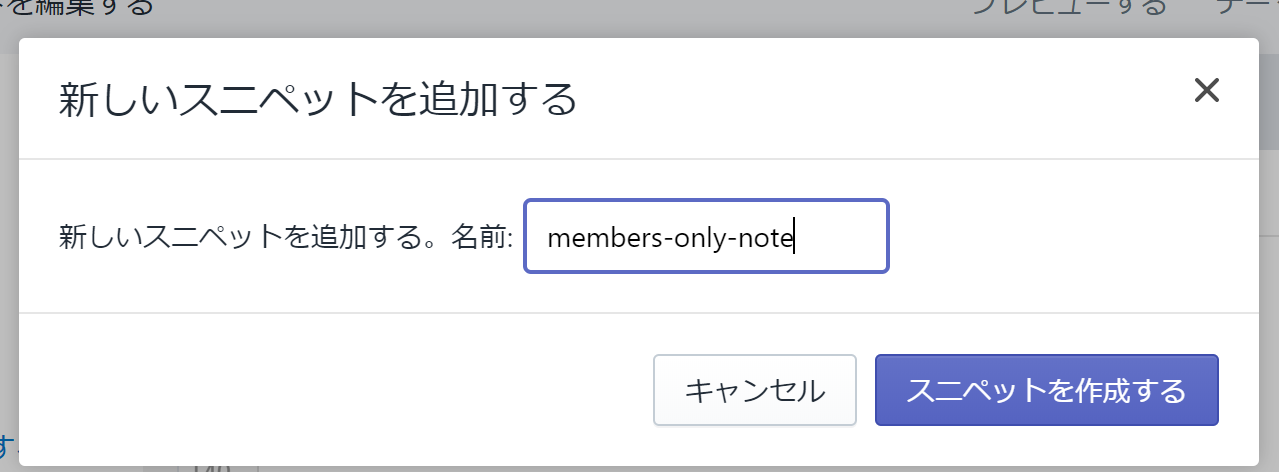
下記のコードを追記します。
<h1>このページは会員専用のページです</h1>
<p>
  {% unless customer %}
    <a href="/account/login">ログインする</a> |
  {% endunless %}
  <a href="/pages/contact-us">お問合せ</a>ください。
</p>
3. テンプレートを追加
次に会員専用のテンプレートを追加します。
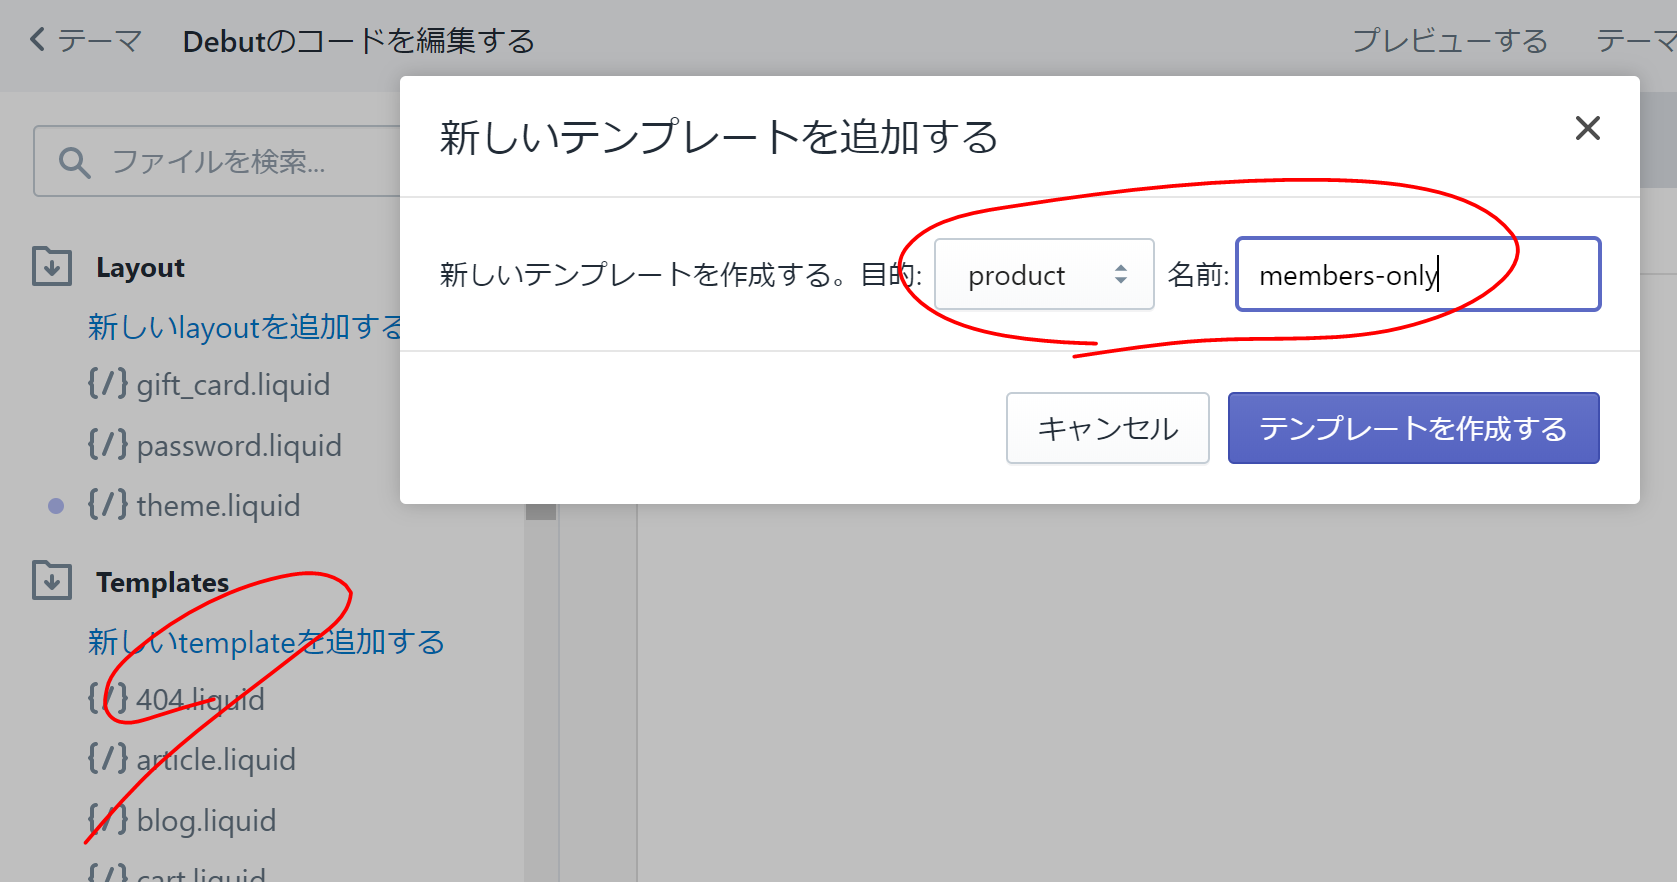
下記のコードが自動で生成されます。
{% comment %}
  The contents of the product.liquid template can be found in /sections/product-template.liquid
{% endcomment %}

{% section 'product-template' %}
{% section 'product-recommendations' %}

{% if collection %}
  <div class="text-center return-link-wrapper page-width">
    <a href="{{ collection.url }}" class="btn btn--secondary btn--has-icon-before return-link">
      {% include 'icon-arrow-left' %}
      {{ 'products.product.back_to_collection' | t: title: collection.title }}
    </a>
  </div>
{% endif %}

<script>
  // Override default values of shop.strings for each template.
  // Alternate product templates can change values of
  // add to cart button, sold out, and unavailable states here.
  theme.productStrings = {
    addToCart: {{ 'products.product.add_to_cart' | t | json }},
    soldOut: {{ 'products.product.sold_out' | t | json }},
    unavailable: {{ 'products.product.unavailable' | t | json }}
  }
</script>

{% assign current_variant = product.selected_or_first_available_variant %}

<script type="application/ld+json">
{
  "@context": "http://schema.org/",
  "@type": "Product",
  "name": {{ product.title | json }},
  "url": {{ shop.url | append: product.url | json }},
  {%- if product.featured_image -%}
    {%- assign image_size = product.featured_image.width | append: 'x' -%}
    "image": [
      {{ product.featured_image.src | img_url: image_size | prepend: "https:" | json }}
    ],
  {%- endif -%}
  "description": {{ product.description | strip_html | json }},
  {%- if current_variant.sku != blank -%}
    "sku": {{ current_variant.sku | json }},
  {%- endif -%}
  "brand": {
    "@type": "Thing",
    "name": {{ product.vendor | json }}
  },
  "offers": [
    {%- for variant in product.variants -%}
      {
        "@type" : "Offer",
        {%- if variant.sku != blank -%}
          "sku": {{ variant.sku | json }},
        {%- endif -%}
        "availability" : "http://schema.org/{% if product.available %}InStock{% else %}OutOfStock{% endif %}",
        "price" : {{ variant.price | divided_by: 100.00 | json }},
        "priceCurrency" : {{ cart.currency.iso_code | json }},
        "url" : {{ shop.url | append: variant.url | json }}
      }{% unless forloop.last %},{% endunless %}
    {%- endfor -%}
  ]
}
</script>
一旦このコードはそのままにしておきます。必要に応じてカスタマイズしてください。
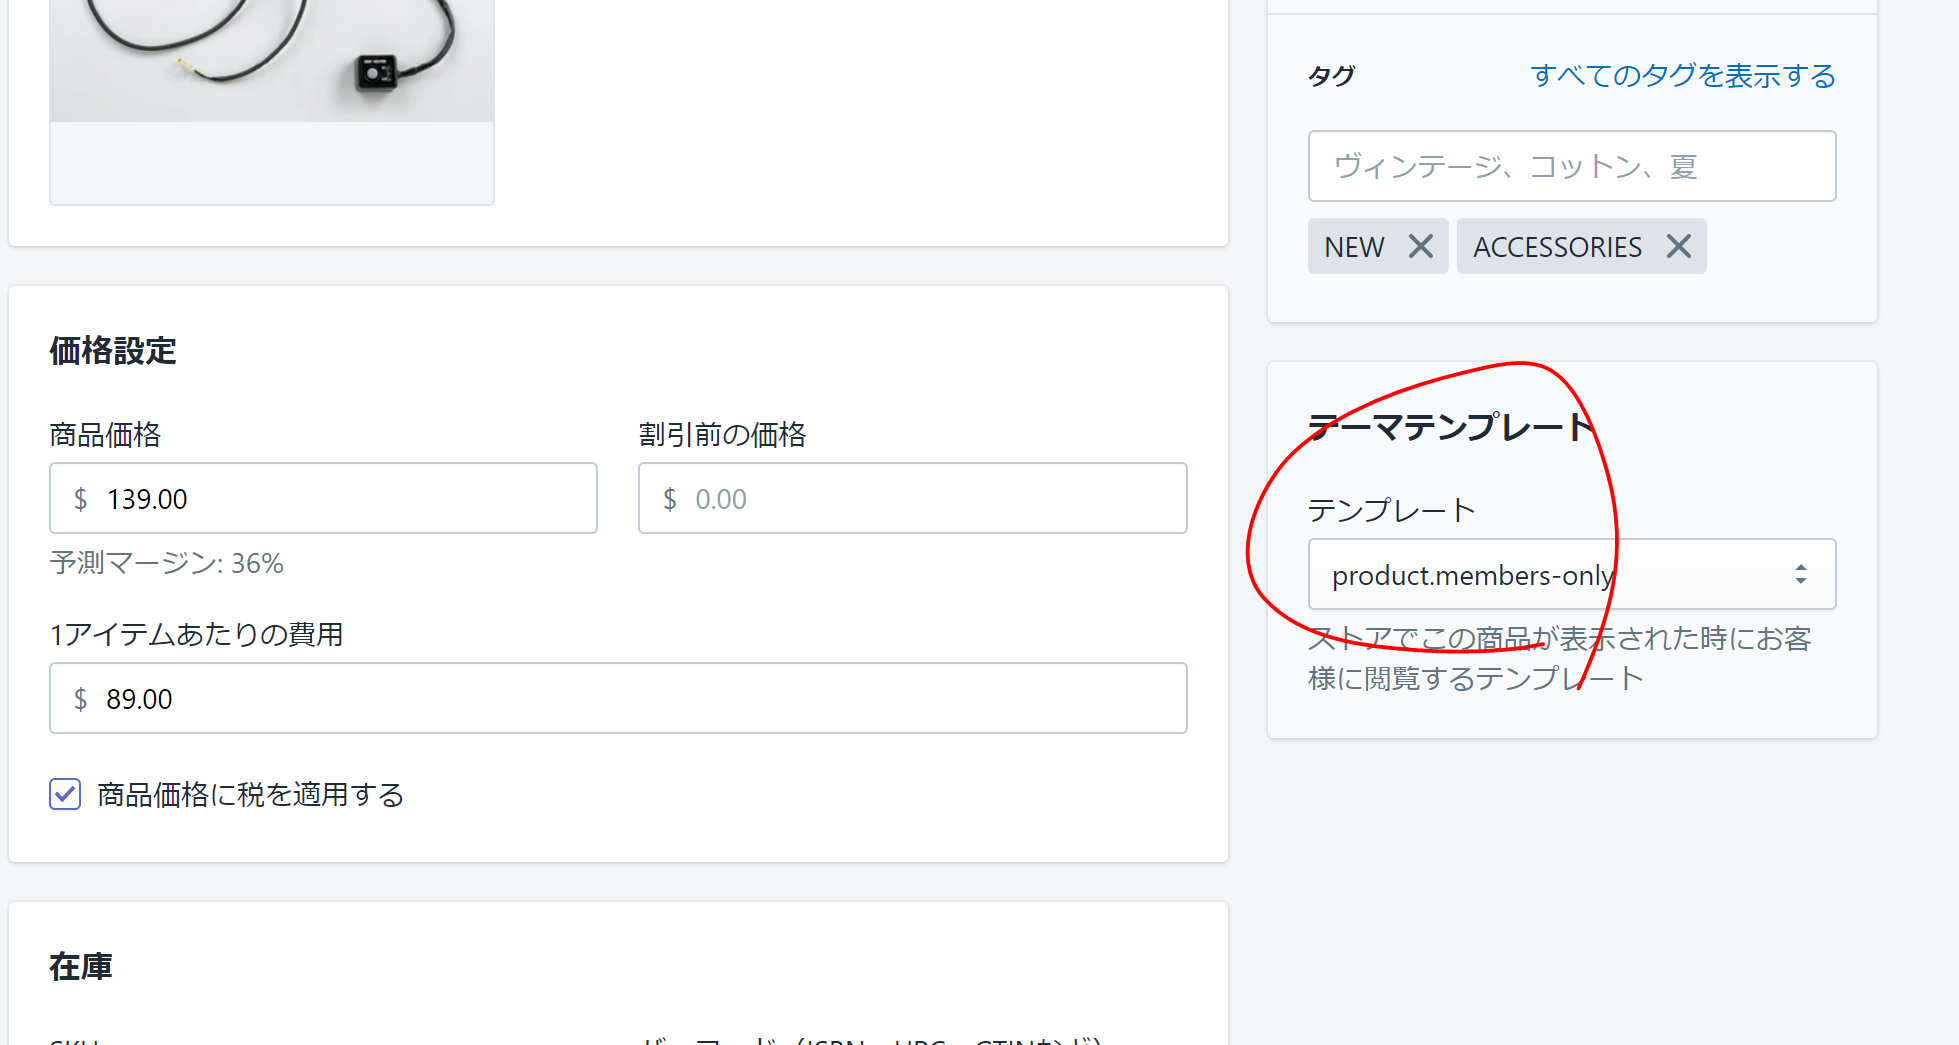
4. 特定会員用の商品を追加
次に特定会員のみに表示したい商品を選択します。商品ページの右下部分にあるテーマより、先ほど作ったテンプレートを選択します。
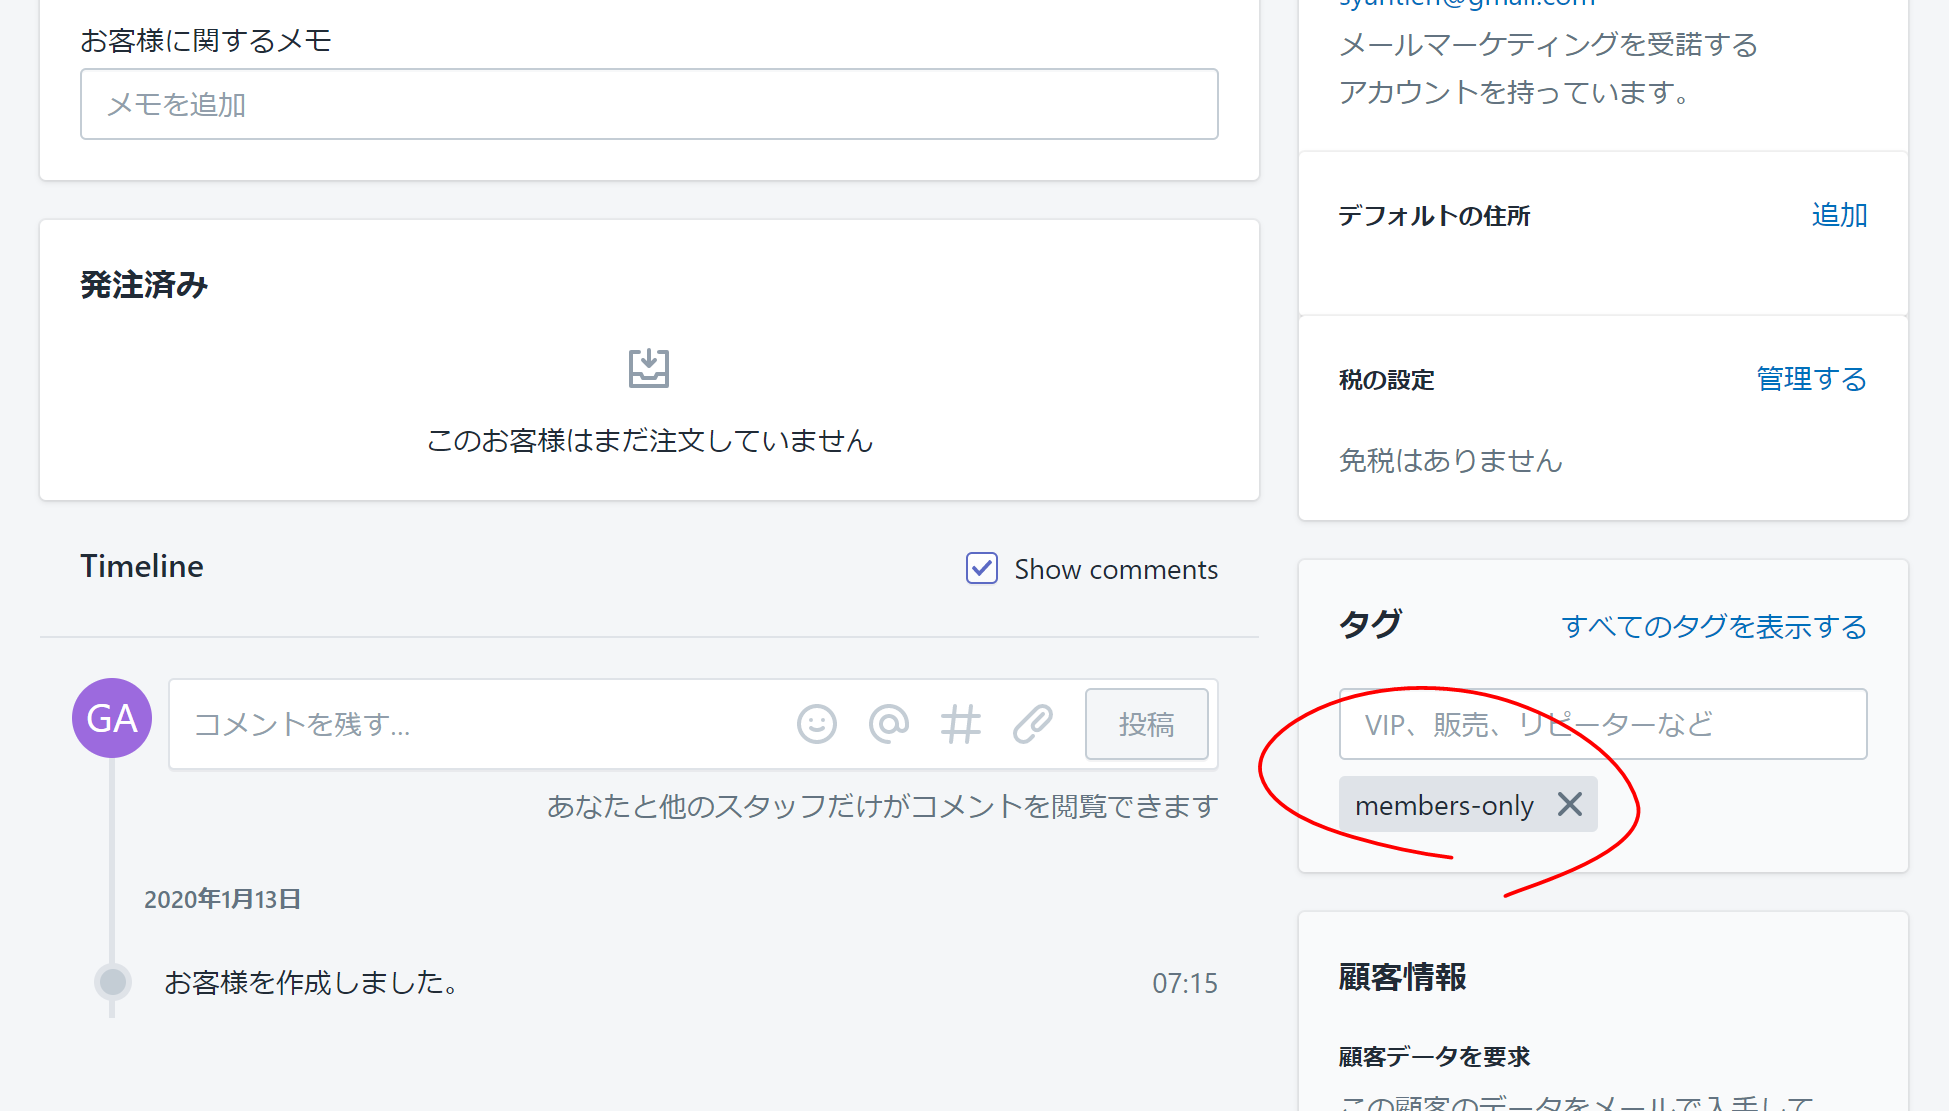
5. 登録したユーザーを特定会員に指定する
次に登録されているユーザーを特定会員に指定します。ユーザーの詳細ページより、members-onlyをタグで追加をします。
6. 特定ユーザーにメニュー(リンク)を表示
最後に特定会員が特定会員商品に遷移できるようにメニューリンクを用意します。
section/header.liquidを編集します。
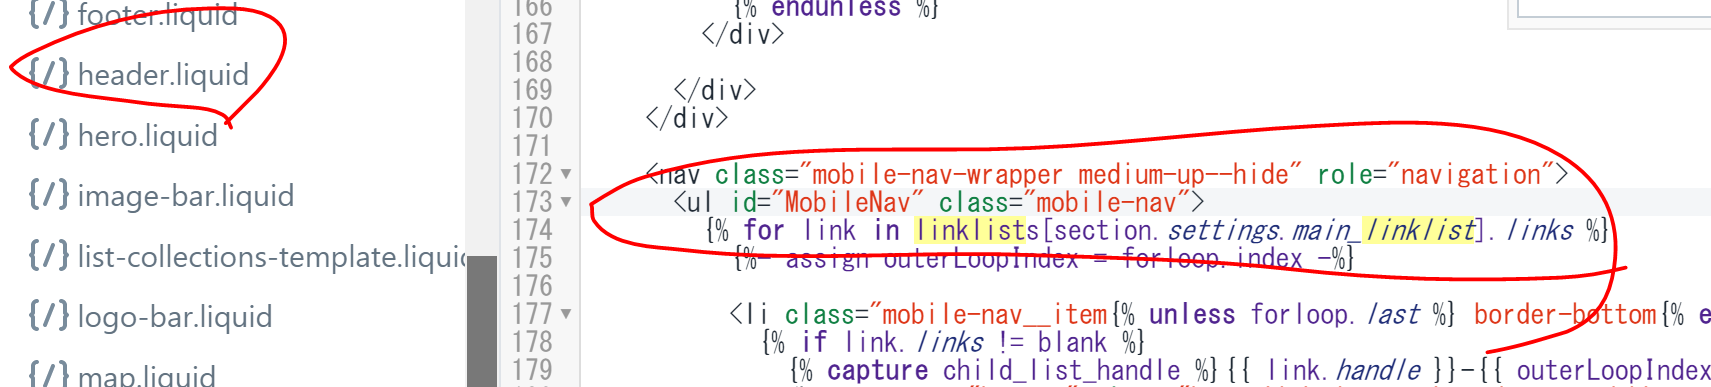
上記の部分を下記のように編集します。
{% assign menu_handle = 'main-menu' %}
  {% if customer %}
    {% if customer.tags contains 'members-only' %}
      {% assign menu_handle = 'main-menu-membersonly' %}
    {% endif %}
  {% endif %}
{% for link in linklists[menu_handle].links %}
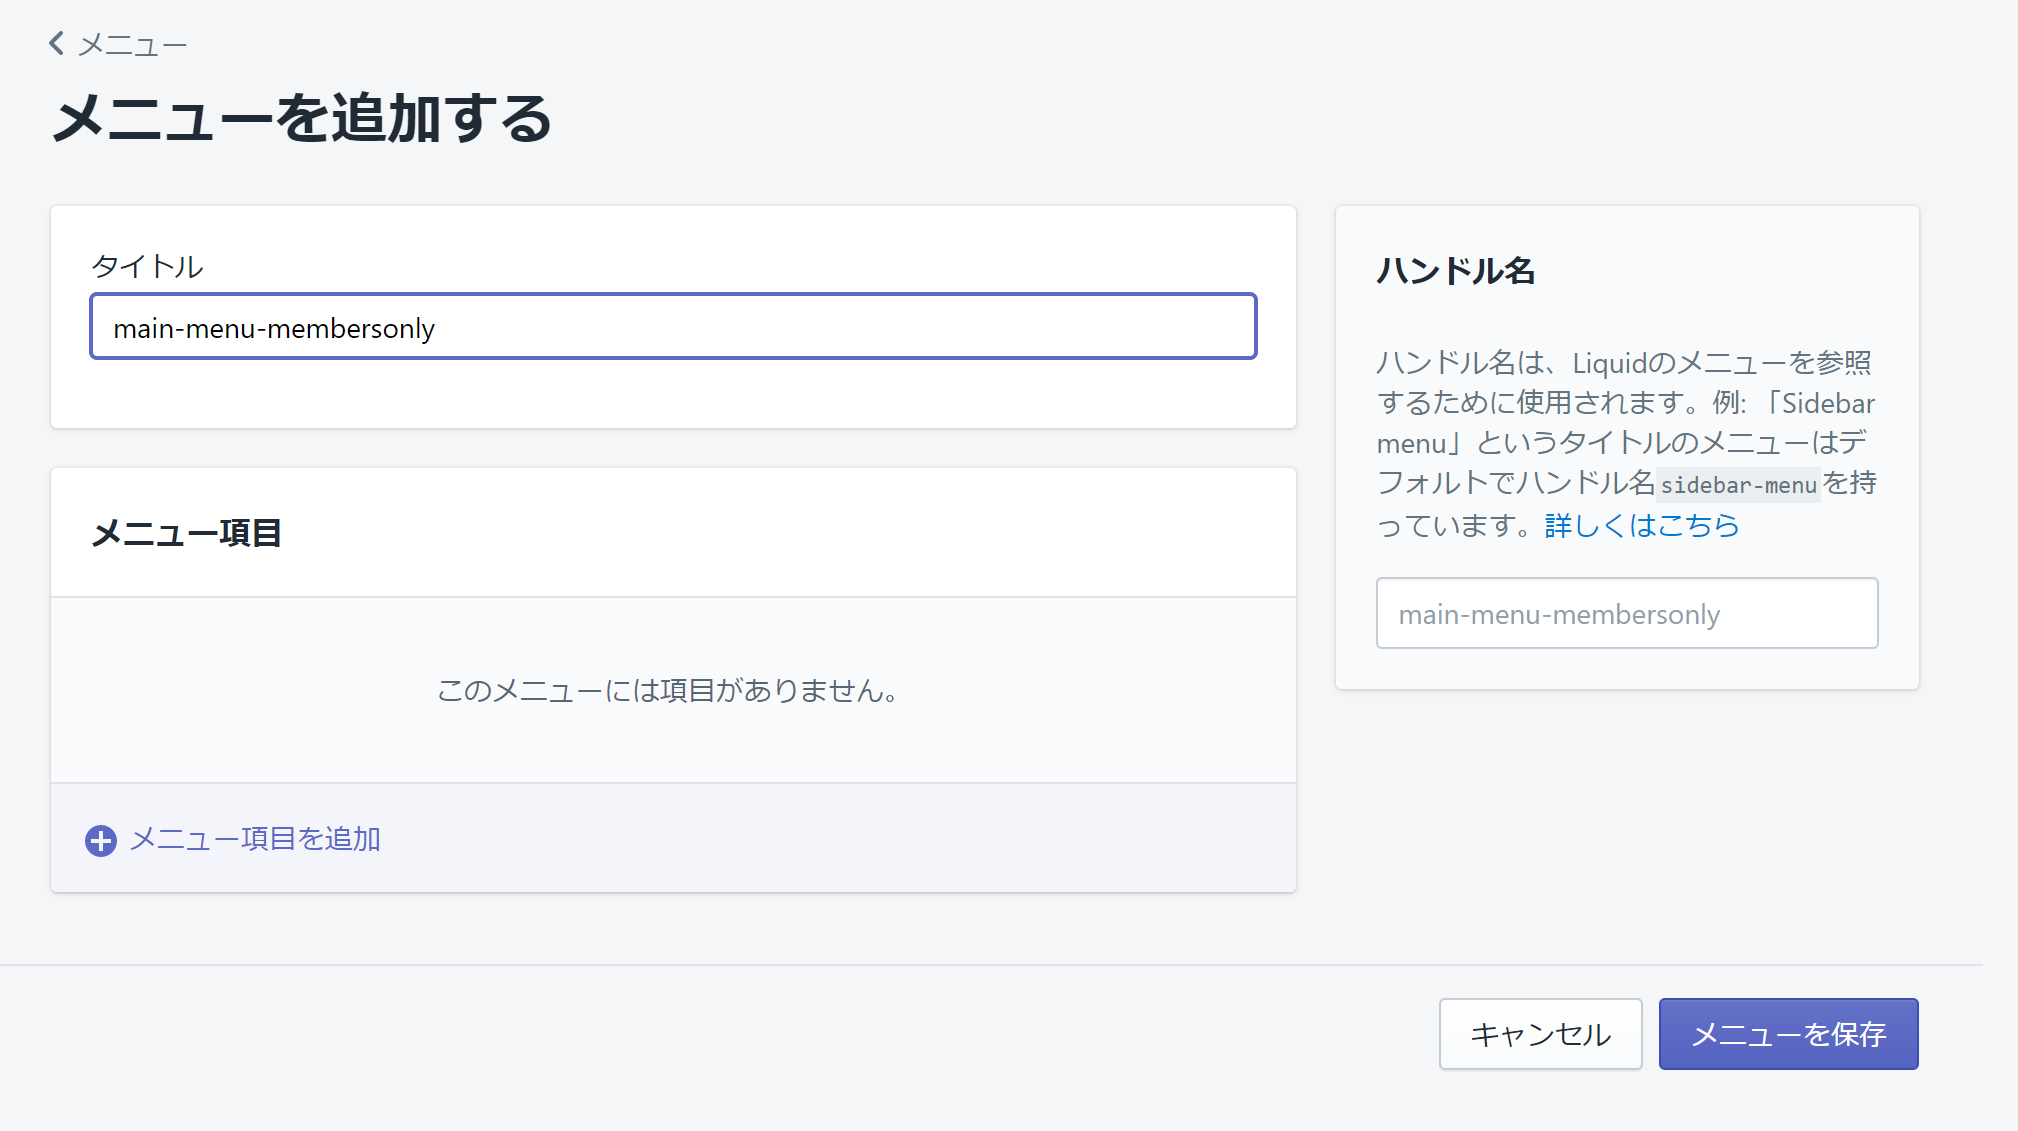
メニューの追加
特定会員に表示するメニューリンクを追加します。
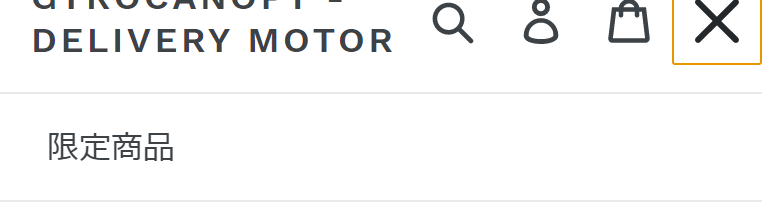
先ほどmembers-onlyにアサインしたユーザーでログインするとメニューが表示されていることが確認できました。
ログアウトをしてみます。
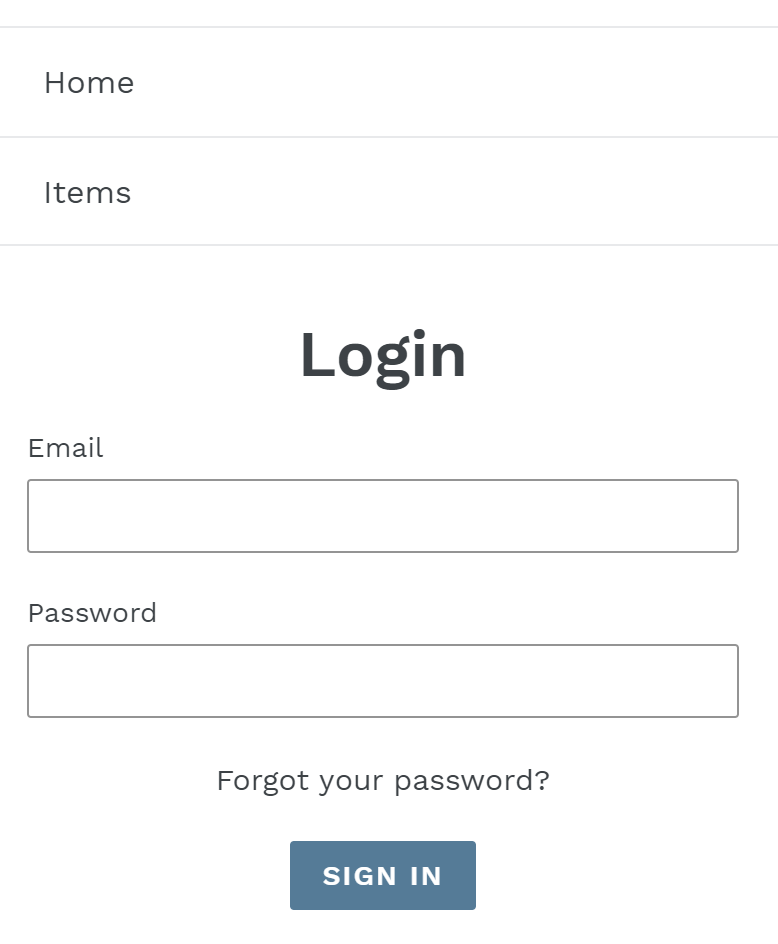
違うメニューが表示されていることが確認できました。
次
次はマルチパスでの会員制ストアも見てみます。
宣伝
下記宣伝になります。
EC構築運用サービス
「物流のデジタルトランスフォーメーションを実現」ということで、Shopifyの構築、運用をサポートさせていただいています。下記ご参照ください。
https://www.t-rnd.com/shopify
求人
Shopify構築してみたい!というエンジニアの方はぜひジョインしてください。
開発じゃないけど、EC案件の仕事したいという方も是非。
https://t-rnd.com/Jobs