最初に
この記事は、SwiftでHTMLを構文解析する方法を記載した記事です。
記載時(2015/12/06)のバージョンは下記の通りです。
| 対象 | バージョン |
|---|---|
| Swift | 2.1 |
| Ono | 1.2.2 |
| XCode | 7.1.1 |
| Mac | 10.11.1 |
最後に今回のサンプルコードをGitHubにあげております。
(あまり綺麗なコードじゃないかもしれないですが、参考程度にしてもらえればと思います)
なぜWebViewを使わずに、UITableViewにマッピングするのか
理由はデザインを統一させたいというのが一番です。
あとはOnoの作者である**Matttさん**が復活したということで、
今回Onoについてご紹介したかったのが大きいです(-∀-)
この記事は、マッピング方法を記載しておりますが、
HTMLの構文解析だけを行いたい場合でも、参考になると思います。
実装方法
ライブラリ導入
https://github.com/mattt/Ono#podfile
Onoをプロジェクトに導入します。
動作確認
以下のようにOnoをImportして、利用することが出来れば問題なく導入できている思います。
import Ono
<省略>
let document = try ONOXMLDocument.HTMLDocumentWithString("<html><body>hoge</body></html>", encoding: NSUTF8StringEncoding)
実装のポイント①:許可するタグを選定する
HTMLには様々なタグが存在しますが、全てに準拠しようとすると大変です。
なので、許可するタグを管理するEnumを作成します。
今回は文章の基本構成を表す
<p>,<h1>,<h2>,<h3> を許可することにします。
enum PermitTag: String {
    case none = ""
    case p = "p"
    case h1 = "h1"
    case h2 = "h2"
    case h3 = "h3"
}
上記のEnumを利用し、パース処理を行う時にタグの選定を行います
for element in bodyElement.children {
    if let element = element as? ONOXMLElement {
        // 許可しているタグのみパースする
        if let tag = PermitTag(rawValue: element.tag) {
            parseElement(element, tag: tag)
        }
    }
}
実装のポイント②:タグごとに対応するUITableViewCellのカスタムクラスを作成する
タグごとに対応するUITableViewCellのカスタムクラスを作成し、
cellForRowAtIndexPathで、それぞれに合う型変換を行う
    func tableView(tableView: UITableView, cellForRowAtIndexPath indexPath: NSIndexPath) -> UITableViewCell {
        let element = elements[indexPath.row]
        let identifier = element.tag.rawValue.uppercaseString + "TagTableViewCell"

        switch element.tag {
        case .p:
            let cell = tableView.dequeueReusableCellWithIdentifier(identifier, forIndexPath: indexPath) as! PTagTableViewCell
            cell.body = element.value
            return cell
        case .h1:
            let cell = tableView.dequeueReusableCellWithIdentifier(identifier, forIndexPath: indexPath) as! H1TagTableViewCell
            cell.body = element.value
            return cell
        case .h2:
            let cell = tableView.dequeueReusableCellWithIdentifier(identifier, forIndexPath: indexPath) as! H2TagTableViewCell
            cell.body = element.value
            return cell
        case .h3:
            let cell = tableView.dequeueReusableCellWithIdentifier(identifier, forIndexPath: indexPath) as! H3TagTableViewCell
            cell.body = element.value
            return cell
        default:
            return UITableViewCell()
        }
    }
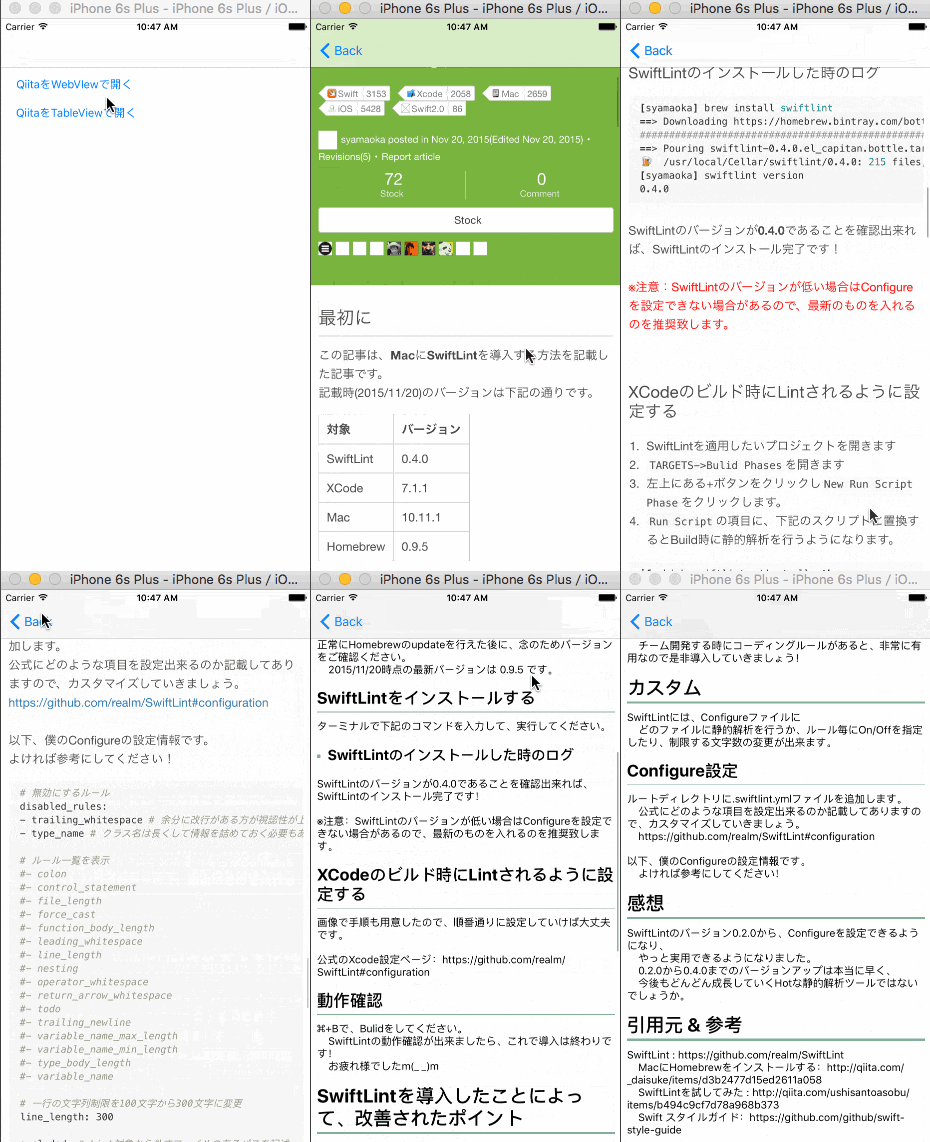
Qiitaの記事を取り込んで、動作確認
※ 今回はhtmlファイルをローカルに落とし込んで、さらに記事本文の部分だけを抜き出しています。パース処理 & マッピングにフォーカスするために、webから取得する部分を省きました。
感想
ニュースアプリを見ていると、
本文部分だけWebViewなのを見ると少しがっかり感ありますよね。
UITableViewでマッピングしてやると、表示漏れが出てきたり、
今後新しいタグが増えたらどうするんだ?とか色々懸念点はありますが・・
逆に指定したタグ以外は絶対に表示されないというメリットもあります。
とりあえず、言えることはこの記事需要なさそうである。(書いてて薄々気付いていた)
もし、要望があれば<a>,<strong>,<img>も対応した記事を書こうかなと思っています...('_`)
GitHub : https://github.com/bpyamasinn/MappingToTableView
引用元
Ono:https://github.com/mattt/Ono
Qiitaのサンプルに用いたページ SwiftLint導入もよろしくお願いします:http://qiita.com/syamaoka/items/2edfe315940d91846bf0
