kintoneの詳細画面にダイアログを表示するサンプルです。
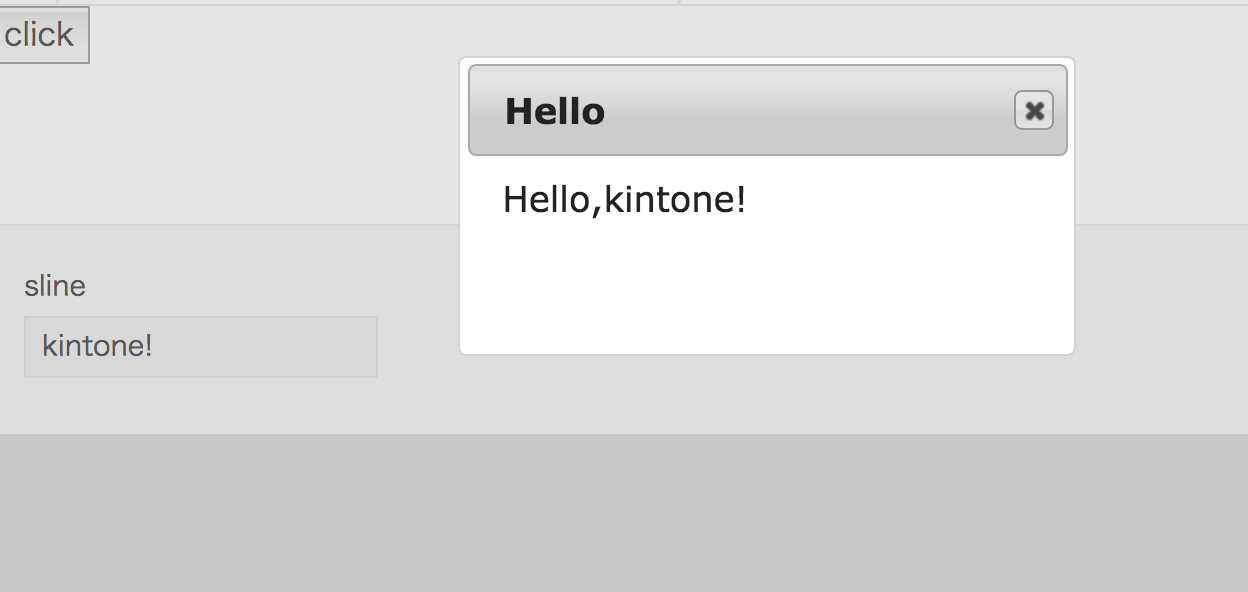
サンプルアプリ画面
実装方法
- 詳細画面にダイアログ表示用のボタンを設置(詳細画面のメニュー右の空白を利用)
- ダイアログ画面のHTMLを準備(変数にダイアログ用のHTMLをセットする)
- ダイアログ画面を表示する関数を作成($( "ダイアログ用のHTML" ).dialog().dialog('open');)
- ボタンクリックイベントに3.のダイアログ表示関数の実行を設定
動作説明
- 文字列1行のフィールドを1つ設置したアプリを作成します。
- フィールドコードは sline とします。
- レコードを登録します。
- 詳細画面に表示されたclickボタンを押下します。
- ダイアログが表示されて、フィールドに入力された文字列が Hello,の後に繋げて表示されます。
注意
jQueryを使いますので、アプリの設定画面で読み込んでおいて下さい。
- https://js.cybozu.com/jquery/2.2.4/jquery.min.js
- https://js.cybozu.com/jqueryui/1.12.0/jquery-ui.min.js
-
https://js.cybozu.com/jqueryui/1.12.1/themes/smoothness/jquery-ui.css
また、今回のサンプルではUnderscore.jsも利用していますので、そちらも読み込みをお願いします。 - https://js.cybozu.com/underscore/1.9.0/underscore-min.js
ソースコード
jQuery.noConflict();
(function($) {
    "use strict";
    kintone.events.on("app.record.detail.show", function(e) {
        var elfield = kintone.app.record.getFieldElement('sline');
        var compiled = _.template('<div id="dialog" title="Hello"> Hello,<%= echo %></div>')({echo: $(elfield).text()});

        var elMyBt = _.template('<button id="myBt">click</button>');
        $(kintone.app.record.getHeaderMenuSpaceElement()).append(elMyBt);

        $('#myBt').on('click', function() {
            console.log("on click");
            viewDialog();
        });

        function viewDialog() {
            console.log("viewDialog");
            $(compiled).dialog({autoOpen: false, modal: true}).dialog('open');
        }
    });
})(jQuery);
参考文献
- jQuery UI Dialog https://jqueryui.com/dialog/