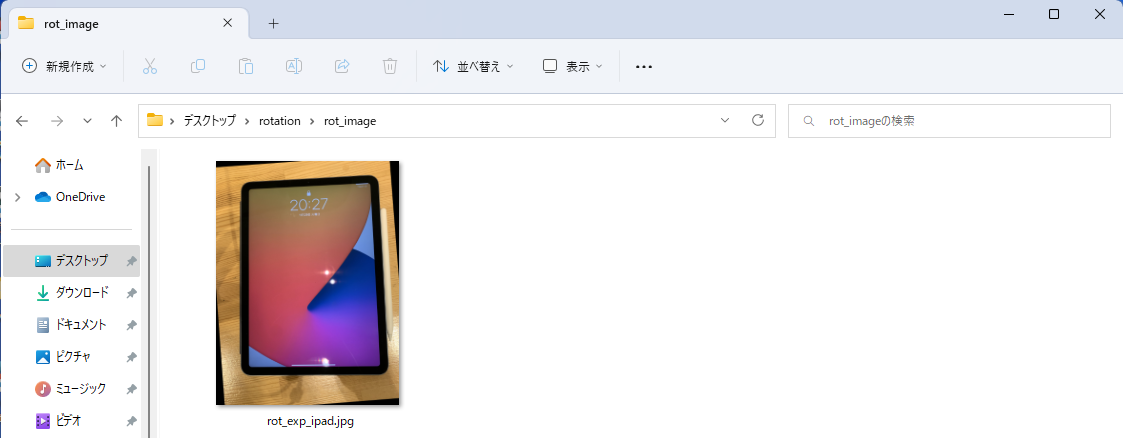
やりたい事
対象物を撮影後に傾きを発見し、水平方向に補正したいと思ったことはないですか。
例えば、下記のようにiPadを撮影した時に、底面を基準に水平補正したいとした時に、このプログラムを使えます。

汎用の画像編集ソフトでは、0.1°単位での補正しかできません。そのため、研究活動やレタッチの際に詳細な水平補正で苦労するかと思います。また、目視での水平補正では、ピクセル単位で水平か確認できません。
そこで、本プログラムを使用することにより、0.01°の補正や指定辺を基準に回転補正することを容易にすることができます。
動作
本プログラムは、コードを扱うことに慣れていない人向けに作成したため、すべての動作をGUIにより動作します。
①実行後はGUIにより、水平補正を行いたい画像を選択します。

②openCVのウィンドウを用いて、回転させる基準線を選択する

左クリック:ポイントの追加
右クリック:ポイントの削除
Enterキー:選択の終了
③カレントディレクトリの"rot_image"フォルダに水平補正後の画像が保存されます。

onMouseの細かな動作に関しては、最下記の引用元をご覧ください
メインコード
import cv2
import tkinter
import math
from IPython.display import Image, display
import os

if not os.path.exists("rot_image"):
    os.mkdir("rot_image")

## マウス処理
def onMouse(event, x, y, flag, params):
    raw_img = params["img"]
    wname = params["wname"]
    point_list = params["point_list"]
    point_num = params["point_num"]

    ## クリックイベント
    ### 左クリックでポイント追加
    if event == cv2.EVENT_LBUTTONDOWN:
        if len(point_list) < point_num:
            point_list.append([x, y])

    ### 右クリックでポイント削除
    if event == cv2.EVENT_RBUTTONDOWN:
        if len(point_list) > 0:
            point_list.pop(-1)

    ## レーダーの作成, 描画
    img = raw_img.copy()
    h, w = img.shape[0], img.shape[1]
    cv2.line(img, (x, 0), (x, h), (255, 0, 0), 1)
    cv2.line(img, (0, y), (w, y), (255, 0, 0), 1)

    ## 点, 線の描画
    for i in range(len(point_list)):
        cv2.circle(img, (point_list[i][0], point_list[i][1]), 3, (0, 0, 255), 3)
        if 0 < i:
            cv2.line(img, (point_list[i][0], point_list[i][1]),
                     (point_list[i-1][0], point_list[i-1][1]), (0, 255, 0), 2)
        if i == point_num-1:
            cv2.line(img, (point_list[i][0], point_list[i][1]),
                     (point_list[0][0], point_list[0][1]), (0, 255, 0), 2)

    if 0 < len(point_list) < point_num:
        cv2.line(img, (x, y),
                     (point_list[len(point_list)-1][0], point_list[len(point_list)-1][1]), (0, 255, 0), 2)

    cv2.putText(img, "({0}, {1})".format(x, y), (0, 20), cv2.FONT_HERSHEY_PLAIN, 1, (255, 255, 255), 1, cv2.LINE_AA)

    cv2.imshow(wname, img)


#回転角度を求める
def calc_rotation_angle(left_pos, right_pos):
    x = right_pos[0] - left_pos[0]
    y = right_pos[1] - left_pos[1]
    return math.degrees(math.atan2(y, x))

#openCVをウィンドウ上で出力
def imshow(img):
    ret, encoded = cv2.imencode(".jpg", img)
    display(Image(encoded))

#回転の座標指定
def rotate_img(img, angle):
    size = tuple([img.shape[1], img.shape[0]])
    center = tuple([size[0] // 2, size[1] // 2])
    mat = cv2.getRotationMatrix2D(center, angle, scale=1.0)
    rot_img = cv2.warpAffine(img, mat, size, flags=cv2.INTER_CUBIC)
    return rot_img

def main():
    root= tkinter.Tk()
    root.attributes("-topmost", True)
    file_path = tkinter.filedialog.askopenfilename()
    root.withdraw()
    img = cv2.imread(file_path)

    wname = "MouseEvent"
    point_list = []
    point_num = 2
    params = {
        "img": img,
        "wname": wname,
        "point_list": point_list,
        "point_num": point_num,
    }

    ## メイン
    cv2.namedWindow(wname)
    cv2.setMouseCallback(wname, onMouse, params)
    cv2.imshow(wname, img)
    cv2.moveWindow(wname, 10, 20)
    cv2.waitKey(0)
    cv2.destroyAllWindows()

    angle = calc_rotation_angle(point_list[0], point_list[1])
    if (angle<=-90):
        angle+=180

    #ベースネームを取得
    name = os.path.basename(file_path)

    rot_img = rotate_img(img,angle)

    cv2.imwrite("rot_image\\rot_" + name , rot_img)

if __name__ == "__main__":
    main()
下記のサイトを参考にしました