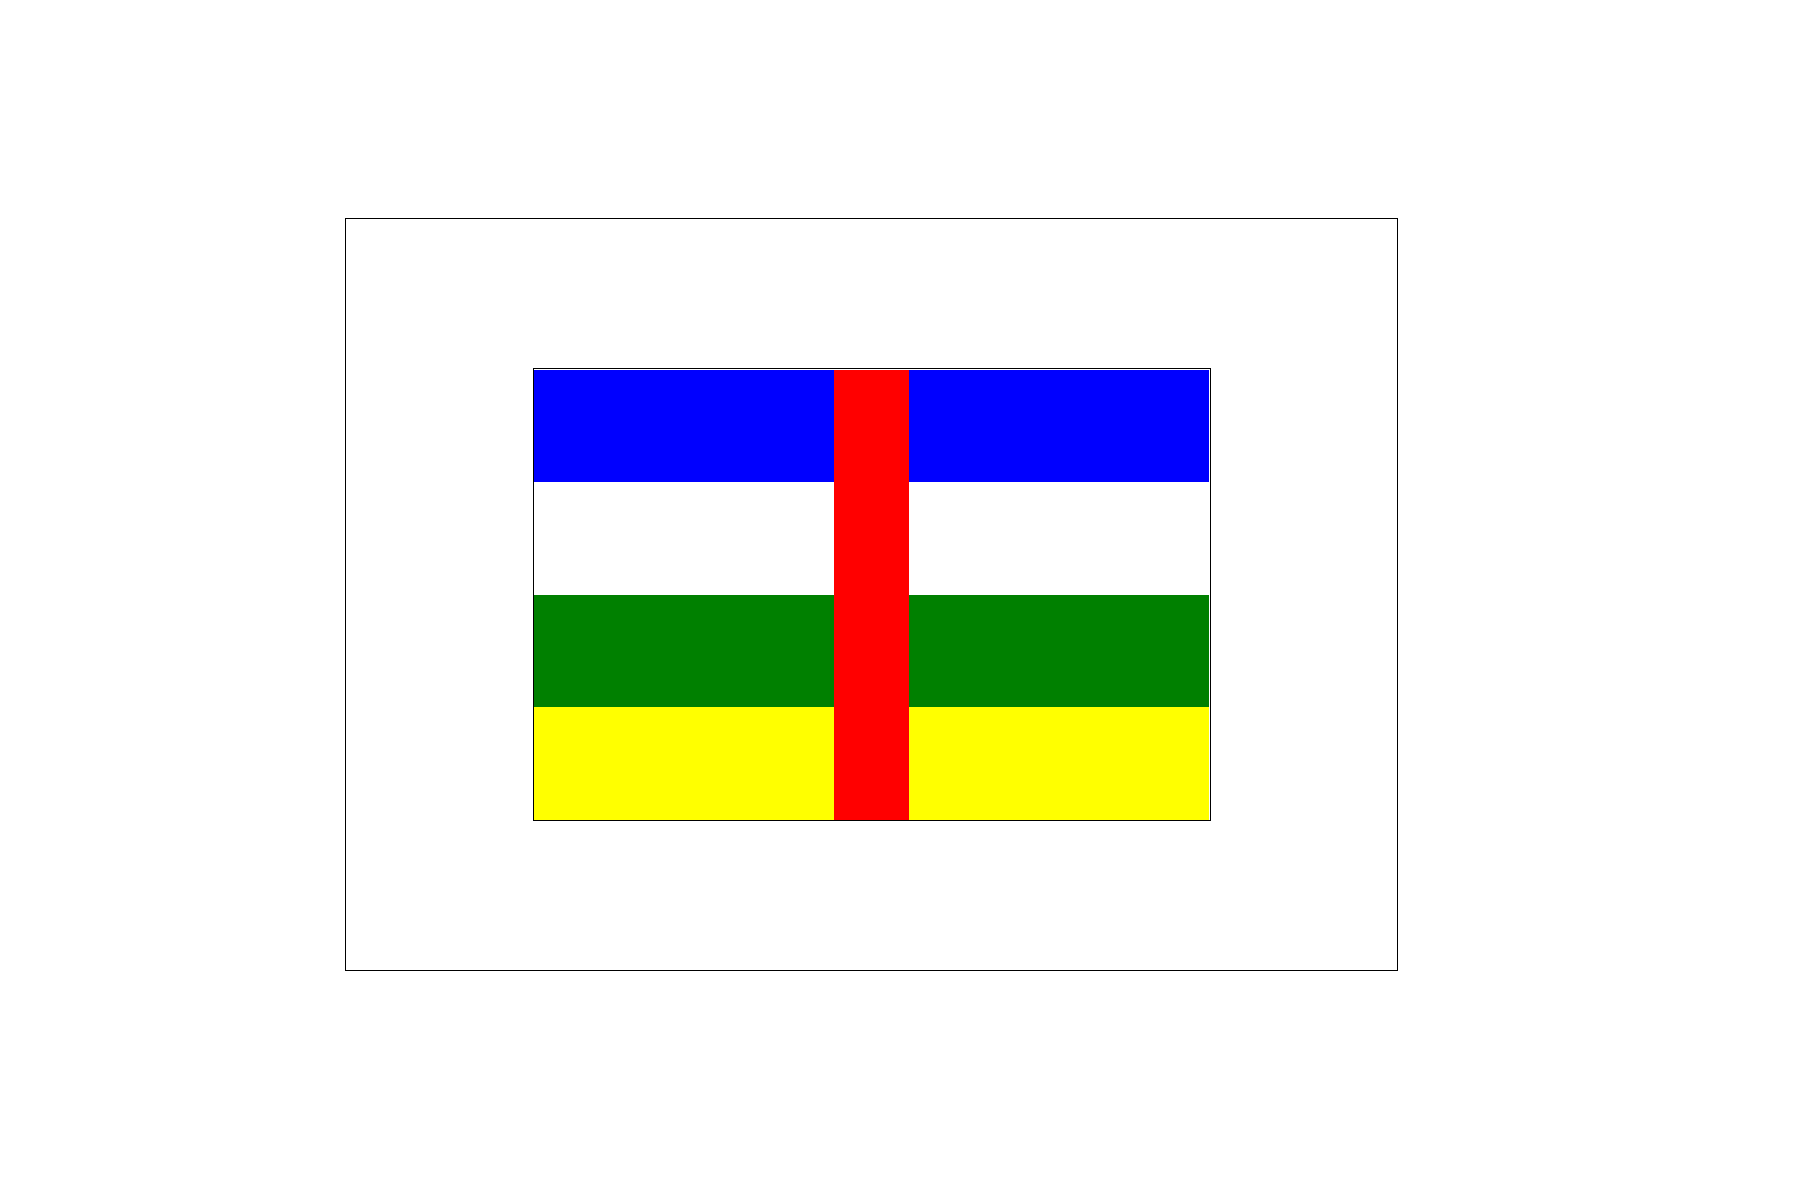
Flexboxを使って国旗を作る
今回は中央アフリカ共和国の国旗
黄色の星は省きます
目標:Flexboxの基礎を理解するため
テキストエディターはVSCode.
↓下記のFlexboxチートシートを参考
[Css Flexboxのチートシート] (https://www.webcreatorbox.com/tech/css-flexbox-cheat-sheet)
~codeを書き始める前の準備~
・構成を考える! 何をどんな風に、どうやって作るのか?
最初にある程度決めておくと後が楽になります。
例 中央アフリカ国旗を調べる
<div>は何個必要なのか?
class属性名はどうしようか?
ここまで出来たらcodeを書いていきます♪ ※head部分は省略
      <div class="african1">
        <div class="afr">
            <div class="africa afr3">box1</div>
            <div class="africa afr4">box2</div>
            <div class="africa afr5">box3</div>
            <div class="africa afr6">box4</div>
        </div>
        <div class="afr1">box5</div>
        <div class="afr">
          <div class="africa afr3">box1</div>
          <div class="africa afr4">box2</div>
          <div class="africa afr5">box3</div>
          <div class="africa afr6">box4</div>
      </div>
      </div>
.african1 {
  width: 450px;
  height: 300px;
  background-color: pink;
  border: 1px solid black;
}

.afr3 {
  width: 185px;
  background-color: blue;
}

.afr4 {
  background-color: white;
}

.afr5 {
  background-color: green;
}

.afr6 {
  background-color: yellow;
}

.afr1 {
  width: 30px;
  background-color: red;
}
この状態を一旦ブラウザで確認 ↓
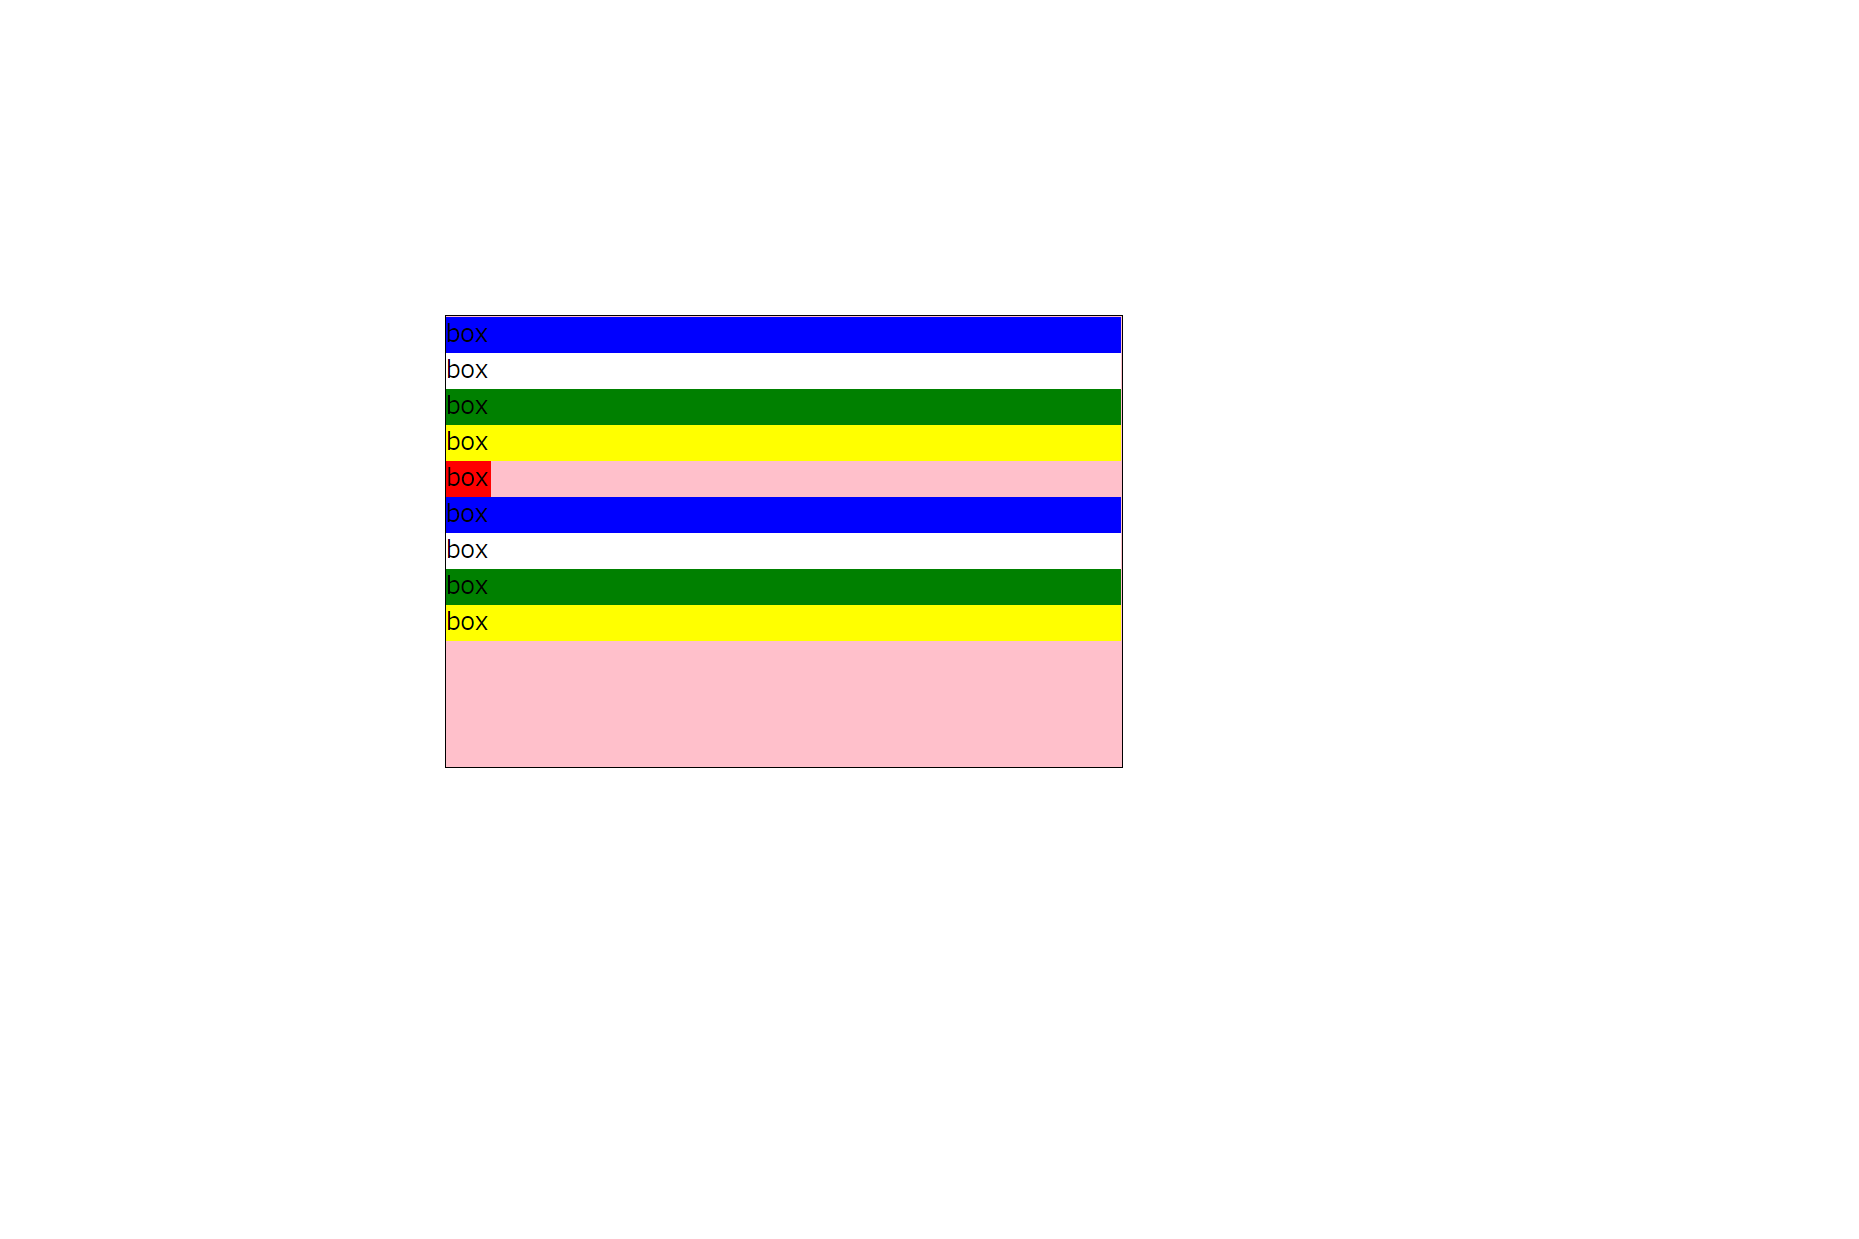
この状態にFlexbox のdisplayboxをつけます
.african1 {
  width: 450px;
  height: 300px;
  background-color: pink;
  border: 1px solid black;

  display: flex; ※追加
  flex-direction: row; ※追加
}
boxが横並びになりました ↓↓
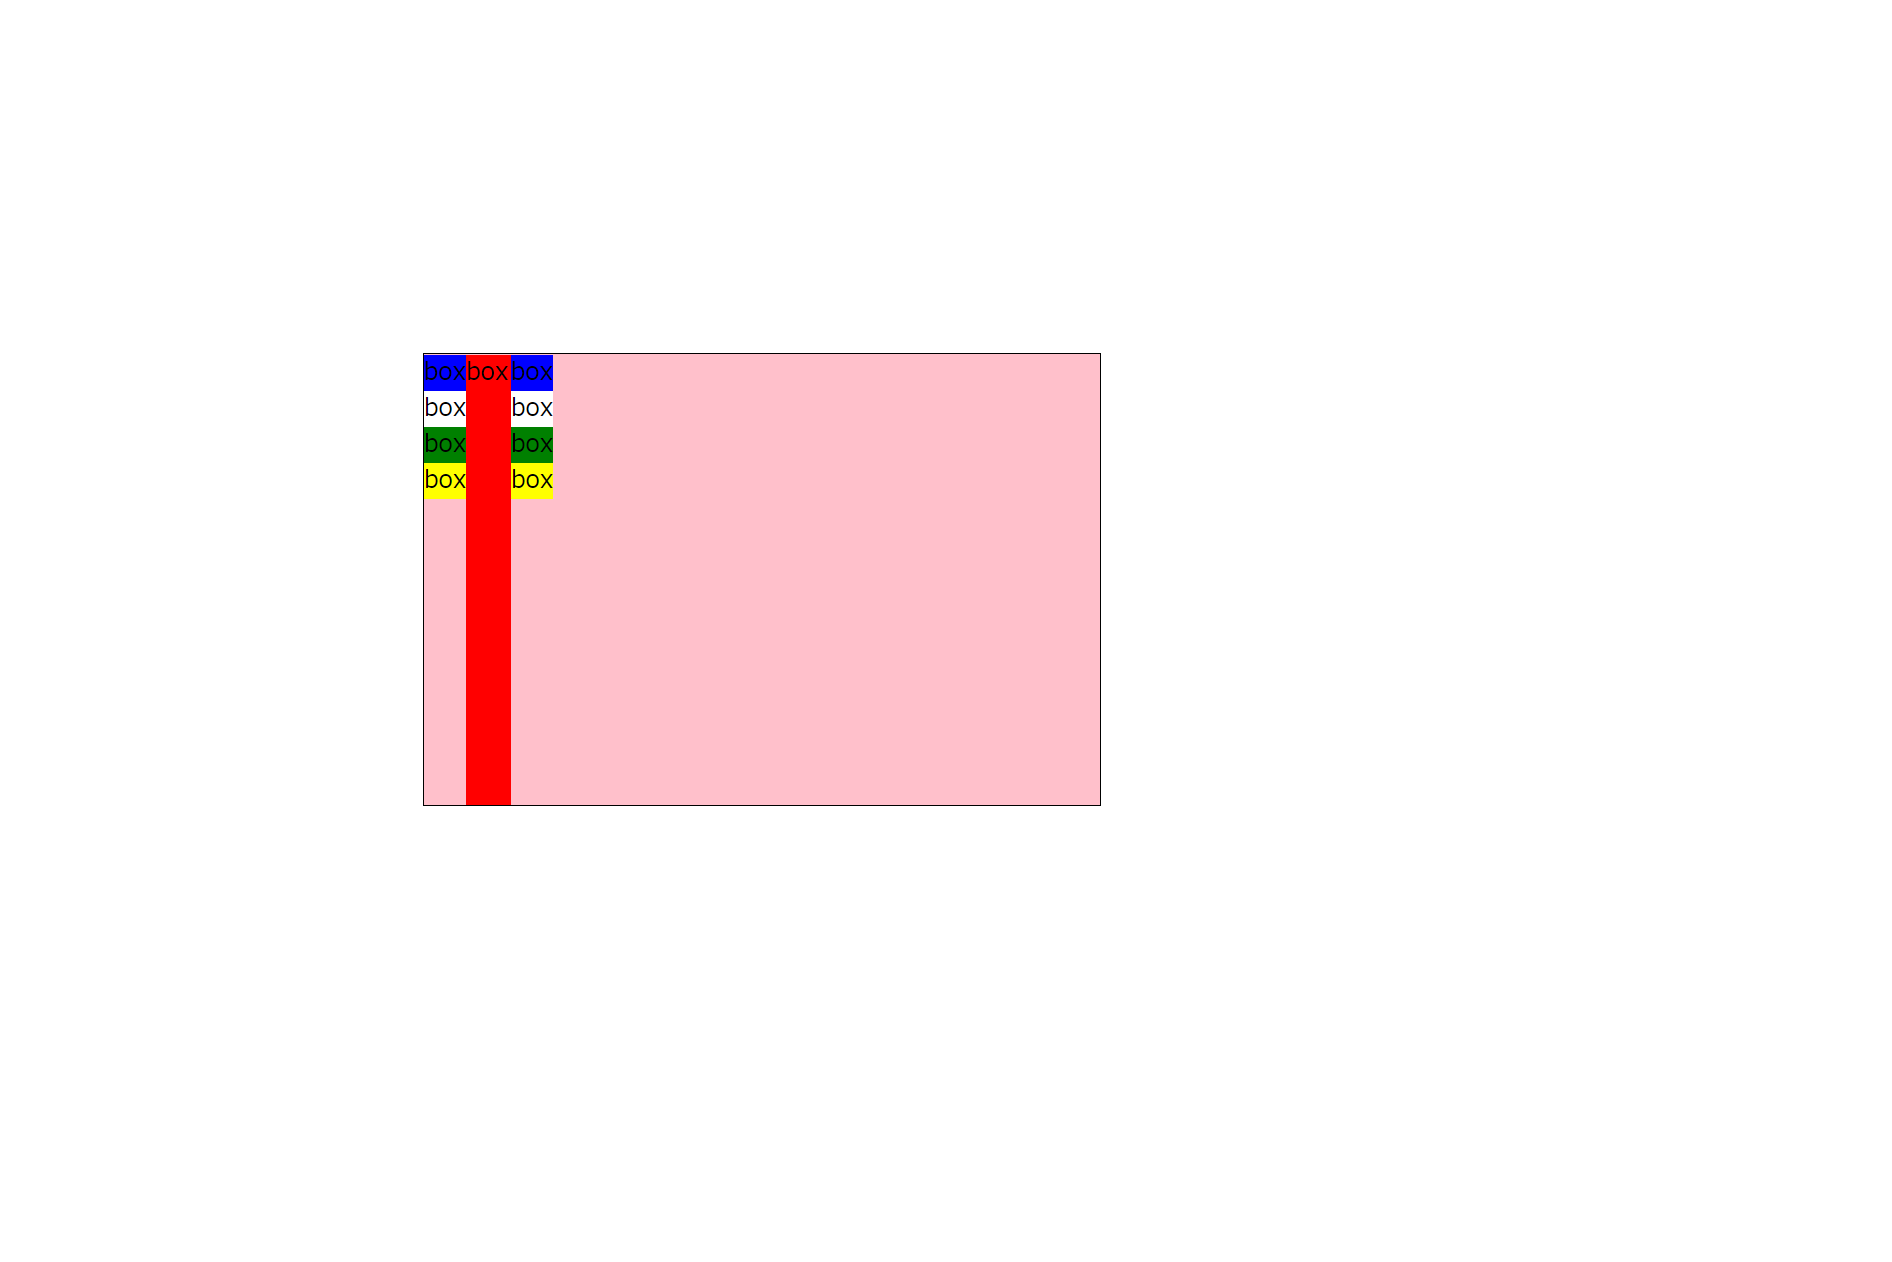
次に『box1,2,3,4 & .afr 』にFlexアイテム(子要素)をつけるため
『box1,2,3,4』の親要素にdisplay: flexとflexコンテナー(親要素)をつけます
.afr {

  display: flex; ※追加
  flex-direction: column; ※追加
}
flex-direction: column; をつけたので変化なし

『.afr3,4,5,6,1』にFlexアイテムの flex-grow をつけます
.afr {
  display: flex;
  flex-direction: column;
}

.afr3 {
  width: 185px;
  background-color: blue;
  flex-grow: 2;
}
.afr4 {
  background-color: white;
  flex-grow: 2;
}
.afr5 {
  background-color: green;
  flex-grow: 2;
}
.afr6 {
  background-color: yellow;
  flex-grow: 2;
}

.afr1 {
  width: 30px;
  background-color: red;

  flex-grow: 1;
}
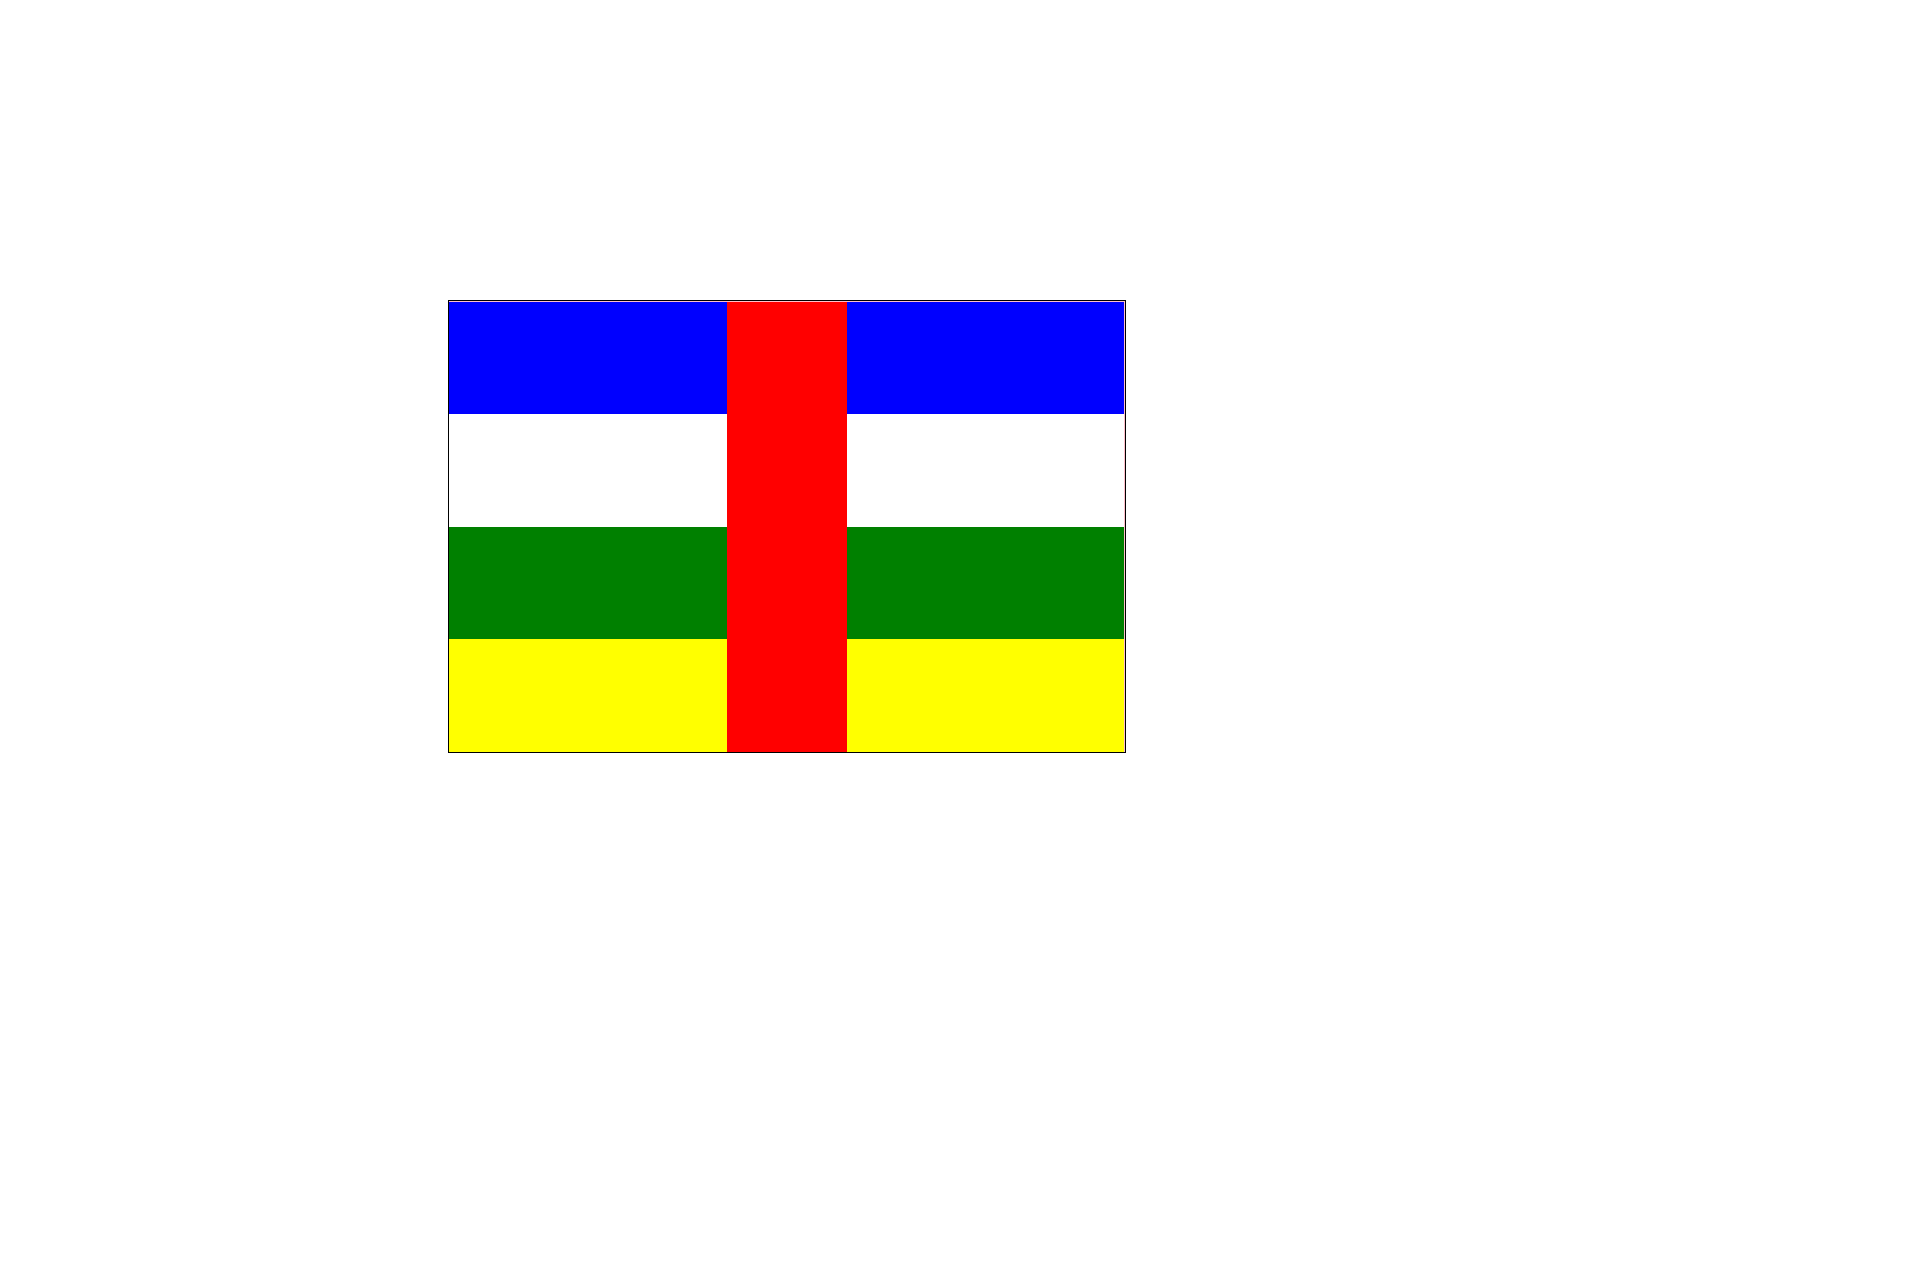
flexコンテナー と、flexアイテム を使って完成しました!
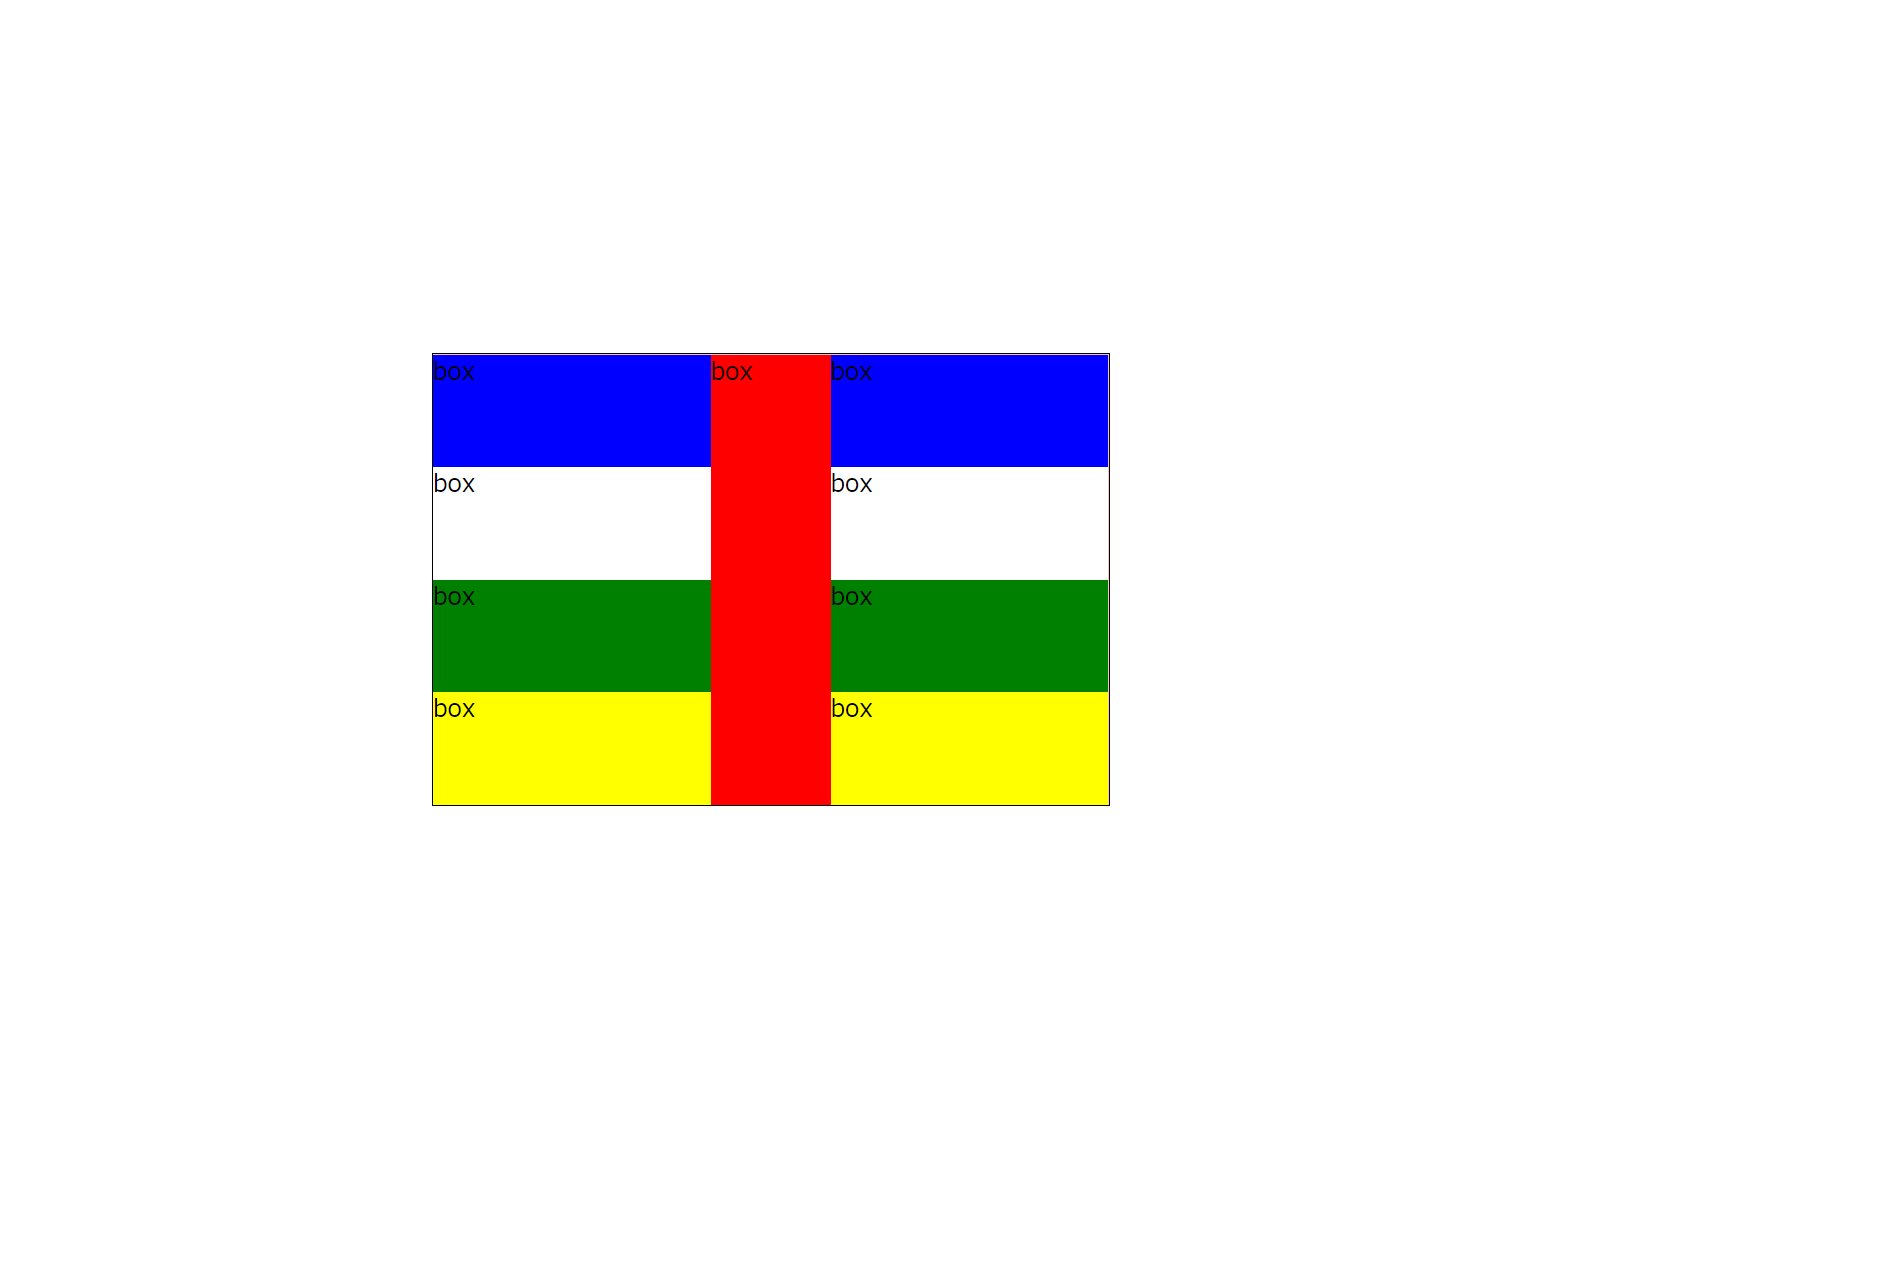
最後に「文字」を消して完成です ↓
まとめ
Flexコンテナー と Flexアイテム の両方を使用しました。
Flexアイテム を使うため、敢えて『親要素』にFlexコンテナーを使いました
Flexアイテム を使うためにはdisplay: flex; を付ける必要があります
見落としがちで、display: flex; を付けずに Flexアイテム を付けてしまい
挙動が反応しない現象に陥ってしまうので注意が必要です
引き続きFlexbox の基礎を理解して自由に使えたら嬉しいです
今回は以上です!
ありがとうございました