初めに
Jetpack Composeを用いたandroid開発について学ぶ中でUIの微調整のためにModifierを使うことが多かったため、主な使われ方(主観)について調べ、まとめました。
なお、当方、この記事が初投稿となります。拙い点もあるかと思いますが、どうか温かい目で見ていただければ幸いです。
目次
- Modifierについて
- Modifierの活用法(コードと実際の画面)
- サイズ・レイアウト
- 背景・ボーダー
- オブジェクトの配置
- スタイル調整
- 視覚への効果
- まとめ
対象読者
- android開発初学者の方
Modifierとは何か
まず、Modifierとは、UIコンポーネント(UIのレンダリングを行う関数)に対して、外観、レイアウト、動作などを定義し、文字通りUIコンポーネントに対しての修飾子としての役割を果たしています。このModifierを有効に活用することで、UI要素のレイアウトや装飾、動作を柔軟に決定することができるため、複雑なUIを構成するためにはModifierについての理解が非常に重要になります。
Modifierの活用法
1:サイズ・レイアウト
- fillMaxSize
@Composable
fun Myfunc(
    text: String = "This is a sample text!",
    modifier: Modifier = Modifier
) {
    Box(
        modifier = modifier
            .fillMaxSize()
            .background(Color.Cyan),
        contentAlignment = Alignment.Center
    ) {
        Text(
            text = "This is a sample text!",
            fontSize = 32.sp,
            fontWeight = FontWeight.Bold,
        )
    }
}
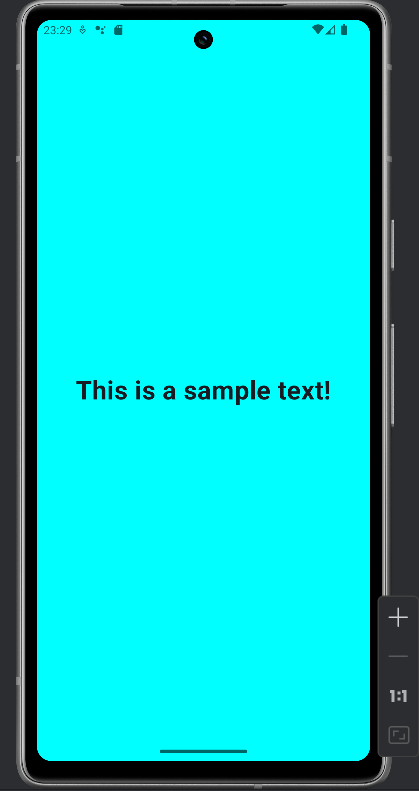
fillMaxSize()関数では、幅と高さの両方を親要素のサイズいっぱいに広げます。このため、画面上でも水色の背景がデバイス全体に広がっています。

- fillMaxWidth
@Composable
fun Myfunc(
    text: String = "This is a sample text!",
    modifier: Modifier = Modifier
) {
    Column(
        verticalArrangement = Arrangement.Center,
    ) {
        Box(
            modifier = modifier
                .fillMaxWidth(),
            contentAlignment = Alignment.Center
        ) {
            Text(
                text = "This is a sample text!",
                fontSize = 32.sp,
                fontWeight = FontWeight.Bold,
            )
        }
    }
}
fillMaxWidth()関数は横幅だけを親の幅一杯に広げます。

- fillMaxHeight
@Composable
fun Myfunc(
    text: String = "This is a sample text!",
    modifier: Modifier = Modifier
) {
    Column(
        modifier = Modifier.fillMaxHeight()
    ) {
        Box(
            modifier = modifier
                .fillMaxHeight()
                .background(Color.DarkGray)
                .weight(1f)
                .width(200.dp),
            contentAlignment = Alignment.Center
        ) {
            Text(
                text = "first text",
                fontSize = 32.sp,
                fontWeight = FontWeight.Bold,
                color = Color.White
            )
        }
        Box(
            modifier = modifier
                .fillMaxHeight()
                .background(Color.Magenta)
                .weight(1f)
                .width(200.dp),
            contentAlignment = Alignment.Center
        ) {
            Text(
                text = "second text",
                fontSize = 32.sp,
                fontWeight = FontWeight.Bold,
                color = Color.White
            )
        }
    }
}
fillMaxHeight()関数は縦幅だけを親の高さいっぱいに広げます。画面では、後述するweight()関数を利用して縦方向に2つのBoxを配置しています。

2:背景・ボーダー
- background
@Composable
fun Myfunc(
    text: String ="This is a sample text!",
    modifier: Modifier = Modifier
) {
    Box(
        modifier = modifier
            .fillMaxSize()
    ) {
        Text(
            text = text,
            modifier = modifier
                .align(Alignment.Center)
                .background(Color.Cyan),
            fontSize = 32.sp,
            fontWeight = FontWeight.Bold
        )
    }
}
background()関数では任意の背景色を付けることが出来ます。画面では、Text内のmodifierでこの関数を使用することでテキストの背景をシアンカラーにしています。

- border
@Composable
fun Myfunc(
    text: String ="This is a sample text!",
    modifier: Modifier = Modifier
) {
    Box(
        modifier = modifier
            .fillMaxSize()
    ) {
        Text(
            text = text,
            modifier = modifier
                .align(Alignment.Center)
                .background(Color.Cyan)
                .border(4.dp,Color.Black),
            fontSize = 32.sp,
            fontWeight = FontWeight.Bold
        )
    }
}
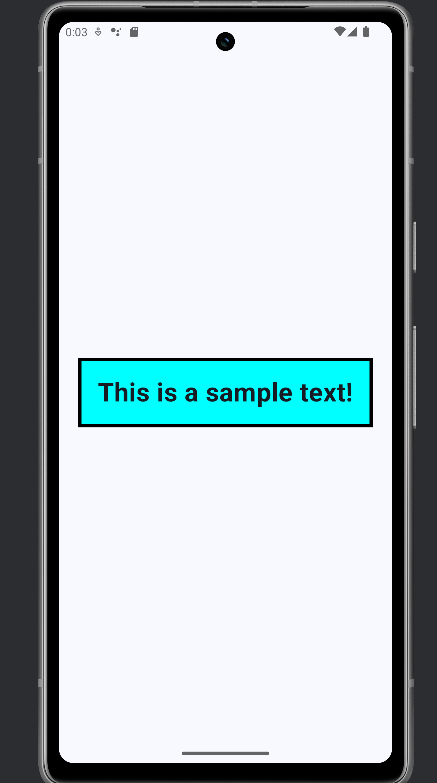
border()関数ではUI部品の周囲を枠線で囲うことができる関数です。

3:オブジェクトの配置
- align
@Composable
fun Myfunc(
    text: String ="This is a sample text!",
    modifier: Modifier = Modifier
) {
    Box(
    ) {
        Text(
            text = text,
            modifier = modifier.align(Alignment.Center),
            fontSize = 32.sp,
            fontWeight = FontWeight.Bold
        )
    }
}
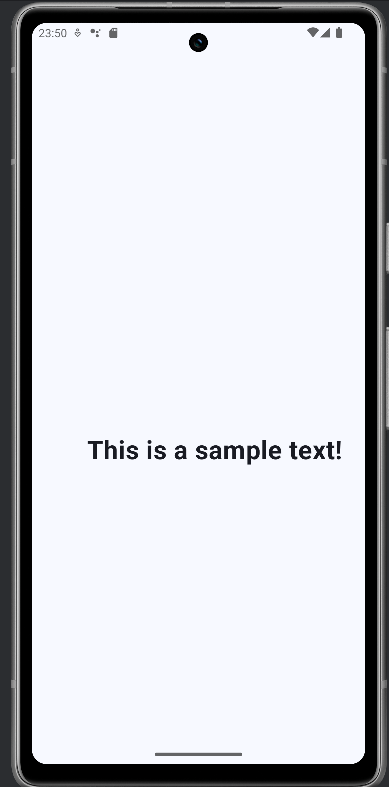
align()関数は親要素の中での子要素の配置(右揃え、左揃え、中央揃え)を決定する関数です。コードでは、align(Alignment.Center)とすることでBox内のテキストを中央揃えしています。

- offset
@Composable
fun Myfunc(
    text: String ="This is a sample text!",
    modifier: Modifier = Modifier
) {
    Box(
        modifier = modifier
            .fillMaxSize()
    ) {
        Text(
            text = text,
            modifier = modifier
                .align(Alignment.Center)
                .offset(y = 70.dp,x=20.dp),
            fontSize = 32.sp,
            fontWeight = FontWeight.Bold
        )
    }
}
offset関数はUI要素の位置を相対的に移動させるための関数です。移動幅はx軸とy軸に分けて設定することが出来ます。コードではoffset(y = 70.dp,x=20.dp)としているため、align()関数で中央揃えした時よりもテキストが右下に寄っていることが分かります。

4:スタイル調整
- padding
@Composable
fun Myfunc(
    text: String ="This is a sample text!",
    modifier: Modifier = Modifier
) {
    Box(
        modifier = modifier
            .fillMaxSize()
    ) {
        Text(
            text = text,
            modifier = modifier
                .align(Alignment.Center)
                .background(Color.Cyan)
                .border(4.dp,Color.Black)
                .padding(24.dp),
            fontSize = 32.sp,
            fontWeight = FontWeight.Bold
        )
    }
}
padding()関数はそのUI部品の周囲の余白を指定する関数です。border()関数を用いた際の画面と比べるとテキストの周りに余白が出来ていることが分かります。

- size
@Composable
fun Myfunc(
    text: String ="This is a sample text!",
    modifier: Modifier = Modifier
) {
    Box(
        modifier = modifier
            .fillMaxSize()
    ) {
        Text(
            text = text,
            modifier = modifier
                .align(Alignment.Center)
                .background(Color.Cyan)
                .border(4.dp,Color.Black)
                .padding(24.dp)
                .size(240.dp,120.dp),
            fontSize = 32.sp,
            fontWeight = FontWeight.Bold
        )
    }
}
size()関数はUI要素のスケールを調整するための関数です。
コードの中ではsize(240.dp,120.dp)という形で記述することで元々よりすケースが大きくなっています。

- weight
@Composable
fun Myfunc(
    text: String = "This is a sample text!",
    modifier: Modifier = Modifier
) {
    Column(
        modifier = modifier
            .fillMaxSize()
            .background(Color.LightGray),
    ) {
        Box(
            modifier = Modifier
                .fillMaxWidth()
                .background(Color.Red)
                .weight(0.3f)
        ) {
            Text(
                text = "sample test",
                color = Color.White,
                fontSize = 24.sp,
                fontWeight = FontWeight.Bold,
            )
        }
        Box(
            modifier = Modifier
                .fillMaxWidth()
                .background(Color.Blue)
                .weight(0.2f)
        ) {
            Text(
                text = "sample test",
                color = Color.White,
                fontSize = 24.sp,
                fontWeight = FontWeight.Bold,
            )
        }
        Box(
            modifier = Modifier
                .fillMaxWidth()
                .background(Color.DarkGray)
                .weight(0.5f)
        ) {
            Text(
                text = "sample test",
                color = Color.White,
                fontSize = 24.sp,
                fontWeight = FontWeight.Bold,
            )
        }
    }
}
weight()関数はRowやColumnなどの中でUI要素に割り当てる比率を調整するための関数です。
画面では3つのBoxが縦に並んでいますが、それぞれのweight()関数の引数を0,2f,0.5f,0.3f(全体の大きさは1f)としているので画面でもその通りの大きさの比率となっています。

5:視覚への効果
- alpha
@Composable
fun Myfunc(
    text: String ="This is a sample text!",
    modifier: Modifier = Modifier
) {
    Box(
        modifier = modifier
            .fillMaxSize()
    ) {
        Text(
            text = text,
            modifier = modifier
                .align(Alignment.Center)
                .clip(RoundedCornerShape(20.dp))
                .alpha(0.5f)
                .background(Color.Green)
                .padding(24.dp),
            fontSize = 32.sp,
            fontWeight = FontWeight.Bold
        )
    }
}
alpha()関数はUI部品の透明度を調節する関数です。コードではalpha(0.5f)としていますが、これにより画面においてボタンとその中のテキストの色が通常よりも薄くなっているのが分かります。

- clip
@Composable
fun Myfunc(
    text: String ="This is a sample text!",
    modifier: Modifier = Modifier
) {
    Box(
        modifier = modifier
            .fillMaxSize()
    ) {
        Text(
            text = text,
            modifier = modifier
                .align(Alignment.Center)
                .clip(RoundedCornerShape(20.dp))
                .background(Color.Green)
                .padding(24.dp),
            fontSize = 32.sp,
            fontWeight = FontWeight.Bold
        )
    }
  }
clip()関数はコンポーネントを丸く切り抜くための関数です。画面を見ると、ボタンの角が少し丸みがかっているのが分かります。なお、引数のshapeにはRoundedCornerShapeなどが必要になります。

- scale
@Composable
fun Myfunc(
    text: String ="This is a sample text!",
    modifier: Modifier = Modifier
) {
    Column(
        modifier = modifier
            .fillMaxSize()
            .padding(16.dp)
            .background(Color.LightGray),
        verticalArrangement = Arrangement.Center,
        horizontalAlignment = Alignment.CenterHorizontally,
    ) {
        Text(
            text = "Small Text",
            color = Color.Red,
            fontSize = 24.sp,
            modifier = Modifier.scale(0.7f, 0.7f)
        )
        Spacer(modifier =Modifier.height(16.dp))
        Text(
            text = "Middle test",
            color = Color.Blue,
            fontSize = 24.sp,
            modifier= Modifier.scale(1.0f, 1.0f)
        )
        Spacer(modifier =Modifier.height(16.dp))
        Text(
            text = "Large Text",
            color = Color.Black,
            fontSize = 24.sp,
            modifier= Modifier.scale(1.8f, 1.8f)
        )
        Spacer(modifier =Modifier.height(32.dp))
        Button(
            onClick = { /*TODO*/ },
            modifier=Modifier.scale(0.8f,0.8f)) {
            Text("小さいボタン")
        }
        Spacer(modifier =Modifier.height(32.dp))
        Button(
            onClick = { /*TODO*/ },
            modifier=Modifier.scale(1.5f,1.5f)) {
            Text("大きいボタン")
        }
    }
}
scale()関数はUI要素のスケールを調整するための関数です。このscale()関数の引数では1fは元のサイズを表し、それより大きい引数とすれば通常よりサイズの大きいUI部品が、小さい値の引数とすれば通常より小さいUI部品が描画されます。

まとめ
Modifierを適切に使用することで、コードの再利用性や可読性が向上されられるため、効率的なアプリケーション開発に不可欠だと言えます。
なお、本記事で紹介したのは一例にすぎません。興味を持った方はぜひ公式ドキュメントを参照してください。