Swift3でテーブルに「>」(右向き矢印)のアイコンをつける
今回の目標
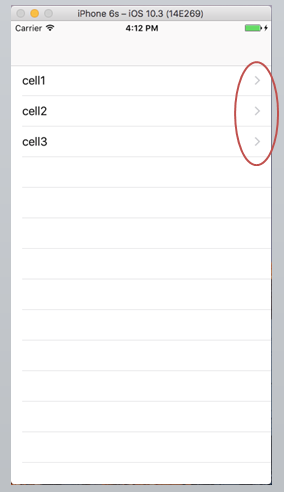
テーブルのセルに「>」のアクセサリを表示する
開発環境
- Xcode:8.2.1
- 言語:Swift 3
- OS:MacOS
アイコン表示方法
Storyboardで事前にTableViewを作成し、CellにIdentifier(今回は"Cells")を付与しておきます
そのCellを指定する形で下記のコードを実装します
UITableviewCell.accessoryType = UITableViewCellAccessoryType.disclosureIndicator
サンプルコード
ViewController.swift
    let display:Array = ["cell1", "cell2", "cell3"]

    // Cellの値を設定
    func tableView(_ tableView: UITableView, cellForRowAt indexPath: IndexPath) -> UITableViewCell {
        let cell = tableView.dequeueReusableCell(withIdentifier: "Cells", for: indexPath) // Storyboard上のテーブルセルのIdentifierと一致
        cell.textLabel!.text = display[indexPath.row]
        cell.accessoryType = UITableViewCellAccessoryType.disclosureIndicator // ここで「>」ボタンを設定
        return cell
    }
備考
UITableViewCellAccessoryType.disclosureIndicatorを指定する時にdisclosureIndicator以外の種類として、チェックマーク(checkmark)や詳細(インフォメーション)マーク(detailButton)なども設定できる