13KB以下でHTMLゲームを開発するコンテスト js13kGames のために、とても簡単なゲーム開発の環境を構築しました。
やることは単なる伝統的なCanvas API操作なのですが、ファイルサイズを抑えるため一切ライブラリを同梱しないVanilla JSで記述していきます。ECMAScript 2015+(ES6+)で開発し、webpackでビルドします。Visual Studio CodeのJavaScript開発支援機能も少し使っていきます。
js13kGamesについて
下記の記事が詳しいです。
- 1か月かけてJavaScriptで13KBのゲームを作るゲームジャム「js13kGames」がもたらした知見とは - GamesIndustry.biz Japan Edition
- js13kGames:コードゴルフ型ゲーム開発大会 | Mozilla Developer Street (modest)
js13kGamesは参加してみて結構面白いと思ったのですが、日本語の情報があまり見つかりませんでした。もし来年以降も開催されるならば初学者の方が参加しやすくなるよう、このような単純な開発環境の構築手順をメモしておきます。
環境
- Windows Subsystem for Linux / Ubuntu 16.04.4 LTS
- たぶんMacでもほぼ同じです
- node 9.4.0
- npm 6.4.1
- webpack 4.19.0
- Visual Studio Code 1.27.2
jQuery, Lodash, Phaserのようなパッケージは一切使いません。
作成
適当な名前でリポジトリを作ります。ここではmy-gameとします。
$ mkdir my-game
$ cd my-game
$ git init
$ curl 'https://raw.githubusercontent.com/github/gitignore/master/Node.gitignore' > .gitignore
package-lock.jsonがgit diffの出力結果に混ざって欲しくない場合は、バイナリ扱いにしておきます。
$ echo 'package-lock.json binary' >> .gitattributes
webpackによるビルドの設定
まずpackage.jsonを作成します。
npm initで作成できますが、回答は適当で構いません。
$ npm init
webpackをインストールします。
$ npm install --save-dev webpack webpack-cli webpack-merge
本番出力用のwebpack.config.jsを作成します。
module.exports = {
  mode: 'production',
  entry: './src/index.js',
};
開発時に使うためのwebpack.dev.jsを作成します。
const merge = require('webpack-merge');
const common = require('./webpack.config.js');
module.exports = merge(common, {
  mode: 'development',
  devtool: 'inline-source-map',
});
webpack --config webpack.config.jsで本番用のビルドを、webpack --config webpack.dev.jsで開発用のビルドをします。これらのコマンドを実行しやすいよう npm scripts に記述しておきます。
最終的にpackage.jsonはこんな感じになります。
{
  "private": true,
  "scripts": {
    "prepare": "webpack --config webpack.config.js",
    "watch": "webpack --config webpack.dev.js --watch"
  },
  "devDependencies": {
    "webpack": "^4.19.0",
    "webpack-cli": "^3.1.0",
    "webpack-merge": "^4.1.4"
  }
}
Hello World
dist/index.htmlにHTMLを記述していきます。
VSCodeで空のファイルを作成してhtml:5と入力してTabを押すことで、Emmetのテンプレートを呼び出すと便利です。
<!DOCTYPE html>
<html lang="en">
<head>
  <meta charset="UTF-8">
  <meta name="viewport" content="width=device-width, initial-scale=1.0">
  <meta http-equiv="X-UA-Compatible" content="ie=edge">
  <script src="./main.js"></script>
  <title>My Game</title>
</head>
<body>
  <canvas id="main-canvas" width="640" height="480"></canvas>
</body>
</html>
JavaScriptの処理を記述していきます。
#main-canvasに「Hello, World」と描画してみます。
document.addEventListener('DOMContentLoaded', () => {
  // Canvas initialize
  const canvasElem = document.getElementById('main-canvas');
  const canvasContext = canvasElem.getContext('2d');
  canvasContext.font = '18px serif';

  // Canvas Clear
  canvasContext.fillStyle = 'black';
  canvasContext.clearRect(0, 0, canvasElem.width, canvasElem.height);
  canvasContext.fillRect(0, 0, canvasElem.width, canvasElem.height);

  // Render
  canvasContext.fillStyle = 'white';
  canvasContext.fillText('Hello, World!', 4, 20);
});
Visual Studio Codeでnpm watch
$ npm run watchコマンドでJavaScriptをビルドします。
Visual Studio Codeのnpm統合機能を使う場合は、コマンドパレットを開き、>Preferences: Open User Settingsで「ワークスペースの設定」からnpm.enableScriptExplorerをtrueにします。
{
  "npm.enableScriptExplorer": true
}
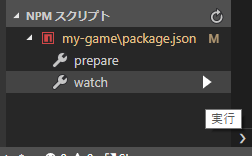
ここで、「NPMスクリプト」欄からnpm run watchを実行できるようになります。
ゲームの実行
dist/index.htmlを開きます。
# Windows Subsystem for Linuxの場合
$ explorer.exe $(wslpath -w dist/index.html)

# Macとかの場合
$ open dist/index.html
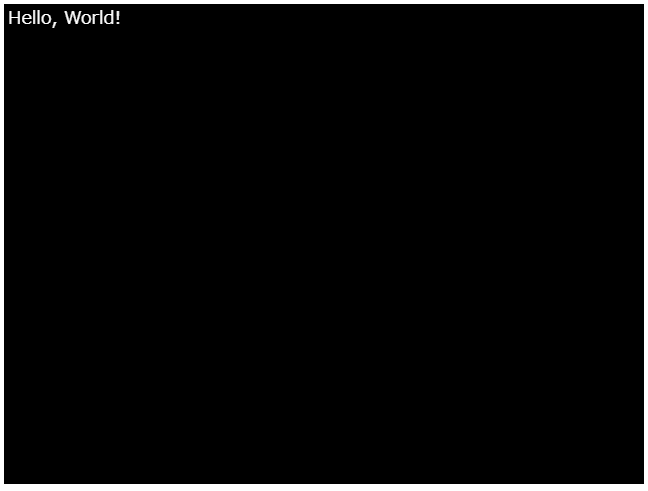
黒い背景に「Hello,World!」と表示されたら成功です。
これでゲームを実行するところまでは完成しました。あとは、JavaScriptでメイン処理を記述していくだけです。
例
たとえば以下のように記述すると、「Hello, World!」の文字をカーソルキーで操作できるようになります。
document.addEventListener('DOMContentLoaded', () => {
  // Keyboard Settings
  const keyCodes = {
    Right: 39,
    Left: 37,
    Up: 38,
    Down: 40,
    D: 68,
    A: 65,
    W: 87,
    S: 83,
  };
  let rightPressed;
  let leftPressed;
  let upPressed;
  let downPressed;
  function setKeyPressed(eventName, value) {
    document.addEventListener(eventName, (e) => {
      switch (e.keyCode) {
        case keyCodes.Right:
        case keyCodes.D:
          rightPressed = value;
          break;
        case keyCodes.Left:
        case keyCodes.A:
          leftPressed = value;
          break;
        case keyCodes.Up:
        case keyCodes.W:
          upPressed = value;
          break;
        case keyCodes.Down:
        case keyCodes.S:
          downPressed = value;
          break;
        default:
      }
    }, false);
  }
  setKeyPressed('keydown', true);
  setKeyPressed('keyup', false);

  // Canvas initialize
  const canvasElem = document.getElementById('main-canvas');
  const canvasContext = canvasElem.getContext('2d');
  canvasContext.font = '18px serif';

  // Cursor initialize
  let x = 4;
  let y = 20;
  const speed = 10;

  function main() {
    // Canvas Clear
    canvasContext.fillStyle = 'black';
    canvasContext.clearRect(0, 0, canvasElem.width, canvasElem.height);
    canvasContext.fillRect(0, 0, canvasElem.width, canvasElem.height);

    // User input
    if (rightPressed) {
      x += speed;
    } else if (leftPressed) {
      x -= speed;
    }
    if (downPressed) {
      y += speed;
    } else if (upPressed) {
      y -= speed;
    }

    // Render
    canvasContext.fillStyle = 'white';
    canvasContext.fillText('Hello, World!', x, y);
  }

  // loop
  setInterval(main, 1000 / 30);
});
たとえばMDNのブロック崩しチュートリアルなどを参考に、ゲームを開発していきましょう。
ESLintの導入
Canvas APIについてググって出てくる情報には、古い内容も多いです。
きちんとECMAScript 2015+に対応できるよう、予め ESLint を入れておくと効果を発揮すると思います。
$ npm install --save-dev eslint
$ ./node_modules/.bin/eslint --init
eslint --initの質問はお好みで。今回はこんな感じで設定しました。
| Question | Answer |
|---|---|
| How would you like to configure ESLint? | Use a popular style guide |
| Which style guide do you want to follow? | Airbnb (https://github.com/airbnb/javascript) |
| Do you use React? | No |
| What format do you want your config file to be in? | JavaScript |
| Would you like to install them now with npm? | Yes |
"env.browser": trueの設定は入れておきましょう。
module.exports = {
  "env": {
    "browser": true
  },
  "extends": "airbnb-base"
};
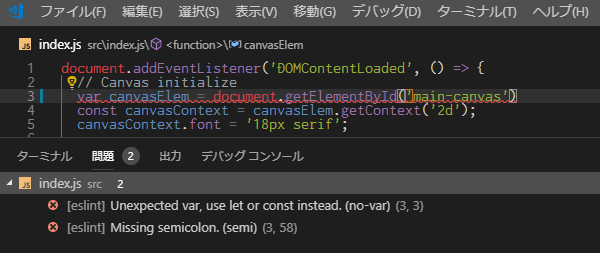
Visual Studio Codeの ESLint 拡張を導入することで、ルールに違反している箇所が「問題」として警告が出るようになります。
完成
本番用のwebpackビルドをして、JavaScriptを圧縮します。
$ npm run prepare
もしjs13kGamesに応募するならば、dist/以下をzipで固めた物が提出物になります。このzipファイルが13KBを下回っていなければなりません。
$ zip --recurse-paths dist.zip dist/*
$ du --human-readable dist.zip
4.0K    dist.zip
参考
- js13kGames - HTML5 and JavaScript Game Development Competition in just 13 kilobytes
- webpack
- ESLint - Pluggable JavaScript linter
- Canvas API - HTML: HyperText Markup Language | MDN
最終的に私が開発してjs13kGamesに提出した物はこちらです。
https://js13kgames.com/entries/inside-the-rect
締切当日夜20時に作り始めたため単純な内容であり、本稿以外の複雑な技術は使っていません。