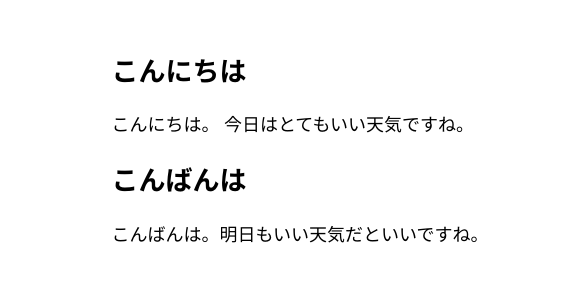
下記のように表示するようなNext.jsアプリを作ってみます。

環境
- ChromeOS Crostini (Linux) Debian 10.10
- Docker version 20.10.7
- Next.js 11.0.1
GCPでサービスアカウントの準備
Node.jsでスプレッドシートに接続する方法はいくつかありますが、今回はGCPのサービスアカウントを使います。OAuth2等その他の方法については、google-api-nodejs-clientのドキュメントを読んでください。
下記手順でサービスアカウントを用意します。
- GCPプロジェクトを作成
- 「APIとサービス」→「APIとサービスを有効化」→「Google Sheets API」を有効化
- 「サービスアカウント」→「サービスアカウントを作成」→適当な名前(next-spreadsheet-cms)で作成
- JSON形式でサービスアカウントの鍵を作成
- JSON内の
private_keyと.client_emailを控えておく-
jqコマンドを使うなら$ cat XXXXXXXX.json | jq '.private_key,.client_email'で取り出せます。
-
スプレッドシートの作成
https://sheets.new からGoogleスプレッドシートを新規作成し、適当に作ります。

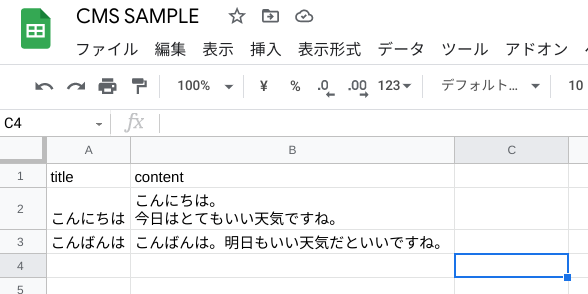
ここではcontentsというシート名で、A列にタイトル、B列に本文を入れてみます。(本来ブログみたいな物を作るならば、sulgとか投稿日時とかが欲しいですね)
URLの第三階層(https://docs.google.com/spreadsheets/d/XXXXXXXX/edit#gid=0 のXXXXXXXX 部分)がスプレッドシートのIDになるので、控えておきます。
右上の「共有」ボタンから「ユーザーやグループを追加」で、先程控えたサービスアカウントのメールアドレスを追加します。権限は「閲覧者」でOKです。
Next.jsプロジェクトの作成
適当な方法でNext.jsプロジェクトを準備します。今回は$ yarn create next-app --typescript で作成します。
$ mkdir next-spreadsheet-cms && cd $_
$ dun docker run --interactive --tty --rm --volume $(pwd):/app --workdir /app node:alpine yarn create next-app --typescript ./
docker-compose.yml を作成します。
version: '3'
services:
  app:
    image: node:alpine
    working_dir: /app
    ports:
      - 3000:3000
    volumes:
      - .:/app
    command: yarn dev
$ docker-compose upで起動して、localhost:3000でNext.jsの画面が映れば成功です。
Next.jsからGoogleスプレッドシートに接続
googleapisをインストールします。
$ docker-compose run --rm app yarn add googleapis
googleapisのテストコードを参考に、JWTを取得してスプレッドシートからデータを取得する関数を実装します。
import { GoogleApis, google } from 'googleapis';
import { Content } from './content';

const getSheets = () => {
  const googleapis = new GoogleApis();
  const scopes = ['https://www.googleapis.com/auth/spreadsheets.readonly'];
  const jwt = new googleapis.auth.JWT(
    process.env.GCP_SERVICEACCOUNT_EMAIL,
    undefined,
    (process.env.GCP_SERVICEACCOUNT_PRIVATE_KEY || '').replace(/\\n/g, '\n'),
    scopes
  );
  return google.sheets({ version: 'v4', auth: jwt });
};

export const getContents = async (): Promise<Content[]> => {
  const sheets = getSheets();
  const response = await sheets.spreadsheets.values.get({
    spreadsheetId: process.env.SPREADSHEET_ID,
    range: 'contents',
  });
  const rows = response.data.values;
  if (rows) {
    return rows.slice(1).map((row): Content => {
      return {
        title: row[0],
        content: row[1]
      };
    });
  }
  return [];
};
export type Content = {
  title: string
  content: string
}
このスプレッドシートのデータをgetStaticProps()で読み込んで使います。
import Head from 'next/head';
import styles from '../styles/Home.module.css';

import { getContents } from '../lib/spreadsheet';
import { Content } from '../lib/content';

export default function Home({ contents }: { contents: Content[] }) {
  return (
    <div className={styles.container}>
      <Head>
        <title>Next.js Spreadsheet CMS</title>
        <meta name="description" content="Next.js Spreadsheet CMS" />
      </Head>

      <main>
        { contents.map(content => {
          return <>
            <h2>{content.title}</h2>
            <p>{content.content}</p>
          </>;
        }) }
      </main>
    </div>
  );
}

export async function getStaticProps() {
  const contents = await getContents();
  return {
    props: { contents },
    revalidate: 3600,
  };
}
控えておいたサービスアカウントの情報とスプレッドシートのIDを、環境変数として渡します。開発環境であれば.env.localに記述すればOKです。デフォルトのNext.jsの設定であれば.env.localは.gitignoreに入っているので安心です。
GCP_SERVICEACCOUNT_EMAIL=XXXX
GCP_SERVICEACCOUNT_PRIVATE_KEY=XXXX
SPREADSHEET_ID=XXXX
下記のようにスプレッドシートの中身が表示されれば成功です。
以上です。今回の手順で作ったものが下記になります。
