はじめに
現場でGraphQLを使用しているのですが、保守改修段階でプロジェクトに入ったのでスキーマ作成などの基本的なところをやったことがありませんでした。また、NoSQLデータベースも使ったことがなかったので、まとめて学んでみようということでNode.js+MongoDBの構成でGraphQLサーバをたててみることにしました。
今回作成したプロジェクトはGitHubにあります。
GraphQLのよさ
RESTとの比較記事がいたるところにあるので(例えばこちら)詳しく書きませんが、単一のエンドポイントであるというのがGraphQLの一番の特徴です。
GraphQLをつかうことで、RESTで必要なすべてのデータを取得しようとするときに発生する以下のような問題を解決することができます。
- 複数のエンドポイントへリクエストを行う必要がある
- 不要なデータも一緒に取得されてしまう
サーバ構築
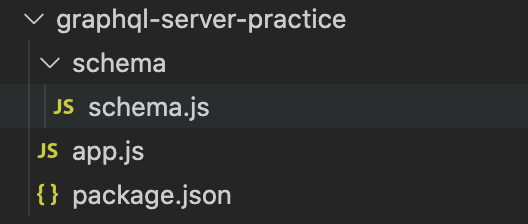
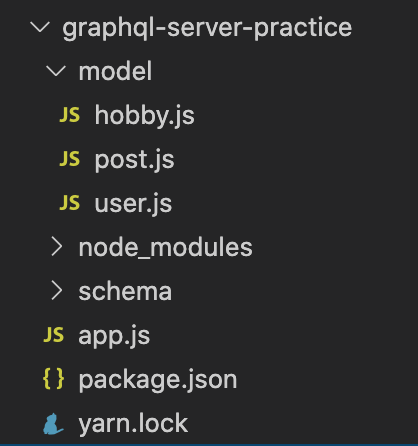
適当なフォルダ(graphql-server-practice)を作成してyarn initします。そのあと、以下の構成でフォルダおよびファイルを作成します。
Schema, Query, MutationをSchema.jsに記載していきます。
Schemaの作成
今回は練習のため、User, Hobby, Postの3つのSchemaをつくります。
Userはそれぞれ複数のHobbyやPostをもてるような関係になっています(One to Many relationship)。
まずはyarn add graphqlでgraphqlパッケージを導入し、schema.jsで以下を読み込みます。
const graphql = require('graphql');

const {
  GraphQLObjectType,
  GraphQLID,
  GraphQLString,
  GraphQLInt,
  GraphQLSchema,
  GraphQLNonNull,
  GraphQLList,
} = graphql;
UserのSchemaをUserTypeとして作成します。GraphQLObjectTypeでラッピングすることでSchemaのname, description, fieldsを定義することができます。
fieldsのid, name, age, professionをGraphQLID, GraphQLString, GraphQLInt, GraphQLStringというスカラー型で定義します。
const UserType = new GraphQLObjectType({
  name: 'User',
  description: 'Documentation for user...',
  fields: () => ({
    id: { type: GraphQLID },
    name: { type: GraphQLString },
    age: { type: GraphQLInt },
    profession: { type: GraphQLString },
  }),
});
HobbyTypeとPostTypeについても同様に作成します。
const HobbyType = new GraphQLObjectType({
  name: 'Hobby',
  description: 'Hobby description',
  fields: () => ({
    id: { type: GraphQLID },
    title: { type: GraphQLString },
    description: { type: GraphQLString },
  }),
});

const PostType = new GraphQLObjectType({
  name: 'Post',
  description: 'Post description',
  fields: () => ({
    id: { type: GraphQLID },
    comment: { type: GraphQLString },
  }),
});
3つのSchemaを作成しましたが、この状態ではまだUserとPost、UserとHobbyの関係が定義されていないので、これらのリレーションを考えてあげる必要があります。
UserとPostの例を考えてみます。
const UserType = new GraphQLObjectType({
  name: 'User',
  description: 'Documentation for user...',
  fields: () => ({
    id: { type: GraphQLID },
    name: { type: GraphQLString },
    age: { type: GraphQLInt },
    profession: { type: GraphQLString },
    posts: {
      type: new GraphQLList(PostType),
      resolve(parent, args) {
        return postsData.filter((data) => data.userId === parent.id);
      },
    },
  }),
});

const PostType = new GraphQLObjectType({
  name: 'Post',
  description: 'Post description',
  fields: () => ({
    id: { type: GraphQLID },
    comment: { type: GraphQLString },
    user: {
      type: UserType,
      resolve(parent, args) {
        return usersData.find((data) => data.id === parent.userId);
      },
    },
  }),
});
User1つに対してPostは複数存在します。そのため、UserTypeのfieldsに新しく作られたpostsはPostTypeの配列型となり、new GraphQLList(PostType)と定義されます。
    posts: {
      type: new GraphQLList(PostType),
      resolve(parent, args) {
        return postsData.filter((data) => data.userId === parent.id);
      },
    },
また、resolveはどのUserに対するPostを表示するのかを定義するものです。parentは親のfields(ここではUserType)を指しており、以上の処理ではUserのidと等しいuserIdをもったPostのデータのみを取得するようになっています。
const usersData = [
  { id: '1', name: '山田勝己', age: 36, profession: 'SASUKE' },
];

const postsData = [
  { id: '1', comment: '僕にはSASUKEしかないんです', userId: '1' },
  { id: '2', comment: '完全制覇がしたいんです', userId: '1' },
];
Queryの作成
QueryはSchemaと同様に、GraphQLObjectTypeで定義を行います。試しに指定したidのUserを取得するuserクエリとすべてのUserを取得するusersクエリを作成してみます。
const RootQuery = new GraphQLObjectType({
  name: 'RootQueryType',
  description: 'Description',
  fields: {
    user: {
      type: UserType,
      args: { id: { type: GraphQLID } },

      resolve(parent, args) {
        return usersData.find((data) => data.id === args.id);
      },
    },

    users: {
      type: new GraphQLList(UserType),
      resolve(parent, args) {
        return usersData;
      },
    },
  },
});
userクエリではidを引数(args)としてとるので、fieldsでargsの型定義を行っています。resolveではargsのidと同じデータだけ取得するような処理を書いています。
一方、usersクエリでは、すべてのデータを取得するだけなのでargsは必要ありません。
ローカルサーバをたててQueryの動作確認
Mutation作成とDB接続の前に、ローカルサーバをたててQueryの挙動を確認します。
作成したRootQueryをnew GraphQLSchemaでラッピングしてエクスポートします。
module.exports = new GraphQLSchema({
  query: RootQuery
});
yarn add express express-graphqlで必要なパッケージを導入し、以下の設定を行います。
const express = require('express');
const { graphqlHTTP } = require('express-graphql');

const schema = require('./schema/schema');

const app = express();

app.use(
  '/graphql',
  graphqlHTTP({
    graphiql: true,
    schema,
  })
);

app.listen(4000, () => {
  console.log('Listening for requests on my awesome port 4000');
});
node appで4000ポートにサーバが立ち上がるのですが、ソースコードの修正をリアルタイムで反映させるためにyarn global add nodemonでnodemonを導入します。
nodemon appでサーバを立ち上げ、http://localhost:4000/graphql を開くと以下の画面が現れます。
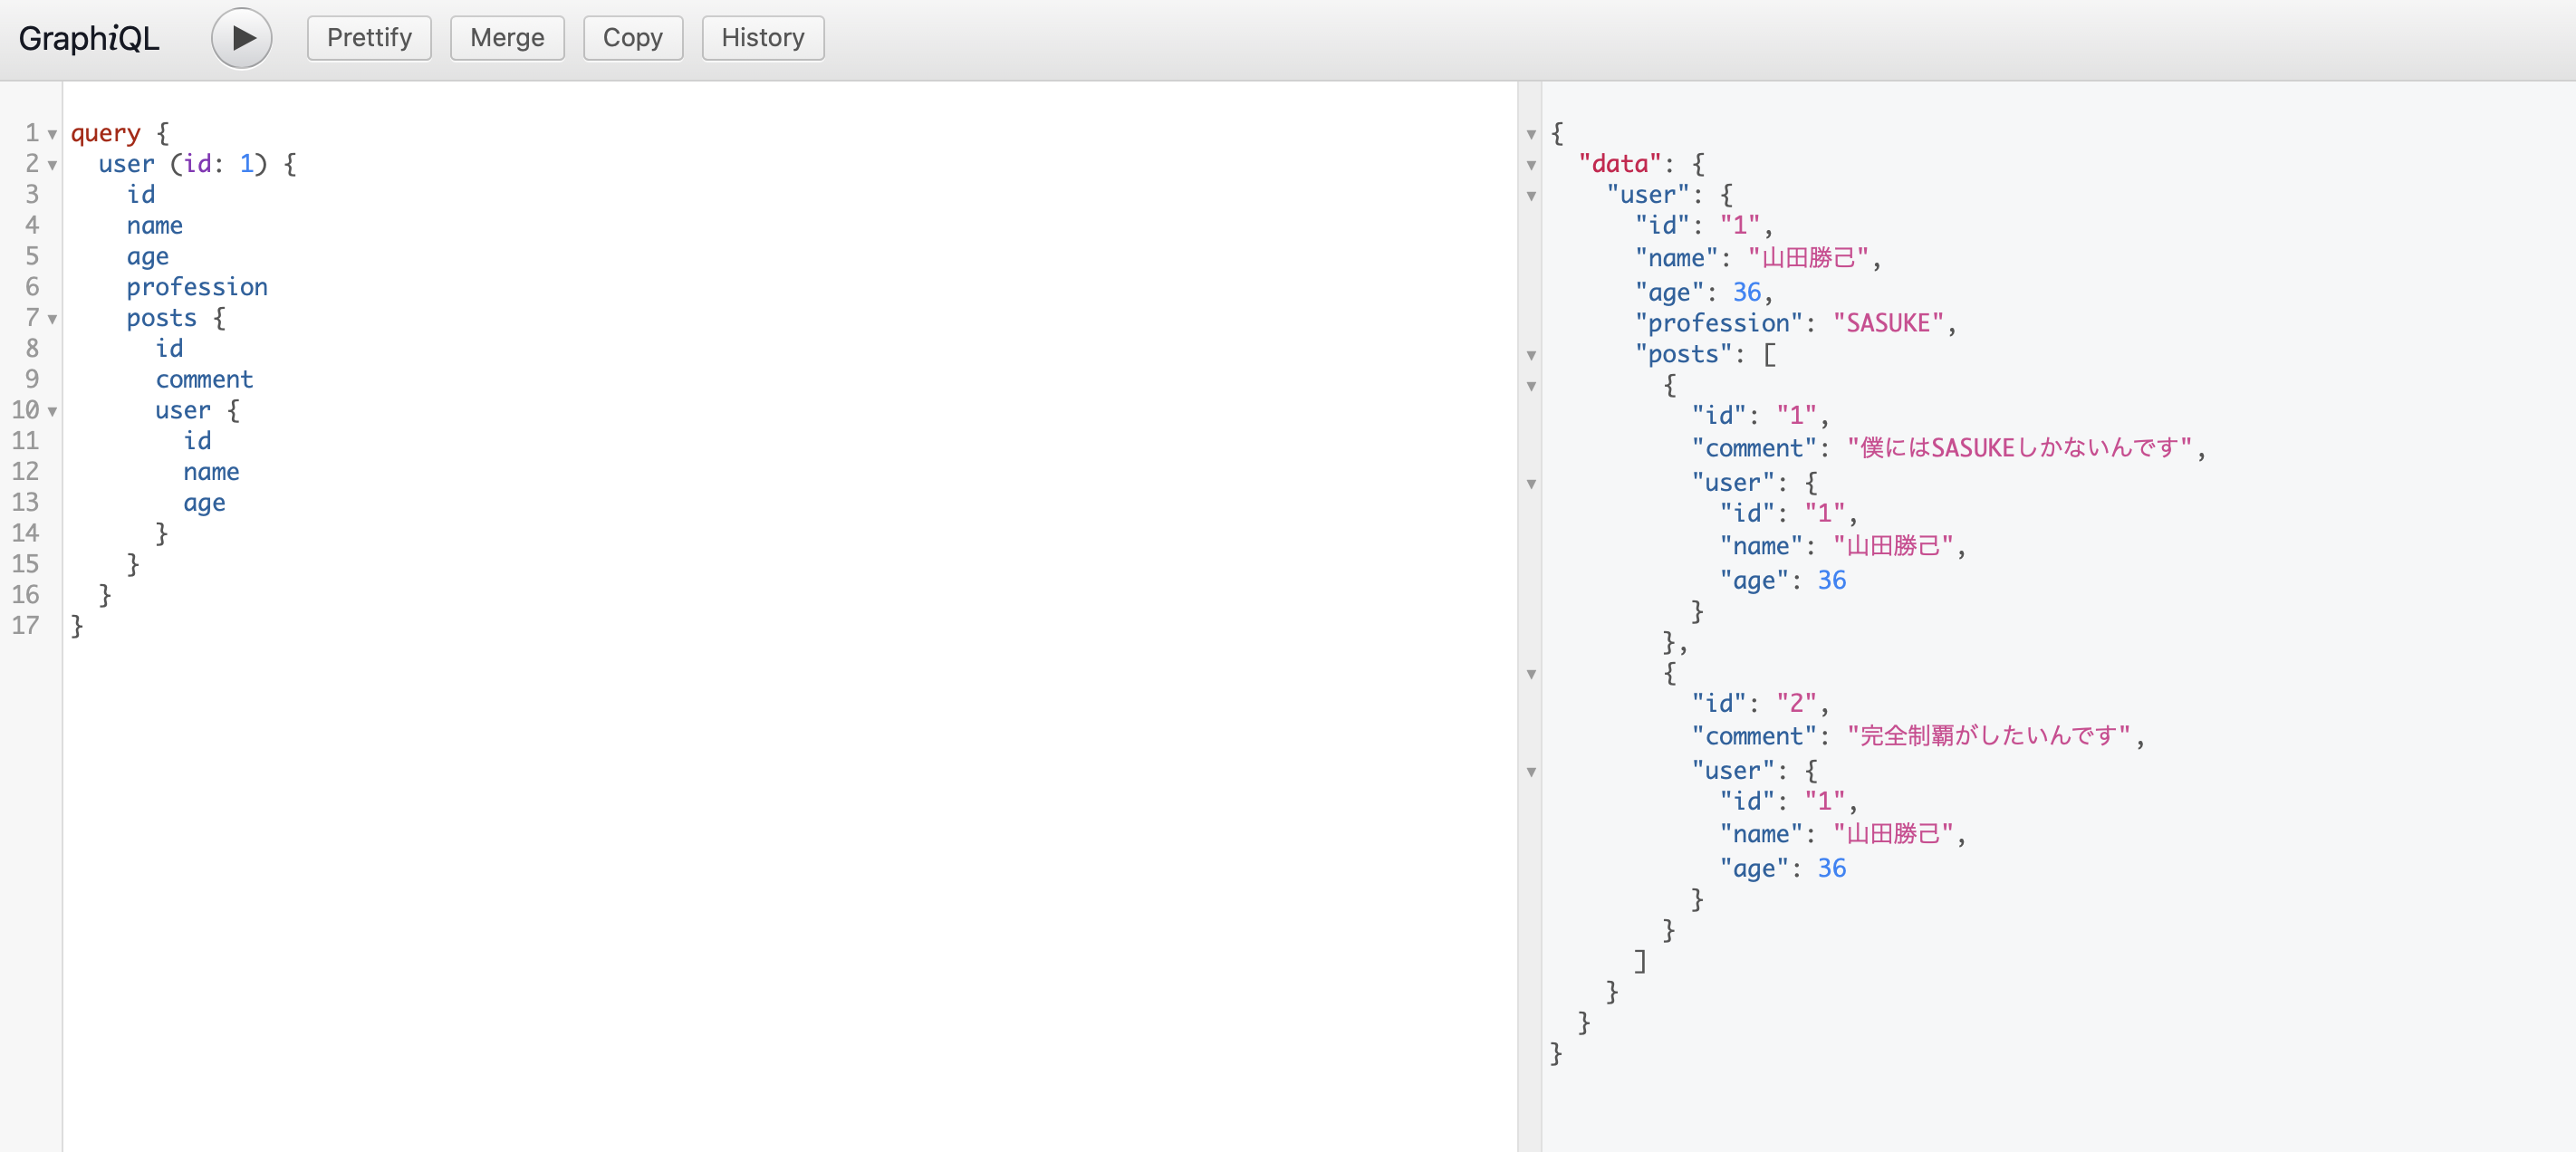
userクエリを試しに実行すると右側に取得データが表示されます。postsのデータも問題なく表示されています。
MongoDBとの接続
DBと接続してMutationを実装します。
MongoDB Atlasの設定
MongoDB Atlasのアカウントを作成します。Googleアカウントがあれば大丈夫です。
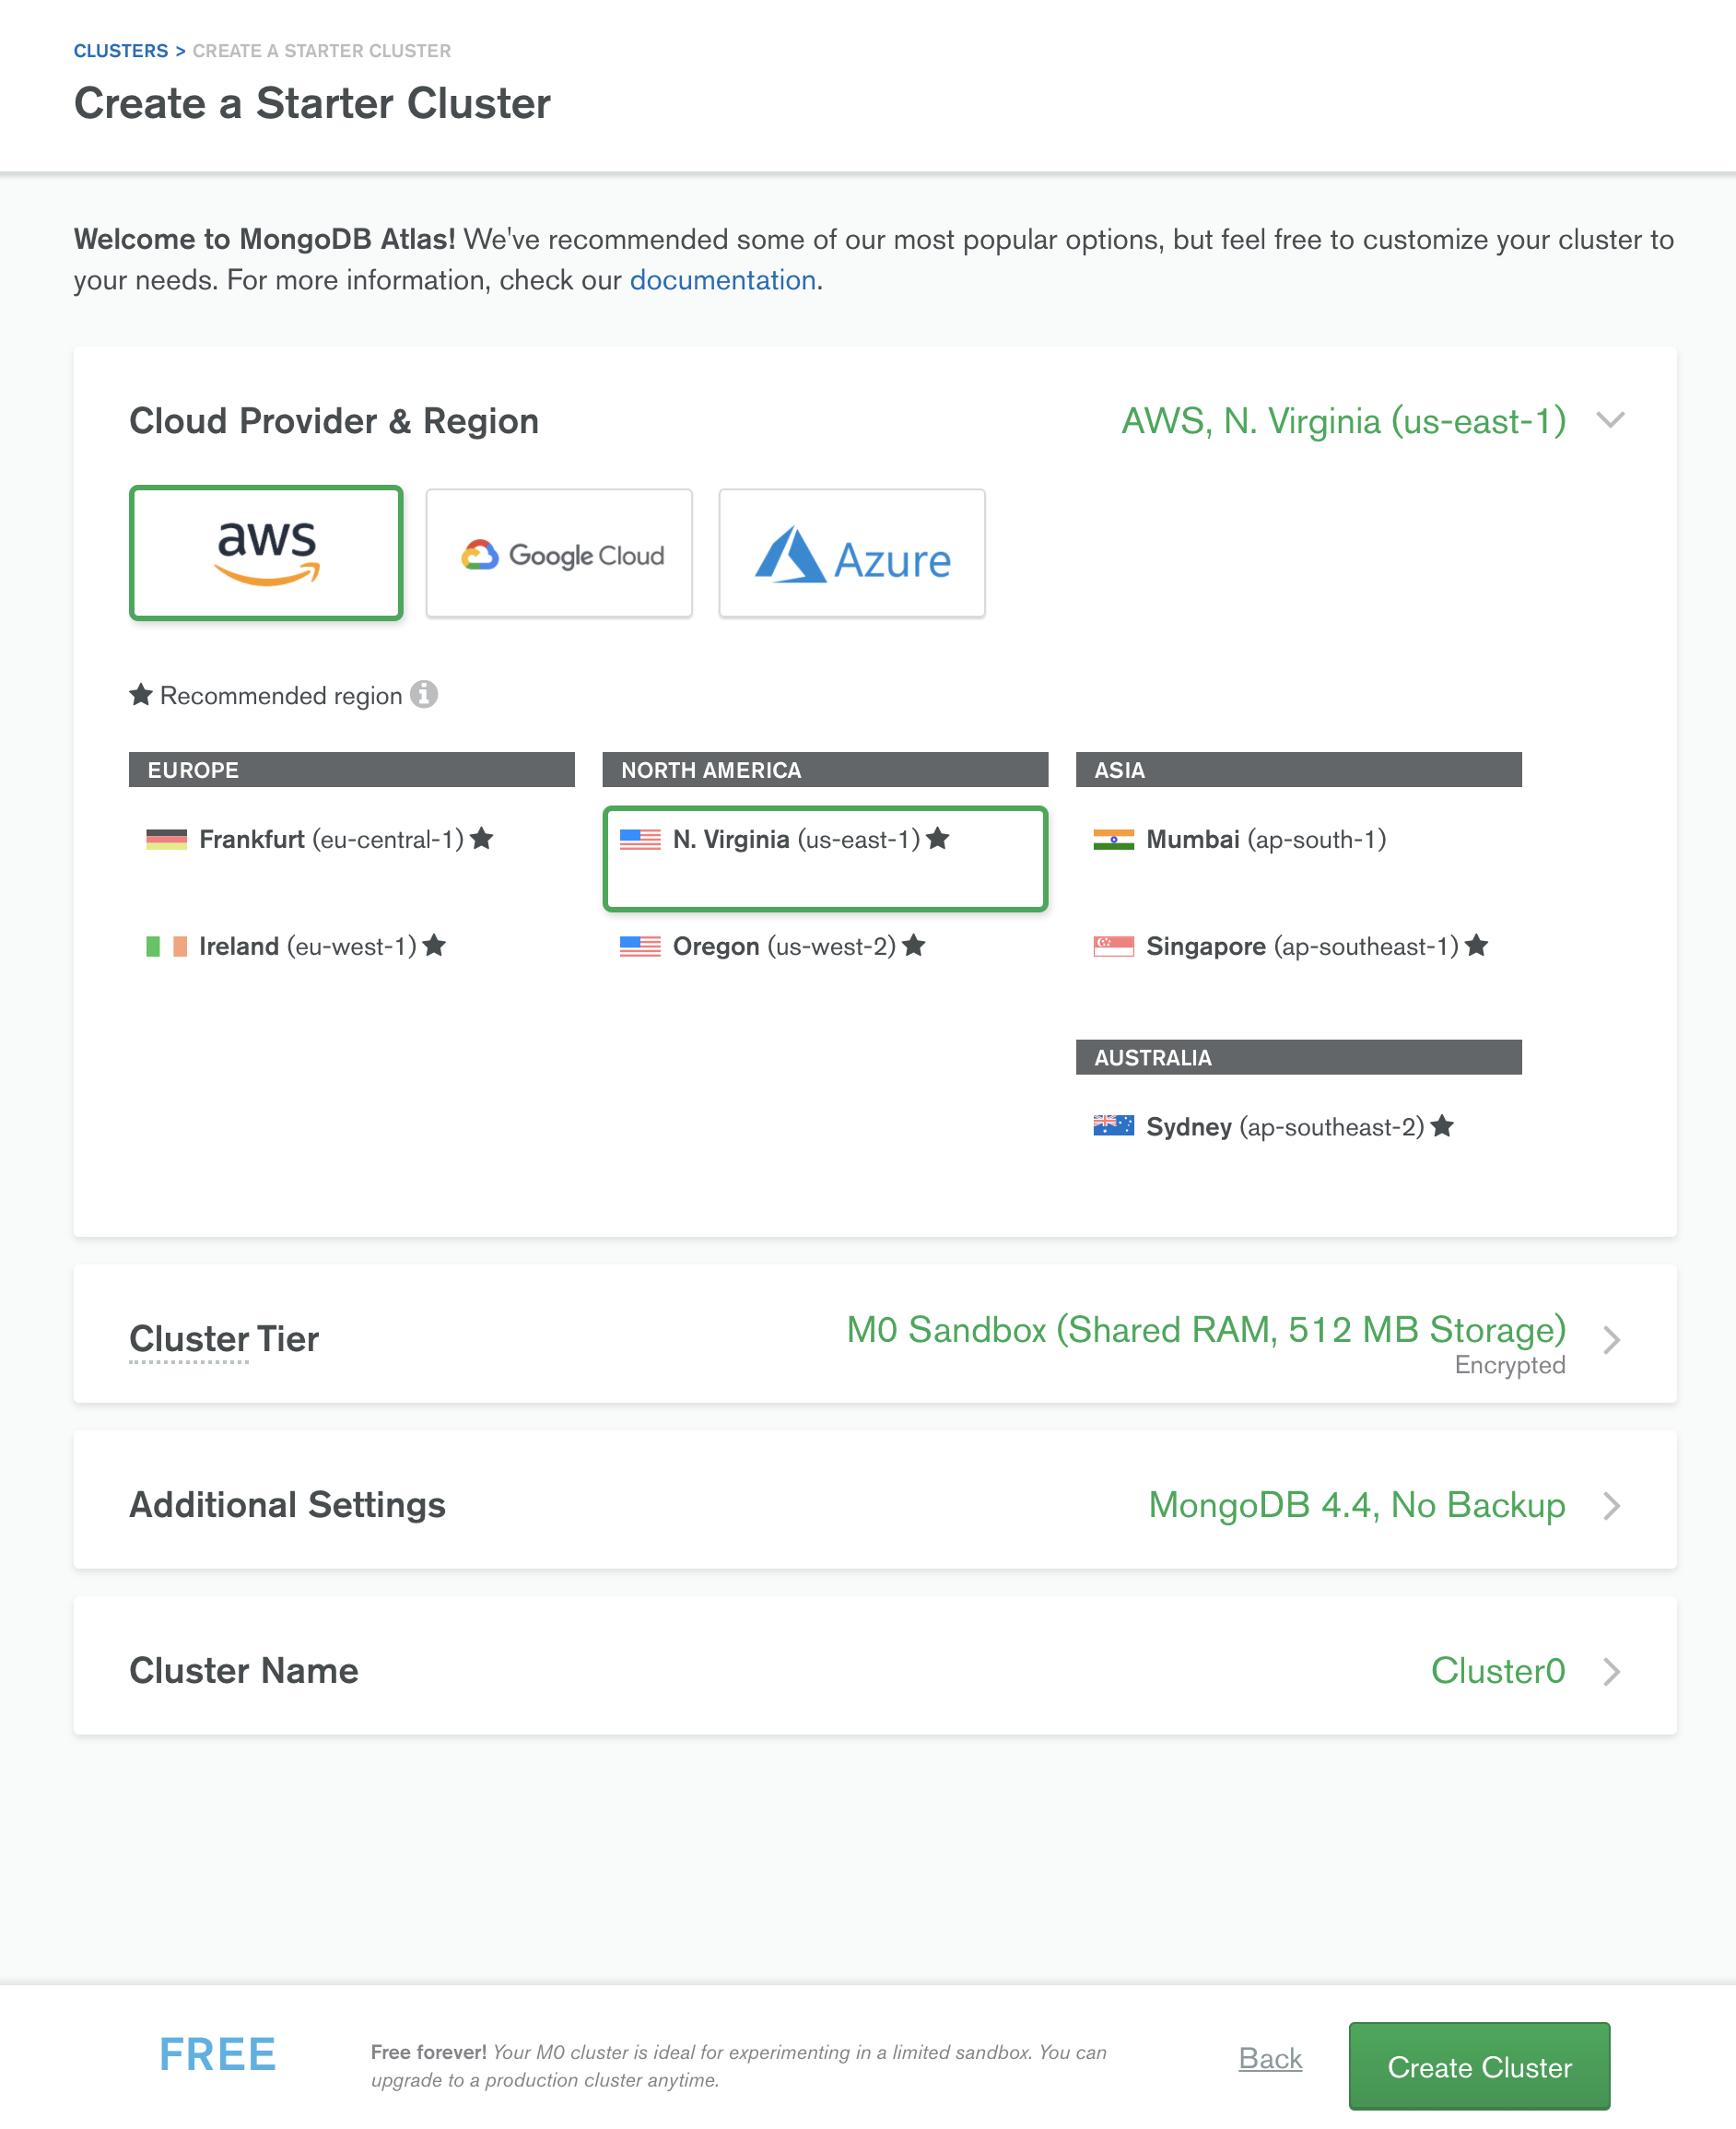
Projects内でClusterを作成します。今回、クラウドにはAWSを使用し、DB性能に関わるCluster Tierには無料のM0 Sandboxを使用します。
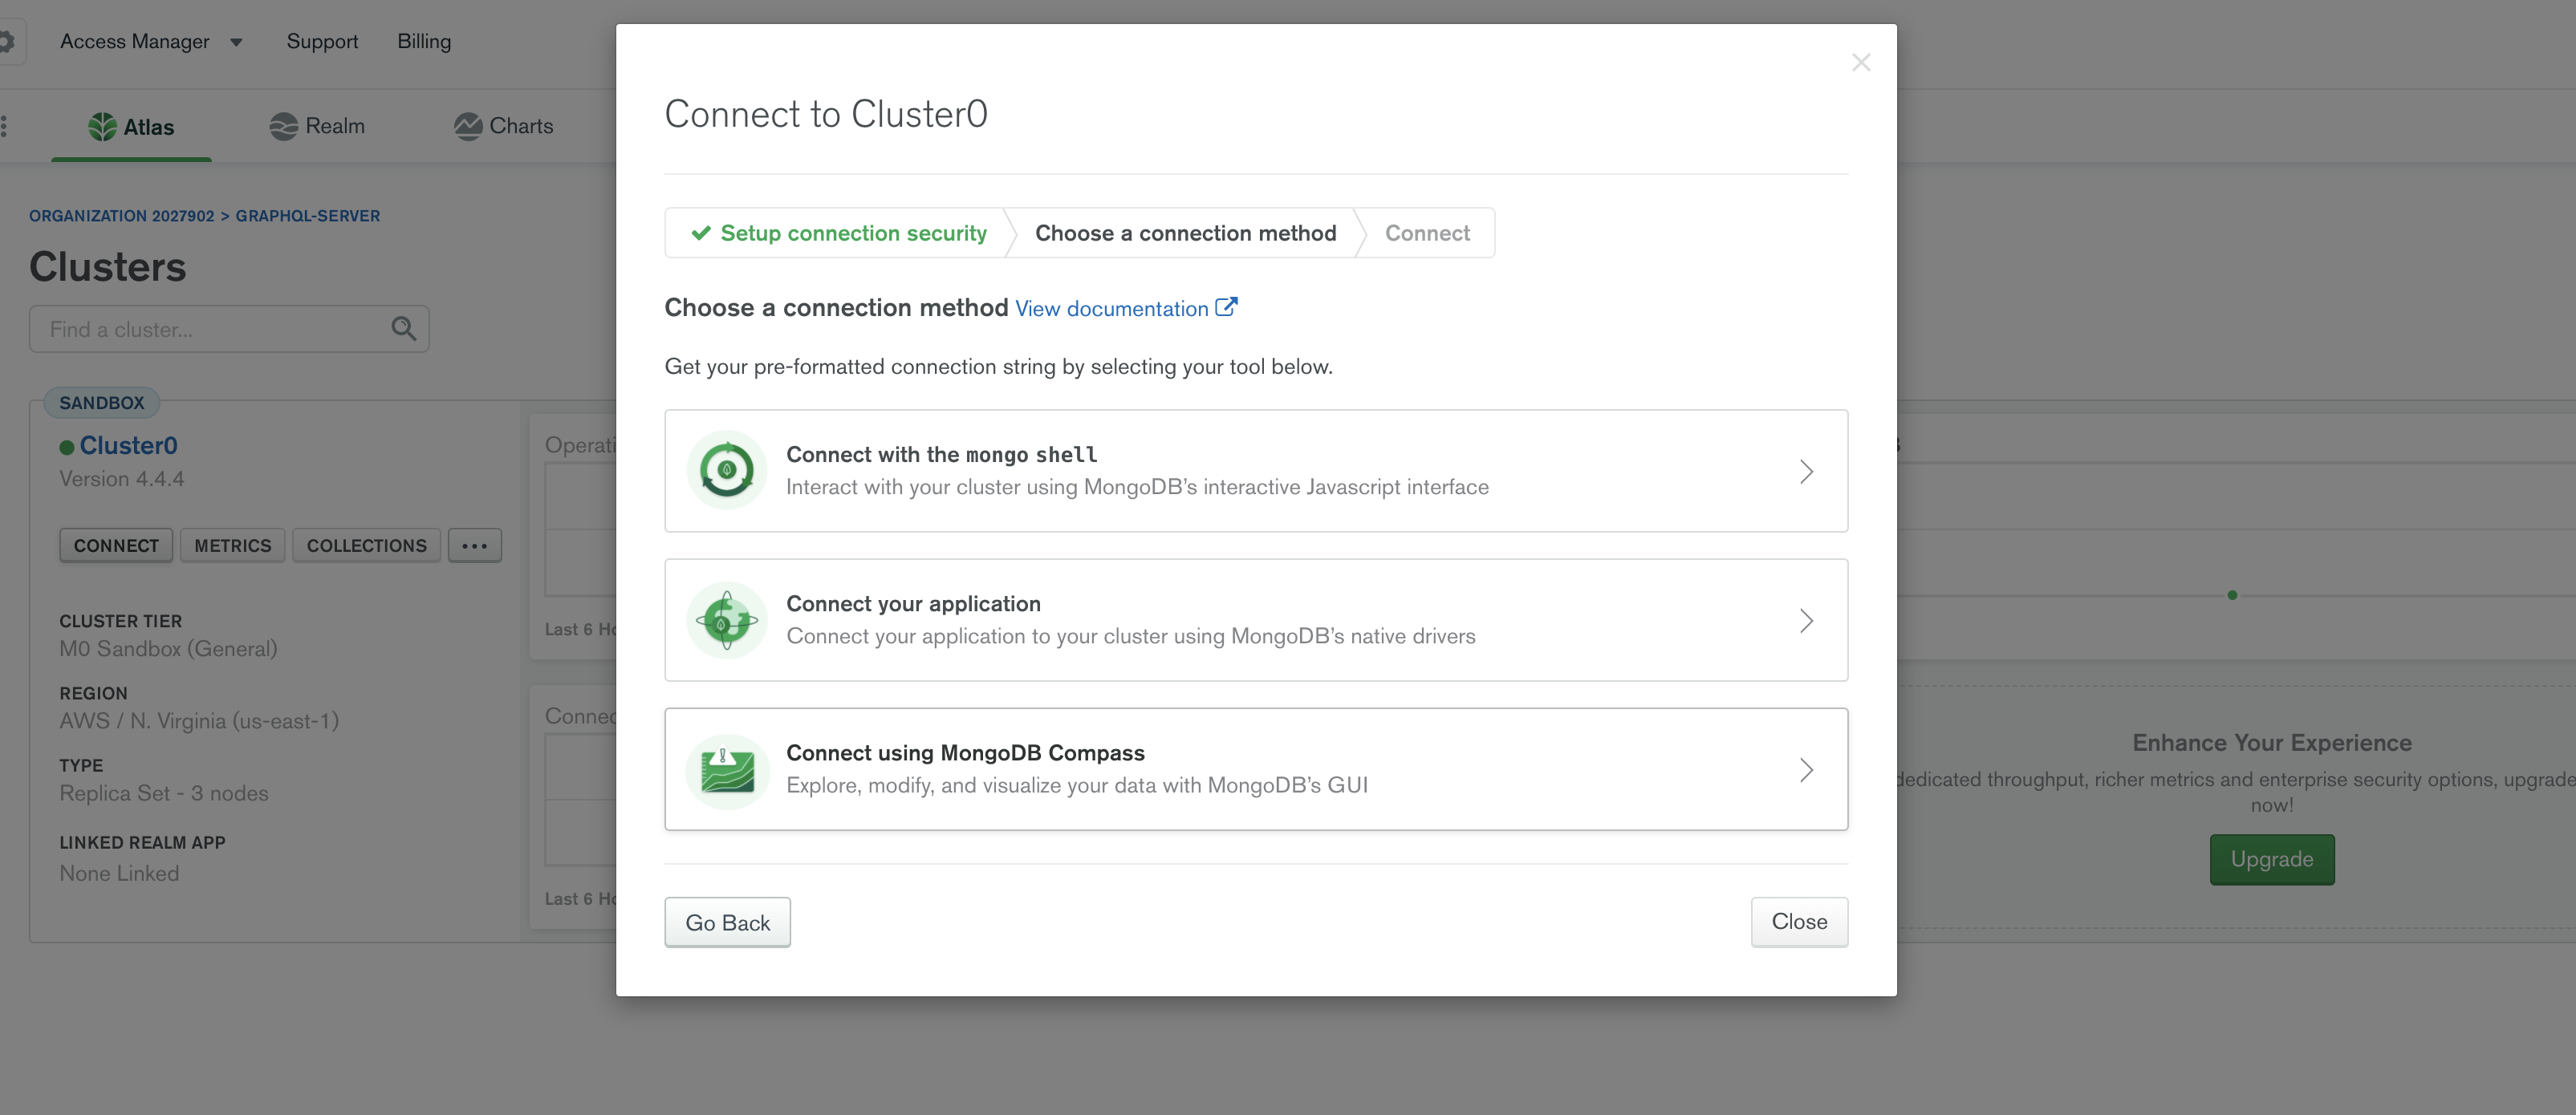
作成したClusterのCONNECTボタンを押して、"Connect using MongoDB Compass"を選択します。CompassはMongoDB用のGUIツールです。
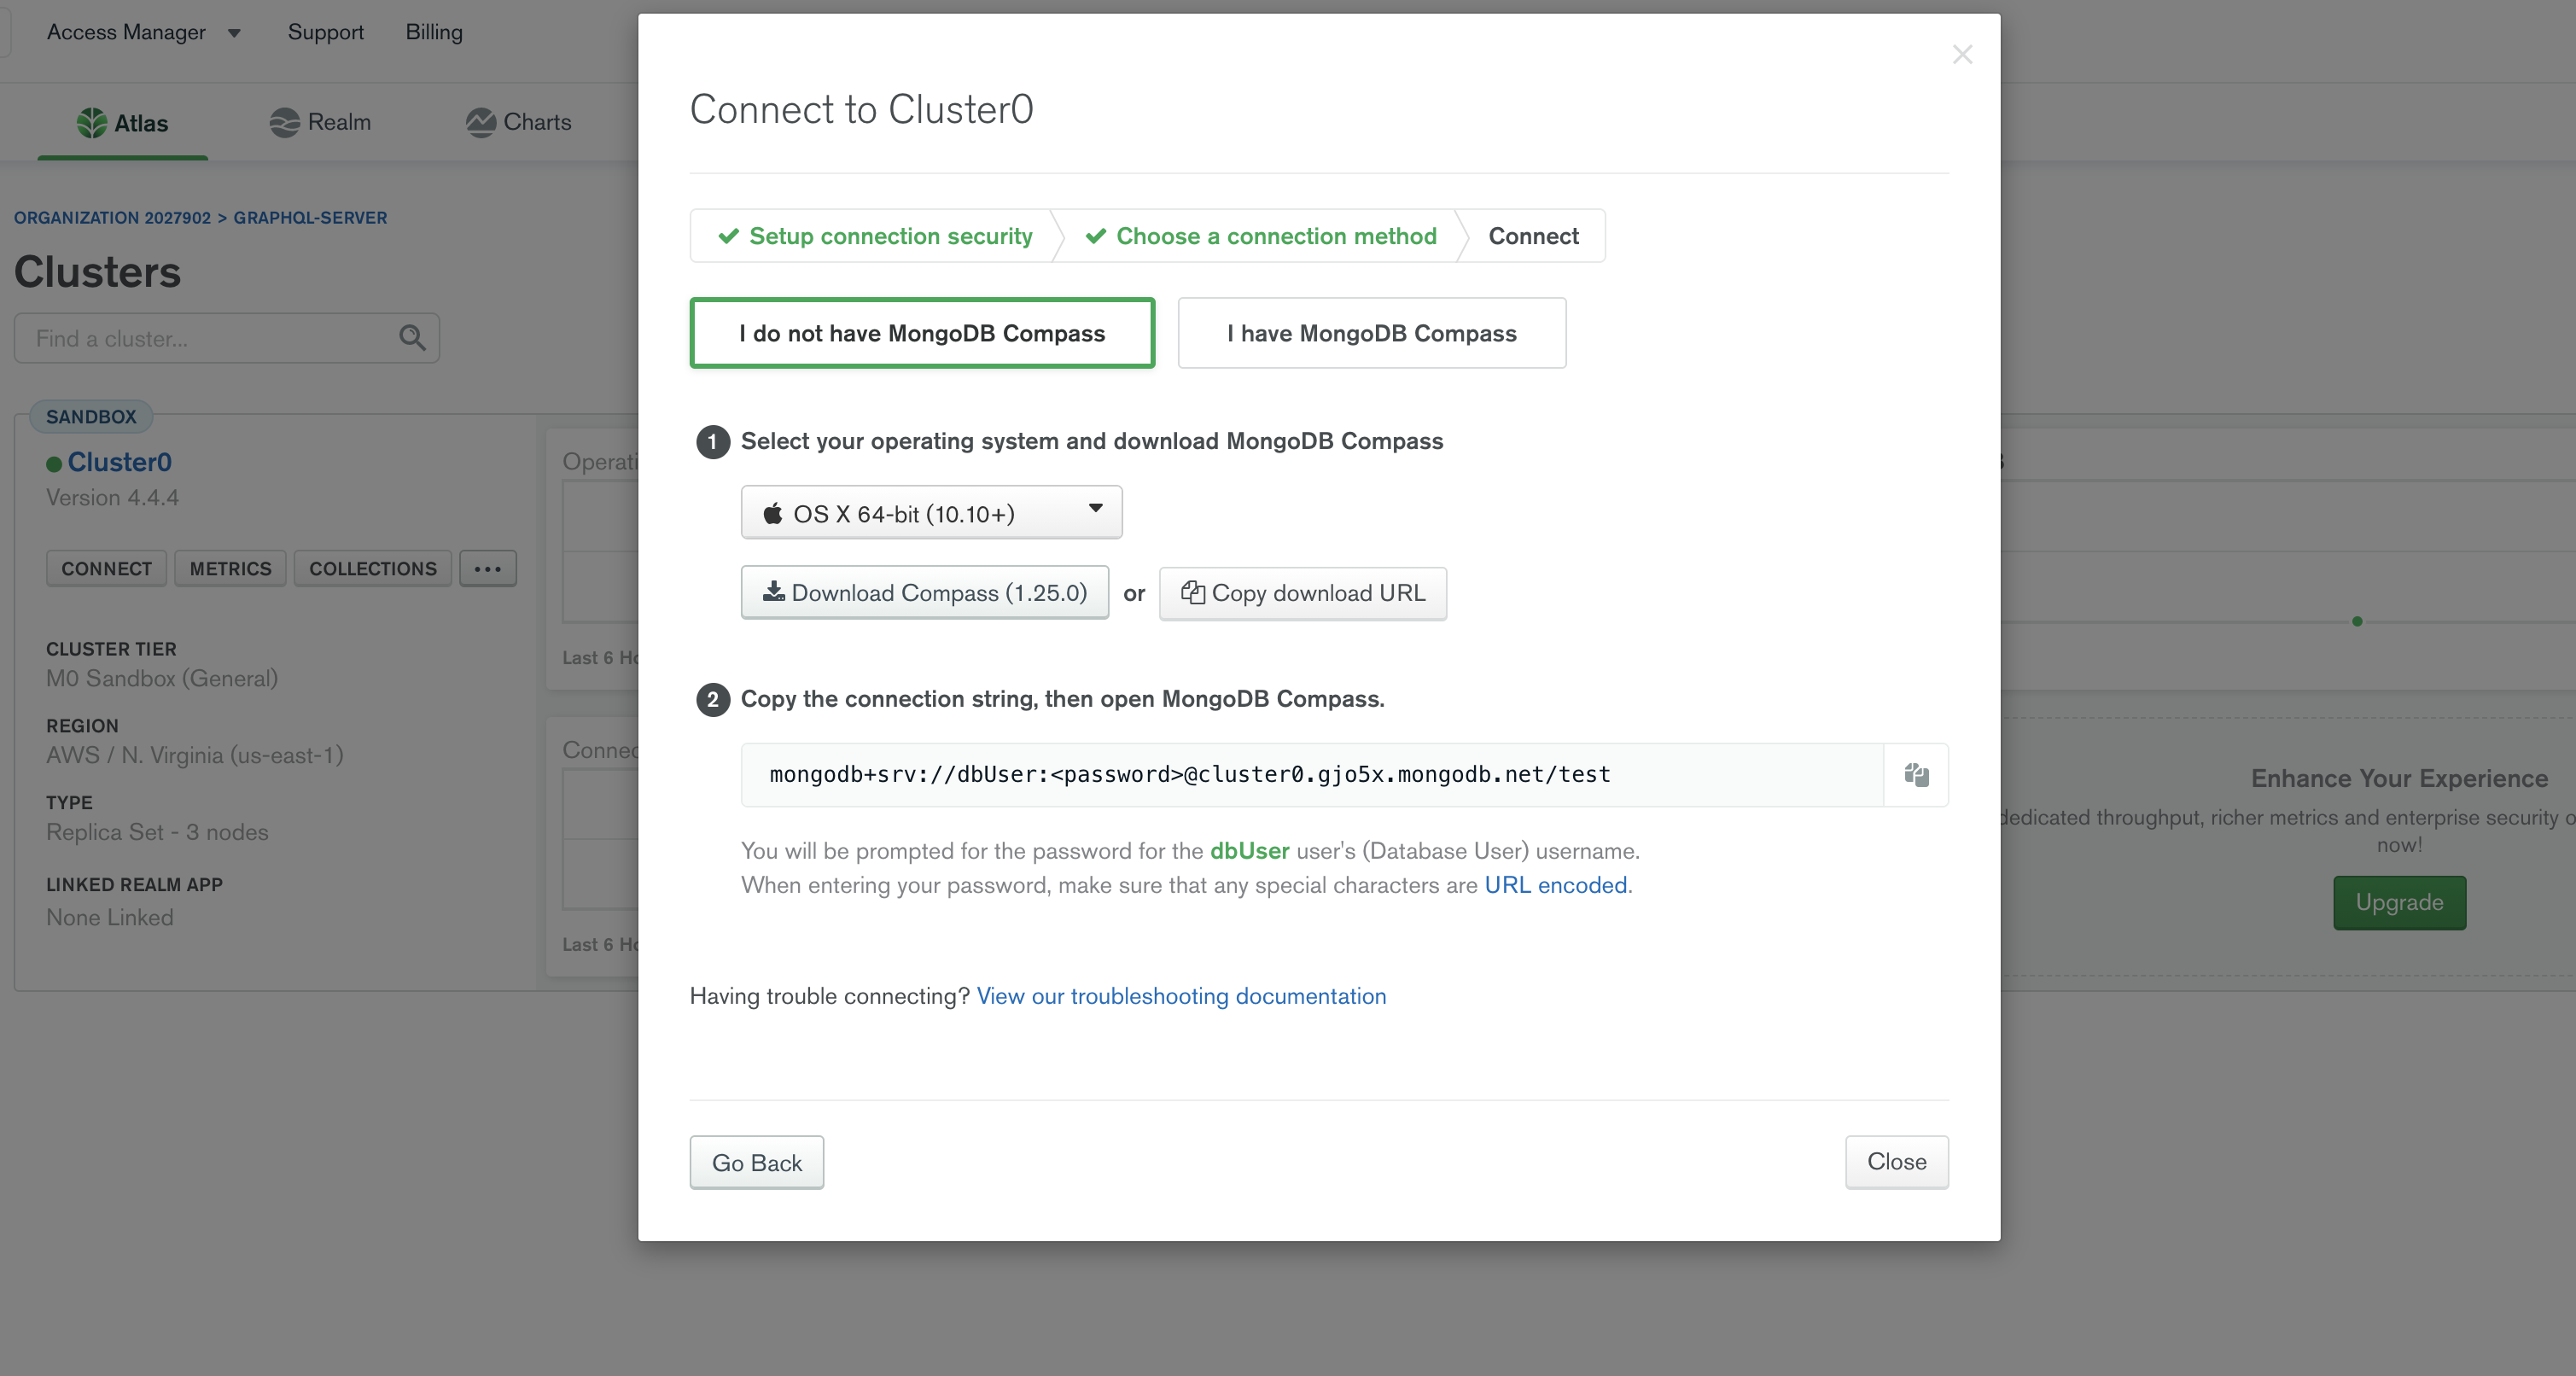
Compassをダウンロードし、DB接続用のコードをコピーします。
Node.jsの設定
GraphQLとMongoDBと連携するために、Node.jsのmongooseというパッケージを使用します(yarn add mongoose)。
app.jsファイルを以下のようにします。mongoose.connectでMongoDBとの接続、mongoose.connection.onceで接続が成功したことを確認するためのコンソールログを行っています。
const express = require('express');
const { graphqlHTTP } = require('express-graphql');
const mongoose = require('mongoose');
const schema = require('./schema/schema');

const app = express();

mongoose.connect(
  'mongodb+srv://dbUser:<password>@cluster0.gjo5x.mongodb.net/test', // <password>には自分で設定したものを入力
  { useNewUrlParser: true }
);
mongoose.connection.once('open', () => {
  console.log('we are connected.');
});

app.use(
  '/graphql',
  graphqlHTTP({
    graphiql: true,
    schema,
  })
);

app.listen(4000, () => {
  console.log('Listening for requests on my awesome port 4000');
});
Modelの作成
DBのSchemaにあたるModelを作成していきます。GraphQLのSchemaとModelを関連付けることで、DBからデータを取得(Query)したり、登録・削除(Mutation)などを行うことができます。
modelフォルダ以下に新しいファイルを作成します。
UserのModelは以下のようになります。userSchemaは後ほどschema.jsで読み込むので、最後にエクスポートします。
const mongoose = require('mongoose');
const MSchema = mongoose.Schema;

const userSchema = new MSchema({
  name: String,
  age: Number,
  profession: String,
});
module.exports = mongoose.model('User', userSchema);
Mutationの作成
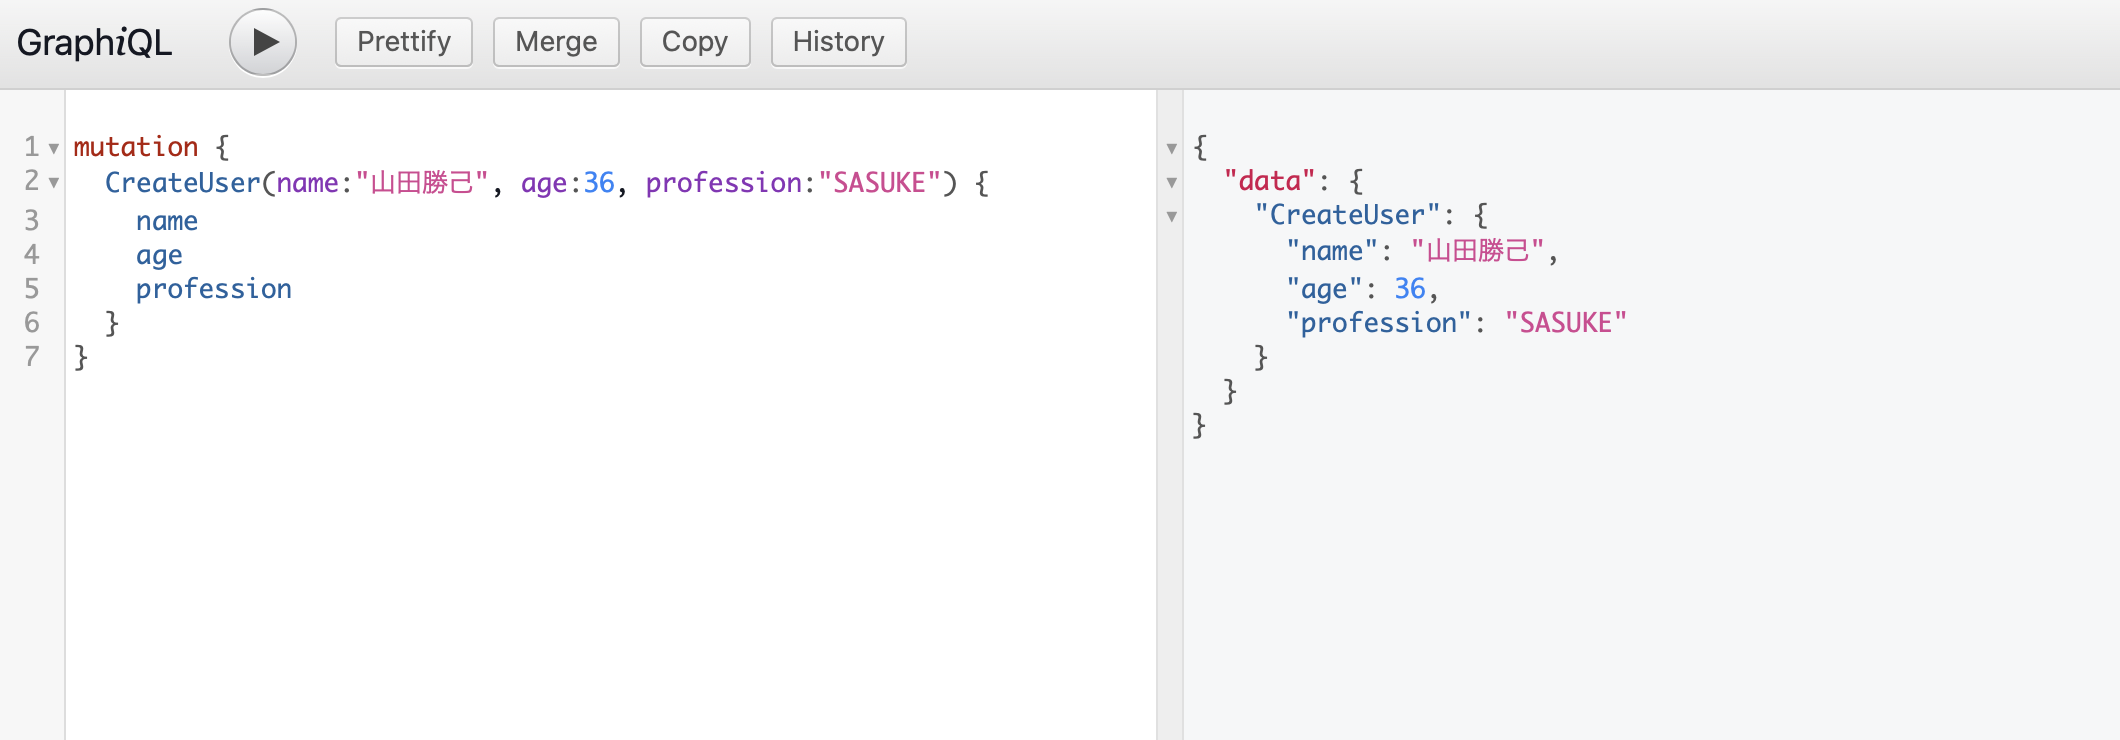
Userデータの作成(CreateUser)、更新(UpdateUser)、削除(RemoveUser)のMutationsを作成します。
const graphql = require('graphql');

const User = require('../model/user');

~中略~

const Mutation = new GraphQLObjectType({
  name: 'Mutation',
  fields: {
    CreateUser: {
      type: UserType,
      args: {
        name: { type: new GraphQLNonNull(GraphQLString) },
        age: { type: new GraphQLNonNull(GraphQLInt) },
        profession: { type: GraphQLString },
      },

      resolve(parent, args) {
        let user = new User({
          name: args.name,
          age: args.age,
          profession: args.profession,
        });

        return user.save();
      },
    },

    UpdateUser: {
      type: UserType,
      args: {
        id: { type: new GraphQLNonNull(GraphQLString) },
        name: { type: new GraphQLNonNull(GraphQLString) },
        age: { type: GraphQLInt },
        profession: { type: GraphQLString },
      },

      resolve(parent, args) {
        return (updatedUser = User.findByIdAndUpdate(
          args.id,
          {
            $set: {
              name: args.name,
              age: args.age,
              profession: args.profession,
            },
          },
          { new: true }
        ));
      },
    },

    RemoveUser: {
      type: UserType,
      args: {
        id: { type: new GraphQLNonNull(GraphQLString) },
      },
      resolve(parent, args) {
        let removedUser = User.findByIdAndRemove(args.id).exec();

        if (!removedUser) {
          throw new 'Error'();
        }

        return removedUser;
      },
    },
}

~中略~

module.exports = new GraphQLSchema({
  query: RootQuery,
  mutation: Mutation,
});
resolve内でUserのModelを読み込み、データ登録用のメソッド(save)や更新用のメソッド(findByIdAndUpdate)を使用します。これらのメソッドについては、mongooseの公式Docsに使い方の詳細な説明が記載されています。
また、更新や削除では処理を行うデータを指定するため、argsのidはNon-nullとなります。Non-nullにしたいカラムについては、GraphQLNonNullをラッピングします。
最後にMutationのエクスポートも忘れずに行います。
Mutationの実行
localhost:4000/graphql を開き、CreateUserを試しに実行してみます。
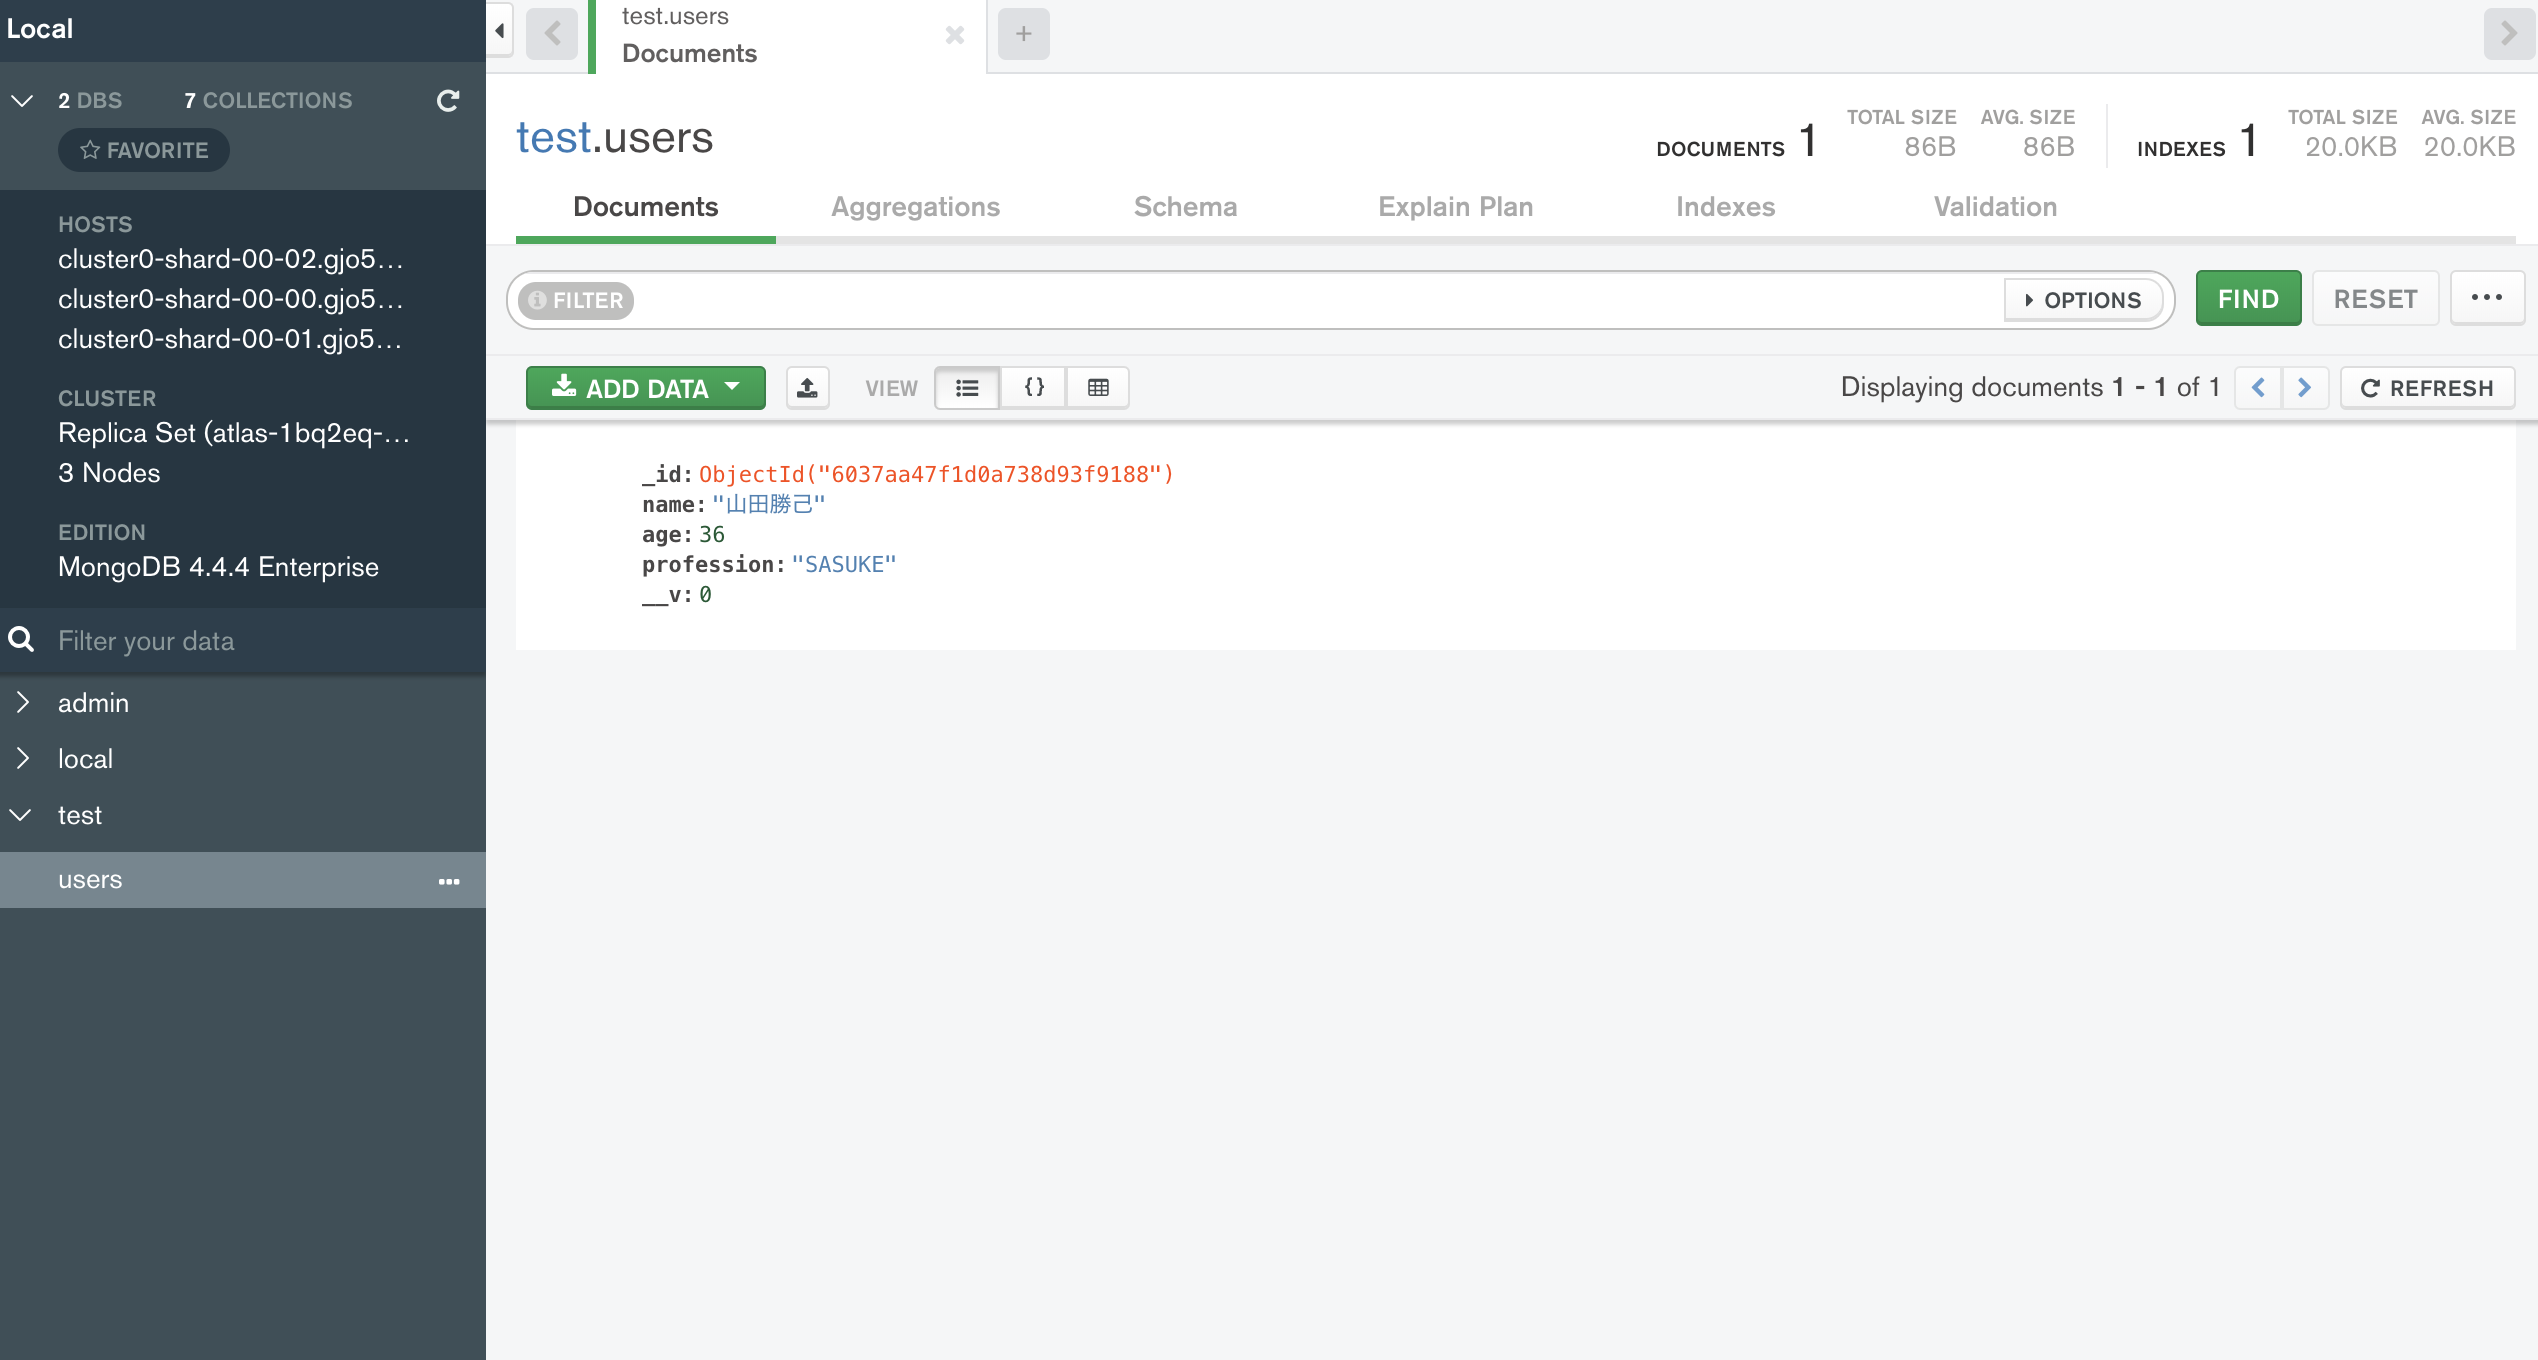
MongoDB Compassでデータが登録されたことを確認することができました。
おわりに
今回のサーバ構築作業には結構時間がかかったのですが、AWS AppSyncを使ったら一瞬で構築できました。なかなか衝撃的な体験だったので、別記事で書こうと思います。
また、PostやHobbyのModelやMutationなど、記載を省略した部分についてご興味がありましたら、GitHubをご確認いただければと思います。
