はじめに
本業でずっとReact Nativeを使っているのですが、ネイティブ言語経験なしでモバイルアプリを作っていることに不安(劣等感?)を感じてきました。
eject済みでネイティブまわりの知識が必要といえば必要で、iOSよりAndroidまわりで引っかかることが多いので、とりあえずKotlinに触れてみることにしました。
そんな感じで3~4時間かけて超簡単なクイズアプリをつくってみました。
一応、Kotlin初心者向けの記事となっています。
アプリの概要
アプリ操作の流れは以下のようになります。
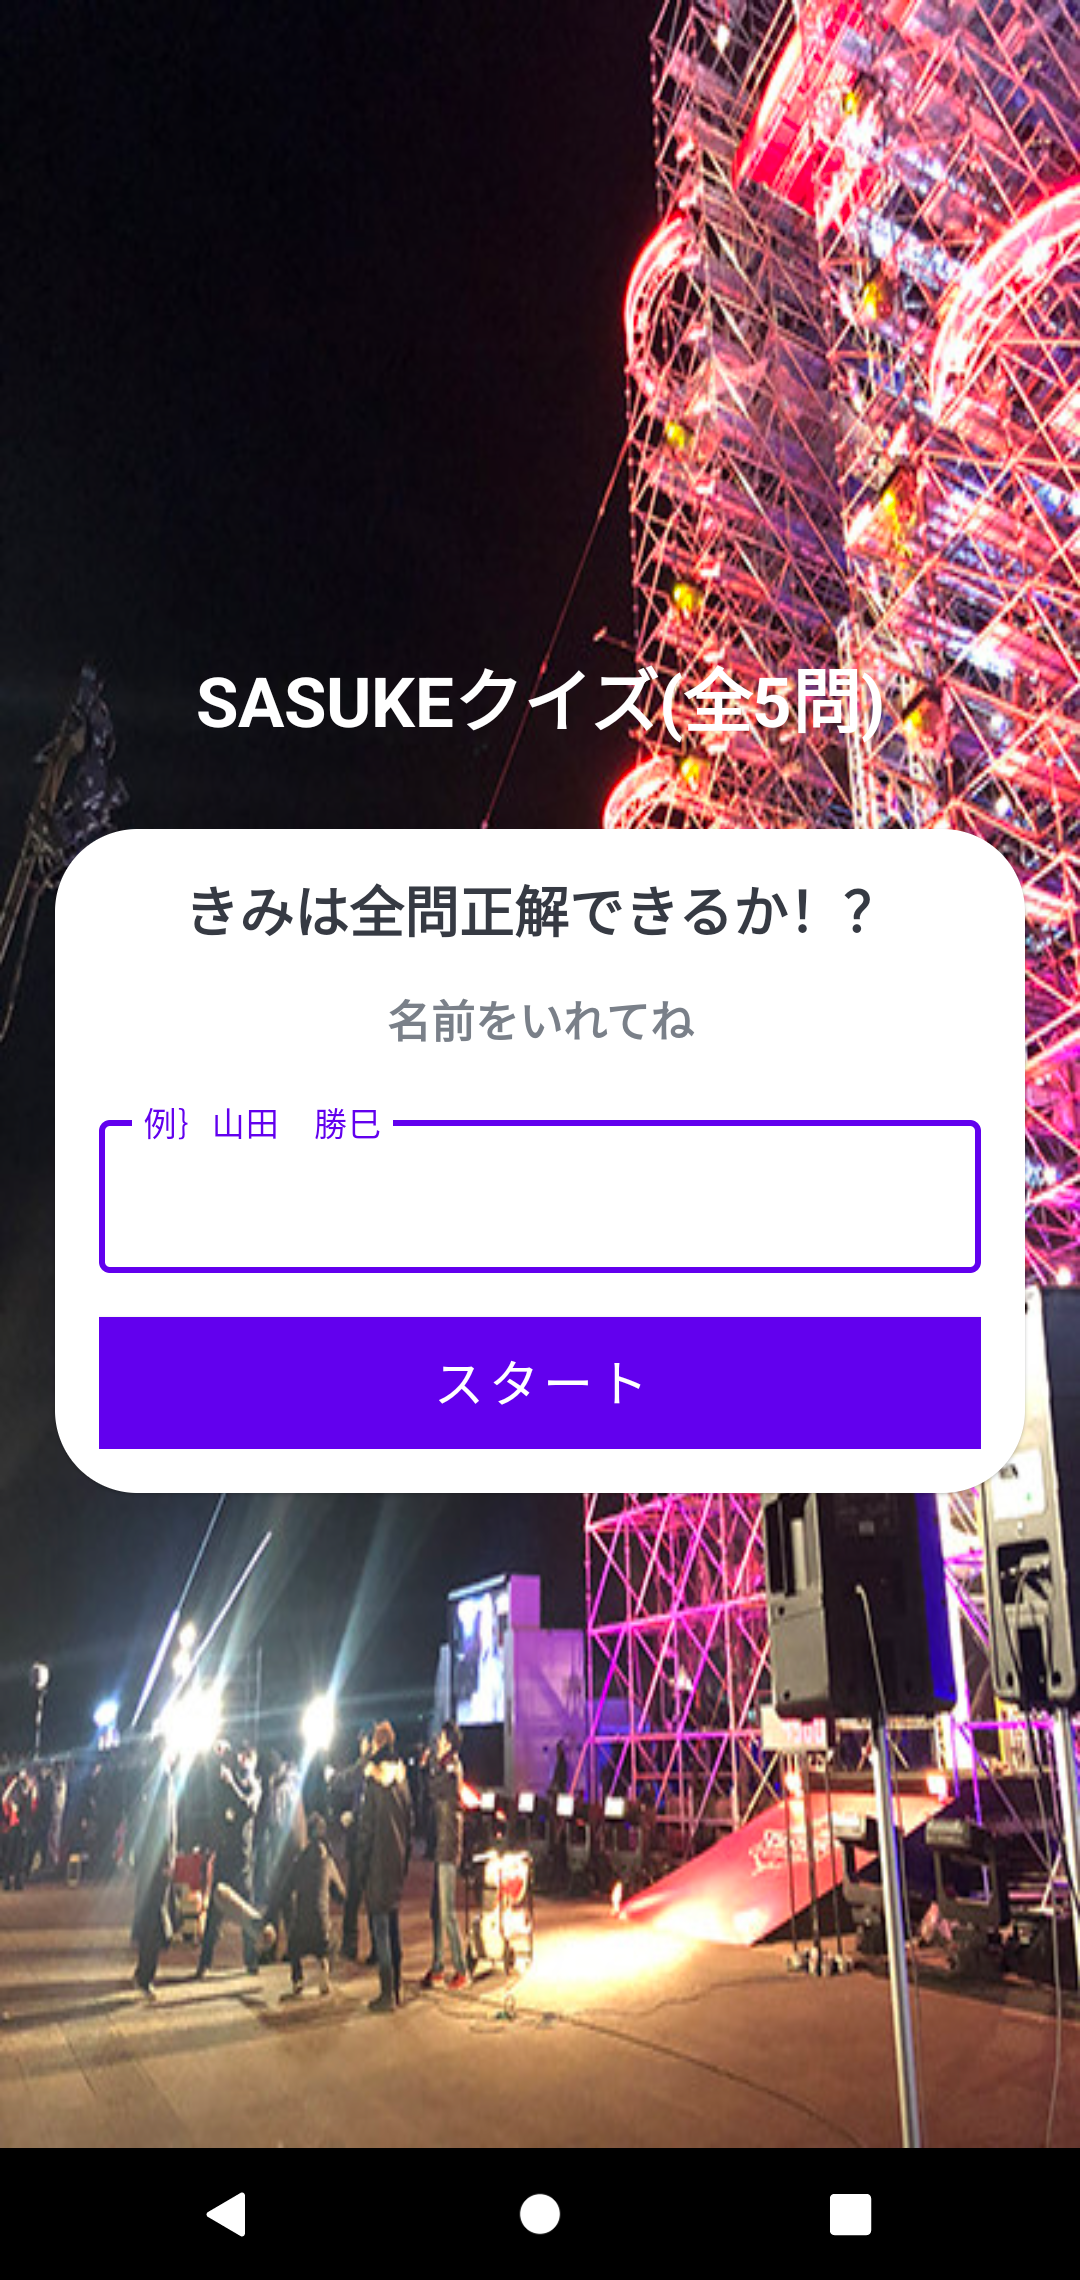
- ユーザ名を入力して解答スタート(スタート画面)
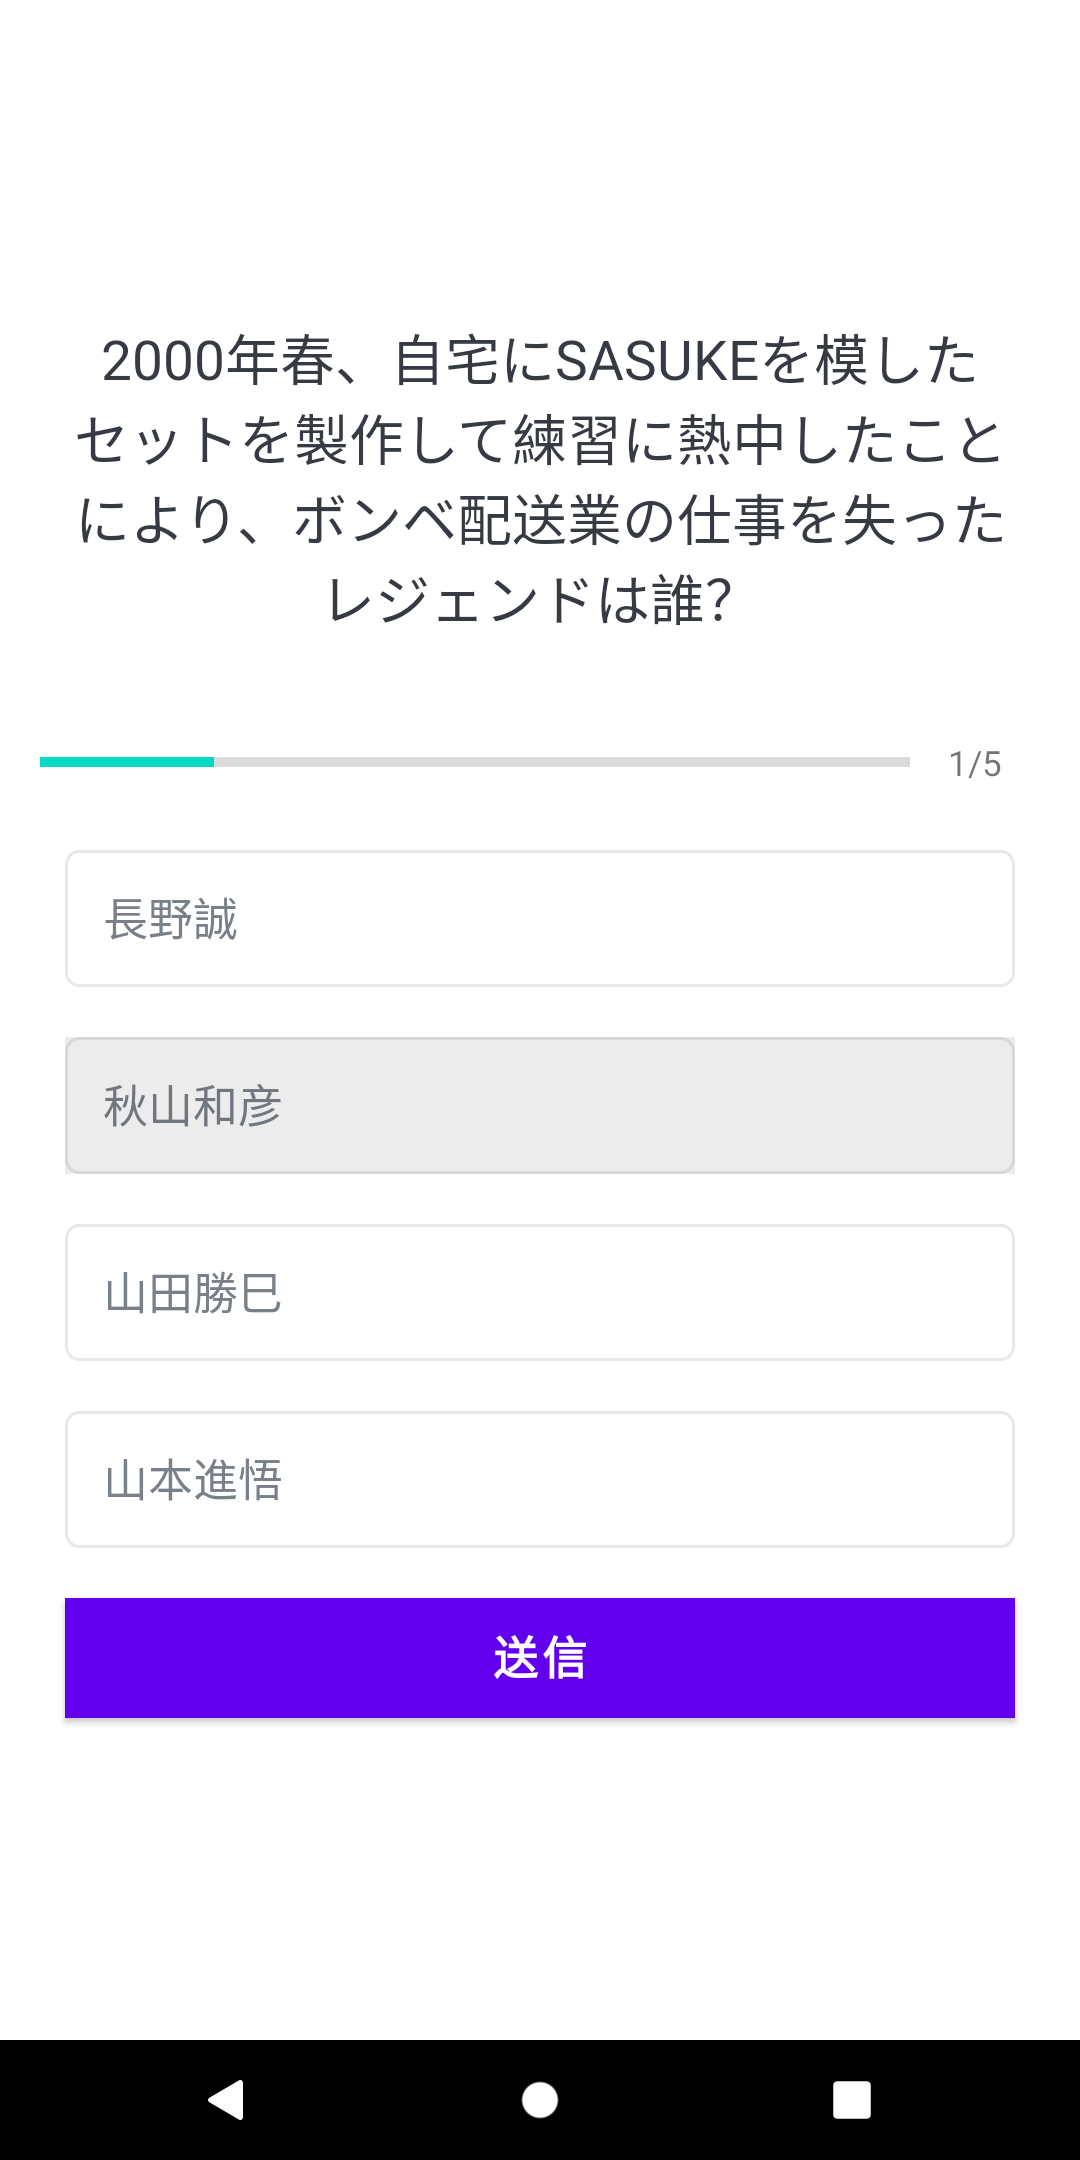
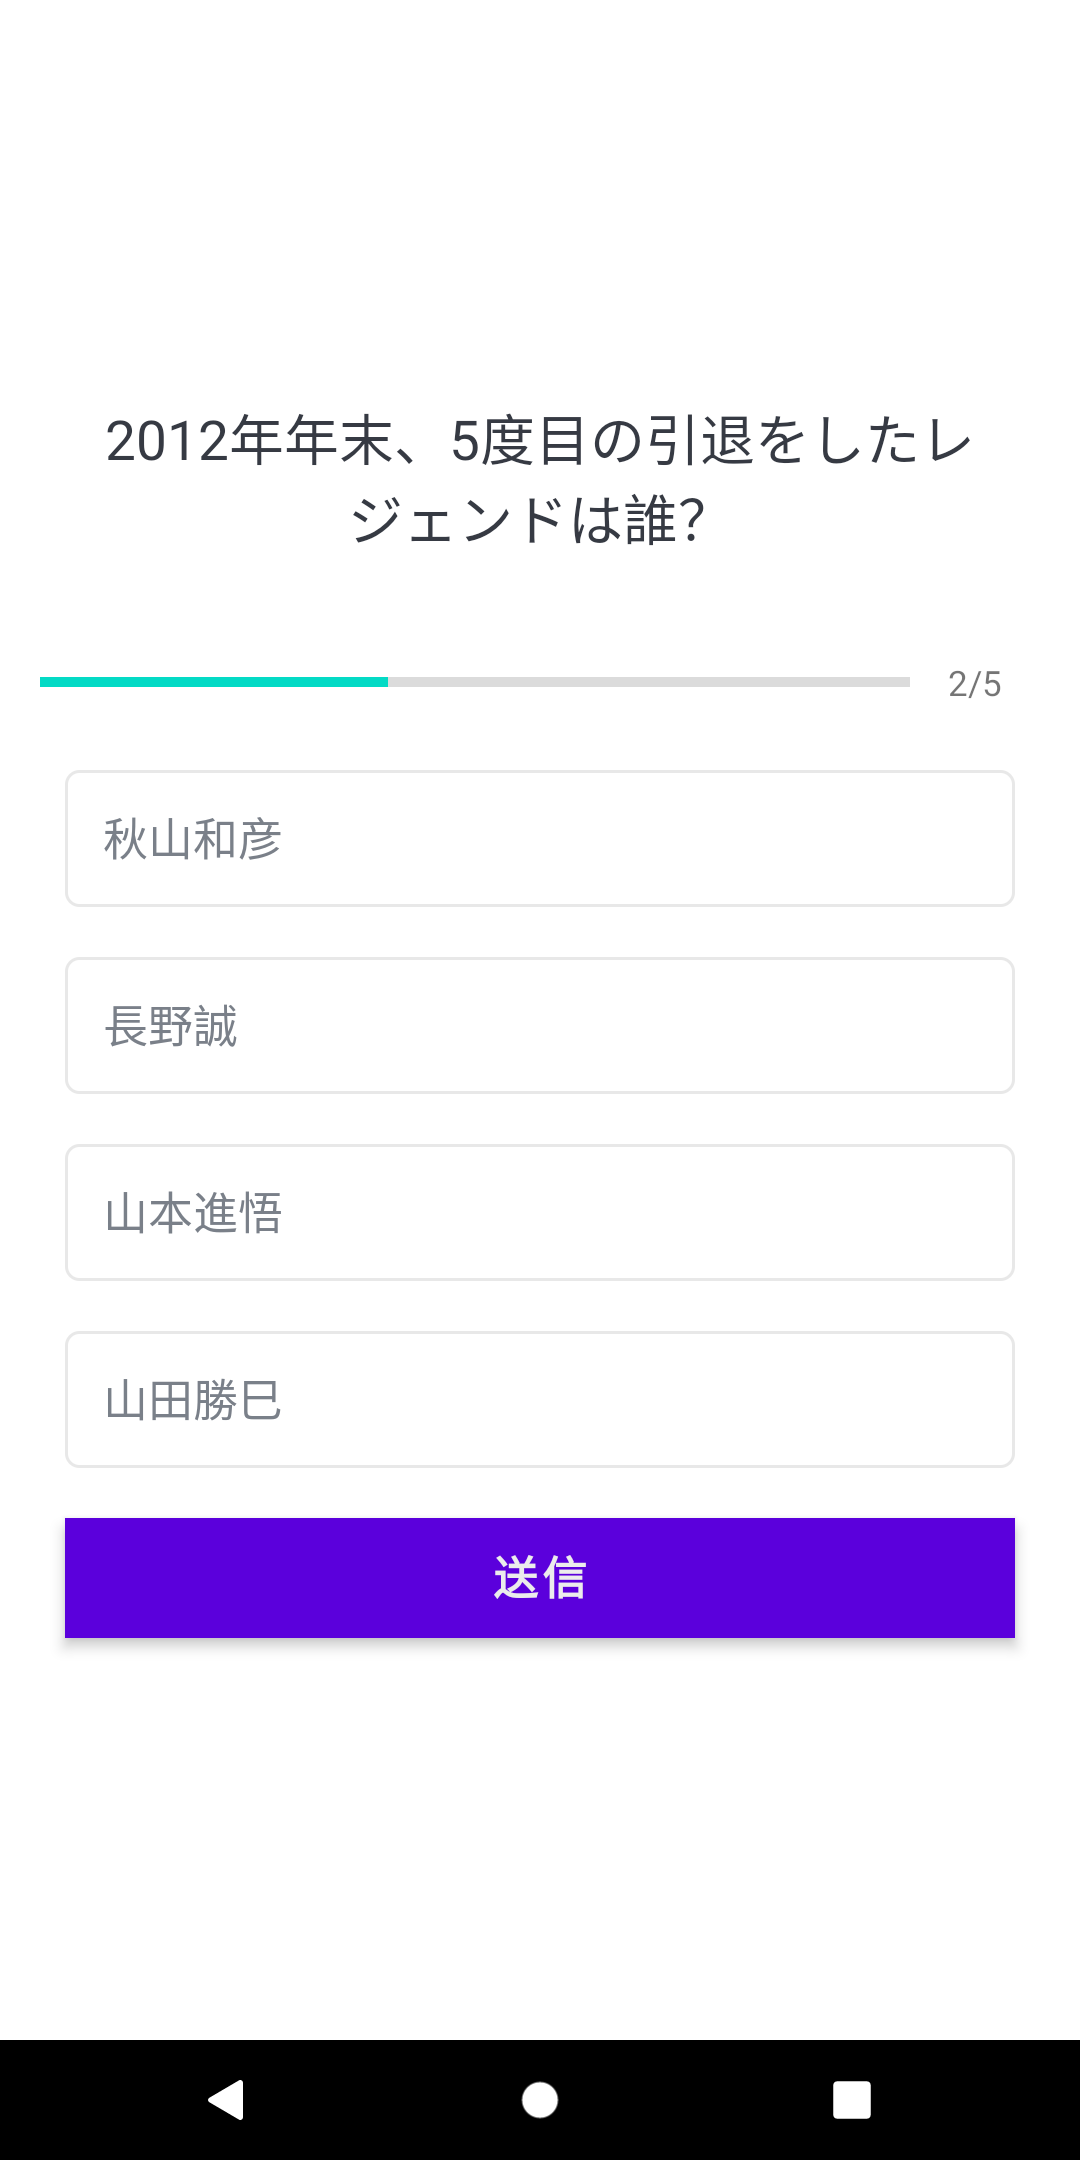
- 全5問のSASUKEレジェンドクイズに解答(クイズ画面)
- 全問解答後に正答数を表示(結果画面)
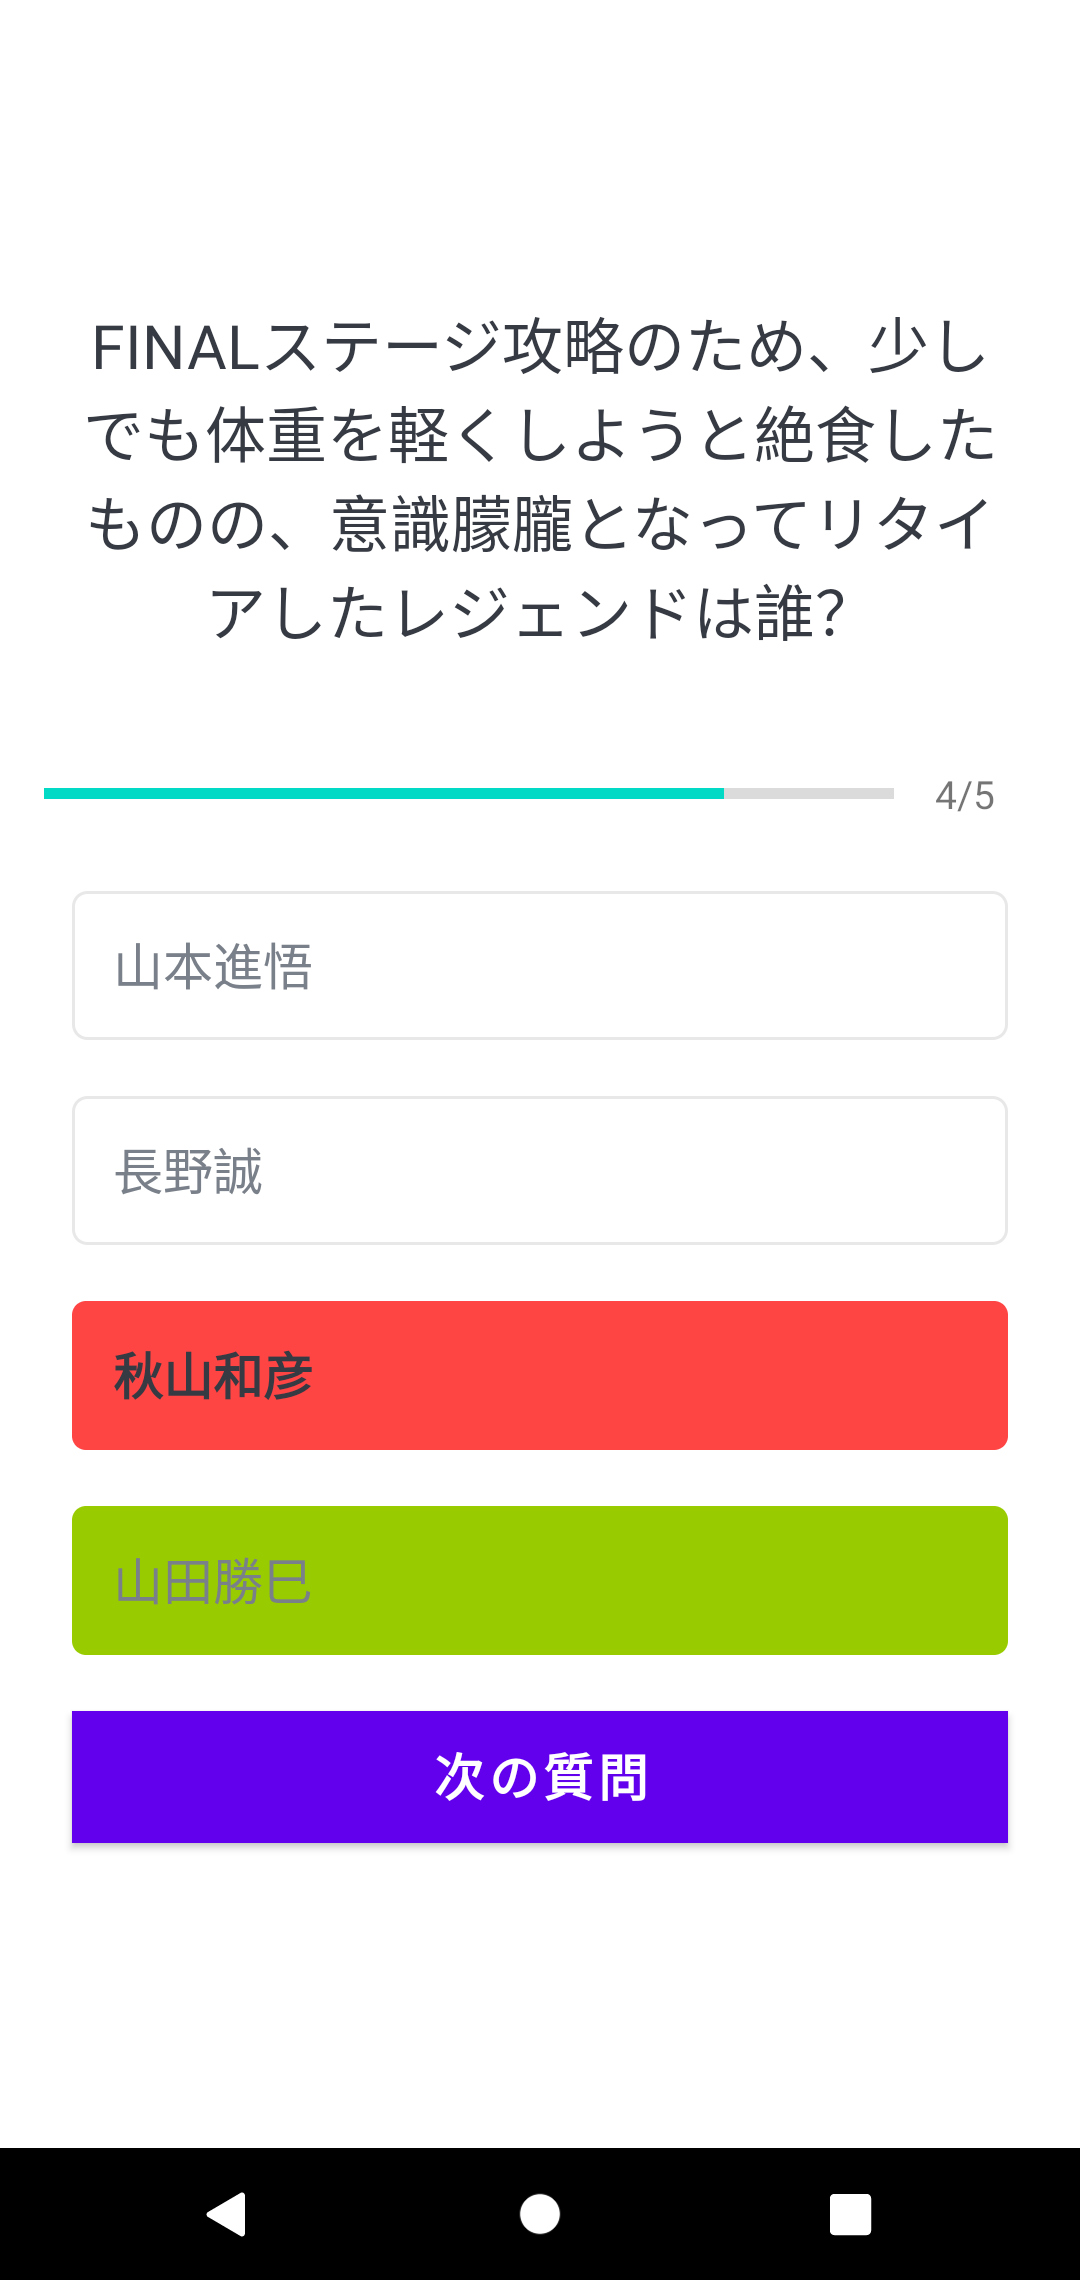
選択肢を選んで「送信」ボタンを押すと、正解の場合は緑、不正解の場合は赤で選択肢が表示されます。
現在が何問目であるかどうかは、質問と選択肢の間にあるプログレスバーで確認することができます。


実装
ユーザ操作を可能にする画面を提供するコンポーネントとしてActivityというものがあります。
こちらにUIと内部の処理(ロジック)をまとめて書くことができるのですが、今回はUI部分をXMLファイルに切り離して記述します。
XMLファイルを使用することで、画面サイズと画面の向きに合わせてさまざまなレイアウトを簡単につくることができます。
スタート画面、クイズ画面、結果画面の実装についてそれぞれ説明します。
スタート画面
UIをapp/res/layout/activity_main.xml、ロジックをapp/java/jp.example.sasukeapp/MainActivity.ktに記述します。
UI
テキストやカードの配置はLinearLayoutで行い、カード自体の作成にはcom.google.android.material.card.MaterialCardViewを利用します。
カードコンポーネントの部分だけを切り取ると以下のようになります。
com.google.android.material.textfield.TextInputLayoutの部分がテキストインプットのフィールドとなります。
各コンポーネント(要素)にandroid:id="@+id/et_name"のようなidを付加することで、MainActivity.ktの中でその要素の値を操作することができます。
    <com.google.android.material.card.MaterialCardView
        android:layout_width="match_parent"
        android:layout_height="wrap_content"
        android:layout_marginStart="20dp"
        android:layout_marginEnd="20dp"
        app:cardCornerRadius="30dp"
        android:background="@color/white"
        >
        <LinearLayout
            android:layout_width="match_parent"
            android:layout_height="wrap_content"
            android:layout_margin="16dp"
            android:orientation="vertical"
            >
            <TextView
                android:layout_width="match_parent"
                android:layout_height="wrap_content"
                android:text="きみは全問正解できるか!?"
                android:textSize="20sp"
                android:textStyle="bold"
                android:gravity="center"
                android:textColor="#363A43"
                />
            <TextView
                android:layout_width="match_parent"
                android:layout_height="wrap_content"
                android:text="名前をいれてね"
                android:textSize="16sp"
                android:layout_marginTop="16dp"
                android:textStyle="bold"
                android:gravity="center"
                android:textColor="#7A8089"
                />
            <com.google.android.material.textfield.TextInputLayout
                android:layout_width="match_parent"
                android:layout_height="wrap_content"
                style="@style/Widget.MaterialComponents.TextInputLayout.OutlinedBox"
                android:layout_marginTop="20dp"
                >
                <androidx.appcompat.widget.AppCompatEditText
                    android:id="@+id/et_name"
                    android:layout_width="match_parent"
                    android:layout_height="wrap_content"
                    android:hint="例}山田 勝巳"
                    android:inputType="textCapWords"
                    android:textColor="#363A43"
                    android:textColorHint="#7A8089"
                    />
            </com.google.android.material.textfield.TextInputLayout>
            <Button
                android:id="@+id/btn_start"
                android:layout_width="match_parent"
                android:layout_height="wrap_content"
                android:layout_marginTop="16dp"
                android:background="@color/design_default_color_primary"
                android:text="スタート"
                android:textColor="@color/white"
                android:textSize="18sp"
                />
        </LinearLayout>
    </com.google.android.material.card.MaterialCardView>
ロジック
作成したUI(activity_main.xml)をsetContentView(R.layout.activity_main)で読み込みます。
ボタンやインプットテキストの要素をval btnStart : Button = findViewById(R.id.btn_start)のように取得して、ボタンクリック時の処理をbtnStart.setOnClickListener内に記述します(JSのDOM操作のイメージ)。
テキストが入力されていれば、クイズ画面に遷移するようにします。
遷移の際にはIntentオブジェクトを作成するのですが、これによって遷移先へ必要な値を渡したり(input.putExtra(key, value))、遷移そのものstartActivity(intent)を行うことができます。
また、遷移操作の最後にfinish()を記述することで、アクティビティの終了操作を行います。
これで遷移後の画面から戻ることができなくなります。
class MainActivity : AppCompatActivity() {
    override fun onCreate(savedInstanceState: Bundle?) {
        super.onCreate(savedInstanceState)
        setContentView(R.layout.activity_main)

        val btnStart : Button = findViewById(R.id.btn_start)
        val etName : EditText = findViewById(R.id.et_name)

        btnStart.setOnClickListener{
            if(etName.text.isEmpty()){
                Toast.makeText(this, "Please enter your name", Toast.LENGTH_LONG).show()
            }else{
                // 画面遷移
                val intent = Intent(this, QuizQuestionsActivity::class.java)
                intent.putExtra(Constants.USER_NAME, etName.text.toString())
                startActivity(intent)
                // アクティビティを終了する(画面をもどれないようにする)
                finish()
            }
        }
    }
}
クイズ画面
UIをapp/res/layout/activity_quiz_questions.xml、ロジックをapp/java/jp.example.sasukeapp/QuizQuestionsActivity.ktに記述します。
UI
プログレスバーの部分にピックアップして説明します。
プログレスバー

現在の質問数をバーと数字(4/5のような)で表現しているのですが、この部分はLinearLayoutの方向(orientation)を水平(horizontal)にすることで実装します。
        <LinearLayout
            android:layout_width="match_parent"
            android:layout_height="wrap_content"
            android:gravity="center_vertical"
            android:layout_marginTop="16dp"
            android:orientation="horizontal">

            <ProgressBar
                android:id="@+id/progressBar"
                android:layout_width="0dp"
                style="?android:attr/progressBarStyleHorizontal"
                android:layout_height="wrap_content"
                android:layout_weight="1"
                android:max="5"
                android:indeterminate="false"
                android:minHeight="50dp"
                android:progress="5"/>

            <TextView
                android:id="@+id/tv_progress"
                android:layout_width="wrap_content"
                android:layout_height="wrap_content"
                android:gravity="center"
                android:padding="15dp"
                android:textSize="14sp"
                tools:text="0/9"/>
        </LinearLayout>
ロジック
コンポーネントの各要素をfindViewById()で取得して、選択肢と送信ボタンにsetOnClickListener(this)でクリック処理を設定します。
thisはQuizQuestionsActivityクラスを指しており、overrideしたonClick()メソッドを後ほど記述します。
また、setQuestion()で現在の質問の問題文、プログレスバーの進捗、選択肢の中身(文章、コンポーネントの色など)を設定します。
class QuizQuestionsActivity : AppCompatActivity(), View.OnClickListener {
    private var mCurrentPosition: Int = 1 // 現在の質問番号
    private var mQuestionsList:ArrayList<Question>? = null
    private var mSelectedOptionPosition : Int = 0 // 選択した番号
    private var mUserName : String? = null
    private var mCorrectAnswers: Int = 0 // 正答数

    private var progressBar: ProgressBar? = null
    private var tvProgress: TextView? = null
    private var tvQuestion: TextView? = null

    private var tvOptionOne: TextView? = null
    private var tvOptionTwo: TextView? = null
    private var tvOptionThree: TextView? = null
    private var tvOptionFour: TextView? = null
    private var btnSubmit: Button? = null

    override fun onCreate(savedInstanceState: Bundle?) {
        super.onCreate(savedInstanceState)
        setContentView(R.layout.activity_quiz_questions)

        mUserName = intent.getStringExtra(Constants.USER_NAME)

        progressBar = findViewById(R.id.progressBar)
        tvProgress = findViewById(R.id.tv_progress)
        tvQuestion = findViewById(R.id.tv_question)
        tvOptionOne = findViewById(R.id.tv_option_one)
        tvOptionTwo = findViewById(R.id.tv_option_two)
        tvOptionThree = findViewById(R.id.tv_option_three)
        tvOptionFour = findViewById(R.id.tv_option_four)
        btnSubmit = findViewById(R.id.btn_submit)

        tvOptionOne?.setOnClickListener(this)
        tvOptionTwo?.setOnClickListener(this)
        tvOptionThree?.setOnClickListener(this)
        tvOptionFour?.setOnClickListener(this)
        btnSubmit?.setOnClickListener(this)

        mQuestionsList = Constants.getQuestions()

        setQuestion()
    }
こちらがsetQuestion()メソッドの中身です。
他クラスで参照できないようにprivateで宣言します。
まずはdefaultOptionsView()を実行して、選択肢のコンポーネントのスタイル(テキスト色、ボーダー色)を設定します。
onCreate()内で設定したmQuestionsListには全問題(と選択肢)が含まれているため、この中から現在の問題をmQuestionsList!![mCurrentPosition - 1]で取得して、各要素にテキストを設定してあげます。
    private fun setQuestion() {
        defaultOptionsView()
        val question: Question = mQuestionsList!![mCurrentPosition - 1]
        progressBar?.progress = mCurrentPosition
        tvProgress?.text = "$mCurrentPosition/${progressBar?.max}"
        tvQuestion?.text = question.question
        tvOptionOne?.text = question.optionOne
        tvOptionTwo?.text = question.optionTwo
        tvOptionThree?.text = question.optionThree
        tvOptionFour?.text = question.optionFour

        if(mCurrentPosition == mQuestionsList!!.size){
            btnSubmit?.text = "完了"
        }else{
            btnSubmit?.text = "送信"
        }
    }
    private fun defaultOptionsView(){
        val options = ArrayList<TextView>()
        tvOptionOne?.let{
            options.add(0, it)
        }
        tvOptionTwo?.let{
            options.add(1, it)
        }
        tvOptionThree?.let{
            options.add(2, it)
        }
        tvOptionFour?.let{
            options.add(3, it)
        }

        for(option in options){
            option.setTextColor(Color.parseColor("#7A8089"))
            option.typeface = Typeface.DEFAULT
            option.background = ContextCompat.getDrawable(
                this,
                R.drawable.default_option_border_bg
            )
        }
    }
また、以下が選択肢をタップしたときにスタイルを設定するメソッドです。
要素tvと選択肢番号selectedOptionNumを引数にとっており、mSelectedOptionPosition = selectedOptionNumで選択番号も更新しています。
    private fun selectedOptionView(tv:TextView, selectedOptionNum:Int){
        defaultOptionsView()

        mSelectedOptionPosition = selectedOptionNum

        tv.setTextColor(Color.parseColor("#363A43"))
        tv.setTypeface(tv.typeface, Typeface.BOLD)
        tv.background = ContextCompat.getDrawable(
            this,
            R.drawable.selected_option_border_bg
        )

    }
以下が解答を送信したときに、選択肢の正否によってスタイル(背景色)を設定するメソッドです。
when()文を用いることで、どの選択肢のスタイルを設定するかどうかの分岐を行います。
    private fun answerView(answer: Int, drawableView: Int){
        when(answer){
            1 -> {
                tvOptionOne?.background = ContextCompat.getDrawable(
                    this,
                    drawableView
                )
            }
            2 -> {
                tvOptionTwo?.background = ContextCompat.getDrawable(
                    this,
                    drawableView
                )
            }
            3 -> {
                tvOptionThree?.background = ContextCompat.getDrawable(
                    this,
                    drawableView
                )
            }
            4 -> {
                tvOptionFour?.background = ContextCompat.getDrawable(
                    this,
                    drawableView
                )
            }
        }
    }
}
最後に、こちらが選択肢や送信ボタンをタップするときのonClick()メソッドです。
選択肢をタップしたときにselectedOptionView()を発火させます。
また、送信ボタンを押したときは、次の質問へいく(もしくは結果を表示する)か解答を送信するかの分岐を行っています。
    override fun onClick(view: View?) {
        when(view?.id){
            R.id.tv_option_one -> {
                tvOptionOne?.let{
                    selectedOptionView(it, 1)
                }
            }
            R.id.tv_option_two -> {
                tvOptionTwo?.let{
                    selectedOptionView(it, 2)
                }
            }
            R.id.tv_option_three -> {
                tvOptionThree?.let{
                    selectedOptionView(it, 3)
                }
            }
            R.id.tv_option_four -> {
                tvOptionFour?.let{
                    selectedOptionView(it, 4)
                }
            }
            R.id.btn_submit -> {
                // 未選択の場合
                if(mSelectedOptionPosition == 0){
                    mCurrentPosition++

                    when{ // 次の質問へいく
                        mCurrentPosition <= mQuestionsList!!.size ->{
                            setQuestion()
                        }
                        else ->{ // 結果を表示する
                            val intent = Intent(this, ResultActivity::class.java)
                            intent.putExtra(Constants.USER_NAME, mUserName)
                            intent.putExtra(Constants.CORRECT_ANSWERS, mCorrectAnswers)
                            intent.putExtra(Constants.TOTAL_QUESTIONS, mQuestionsList?.size)
                            startActivity(intent)
                            finish()
                        }
                    }
                }else{
                    val question = mQuestionsList?.get(mCurrentPosition - 1)
                    if(question!!.correctAnswer != mSelectedOptionPosition){
                        answerView(mSelectedOptionPosition, R.drawable.wrong_option_border_bg)
                    }else{
                        mCorrectAnswers++
                    }
                    answerView(question.correctAnswer, R.drawable.correct_option_border_bg)

                    if(mCurrentPosition == mQuestionsList!!.size){
                        btnSubmit?.text = "完了"
                    }else{
                        btnSubmit?.text = "次の質問"
                    }

                    mSelectedOptionPosition = 0
                }
            }
        }
    }
また、補足ですが、結果画面でユーザ名、正答数、トータル質問数を使用するので、intentを使って値を渡してあげています。
val intent = Intent(this, ResultActivity::class.java)
intent.putExtra(Constants.USER_NAME, mUserName)
intent.putExtra(Constants.CORRECT_ANSWERS, mCorrectAnswers)
intent.putExtra(Constants.TOTAL_QUESTIONS, mQuestionsList?.size)
結果画面
UIをapp/res/layout/activity_result.xml、ロジックをapp/java/jp.example.sasukeapp/ResultActivity.ktに記述します。
UI
スタート画面と同じように、LinearLayoutの中にTextViewやButtonを配置します。
ロジック
クイズ画面から渡された値(トータル質問数、正答数)をintentで取得して、要素に設定しています。
最後に、完了ボタンを押すとスタート画面に戻ります。
class ResultActivity : AppCompatActivity() {
    override fun onCreate(savedInstanceState: Bundle?) {
        super.onCreate(savedInstanceState)
        setContentView(R.layout.activity_result)

        val tvName: TextView = findViewById(R.id.tv_name)
        val tvScore: TextView = findViewById(R.id.tv_score)
        val btnFinish: Button = findViewById(R.id.btn_finish)

        tvName.text = intent.getStringExtra(Constants.TOTAL_QUESTIONS)

        val totalQuestions = intent.getIntExtra(Constants.TOTAL_QUESTIONS, 0)
        val correctAnswers = intent.getIntExtra(Constants.CORRECT_ANSWERS, 0)

        tvScore.text = "$totalQuestions 問中 $correctAnswers 問正解"

        btnFinish.setOnClickListener{
            startActivity(Intent(this, MainActivity::class.java))
        }
    }
}
コード全文
GitHubにあげました。
おわりに
もう一個くらい簡単なアプリをつくってみようと思います。
参考資料