はじめに
自分で実装するのにかなり苦戦したため、うまくいったときの手順を残しておきます。(2021年10月時点)
環境
Windows 10
Firebase(ver : 9.19.0)
npm(ver : 6.14.13)
Firebase側の設定
まずはFirebaseへアクセスし登録まで完了させます。
1.1. 新しいプロジェクトの作成
1.2. プロジェクトの設定
- リソースロケーションの設定
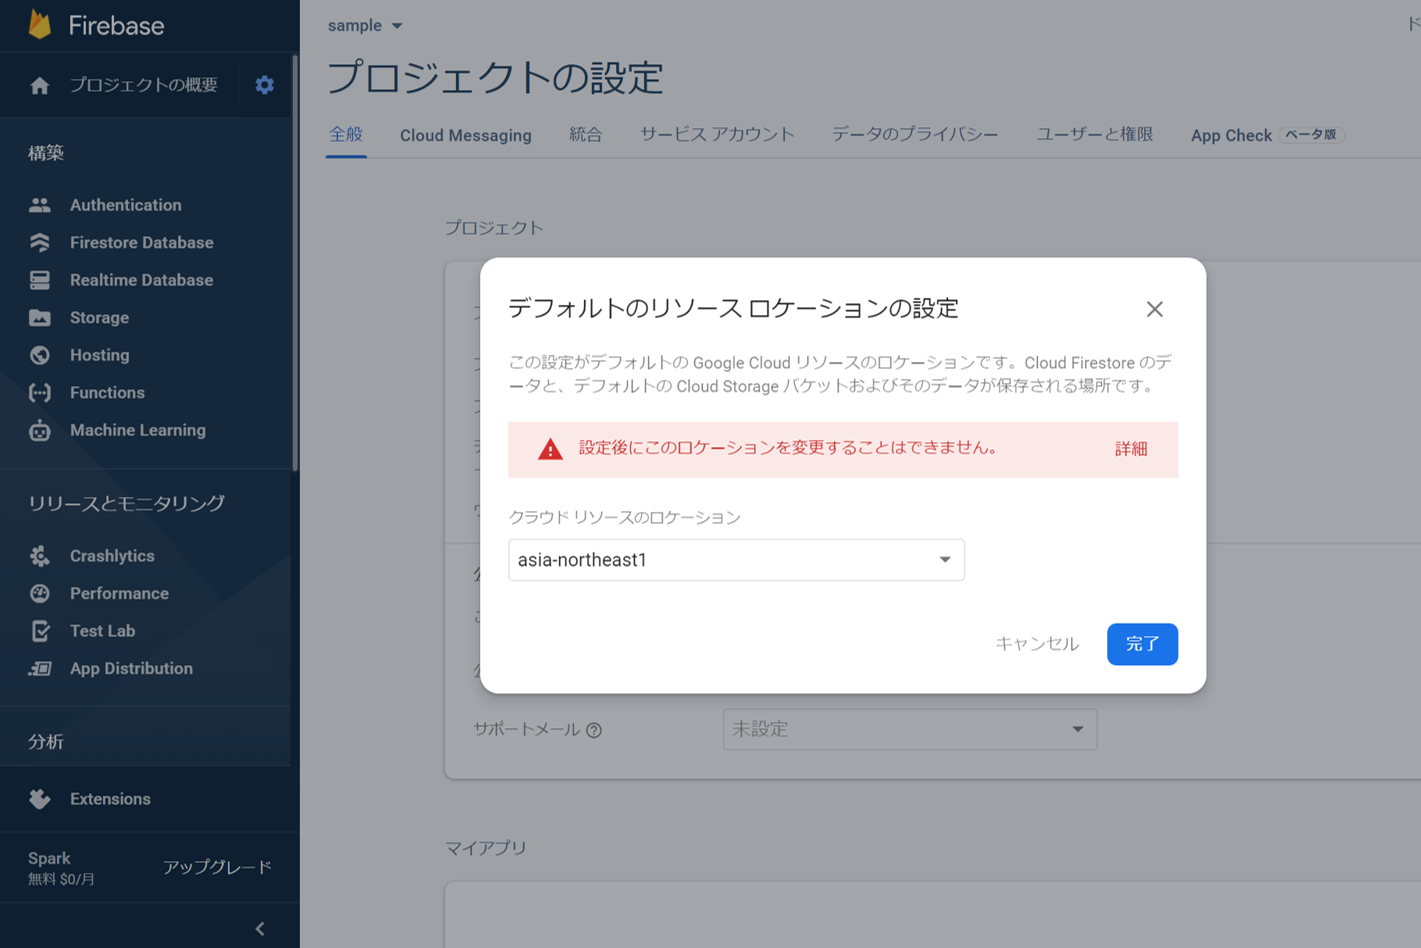
「プロジェクトの概要」横のプロジェクトの設定を押下。
プロジェクト欄にある「デフォルトの GCP リソース ロケーション」から地域を選択(日本の場合はasia-northeast1でいいと思います)。こちらは一度選択すると変更できないので注意。
- マイアプリの設定
プロジェクト欄下にあるマイアプリから目的に応じたプラットフォームを選択
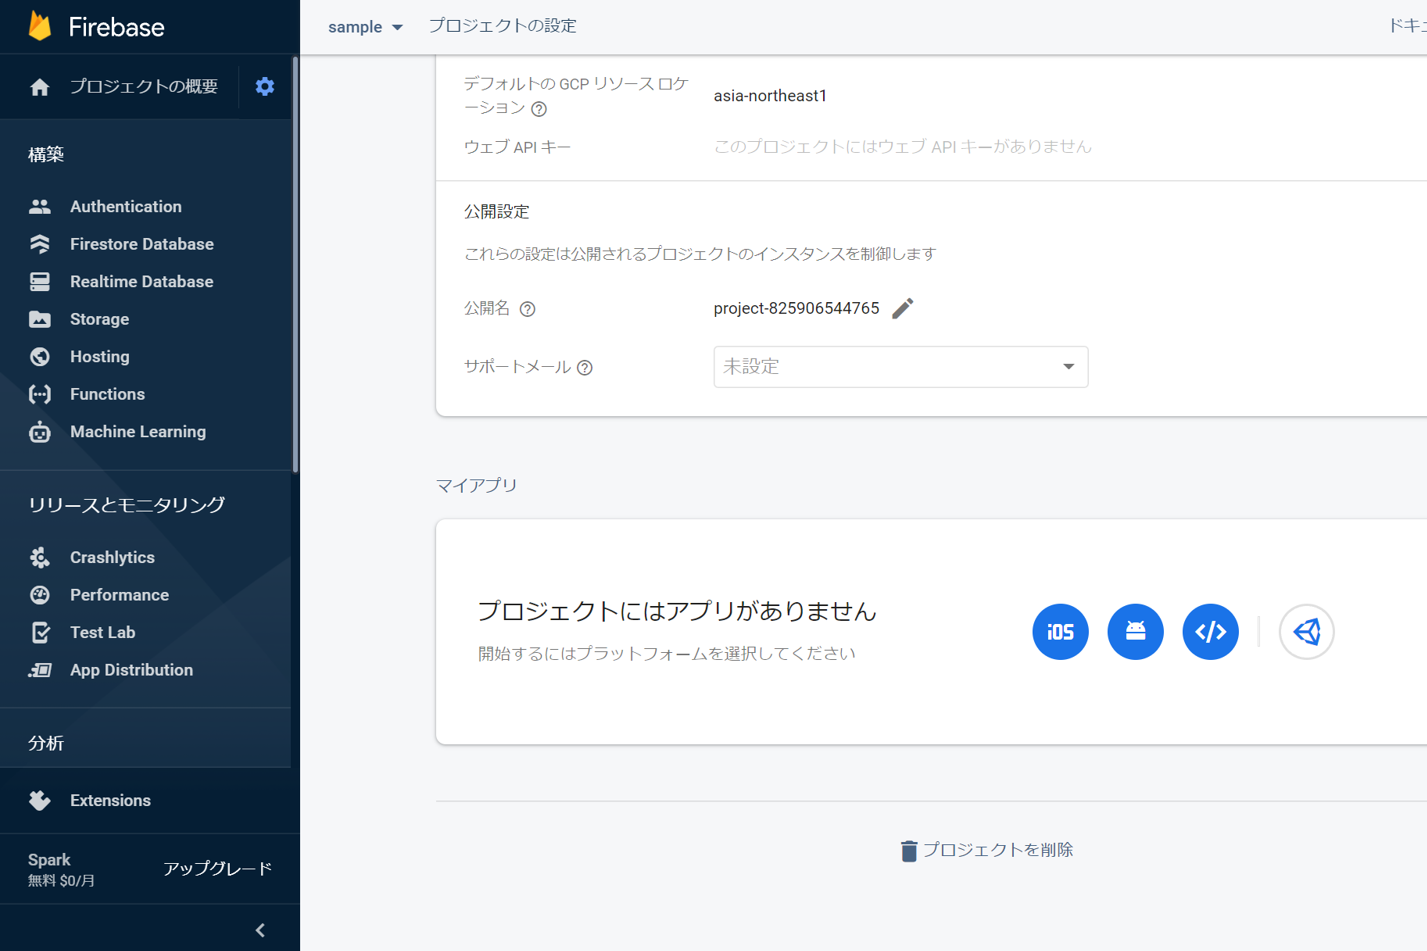
(例)ウェブアプリの場合
「>」のアイコンを選択し、アプリの登録をします。
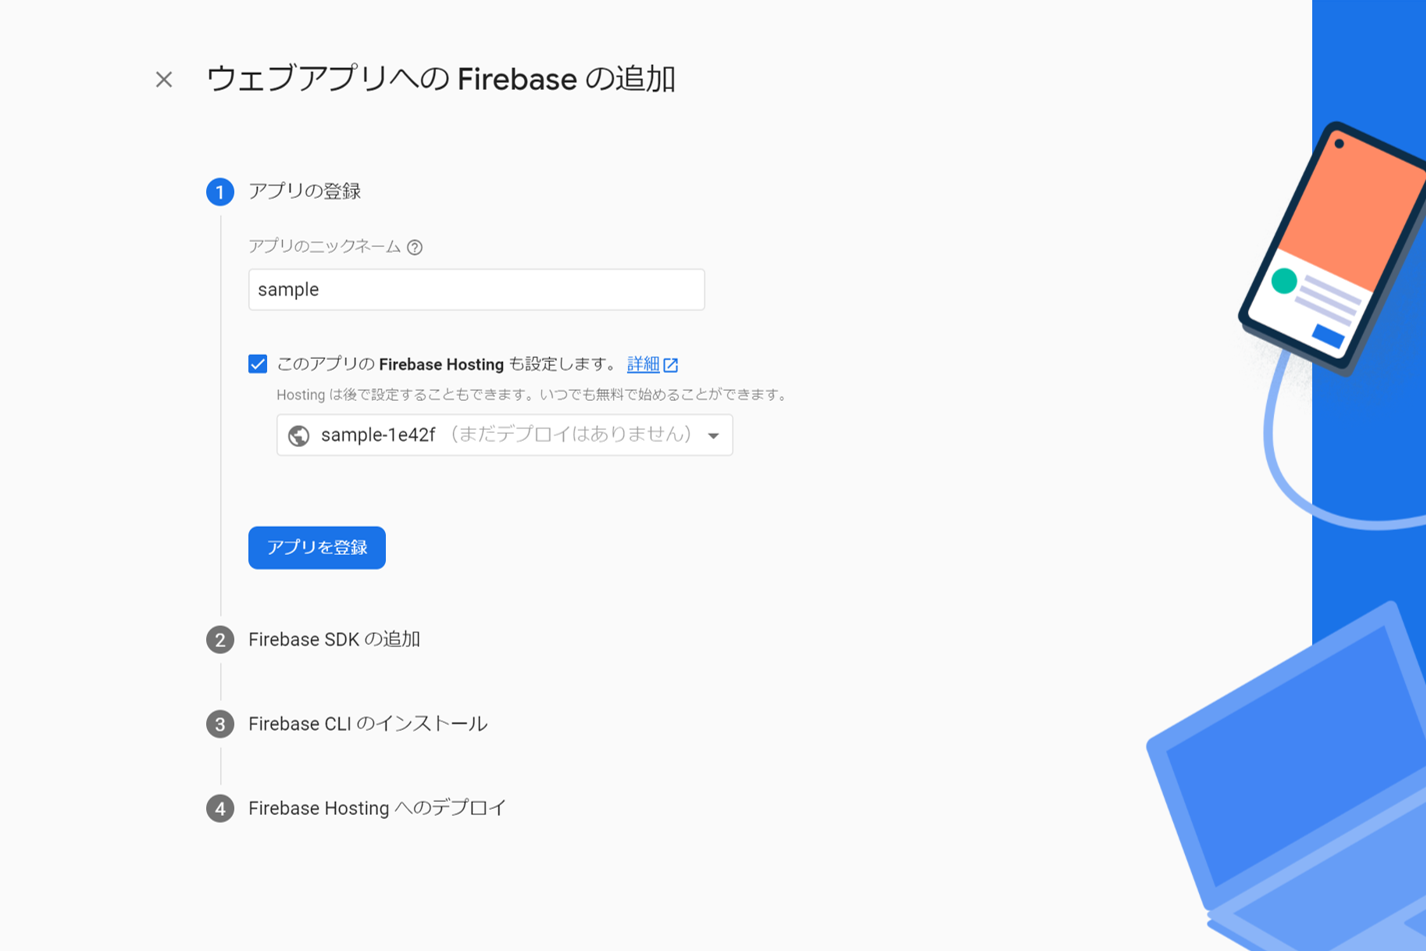
アプリのニックネームを適当に入力し、Firebase Hostingの設定にチェック(Web上に公開する際はチェック)したら、アプリを登録
↓
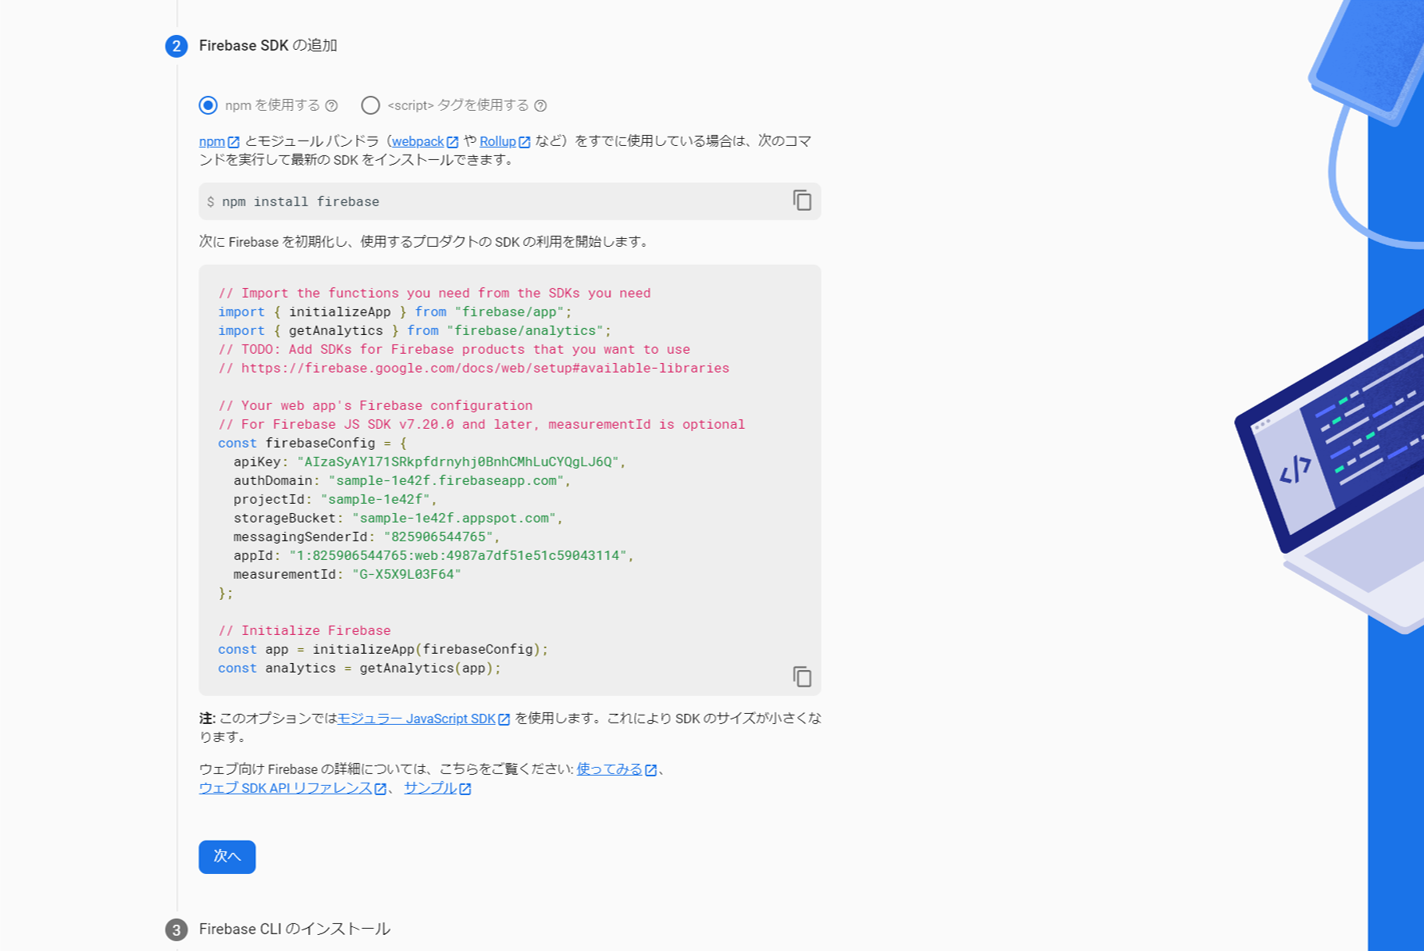
Firebase SDKの追加
色々書いてありますが、npmを使用するを選択して次へ。
↓
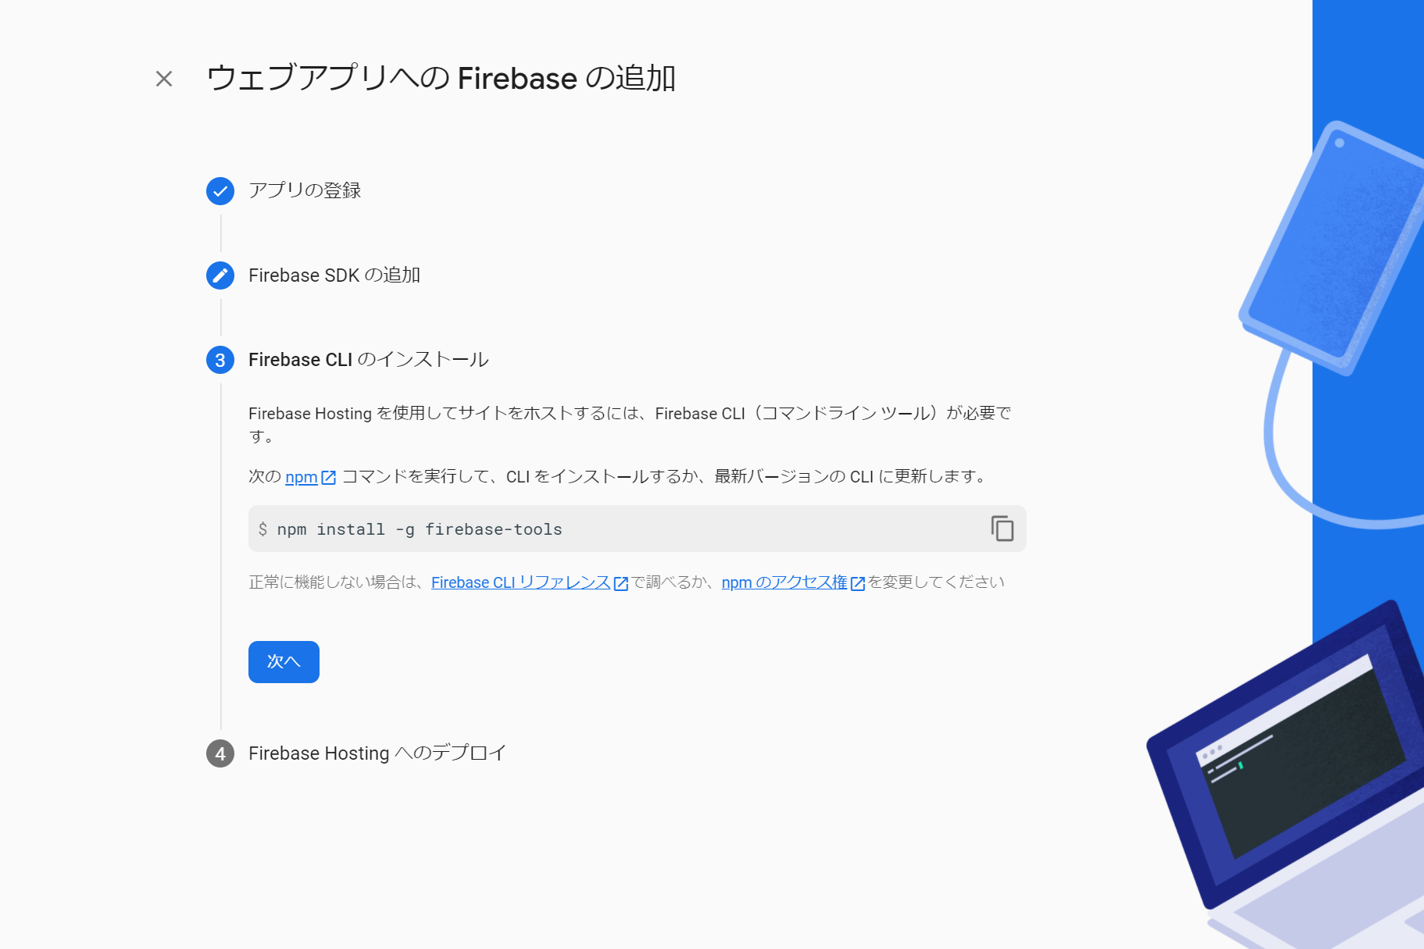
Firebase CLIのインストール
後で設定するのでこのまま次へ。
↓
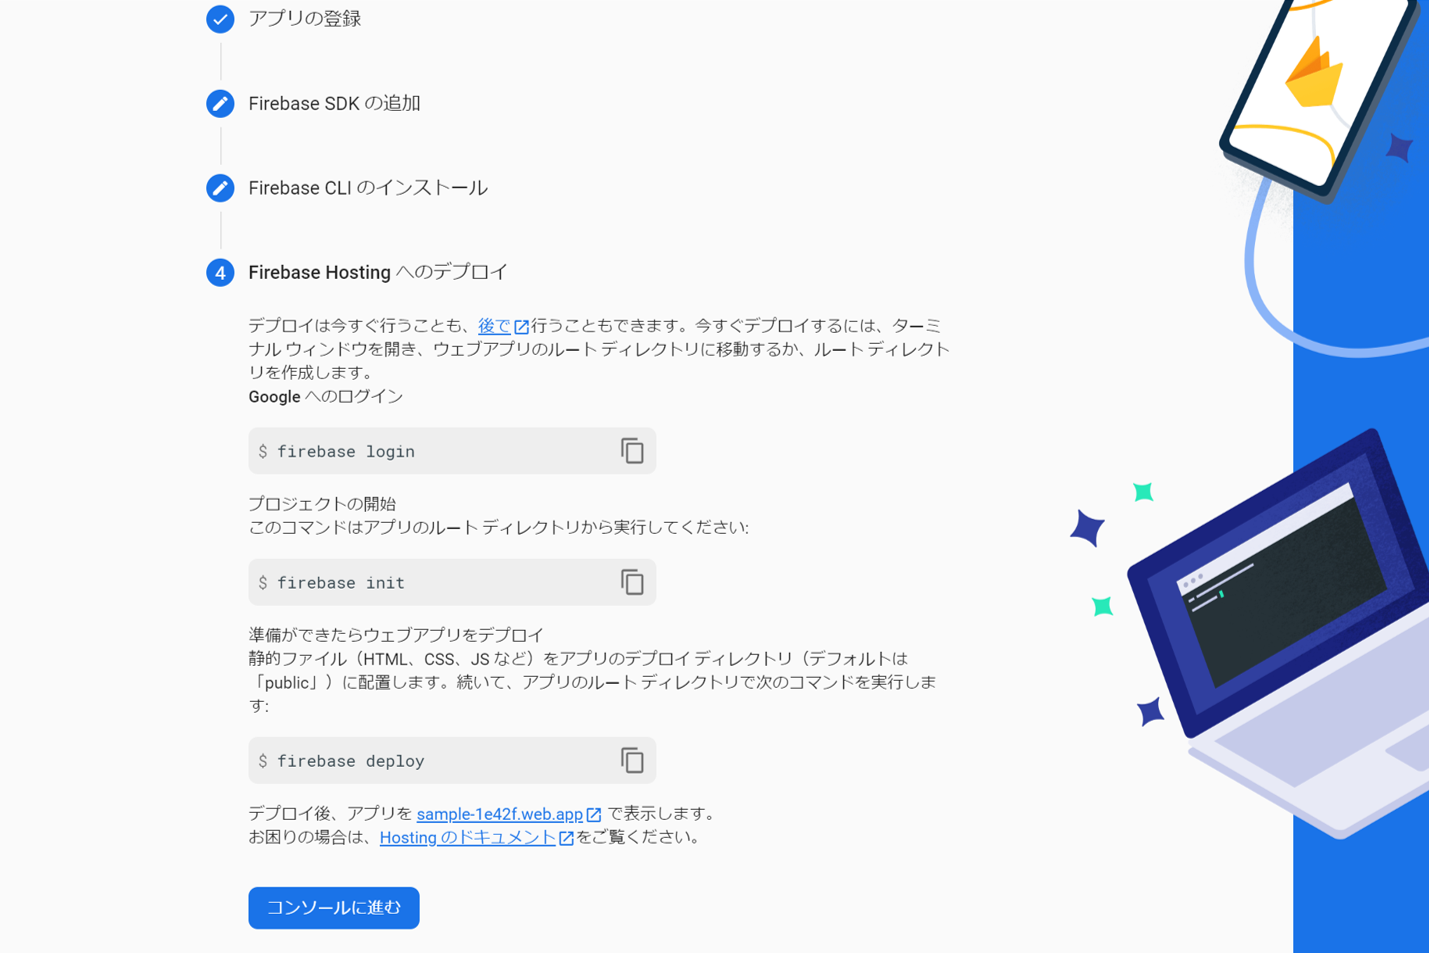
FireHostingへのデプロイ
後で設定するので、コンソールへ進むを選択
1.3. プランの変更
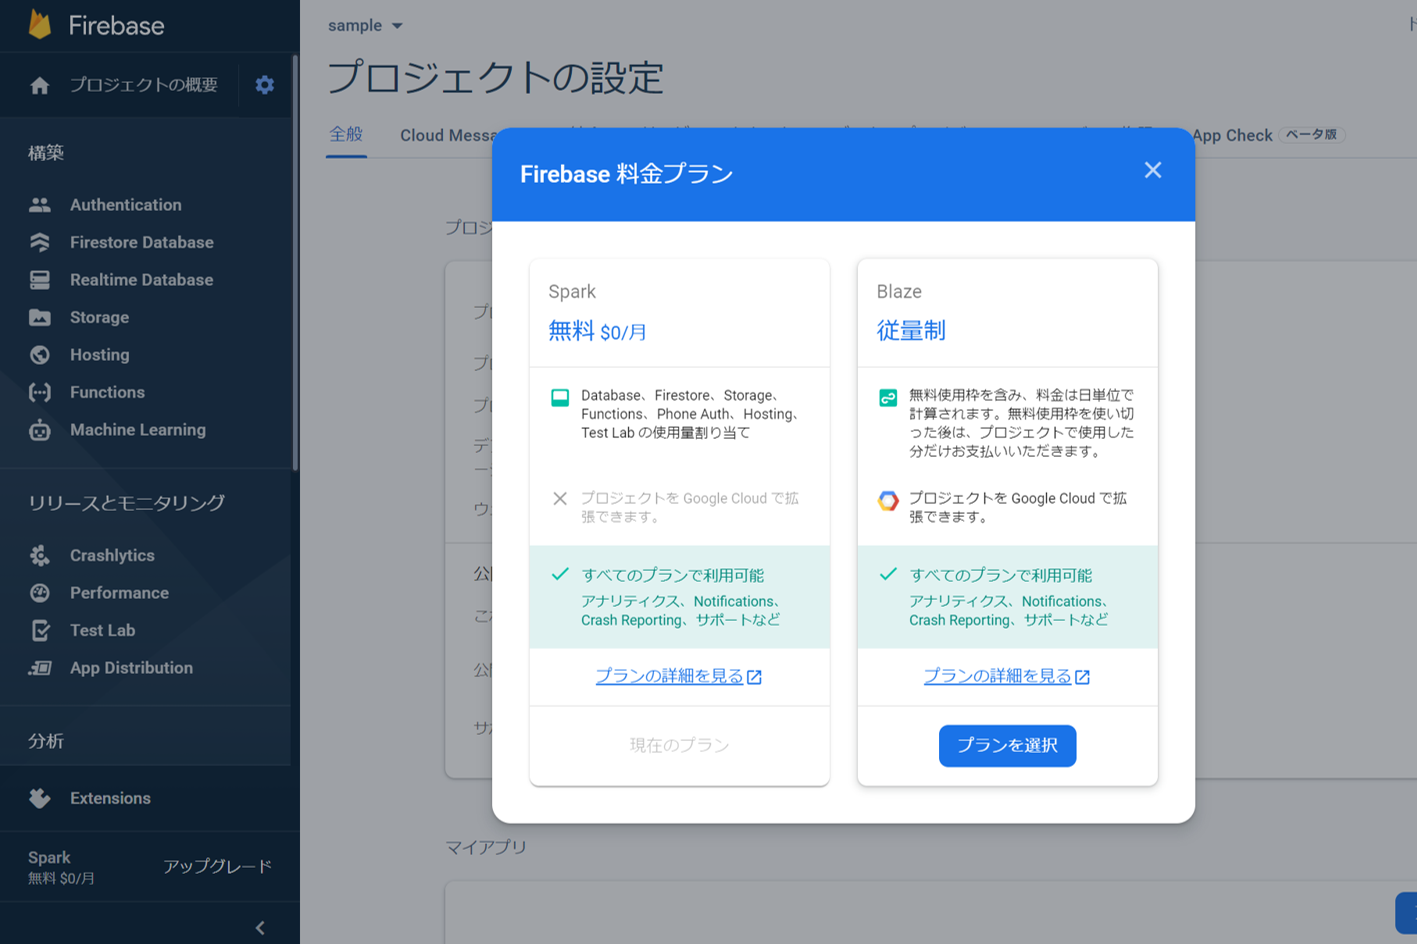
初めは無料のSparkプランですが、この状態ではデプロイができないため有料プラン(Blazeプラン)へアップグレードします。有料と言っても個人で開発する分には十分な容量が設定されているため、よほどのことがなければ請求が発生することはないと思います。
料金体制についてはこちらから。
これでいったんFirebase側の設定は完了です。
エディタでの設定
2.1. アプリディレクトリの作成
使用しているエディタでターミナルを開いて、Reactアプリの立ち上げを行います。ディレクトリ名はsampleとします。
C:\Users\Usename\> npx create-react-app sample
しばらくすると作成完了するので、試しに見てみます。sampleディレクトリへ移動して、
~/sample> npm start
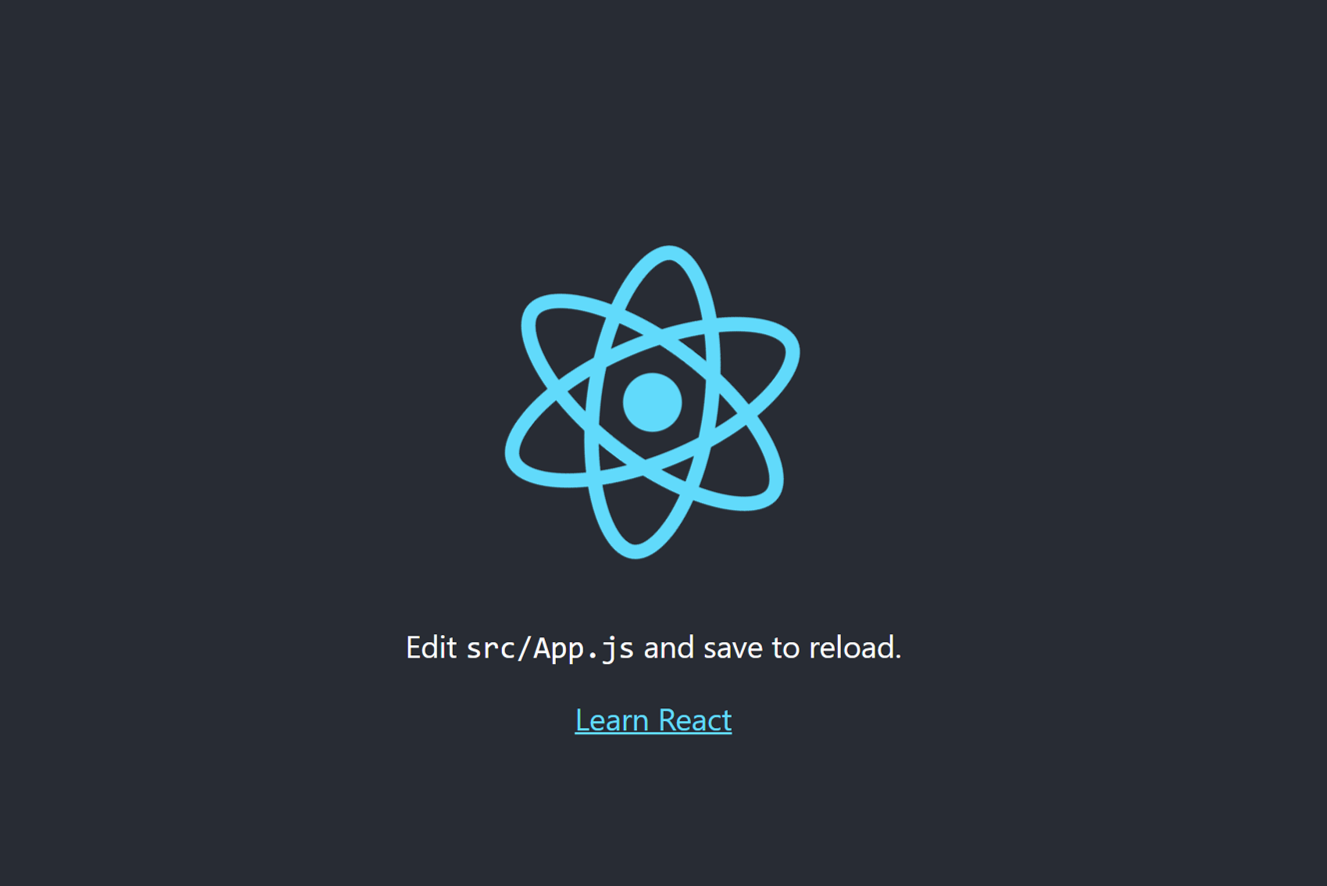
こんな感じで表示されれば成功です。
2.2. Firebaseのインストール ~ 設定
それではFirebaseの設定をしていきます。先ほど開いたターミナルで以下を実行します。
(グローバルインストールなのでPJごとに実行する必要はなく、使ってるPCで一度実行していればスキップ。)
~/sample> npm install -g firebase-tools
↓ 次にパッケージをインストールします。
~/sample> npm install --save firebase
↓ コマンドプロンプトに移動し、Firebaseにログイン
~/sample> firebase login
↓ ログインできたら、Firebaseを初期化していきます。
~/sample> firebase init
↓ initコマンドを実行すると以下の画面になり、初期化してよいか聞かれるのでYesを選択します。
~/sample> firebase init

     ######## #### ########  ######## ########     ###     ######  ########
     ##        ##  ##     ## ##       ##     ##  ##   ##  ##       ##
     ######    ##  ########  ######   ########  #########  ######  ######
     ##        ##  ##    ##  ##       ##     ## ##     ##       ## ##
     ##       #### ##     ## ######## ########  ##     ##  ######  ########

You're about to initialize a Firebase project in this directory:

  C:\Users\Username\projectname

Before we get started, keep in mind:

  * You are initializing within an existing Firebase project directory

? Are you ready to proceed? (Y/n)
↓ どの機能を利用するか聞かれるので、スペースキーでセレクトします。ここではFirestore, Functions, Hostingを選んでみます。
? Which Firebase features do you want to set up for this directory? Press Space to select features, then Enter to confirm your choices. (Press <space> to select, <a> to toggle all, <i> to invert selection)
>( ) Realtime Database: Configure a security rules file for Realtime Database and (optionally) provision default instance
 ( ) Firestore: Configure security rules and indexes files for Firestore
 ( ) Functions: Configure a Cloud Functions directory and its files
 ( ) Hosting: Configure files for Firebase Hosting and (optionally) set up GitHub Action deploys
 ( ) Hosting: Set up GitHub Action deploys
 ( ) Storage: Configure a security rules file for Cloud Storage
 ( ) Emulators: Set up local emulators for Firebase products
(Move up and down to reveal more choices)
↓ Firebase側で先ほど作成したプロジェクトを選択していきます。
既存のプロジェクトを使うので「Use an existing project」を選択します。
=== Project Setup

First, let's associate this project directory with a Firebase project.
You can create multiple project aliases by running firebase use --add,
but for now we'll just set up a default project.

? Please select an option: (Use arrow keys)
> Use an existing project
  Create a new project
  Add Firebase to an existing Google Cloud Platform project
  Don't set up a default project
↓ Firebase側で作成したプロジェクト名を選択。
? Select a default Firebase project for this directory: (Use arrow keys)
> sample-1e42f (sample  )
↓ 選んだ機能に応じてセットアップ方法を聞かれるため、エンターキーで進めていきます。基本的にはデフォルトの選択通りに進めていきます。
=== Firestore Setup

Firestore Security Rules allow you to define how and when to allow
requests. You can keep these rules in your project directory
and publish them with firebase deploy.

? What file should be used for Firestore Rules? (firestore.rules)
Firestore indexes allow you to perform complex queries while
maintaining performance that scales with the size of the result
set. You can keep index definitions in your project directory
and publish them with firebase deploy.

? What file should be used for Firestore indexes? (firestore.indexes.json)
↓ 次にCloud Function を記述する言語の選択をします。
=== Functions Setup

A functions directory will be created in your project with sample code
pre-configured. Functions can be deployed with firebase deploy.

? What language would you like to use to write Cloud Functions? (Use arrow keys)
> JavaScript
  TypeScript
本番環境用としてデプロイしたいので、デフォルトはpublicだけど、buildに変更。
=== Hosting Setup

Your public directory is the folder (relative to your project directory) that
will contain Hosting assets to be uploaded with firebase deploy. If you
have a build process for your assets, use your build's output directory.

? What do you want to use as your public directory? (public)
? What do you want to use as your public directory? build
↓ ここだけデフォルトNoだけど、Yesに変更。
? Configure as a single-page app (rewrite all urls to /index.html)? (y/N)
↓ GitHubとの連携を聞かれますが、デフォルト通りNoを選択。
? Set up automatic builds and deploys with GitHub? (y/N)
これで初期化完了!
i  Writing configuration info to firebase.json...
i  Writing project information to .firebaserc...

+  Firebase initialization complete!
ルールの変更
initした際、sampleディレクトリの直下にfirestore.rulesのファイルが作成されているはずなので、ファイルを開きます。
rules_version = '2';
service cloud.firestore {
  match /databases/{database}/documents {
    match /{document=**} {
      allow read; write: if false;
    }
  }
}
デフォルトでは誰でも読み書き可能で脆弱な状態なので、下のように書き換えます。
rules_version = '2';
service cloud.firestore {
  match /databases/{database}/documents {
    match /{document=**} {
      allow read;
      allow write: if request.auth.uid != null;
    }
  }
}
これで誰でも見ることはできるけど、書き込みは認証されたユーザーしかできないようになりました。
関数の作成
ここまで終えたらもう少しです。
新たに作成されたfunctionsディレクトリ下に以下の関数がデフォルトで作成されます。
const functions = require('firebase-functions');

// Create and Deploy Your First Cloud Functions
// https://firebase.google.com/docs/functions/write-firebase-functions

exports.helloWorld = functions.https.onRequest((request, response) => {
  response.send("Hello from Firebase!");
});
目的のアプリに応じて適宜関数を書き換えてください。とりあえずこのままで進めます。
ビルド
これまで作成してきたコード内容でビルドします。ターミナルで以下のコマンドを実行します。
~/sample> npm run build
デプロイ
いよいよデプロイです。以下のコマンドでデプロイを実行しましょう。
~/sample> firebase deploy

=== Deploying to 'sample-1e42f'...

i  deploying firestore, functions, hosting
i  firestore: reading indexes from firestore.indexes.json...
i  cloud.firestore: checking firestore.rules for compilation errors...
+  cloud.firestore: rules file firestore.rules compiled successfully
i  functions: ensuring required API cloudfunctions.googleapis.com is enabled...
i  functions: ensuring required API cloudbuild.googleapis.com is enabled...
!  functions: missing required API cloudbuild.googleapis.com. Enabling now...
+  functions: required API cloudfunctions.googleapis.com is enabled
+  functions: required API cloudbuild.googleapis.com is enabled
i  functions: preparing functions directory for uploading...
i  functions: packaged functions (24.51 KB) for uploading
+  firestore: deployed indexes in firestore.indexes.json successfully
i  firestore: latest version of firestore.rules already up to date, skipping upload...
+  functions: functions folder uploaded successfully
i  hosting[sample-1e42f]: beginning deploy...
i  hosting[sample-1e42f]: found 19 files in build
+  hosting[sample-1e42f]: file upload complete
+  firestore: released rules firestore.rules to cloud.firestore
i  functions: creating Node.js 14 function helloWorld(us-central1)...
+  functions[helloWorld(us-central1)]: Successful create operation.
i  functions: cleaning up build files...
Function URL (helloWorld(us-central1)): https://us-central1-sample-1e42f.cloudfunctions.net/helloWorld
i  hosting[sample-1e42f]: finalizing version...
+  hosting[sample-1e42f]: version finalized
i  hosting[sample-1e42f]: releasing new version...
+  hosting[sample-1e42f]: release complete

+  Deploy complete!

Project Console: https://console.firebase.google.com/project/*********
Hosting URL: https://**************
Deploy complete! が表示されれば成功です。おめでとうございます。
Hosting URLからページに飛ぶことができます。
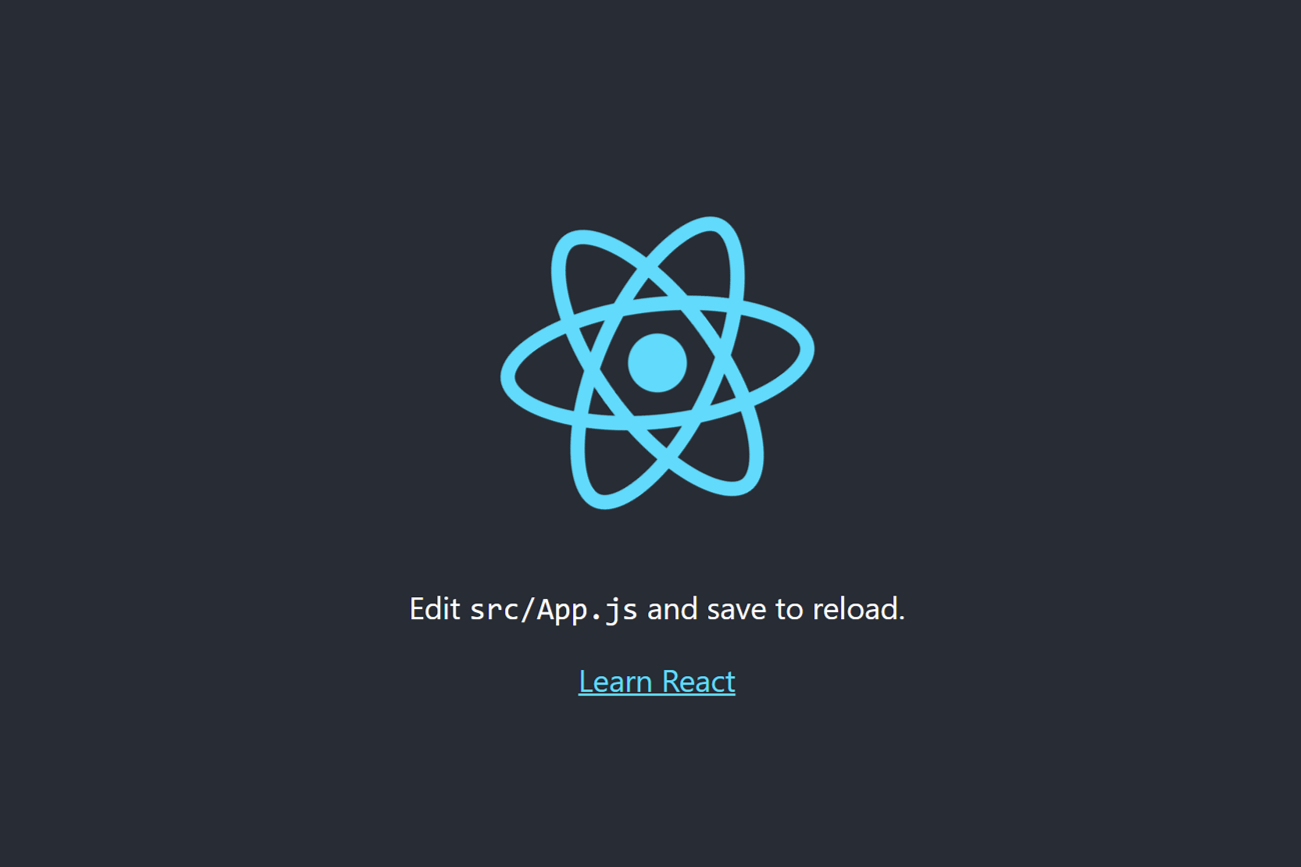
ローカル環境と同じ画面になれば成功です。
デプロイ時のエラー
こんなエラーが出ることがあります。
Running command: npm --prefix "$RESOURCE_DIR" run lint npm ERR! missing script: lint
 :
 :
Error: spawn npm --prefix "%RESOURCE_DIR%" run lint ENOENT at notFoundError
 :
 :
code: 'ENOENT',
errno: 'ENOENT',
syscall: 'spawn npm --prefix "%RESOURCE_DIR%" run lint',
path: 'npm --prefix "%RESOURCE_DIR%" run lint',
spawnargs: []
}

Error: functions predeploy error: Command terminated with non-zero exit code1
どうやらlintが悪さしているようなので、firebase.json にある「npm --prefix "%RESOURCE_DIR%" run lint」を削除することでエラー解消します。
まとめ
- Firebase側の設定
- npm install -g firebase-tools
- npm install --save firebase
- firebase login
- firebase init
- npm run build
- firebase deploy
途中エラー出ることもありますが、調べたら必ず出てくるのでめげずに頑張りましょう~
