ChatGPTのDiscord Botを作る
ほぼ、ここを参考にしました
仮想環境の利用
ここは、飛ばしても構いません
筆者は、ローカルの環境が汚れると嫌だったので、仮想環境を使いました。Miniforgeを使って仮想環境を構築しました
conda create -n 仮想環境名 python=バージョン
conda activate 仮想環境名<-これで仮想環境にはいる
なぜ、仮想環境を使うのか、何が便利なのかは、リンク先が分かりやすいです。(記事は、英語なのでGoogleChromeの拡張などで翻訳してください)
How to Set Up a Virtual Environment in Python – And Why It's Useful
botを作る
ここだけ権限の変える必要がある

botと接続
ここを参考にしてください
接続テスト
ここは、上の記事と異なっているので、注意してください
import discord
DISCORD_TOKEN = 'discord bot のトークン'
intents = discord.Intents.default()
intents.message_content = True
client = discord.Client(intents=intents)
@client.event
async def on_ready():
print(f'We have logged in as {client.user}')
@client.event
async def on_message(message):
if message.author == client.user:
return
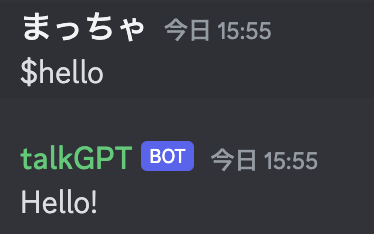
if message.content.startswith('$hello'):
await message.channel.send('Hello!')
client.run(DISCORDTOKEN)
このようになれば、成功です。
openai apiとの接続
まず、openaiのpythonモジュールをインストールしてください
pip3 install openai
ここを参考に、API KEYを取得してください
諸々の説明はここを見ると分かりやすい
https://book.st-hakky.com/docs/open-ai-api-in-python/
messagasというリストがあって、そこの配列に文字列を入れることで、Chatしているみたい。
ChatCompletionによって、あらかじめ会話を設定できる。
response = openai.ChatCompletion.create(
    model="gpt-3.5-turbo",
    messages=[
        {"role": "system", "content": "You are a helpful assistant."},
        {"role": "user", "content": "Who won the world series in 2020?"},
        {"role": "assistant", "content": "The Los Angeles Dodgers won the World Series in 2020."},
        {"role": "user", "content": "Where was it played?"}
    ]
)
完成したのがこちら、ほぼ記事と一緒
import discord
from discord.ext import commands
import openai
DISCORD_TOKEN = 'discord bot のトークン'
openai.api_key = 'openapi のkey'
intents = discord.Intents.default()
intents.message_content = True
bot = commands.Bot(command_prefix="?", intents=intents)
messages = [
{"role": "system", "content": "You are a helpful assistant."},
{"role": "user", "content": "あなたは誰ですか?"},
{"role": "assistant", "content": "私はAIアシスタントです。どうかしましたか?"}
]
@bot.event
async def on_ready():
print(f'Logged in as {bot.user} (ID: {bot.user.id})')
print('------')
# Discordでメッセージが送信されたときに呼び出される関数
@bot.event
async def on_message(message):
# Bot自身が送信したメッセージには反応しない
if message.author == bot.user:
return
# ユーザーからの質問を受け取る
if bot.user.id in [member.id for member in message.mentions]:
print(message.content)
print(message.content.split('>')[1].lstrip())
question = message.content.split('>')[1].lstrip()
messages.append({"role": "user", "content": question})
response = openai.ChatCompletion.create(
model="gpt-3.5-turbo",
messages=messages,
max_tokens=200,#tokenの最大値
)
answer = response.choices[0].message.content
print(answer)
# 回答を送信する
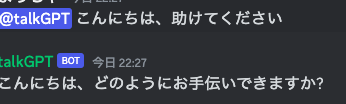
await message.channel.send(answer)
bot.run(DISCORD_TOKEN)
使い方
@bot {メッセージ}
ChatGPTの料金について
1000tokenあたり0.0015$
意外に料金は安く済みます

感想
Discord Bot 初めて作ったけど、意外と早く作れた
みんなもやってみてね
次は、Youtubeの質問コーナーをテキストにして、人格を生成したい
その他[Prefixについて]
DiscordBotとか見てると
?help とか見かけると思うけども、あれは bot.commandでイベントが発火する。この例だと、
?test [ここの文章が入力値になる]
bot = commands.Bot(command_prefix='?', intents=intents)
@bot.command()
async def test(ctx, arg):
    await ctx.send(arg)