追記
UE Tokyo .dev #3 に本記事と同じテーマで登壇しました。
その際に使用したスライドでは、本記事で紹介するプラグインを含めた4つの方法についてまとめているので、こちらもぜひ参考にしてください。
1. はじめに
UE5では、GameplayAbilitySystem の機能が Blueprint のみでも使えるようになってきました。
しかし、GameplayAttribute やその利用が前提の GameplayEffect に関しては、現状 Blueprint のみで使うことはできません。
(GASCompanion や 九里江めいくさんのプラグイン のように、C++ を書かずに GameplayAttribute を定義する方法はありますが、C++ を使わずに定義する方法は現状ないはずです。)
本記事では、そんな我々 BP 信者に優しくない GameplayAttribute を、無理やり BP のみで定義する方法を紹介します。
本記事は半分ネタです。実用性はそんなにありません。
2. 方法
2.1. プラグインをダウンロードする
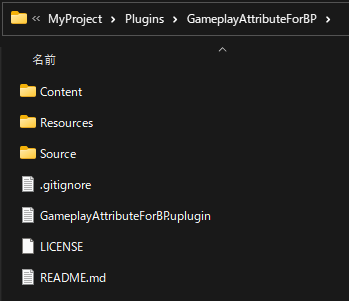
以下のリンクより GameplayAttributeForBP プラグインをダウンロードして、プロジェクトの Plugins フォルダ(なければ作る)にぶっこんでください。
本プラグインは UE 5.1 で作成しました。パッケージにおける動作は未検証です。
2.2. AttributeSet に変数を追加する
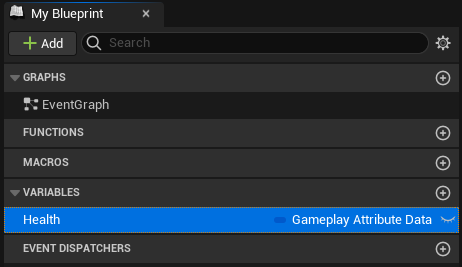
プラグインをビルドしてエディタを起動したら、Plugins/GameplayAttributeForBP Content/AttributeSets/BP_GABPAttributeSetを開き、任意の GameplayAttributeData 型の変数を追加します。
サンプルの変数として "Health" が最初からありますが、削除しても構いません。
Plugins/GameplayAttributeForBP Content/AttributeSets以下に AttributeSet を継承した Blueprint Class を新規作成し、その中に変数を追加してもよいです。
2.3. GABP ボタンをオンにする
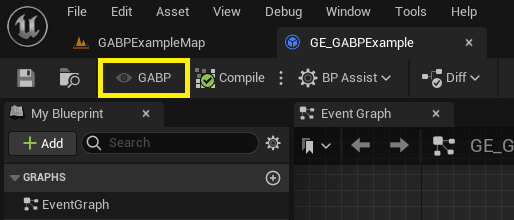
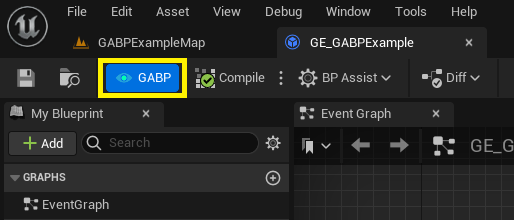
適当なアセットエディタを開き、ツールバーの左の方にある "GABP" と書かれたボタンをクリックしてオンにします。
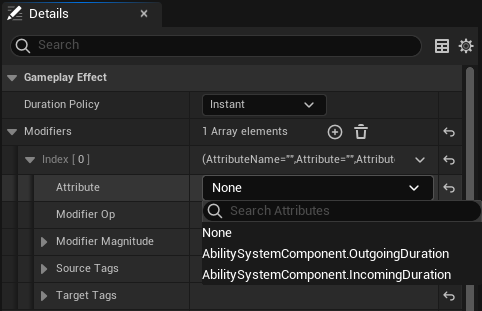
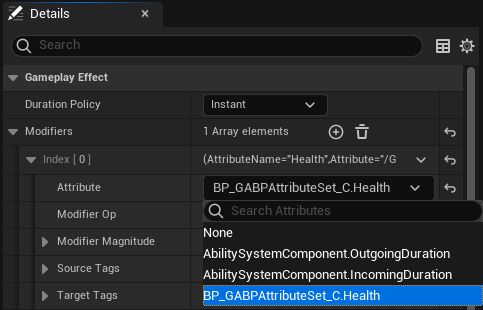
GABP ボタンがオンの時は、2.2. で追加した GameplayAttributeData が Attribute の一覧に表示されるようになります。
GABP ボタンは、Attribute の一覧を使う時のみオンにしてください。
GABP ボタンをオンにしたままにすると、高確率でエディタがクラッシュします(理由は後述)。
- GABP ボタンがオフの時
- GABP ボタンがオンの時
2.4. 実装する
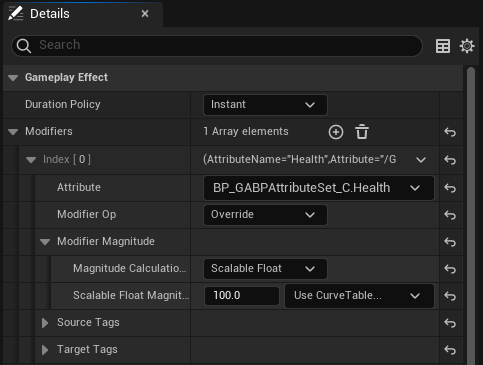
例として、以下の画像の GameplayEffect を使い、
以下の画像のBPを実行してみると、
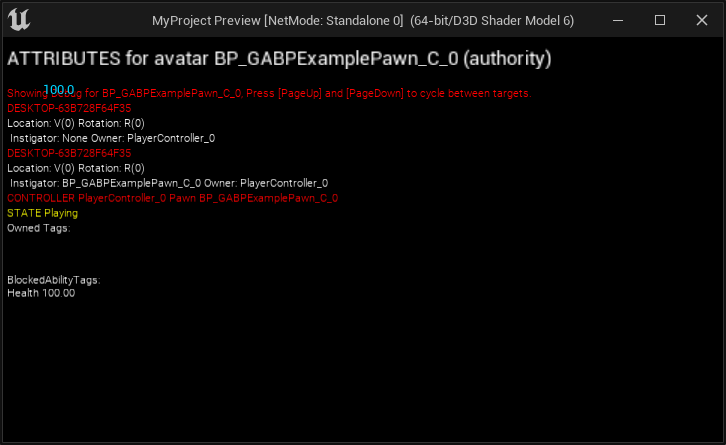
GameplayAttribute が正しく機能していることが確認できます。
3. 解説
3.1. 問題点と解決策
BP のみで GameplayAttribute が使えない理由として、BP の AttributeSet に定義した GameplayAttributeData が Attribute の一覧に表示されないという問題がありました。
そこで、エンジンソースにある Attribute の一覧の表示に関する処理を見てみます。
TSharedPtr<FAttributeViewerNode> SAttributeListWidget::UpdatePropertyOptions()
{
	...

	// Gather all UAttribute classes
	for (TObjectIterator<UClass> ClassIt; ClassIt; ++ClassIt)
	{
		UClass *Class = *ClassIt;
		if (Class->IsChildOf(UAttributeSet::StaticClass()) && !Class->ClassGeneratedBy)
		{
            ...

			for (TFieldIterator<FProperty> PropertyIt(Class, EFieldIteratorFlags::ExcludeSuper); PropertyIt; ++PropertyIt)
			{
                ...

                TSharedPtr<FAttributeViewerNode> SelectableProperty = MakeShareable(new FAttributeViewerNode(Property, FString::Printf(TEXT("%s.%s"), *Class->GetName(), *Property->GetName())));
				PropertyOptions.Add(SelectableProperty);
			}
		}
    ...
ここでは、TObjectIterator を用いてロード済みの BP と C++ の全 UClass の中から、UAttributeSet の子クラスかつ C++ クラス (ClassGeneratedBy == nullptr) である UClass を収集し、その UClass のプロパティを Attribute の一覧に追加しています。
つまり、Attribute の一覧に BP の AttributeSet に定義した GameplayAttributeData を表示させるには、その AttributeSet の BP をロードし、C++ クラスに偽装 (ClassGeneratedBy = nullptr;) すればよいということです。
3.2. プラグインの実装
2.1. で紹介した GameplayAttributeForBP プラグインでは、GABP ボタンが押された時に FARFilter を用いて特定のパス下にある BP をロードし、その BP の中から UAttributeSet の子クラスを収集しています。
収集した UAttributeSet の子 BP クラスは、GABP ボタンがオンになった時に C++ クラスに偽装し、GABP ボタンがオフになった時に偽装を解除します。
// When GABP button is pressed
void UGABPToolBarButton::ToggleActivation()
{
	// Set ARFilter
	FARFilter ARFilter;
	ARFilter.PackagePaths.Add(FName(TEXT("/GameplayAttributeForBP/AttributeSets")));
	ARFilter.ClassPaths.Add(UBlueprint::StaticClass()->GetClassPathName());
	ARFilter.bRecursivePaths = true;
	ARFilter.bRecursiveClasses = true;

	// Load Blueprints
	TArray<FAssetData> Assets;
	IAssetRegistry::Get()->GetAssets(ARFilter, Assets);

	TArray<TSubclassOf<UObject>> AttributeSetClasses;

	// Collect child Blueprint classes of UAttributeSet
	for (const FAssetData& Asset : Assets)
	{
		const UBlueprint* Blueprint = Cast<UBlueprint>(Asset.GetAsset());
		const TSubclassOf<UObject> Class = Blueprint->GeneratedClass;

		if (Class && Class->IsChildOf<UAttributeSet>())
		{
			AttributeSetClasses.Emplace(Class);
		}
	}

	bIsActivated ? Deactivate(AttributeSetClasses) : Activate(AttributeSetClasses);
}

// When GABP button is turned on
void UGABPToolBarButton::Activate(const TArray<TSubclassOf<UObject>>& AttributeSetClasses)
{
	// Disguised as a C++ class
	for (const TSubclassOf<UObject>& AttributeSetClass : AttributeSetClasses)
	{
		ClassGeneratedBys.Emplace(AttributeSetClass, AttributeSetClass->ClassGeneratedBy);
		AttributeSetClass->ClassGeneratedBy = nullptr;
	}

	bIsActivated = true;
	Data.Icon = ActiveIcon;
}

// When GABP button is turned off
void UGABPToolBarButton::Deactivate(const TArray<TSubclassOf<UObject>>& AttributeSetClasses)
{
	// Remove C++ class disguise
	for (const TSubclassOf<UObject>& AttributeSetClass : AttributeSetClasses)
	{
		UObject** ClassGeneratedBy = ClassGeneratedBys.Find(AttributeSetClass);

		if (*ClassGeneratedBy)
		{
			AttributeSetClass->ClassGeneratedBy = *ClassGeneratedBy;
		}
	}

	ClassGeneratedBys.Empty();

	bIsActivated = false;
	Data.Icon = InactiveIcon;
}
ただし、BP を C++ クラスに偽装すると、その間その BP は無効なクラスとして認識されてしまいます。
これは、クラスの生成の原因となった BP を指す ClassGeneratedBy に、偽装のために無理やり nullptr を代入したためです。
何らかのタイミングでこの無効なクラスのロードが発生すると、ぬるぽでエディタがクラッシュします。
GABP ボタンをオンのままにすると高確率でエディタがクラッシュするというのは、そういうことです。
我々 BP 信者は、命懸けで GameplayAttribute を使わなければならないのです。
4. おわりに
命を懸けなくてもいい方法があれば教えてください。
5. おまけ
UEditorUtilityToolMenuEntry を使うと、簡単に(BP のみでも)ツールバーボタンが作れるのでおすすめです。
また、プラグインでは EditorPerProjectUserSettings.ini を上書きできず、エディタ起動時に EditorUtilityBlueprint を実行するように登録する通常の方法が使えなかったため、C++ でゴリ押しています。
GameplayAttributeForBP.cpp に実装があるので、そちらもぜひ参考にしてみてください。
