はじめに
RaspberryPiにubuntu-serverをインストールすることになったのでここに方法を備忘録として残しておきます。
環境
・MacBookPro(High Sierra)
・micro SD card
・RaspberryPi 3B+
方法
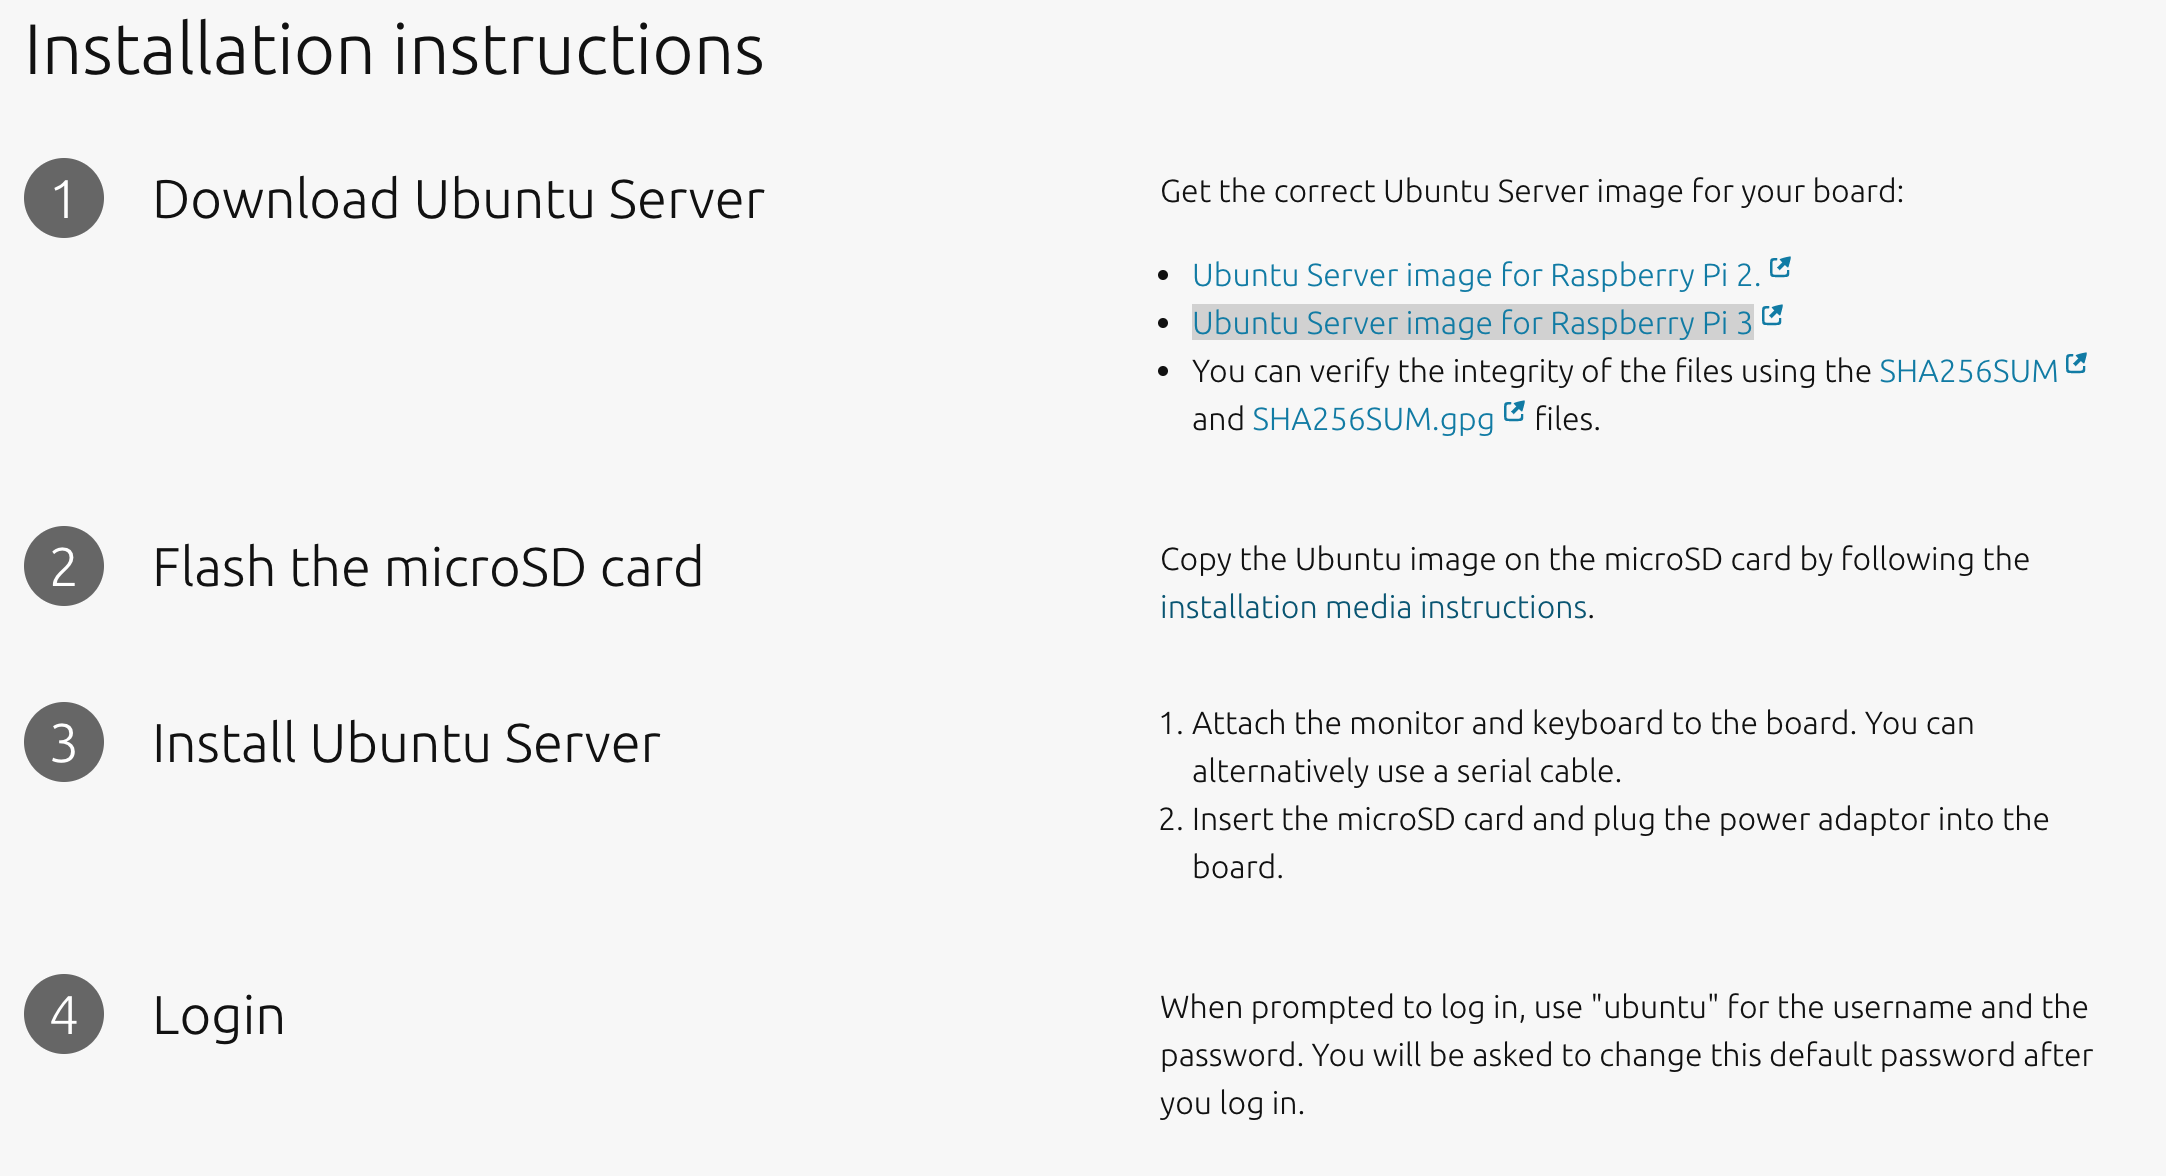
ubuntu-serverのダウンロード
ubuntuの公式サイトからRaspBerryPi用のubuntu-serverをインストールします。RaspberryPi 3B+なので Ubuntu Server image for Raspberry Pi 3 をクリックしダウンロードします。 (ファイルの解凍はしません)
sdcardにubuntu-serverをインストール
次に、ダウンロードしたubuntu-serverをmicro SD card にインストールします。ターミナルを使用した方法とフリーソフトウェアを使用した方法があります。今回はより簡単なbalenaEtcherというフリーソフトウェアを使用した方法を記述します。
公式サイトからbalenaEtcherをダウンロードしてアプリケーションを開きます。
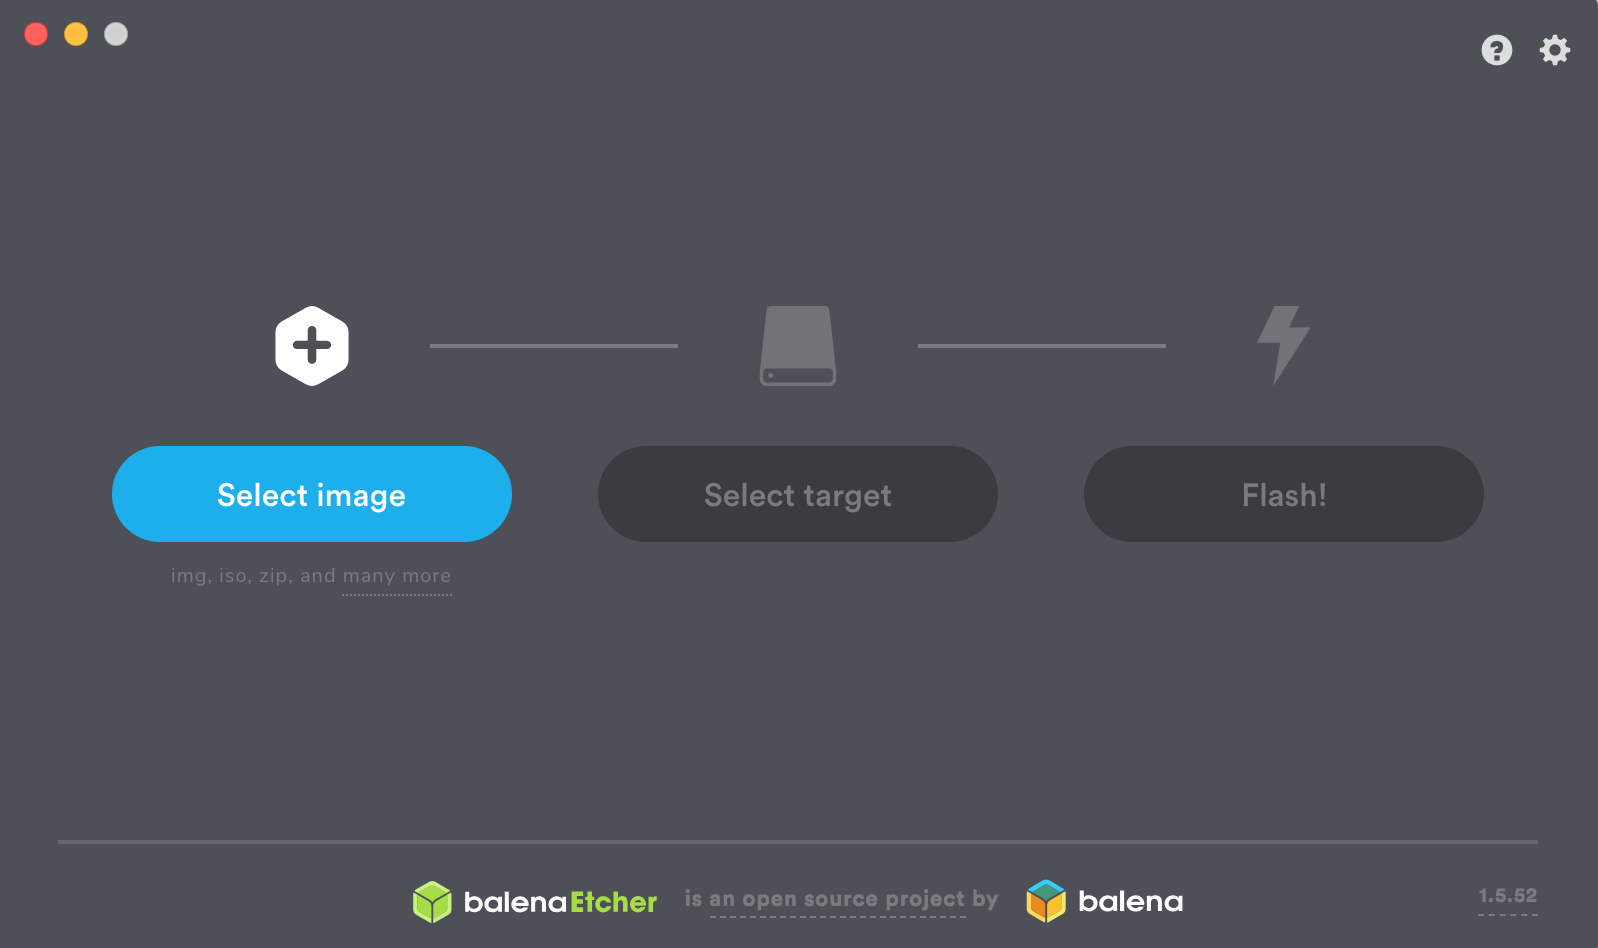
Select imageをおしてダウンロードしておいた ubuntu-18.04.2-preinstalled-server-arm64+raspi3.img.xz を選択します。
次に Select image を押して raspberryPiで使用する micro SD card を選択します。
最後に Flash! を押して数分待つと完成です!
終わりに
micro SD card のフォーマットの仕方やターミナル操作の仕方は時間があるときに更新します。