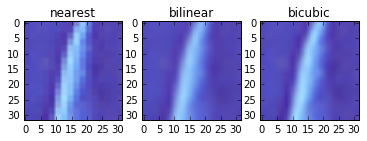
resize
cv2.resize(src, dsize[, dst[, fx[, fy[, interpolation]]]])
| |Method | interpolation |
|---|---|
| Nearest Neighbor | cv2.INTER_NEAREST |
| Bilinear | cv2.INTER_LINEAR |
| Bicubic | cv2.INTER_CUBIC |
In [51]: rszNN = cv2.resize(I, (I.shape[1]*2, I.shape[0]*2), interpolation=cv2.INTER_NEAREST)
    ...: rszBL = cv2.resize(I, (I.shape[1]*2, I.shape[0]*2), interpolation=cv2.INTER_LINEAR)
    ...: rszBC = cv2.resize(I, (I.shape[1]*2, I.shape[0]*2), interpolation=cv2.INTER_CUBIC)
import numpy as np
import cv2
import matplotlib.pyplot as plt

I = cv2.imread('./data/SIDBA/Lenna.bmp')

rszNN = cv2.resize(I, (I.shape[1]*2, I.shape[0]*2), interpolation=cv2.INTER_NEAREST)
rszBL = cv2.resize(I, (I.shape[1]*2, I.shape[0]*2), interpolation=cv2.INTER_LINEAR)
rszBC = cv2.resize(I, (I.shape[1]*2, I.shape[0]*2), interpolation=cv2.INTER_CUBIC)

sz  = np.array([I.shape[0],I.shape[1]])
csz = np.array([32,32])
tlpos = (sz - csz)//2
brpos = tlpos + csz

croppedNN = rszNN[tlpos[0]:brpos[0],tlpos[1]:brpos[1],:]
croppedBL = rszBL[tlpos[0]:brpos[0],tlpos[1]:brpos[1],:]
croppedBC = rszBC[tlpos[0]:brpos[0],tlpos[1]:brpos[1],:]

fig, axes = plt.subplots(ncols=3)
axes[0].imshow(croppedNN)
axes[0].set_title('nearest')
axes[0].set(adjustable='box-forced',aspect='equal')
axes[1].imshow(croppedBL)
axes[1].set_title('bilinear')
axes[1].set(adjustable='box-forced',aspect='equal')
axes[2].imshow(croppedBC)
axes[2].set_title('bicubic')
axes[2].set(adjustable='box-forced',aspect='equal')
fig.show()
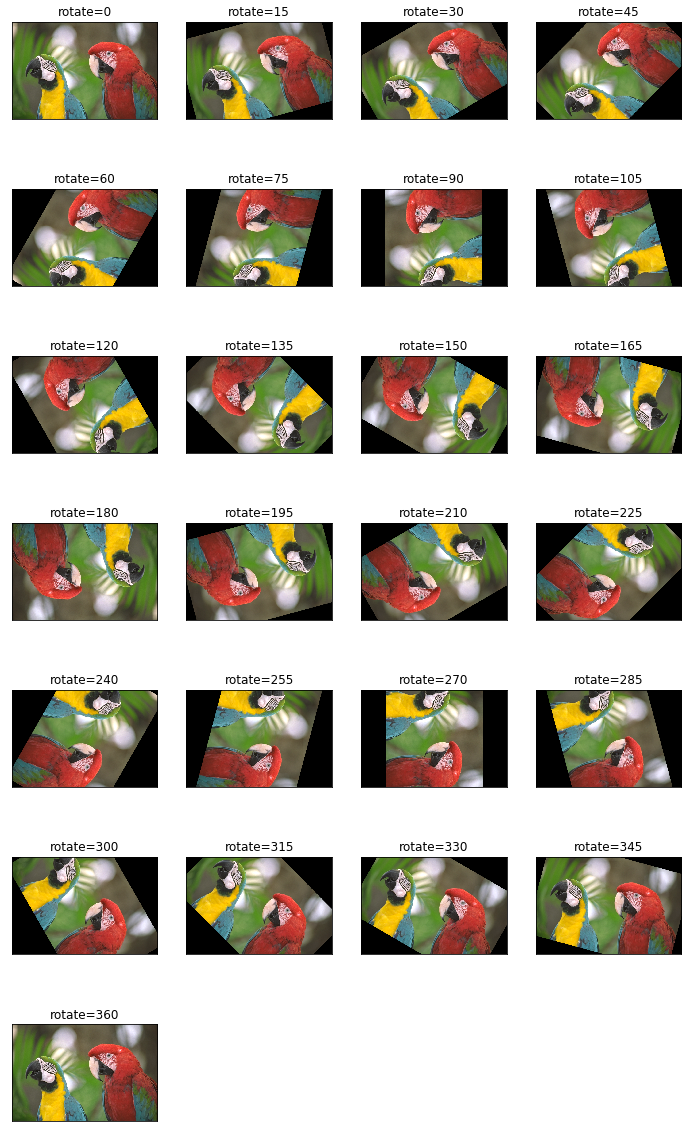
rotate
画像の中心を原点に回転する場合は、getRotationMatrix2DとwarpAffineを使う。ただし、後述するscipyのrotateを使ったほうが簡単にできる。
cv2.getRotationMatrix2D(center, angle, scale)
cv2.warpAffine(src, M, dsize[, dst[, flags[, borderMode[, borderValue]]]])
import cv2
import matplotlib.pyplot as plt
import numpy as np
from scipy import ndimage

I = cv2.imread('./data/SIDBA/Lenna.bmp')

rIntr = 15
rs = 0
re = 360

Ir = []

for r in range(rs, re+1, rIntr):
    center = (I.shape[1]*0.5,I.shape[0]*0.5)
    rotMat = cv2.getRotationMatrix2D(center, r, 1.0)
    Irot = cv2.warpAffine(I, rotMat, (I.shape[1],I.shape[0]), flags=cv2.INTER_LINEAR)
    Ir.append(Irot)

cols = 4
rows = int(np.ceil(len(Ir) / float(cols)))

fig, axes = plt.subplots(nrows=rows, ncols=cols, figsize=(3*cols,3*rows))

for idx, I in enumerate(Ir):
    r = idx // cols
    c = idx % cols

    title = 'rotate=%d' % (rIntr*idx)

    axes[r,c].imshow(cv2.cvtColor(I, cv2.COLOR_BGR2RGB))
    axes[r,c].set_title(title)
    axes[r,c].set(adjustable='box-forced',aspect='equal')
    axes[r,c].get_xaxis().set_visible(False)
    axes[r,c].get_yaxis().set_visible(False)

for i in range(idx+1, rows*cols):
    r = i // cols
    c = i % cols
    fig.delaxes(axes[r,c])

fig.show()
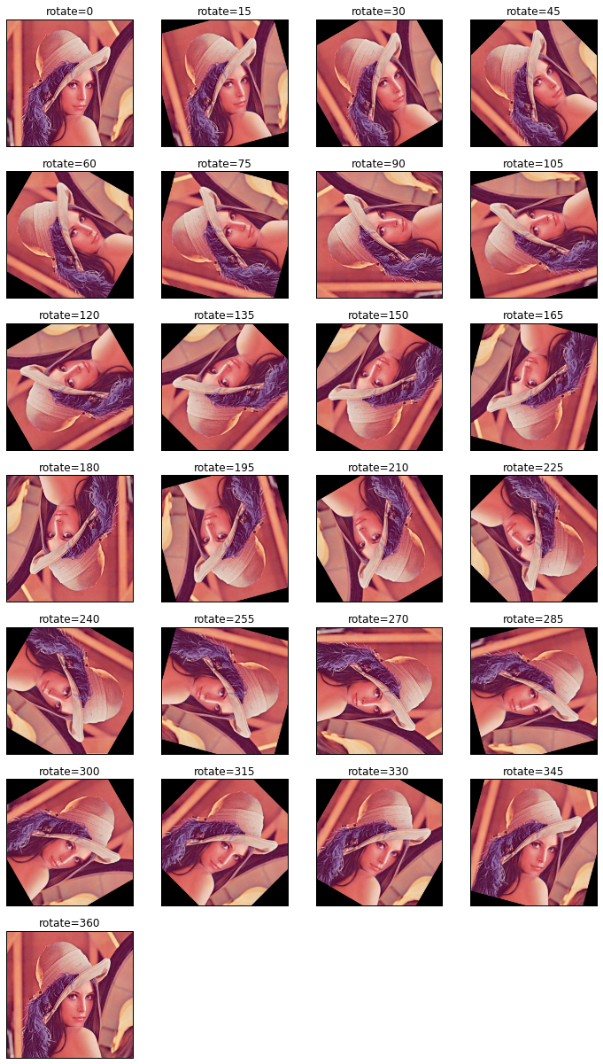
画像が長方形の場合
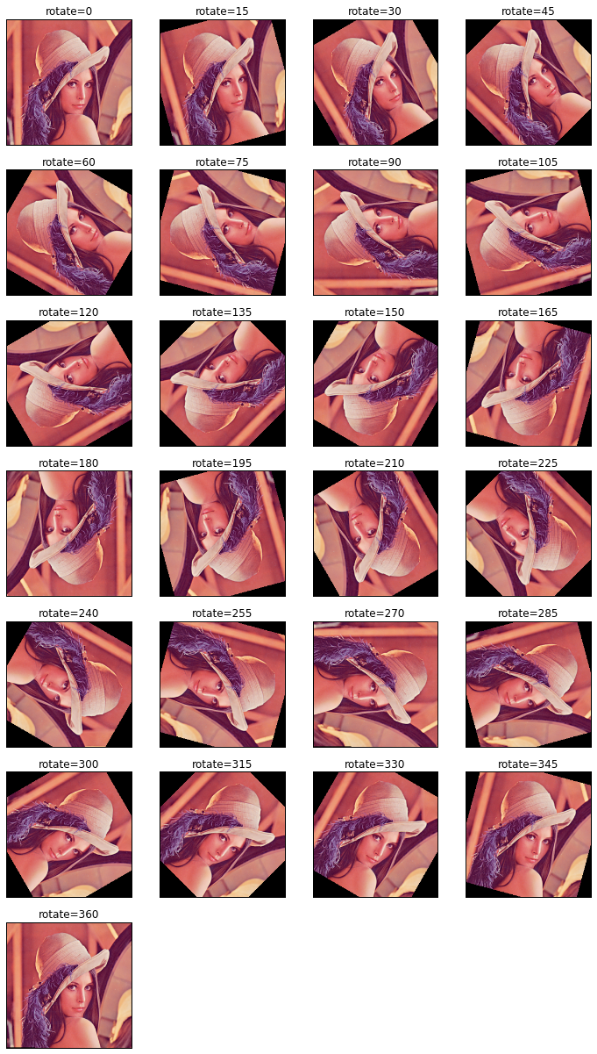
scipy
rotateはscipyでやるのが簡単
import cv2
import matplotlib.pyplot as plt
import numpy as np
from scipy import ndimage

I = cv2.imread('./data/SIDBA/Lenna.bmp')

rIntr = 15
rs = 0
re = 360

Ir = []

for r in range(rs, re+1, rIntr):
    Irot = ndimage.rotate(I, r, reshape=False)
    Ir.append(Irot)

cols = 4
rows = int(np.ceil(len(Ir) / float(cols)))

fig, axes = plt.subplots(nrows=rows, ncols=cols, figsize=(3*cols,3*rows))

for idx, I in enumerate(Ir):
    r = idx // cols
    c = idx % cols

    title = 'rotate=%d' % (rIntr*idx)

    axes[r,c].imshow(cv2.cvtColor(I, cv2.COLOR_BGR2RGB))
    axes[r,c].set_title(title)
    axes[r,c].set(adjustable='box-forced',aspect='equal')
    axes[r,c].get_xaxis().set_visible(False)
    axes[r,c].get_yaxis().set_visible(False)

for i in range(idx+1, rows*cols):
    r = i // cols
    c = i % cols
    fig.delaxes(axes[r,c])

fig.show()
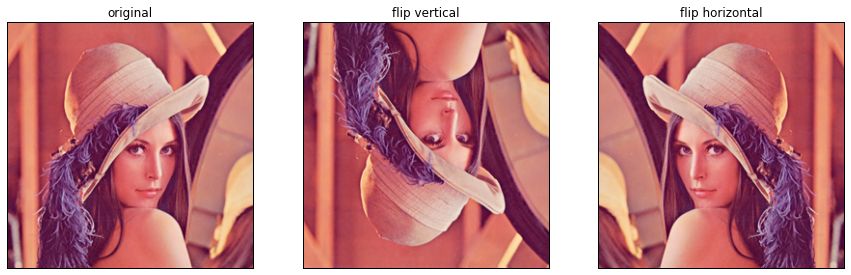
flip
cv2.flip(src, flipCode[, dst])
flipCodeがどっちがverticalかhorizontalかわからなくなる
flipCode = 0 ... vertical
flipCode = 1 ... horizontal
後述のnumpyのfliplr, flipudを使ってもいいかも。
lrはleft、right、udはup、downの意味。
import cv2
import matplotlib.pyplot as plt
import numpy as np
from scipy import ndimage

I = cv2.imread('./data/SIDBA/Lenna.bmp')
Iv = cv2.flip(I, 0)
Ih = cv2.flip(I, 1)


fig, axes = plt.subplots(ncols=3, figsize=(15,10))

axes[0].imshow(cv2.cvtColor(I, cv2.COLOR_BGR2RGB))
axes[0].set_title('original')
axes[0].set(adjustable='box-forced',aspect='equal')
axes[0].get_xaxis().set_visible(False)
axes[0].get_yaxis().set_visible(False)

axes[1].imshow(cv2.cvtColor(Iv, cv2.COLOR_BGR2RGB))
axes[1].set_title('flip vertical')
axes[1].set(adjustable='box-forced',aspect='equal')
axes[1].get_xaxis().set_visible(False)
axes[1].get_yaxis().set_visible(False)

axes[2].imshow(cv2.cvtColor(Ih, cv2.COLOR_BGR2RGB))
axes[2].set_title('flip horizontal')
axes[2].set(adjustable='box-forced',aspect='equal')
axes[2].get_xaxis().set_visible(False)
axes[2].get_yaxis().set_visible(False)

fig.show()
numpy
numpy.fliplr(m)
水平方向 flip
numpy.flipud(m)
垂直方向 flip
import cv2
import matplotlib.pyplot as plt
import numpy as np
from scipy import ndimage

I = cv2.imread('./data/SIDBA/Lenna.bmp')
Iv = np.flipud(I)
Ih = np.fliplr(I)


fig, axes = plt.subplots(ncols=3, figsize=(15,10))

axes[0].imshow(cv2.cvtColor(I, cv2.COLOR_BGR2RGB))
axes[0].set_title('original')
axes[0].set(adjustable='box-forced',aspect='equal')
axes[0].get_xaxis().set_visible(False)
axes[0].get_yaxis().set_visible(False)

axes[1].imshow(cv2.cvtColor(Iv, cv2.COLOR_BGR2RGB))
axes[1].set_title('flip vertical')
axes[1].set(adjustable='box-forced',aspect='equal')
axes[1].get_xaxis().set_visible(False)
axes[1].get_yaxis().set_visible(False)

axes[2].imshow(cv2.cvtColor(Ih, cv2.COLOR_BGR2RGB))
axes[2].set_title('flip horizontal')
axes[2].set(adjustable='box-forced',aspect='equal')
axes[2].get_xaxis().set_visible(False)
axes[2].get_yaxis().set_visible(False)

fig.show()
