はじめに
SIGGRAPH 2020に投稿されたRigNetがGithubに公開されていたので、さっそく自宅のWindowsPCで動かしてみました!
この記事では、環境構築からquick_startをWindows上で実行するところまでの手順を記載します。
最後にオマケとしてPIFuHDで生成された.objファイルで試した結果も記載します。(私の手順が悪かったのかあまり良い感じではないですが、一応載せておきます...)
RigNetのプロジェクトページはこちら
PIFuHDのプロジェクトページはこちら
以前書いた「PIFuHDをWindowsでとりあえず動かしてみた」
実行環境
- Windows10 64bit Home
- Anaconda3
- RTX2080Ti
- CUDA 10.2
環境構築
基本的には、RigNetのGithubで用意していただいている手順をなぞります。
本家はUbuntuでの環境構築方法なので、少し弄って自分のPCで動くようにしております。
コードのクローン
(base)$git clone https://github.com/zhan-xu/RigNet.git
(base)$cd RigNet
仮想環境の作成
(base)$conda create -n rignet python=3.6
(base)$conda activate rignet
ライブラリのインストール
自分のPCのCUDAのバージョンが本家とは異なるため、pytorchのバージョンなどを変更してインストールしています。
(rignet)$pip install numpy scipy matplotlib tensorboard opencv-python open3d==0.9.0
(rignet)$pip install trimesh[easy]
(rignet)$pip install torch===1.5.1 torchvision===0.6.1 -f https://download.pytorch.org/whl/torch_stable.html
(rignet)$pip install --no-cache-dir torch-scatter==latest+cu102 -f https://pytorch-geometric.com/whl/torch-1.5.0.html
(rignet)$pip install --no-cache-dir torch-sparse==latest+cu102 -f https://pytorch-geometric.com/whl/torch-1.5.0.html
(rignet)$pip install --no-cache-dir torch-cluster==latest+cu102 -f https://pytorch-geometric.com/whl/torch-1.5.0.html
(rignet)$pip install --no-cache-dir torch-spline-conv==latest+cu102 -f https://pytorch-geometric.com/whl/torch-1.5.0.html
(rignet)$pip install torch-geometric
binvoxのダウンロード
こちらからbinvox.exeをダウンロードし、RigNetディレクトリ配下に格納する。
(Windows 64 bit executable をクリックすればよい。)
学習済みモデルのダウンロード
READMEに記載されているリンクからtrained_models.zipをダウンロードし、RigNet配下で解凍する。
ソースコードの修正
binvoxを使うときにエラーが発生するので、quick_start.pyを以下のように修正しました。
[quick_start.py]
def create_single_data(mesh_filaname):
    """
    create input data for the network. The data is wrapped by Data structure in pytorch-geometric library
    :param mesh_filaname: name of the input mesh
    :return: wrapped data, voxelized mesh, and geodesic distance matrix of all vertices
    """
    mesh = o3d.io.read_triangle_mesh(mesh_filaname)
    mesh_v = np.asarray(mesh.vertices)
    mesh_vn = np.asarray(mesh.vertex_normals)
    mesh_f = np.asarray(mesh.triangles)

    # vertices
    v = np.concatenate((mesh_v, mesh_vn), axis=1)
    v = torch.from_numpy(v).float()

    # topology edges
    print("     gathering topological edges.")
    tpl_e = get_tpl_edges(mesh_v, mesh_f).T
    tpl_e = torch.from_numpy(tpl_e).long()
    tpl_e, _ = add_self_loops(tpl_e, num_nodes=v.size(0))

    # surface geodesic distance matrix
    print("     calculating surface geodesic matrix.")
    surface_geodesic = calc_surface_geodesic(mesh)

    # geodesic edges
    print("     gathering geodesic edges.")
    geo_e = get_geo_edges(surface_geodesic, mesh_v).T
    geo_e = torch.from_numpy(geo_e).long()
    geo_e, _ = add_self_loops(geo_e, num_nodes=v.size(0))

    # batch
    batch = np.zeros(len(v))
    batch = torch.from_numpy(batch).long()

    # voxel

    # ここを修正
    # os.system("./binvox -d 88 -pb " + mesh_filaname)
    os.system("binvox.exe -d 88 -c " + mesh_filaname)
    with open(mesh_filaname.replace('.obj', '.binvox'), 'rb') as fvox:
        vox = binvox_rw.read_as_3d_array(fvox)

    data = Data(x=v[:, 3:6], pos=v[:, 0:3], tpl_edge_index=tpl_e, geo_edge_index=geo_e, batch=batch)
    return data, vox, surface_geodesic
実行
quick_start.pyを実行する
(rignet)$python quick_start.py
上記コマンドを実行すると、画面上に以下が表示されるかと思います!
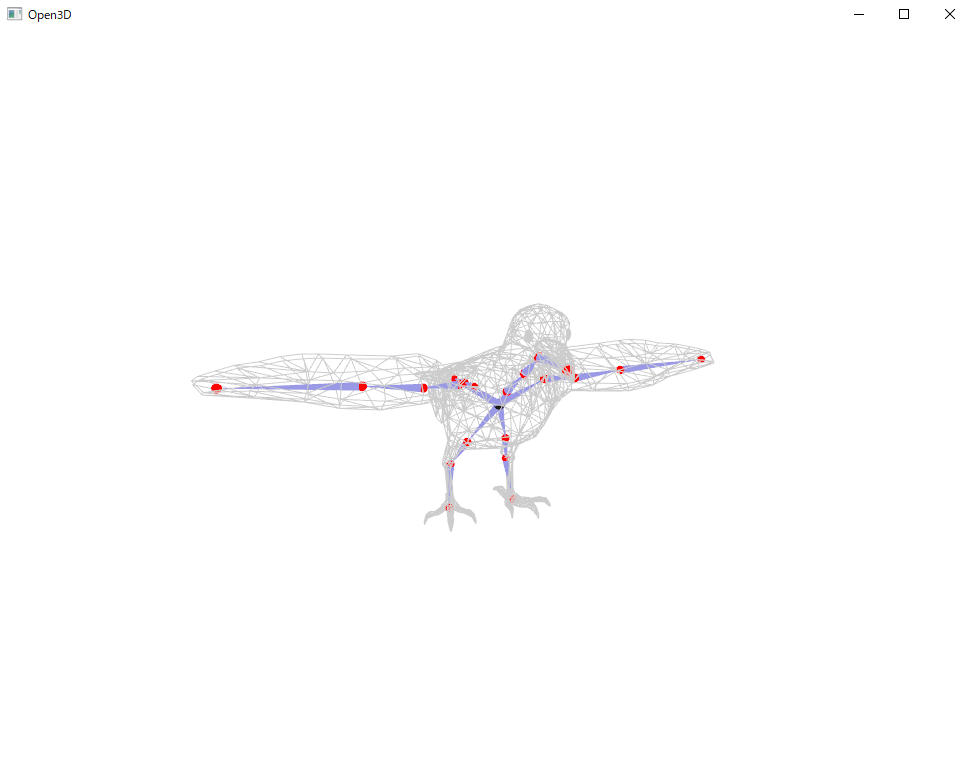
加えて、RigNet/quick_start配下に新しく、17872_ori_rig.txtと17872_remesh_1.binvoxが出力されているかと思います。
ちなみに
本家様が色々サンプルを用意して下さっているので、試すのであればquick_start.pyの以下部分を弄れば他サンプルも確認できます。
    # Here we provide 16 examples. For best results, we will need to override the learned bandwidth and its associated threshold
    # To process other input characters, please first try the learned bandwidth (0.429 in the provided model), and the default threshold 1e-5.
    # We also use these two default parameters for processing all test models in batch.

    model_id, bandwidth, threshold = 17872, 0.045, 0.75e-5
    #model_id, bandwidth, threshold = 8210, 0.05, 1e-5
    #model_id, bandwidth, threshold = 8330, 0.05, 0.8e-5
    #model_id, bandwidth, threshold = 9477, 0.043, 2.5e-5
    #model_id, bandwidth, threshold = 17364, 0.058, 0.3e-5
    #model_id, bandwidth, threshold = 15930, 0.055, 0.4e-5
    #model_id, bandwidth, threshold = 8333, 0.04, 2e-5
    #model_id, bandwidth, threshold = 8338, 0.052, 0.9e-5
    #model_id, bandwidth, threshold = 3318, 0.03, 0.92e-5
    #model_id, bandwidth, threshold = 15446, 0.032, 0.58e-5
    #model_id, bandwidth, threshold = 1347, 0.062, 3e-5
    #model_id, bandwidth, threshold = 11814, 0.06, 0.6e-5
    #model_id, bandwidth, threshold = 2982, 0.045, 0.3e-5
    #model_id, bandwidth, threshold = 2586, 0.05, 0.6e-5
    #model_id, bandwidth, threshold = 8184, 0.05, 0.4e-5
    #model_id, bandwidth, threshold = 9000, 0.035, 0.16e-5
おわりに
今回は、SIGGRAPH2020に投稿されたRigNetのサンプルをWindows上で動かしてみました。
PIFuHD同様に丁寧にREADMEが書かれているので、簡単に環境構築できて試せるかと思います。
性能自体はサンプルを動かしてみるとよい感じにリグが入っていた気がします!
PIFuHDなどの簡単に3Dオブジェクトが作れるものと組み合わせれば、個人的には遊ぶ幅ができてとてもうれしいです!
おまけ
以前に遊んでみたPIFuHDで作成された.objファイルでもできないかなぁと少し試してみました。
対象obj
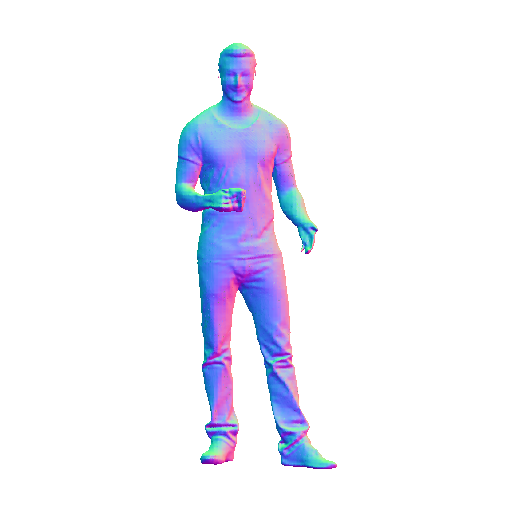
PIFuHDのサンプルで作られる以下のファイルを今回は使いました。
(サンプル実行後の私の環境だと、pifuhd/results/pifuhd_final/recon/result_test_512.obj)
meshの削減
そのまま使おうとするとエラーが出てしまったので、MeshLabを使ってメッシュ量を減らしました。
1.ファイルのインポート
[File] -> [Import Mesh] で、result_test_512.objを読み込みます。
2.メッシュの削減
[Filters] > [Remeshing, Simplification and Reconstruction] -> [Simplification: Quadric Edge Collapse Decimation]
を実行し、今回は Target number of faces に 2000 を設定し、Applyボタンを押しました。
※この 2000 という値は私が適当に設定したものです。(サンプルのファイルサイズが大体これぐらいでした。)
3.エクスポート
[File] -> [Export Mesh As...] でファイルをエクスポートします。
今回は 7777_remesh.obj というファイル名で、RigNet/quick_start配下にエクスポートしました。
コードの修正
quick_start.pyを以下2か所を修正する。
[quick_start.py]
...
    # Here we provide 16 examples. For best results, we will need to override the learned bandwidth and its associated threshold
    # To process other input characters, please first try the learned bandwidth (0.429 in the provided model), and the default threshold 1e-5.
    # We also use these two default parameters for processing all test models in batch.

    # ここを修正
    model_id, bandwidth, threshold = 7777, 0.066, 2.5e-5
    #model_id, bandwidth, threshold = 17872, 0.045, 0.75e-5
    #model_id, bandwidth, threshold = 8210, 0.05, 1e-5
    #model_id, bandwidth, threshold = 8330, 0.05, 0.8e-5
    #model_id, bandwidth, threshold = 9477, 0.043, 2.5e-5
    #model_id, bandwidth, threshold = 17364, 0.058, 0.3e-5
    #model_id, bandwidth, threshold = 15930, 0.055, 0.4e-5
    #model_id, bandwidth, threshold = 8333, 0.04, 2e-5
    #model_id, bandwidth, threshold = 8338, 0.052, 0.9e-5
    #model_id, bandwidth, threshold = 3318, 0.03, 0.92e-5
    #model_id, bandwidth, threshold = 15446, 0.032, 0.58e-5
    #model_id, bandwidth, threshold = 1347, 0.062, 3e-5
    #model_id, bandwidth, threshold = 11814, 0.06, 0.6e-5
    #model_id, bandwidth, threshold = 2982, 0.045, 0.3e-5
    #model_id, bandwidth, threshold = 2586, 0.05, 0.6e-5
    #model_id, bandwidth, threshold = 8184, 0.05, 0.4e-5
    #model_id, bandwidth, threshold = 9000, 0.035, 0.16e-5

    # create data used for inferece
    print("creating data for model ID {:d}".format(model_id))
    mesh_filename = os.path.join(input_folder, '{:d}_remesh.obj'.format(model_id))
    data, vox, surface_geodesic = create_single_data(mesh_filename)
    data.to(device)

    print("predicting joints")
    data = predict_joints(data, vox, jointNet, threshold, bandwidth=bandwidth, mesh_filename=mesh_filename)
    data.to(device)
    print("predicting connectivity")
    pred_skeleton = predict_skeleton(data, vox, rootNet, boneNet, mesh_filename=mesh_filename)
    print("predicting skinning")
    pred_rig = predict_skinning(data, pred_skeleton, skinNet, surface_geodesic, mesh_filename)

    print("Saving result")

    # ここを修正
    if False:
        # here we use original mesh tesselation (without remeshing)
        mesh_filename_ori = os.path.join(input_folder, '{:d}_ori.obj'.format(model_id))
        pred_rig = tranfer_to_ori_mesh(mesh_filename_ori, mesh_filename, pred_rig)
        pred_rig.save(mesh_filename_ori.replace('.obj', '_rig.txt'))
    else:
        # here we use remeshed mesh
        pred_rig.save(mesh_filename.replace('.obj', '_rig.txt'))
    print("Done!")
実行
(rignet)$python quick_start.py
以下のような結果が表示されました。
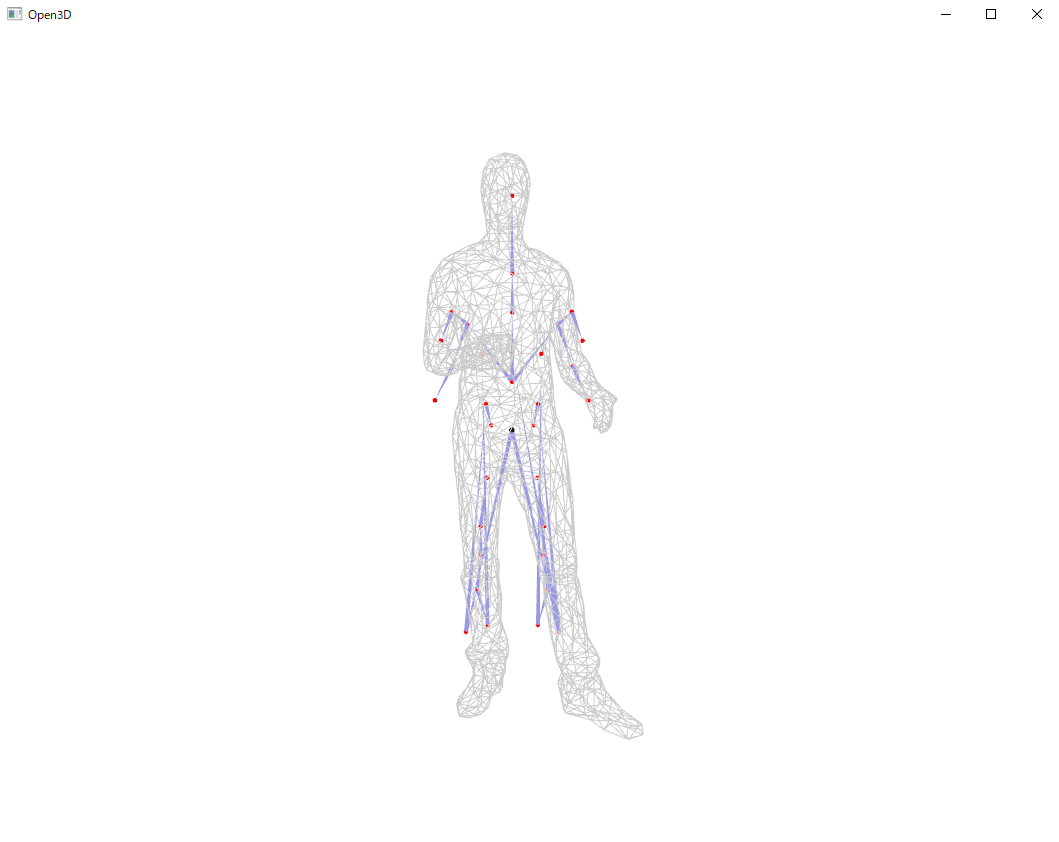
加えて、RigNet/quick_start配下に新しく、7777_remesh_rig.txtと7777_remesh_1.binvoxが出力されているかと思います。
感想
コード中にも記載があるように、閾値などのパラメータを変えることが必要だと思います。
今回は良いパラメータを見つけられなかったのと、私の知識不足が原因でどこかの手順で悪いことしてしまったことから、上画像のような結果になったと思われます...。
RigNetのサンプルにあるようなポーズの画像からPIFuHDで3Dモデルを作ってやればうまくいくのかしら...