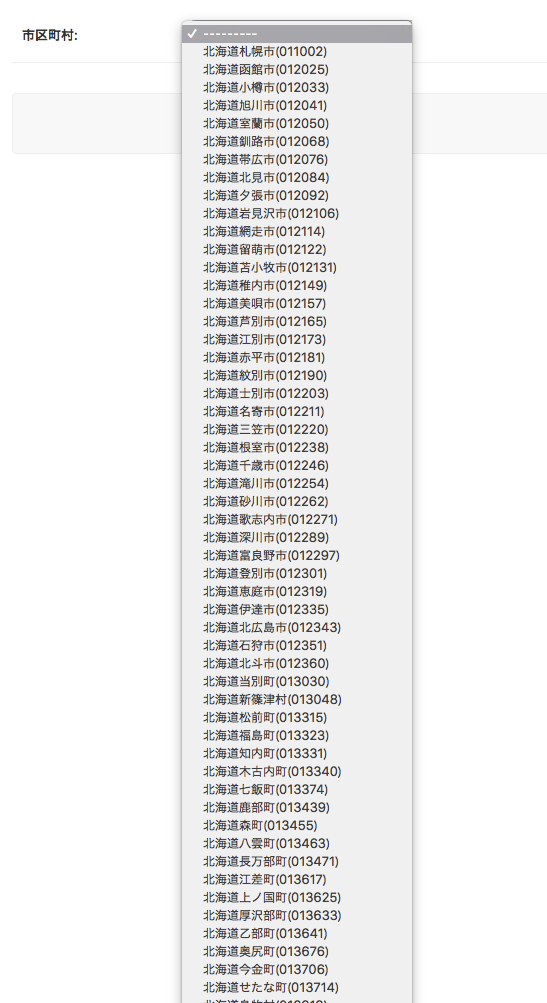
Django admin は、外部キー参照のフォームをデフォルトですべての選択肢を含む <select></select> 要素を表示します。選択肢が数件程度であれば問題ありませんが、20件を超えたあたりで UI として使いづらくなり、5000件を超えてくると動作が遅くなりパフォーマンス的に使い物にならなくなります![]()
この記事では、そんな外部キー参照のフォームに Ajax を使ったオートコンプリートを導入する方法を紹介します。
Python は 2.7, 3.4 をサポート (3.6 でも使えました)
Django は 1.8+ をサポートしています。 (2.0 でも使えました)
django-autocomplete-light をインストール
pip でインストールできます。
pip install django-autocomplete-light
settings.py への追記は INSTALLED_APPS のみです。
'dal', 'dal_select2', を 'django.contrib.admin', より前に追加してください。
INSTALLED_APPS = [
    'dal',
    'dal_select2',
    'django.contrib.admin',
    ...
]
モデルを用意する
モデルはすでにあると思いますが、外部キーで参照される側(選択肢)のモデルに __str__(self) が実装されている必要があります。
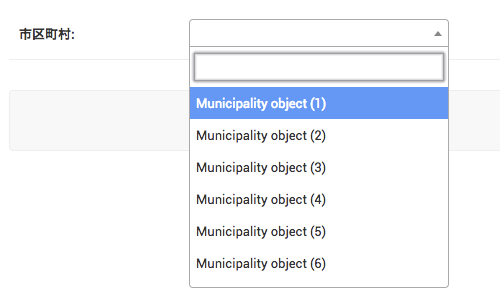
これはデフォルトの <select></select> でも同様ですが、文字列化メソッドが実装されていないとこのように表示されてしまいます。
今回の紹介では、例として以下のモデル定義を使います。
class Municipality(models.Model):

    code = models.CharField(max_length=6, unique=True)
    name = models.CharField(max_length=20)
    kana = models.CharField(max_length=60)

    def __str__(self):
        return "{}({})".format(self.name, self.code)


class UserProfile(models.Model):
    municipality = models.ForeignKey(Municipality, related_name='profiles', on_delete=models.DO_NOTHING, verbose_name='市区町村')
オートコンプリートのための API を用意する
Ajax で呼び出す API を用意します。
追加先のモジュールはどこでも大丈夫ですが、 urls.py から参照することに注意してください。
from dal import autocomplete
from .models import Municipality

# Create your views here.


class MunicipalityAutoComplete(autocomplete.Select2QuerySetView):
    def get_queryset(self):
        # ログインしていない接続元を遮断することを忘れないように
        if not self.request.user.is_authenticated:
            return Municipality.objects.none()

        qs = Municipality.objects.all()
        if self.q:
            qs = qs.filter(name__istartswith=self.q)

        return qs
self.q はオートコンプリートの入力値です。これをクエリフィルタとして使うことで、入力値に一致する選択肢を提供する仕組みです。絞込する際のフィールドや条件を変えたい場合は qs.filter(name__istartswith=self.q) の部分を変更してください。
続いてこの API にアクセスできるよう、 urls.py にルーティングを記述します。
from django.urls import path
from yourappmodule import views

urlpatterns = [
    path(
        r'municipality-autocomplete/',
        views.MunicipalityAutoComplete.as_view(),
        name='municipality-autocomplete'
    ),
]
カスタムフォームを作る
admin で使うためのフォームを作ります。 forms.py を追加して、以下のように書きます。
from dal import autocomplete
from django import forms
from .models import Municipality, UserProfile


class UserProfileForm(forms.ModelForm):
    class Meta:
        model = UserProfile
        fields = ('__all__')
        widgets = {
            'municipality': autocomplete.ModelSelect2(url='municipality-autocomplete')
        }
widgets はフィールドごとに使うフォーム部品を設定する dict です。キーにオートコンプリートにしたいフィールド(今回は municipality)を、値に autocomplete.ModelSelect2 を指定します。
autocomplete.ModelSelect2 の初期化引数 url には urls.py で指定した name を指定します。
admin で使う
from django.contrib import admin
from .models import UserProfile
from .forms import UserProfileForm

# Register your models here.


@admin.register(UserProfile)
class ServiceAdmin(admin.ModelAdmin):
    form = UserProfileForm
ここでは form を設定するだけです。
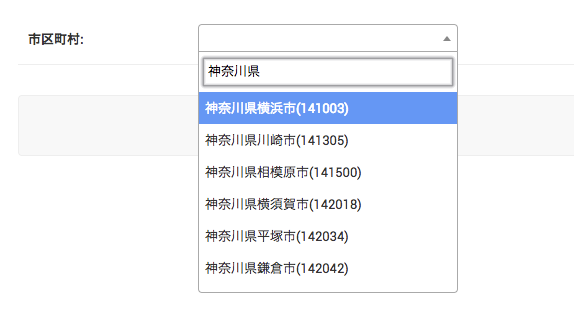
これでオートコンプリートになっているはずです。 admin にアクセスして試してみてください!


