はじめに
Oracle Cloud 上の Nginx (Webサーバー) と 全段の Load Balancer に対して Let's Encrypt を使って SSL 対応する手順を紹介します。たまに聞かれる手順になっていて、毎回曖昧な記憶で試行錯誤しているので、備忘録として残しておきます。
環境情報
- Oracle Linux 7 (CentOS7, RHEL でも問題なし)
- Nginx
- Oracle Cloud の Load Balancer
Nginx Install
Oracle Linux 7 に Nginx をインストールしていきます。簡単のために、firewalld を停止
sudo systemctl disable firewalld --now
Nginx Install
sudo yum install nginx -y
Nginx 起動
sudo systemctl enable nginx --now
Certbot Install
Let's Encrypt から SSL 証明書を発行するクライアントツール (Certbot) をインストール
sudo yum install certbot -y
Let's Encrypt から SSL証明書を発行
Certbot コマンドを使って、SSL証明書を発行
sudo certbot certonly \
  --manual \
  --domain web01.sugioci.tokyo \
  --email your.address@gmail.com \
  --agree-tos \
  --manual-public-ip-logging-ok \
  --preferred-challenges dns
キャンペーンメールなどは不要なので、No
Saving debug log to /var/log/letsencrypt/letsencrypt.log
Plugins selected: Authenticator manual, Installer None
Starting new HTTPS connection (1): acme-v02.api.letsencrypt.org

- - - - - - - - - - - - - - - - - - - - - - - - - - - - - - - - - - - - - - - -
Would you be willing to share your email address with the Electronic Frontier
Foundation, a founding partner of the Let's Encrypt project and the non-profit
organization that develops Certbot? We'd like to send you email about our work
encrypting the web, EFF news, campaigns, and ways to support digital freedom.
- - - - - - - - - - - - - - - - - - - - - - - - - - - - - - - - - - - - - - - -
(Y)es/(N)o: N
ここで一時停止します。表示された TXT レコードを、DV として証明するためにドメインに設定していきます。
次の2つの文字列をメモっておきます
_acme-challenge.web01.sugioci.tokyoASHQZlazqzY0OpRjA3tJsP9oXfM31_M2IUJjKiVMWLA
Obtaining a new certificate
Performing the following challenges:
dns-01 challenge for web01.sugioci.tokyo

- - - - - - - - - - - - - - - - - - - - - - - - - - - - - - - - - - - - - - -
Please deploy a DNS TXT record under the name
_acme-challenge.web01.sugioci.tokyo with the following value:

ASHQZlazqzY0OpRjA3tJsP9oXfM31_M2IUJjKiVMWLA

Before continuing, verify the record is deployed.
- - - - - - - - - - - - - - - - - - - - - - - - - - - - - - - - - - - - - - -
Press Enter to Continue
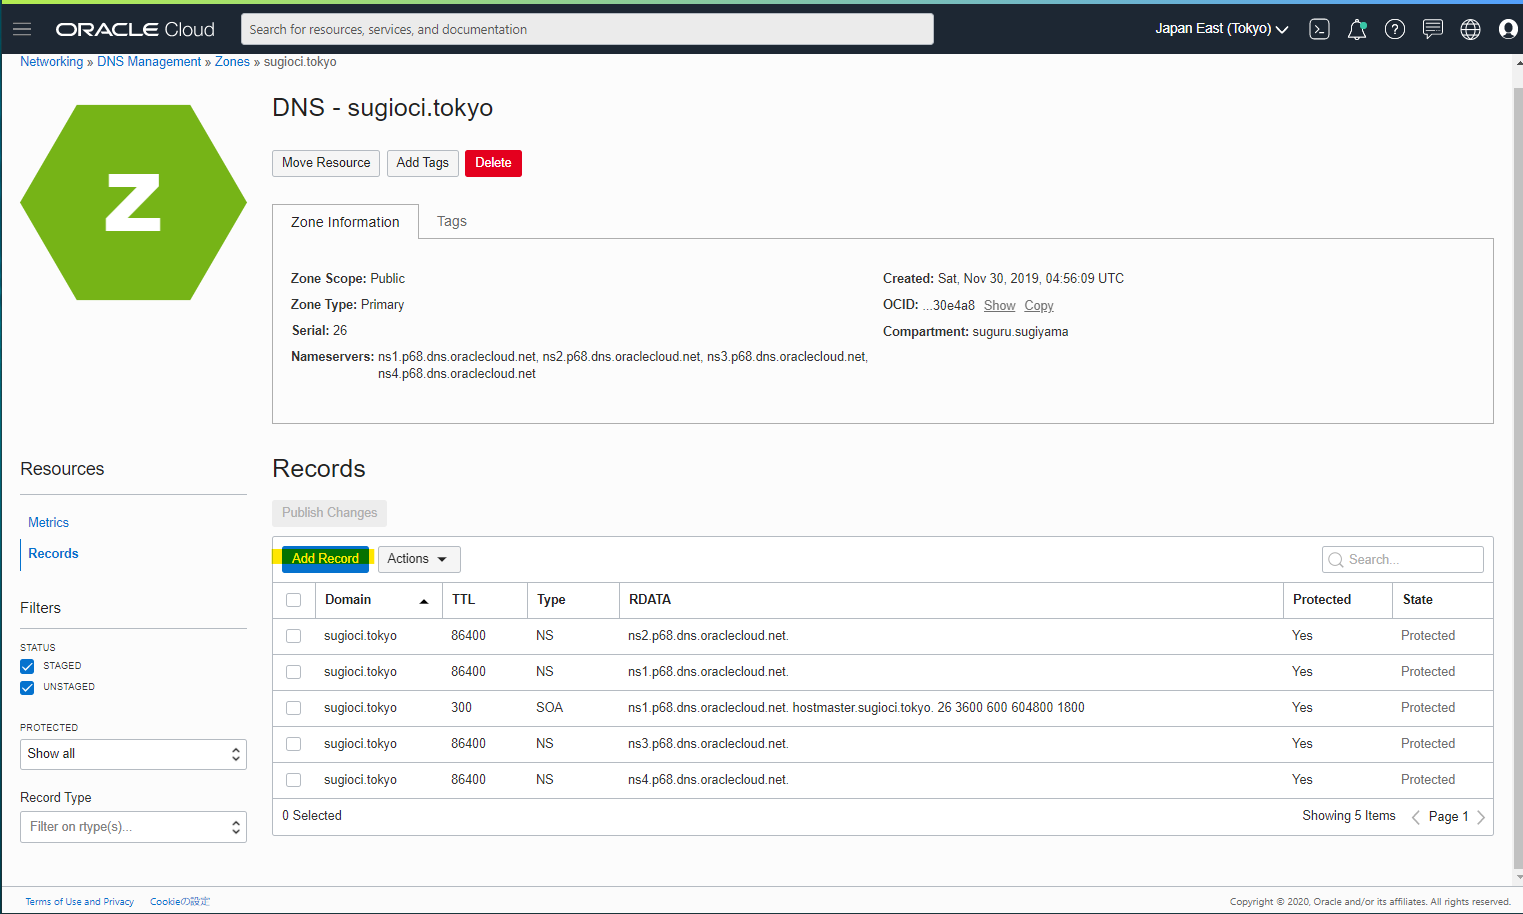
この記事の手順では、sugioci.tokyo のドメインを OCI DNS で管理しているため、OCI Console の画面で紹介します。
Add Record
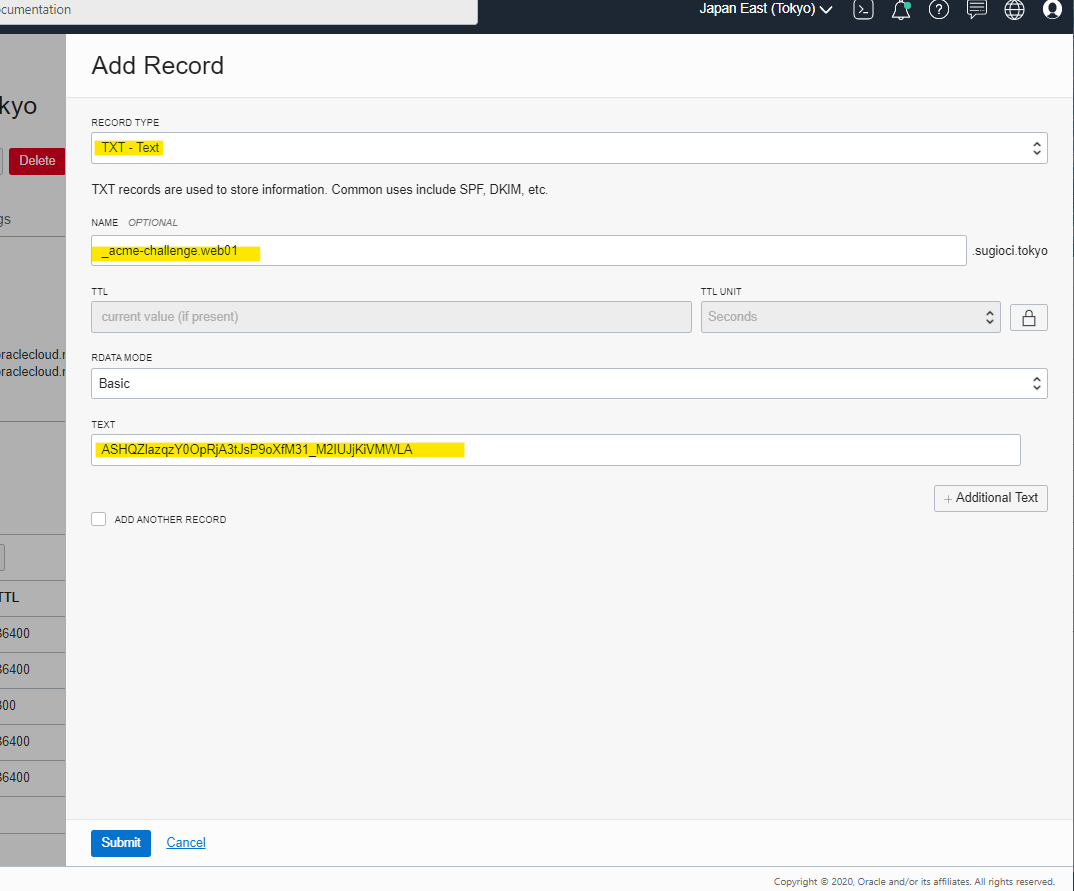
Certbot で表示された次の情報を入力していきます。指定されたレコードを入力することで、対象のドメインを管理していることを証明できます。
_acme-challenge.web01.sugioci.tokyoASHQZlazqzY0OpRjA3tJsP9oXfM31_M2IUJjKiVMWLA
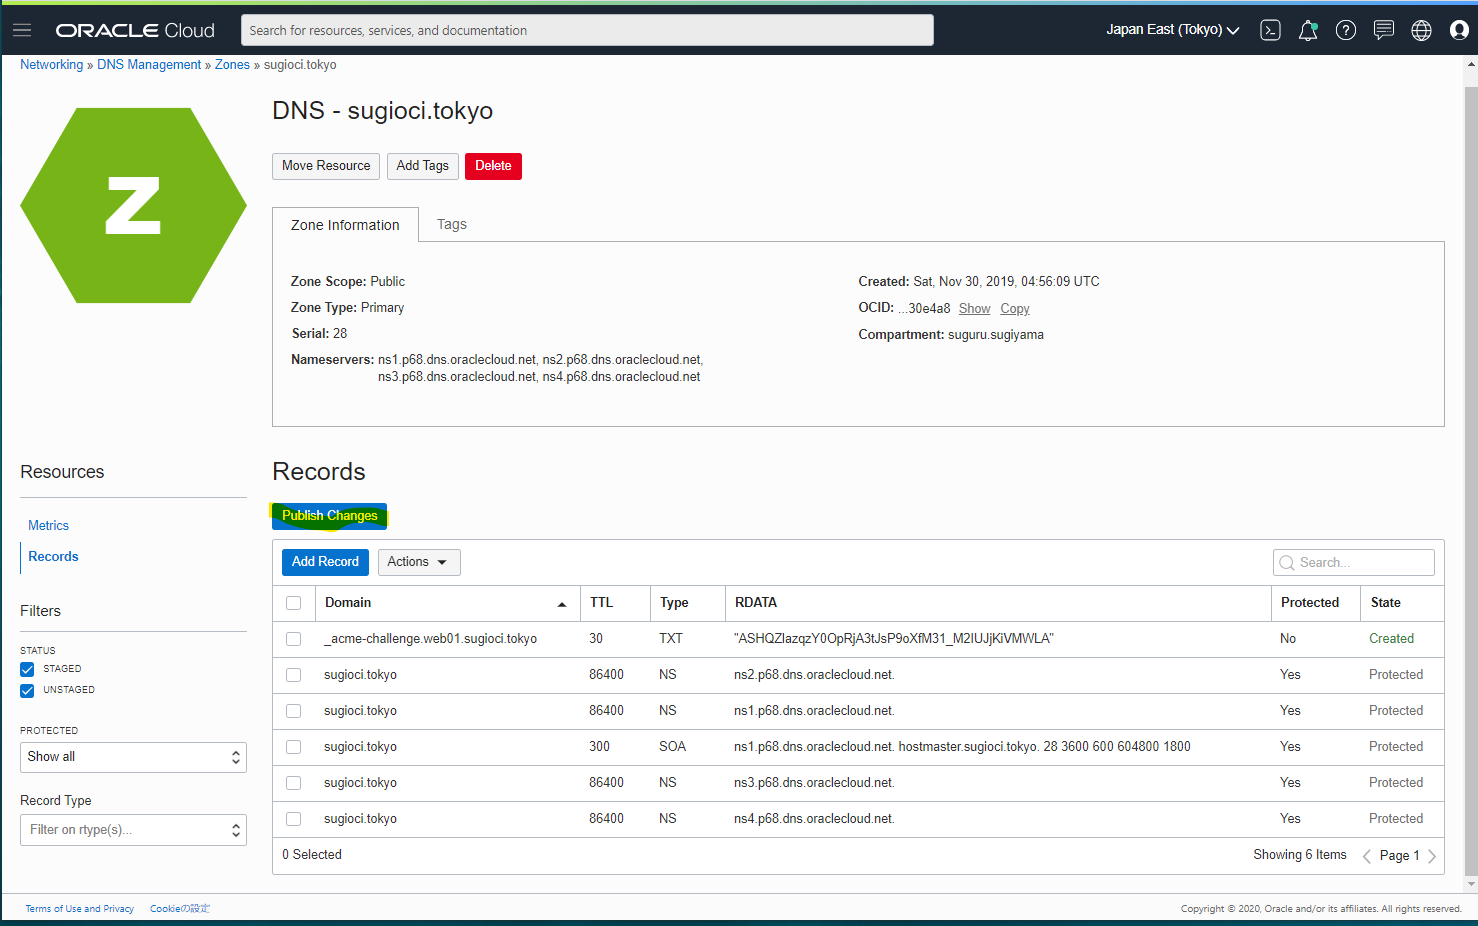
Publish
Publish
dig で問題なく TXT レコードが引けるか確認。
> dig +dnssec @8.8.4.4 _acme-challenge.web01.sugioci.tokyo TXT

; <<>> DiG 9.11.3-1ubuntu1.13-Ubuntu <<>> +dnssec @8.8.4.4 _acme-challenge.web01.sugioci.tokyo TXT
; (1 server found)
;; global options: +cmd
;; Got answer:
;; ->>HEADER<<- opcode: QUERY, status: NOERROR, id: 58053
;; flags: qr rd ra; QUERY: 1, ANSWER: 1, AUTHORITY: 0, ADDITIONAL: 1

;; OPT PSEUDOSECTION:
; EDNS: version: 0, flags: do; udp: 512
;; QUESTION SECTION:
;_acme-challenge.web01.sugioci.tokyo. IN        TXT

;; ANSWER SECTION:
_acme-challenge.web01.sugioci.tokyo. 29 IN TXT  "ASHQZlazqzY0OpRjA3tJsP9oXfM31_M2IUJjKiVMWLA"

;; Query time: 55 msec
;; SERVER: 8.8.4.4#53(8.8.4.4)
;; WHEN: Sat Nov 28 07:30:32 UTC 2020
;; MSG SIZE  rcvd: 120
問題なく TXT レコードを引けたあとに、Certbot のコンソールで一時停止しているところから、Enter を押す
- - - - - - - - - - - - - - - - - - - - - - - - - - - - - - - - - - - - - - -
Please deploy a DNS TXT record under the name
_acme-challenge.web.sugioci.tokyo with the following value:

n67uK8wG75cA_WnQZ4PMaGjpQ8voZF1Aqye6Er-4IoE

Before continuing, verify the record is deployed.
- - - - - - - - - - - - - - - - - - - - - - - - - - - - - - - - - - - - - - -
Press Enter to Continue
正常に証明されている結果です
Waiting for verification...
Cleaning up challenges

IMPORTANT NOTES:
 - Congratulations! Your certificate and chain have been saved at:
   /etc/letsencrypt/live/web01.sugioci.tokyo/fullchain.pem
   Your key file has been saved at:
   /etc/letsencrypt/live/web01.sugioci.tokyo/privkey.pem
   Your cert will expire on 2021-02-26. To obtain a new or tweaked
   version of this certificate in the future, simply run certbot
   again. To non-interactively renew *all* of your certificates, run
   "certbot renew"
 - If you like Certbot, please consider supporting our work by:

   Donating to ISRG / Let's Encrypt:   https://letsencrypt.org/donate
   Donating to EFF:                    https://eff.org/donate-le

[opc@web01 ~]$
サーバ証明書などが生成されています
[root@web01 ~]# ls -la /etc/letsencrypt/archive/web01.sugioci.tokyo/
total 16
drwxr-xr-x. 2 root root   83 Nov 28 07:30 .
drwx------. 3 root root   33 Nov 28 07:30 ..
-rw-r--r--. 1 root root 1923 Nov 28 07:30 cert1.pem      # SSL/TLS サーバ証明書
-rw-r--r--. 1 root root 1647 Nov 28 07:30 chain1.pem     # 中間証明書
-rw-r--r--. 1 root root 3570 Nov 28 07:30 fullchain1.pem # サーバ証明書と中間証明書が結合されたもの
-rw-------. 1 root root 1704 Nov 28 07:30 privkey1.pem   # 秘密鍵
Load Balancer に SSL/TSL 証明書をアップロード
OCI Load Balancer に証明書をアップロード
次の2つのファイルの中身をコピペで貼り付けます
-
cert1.pem
-
privkey1.pem
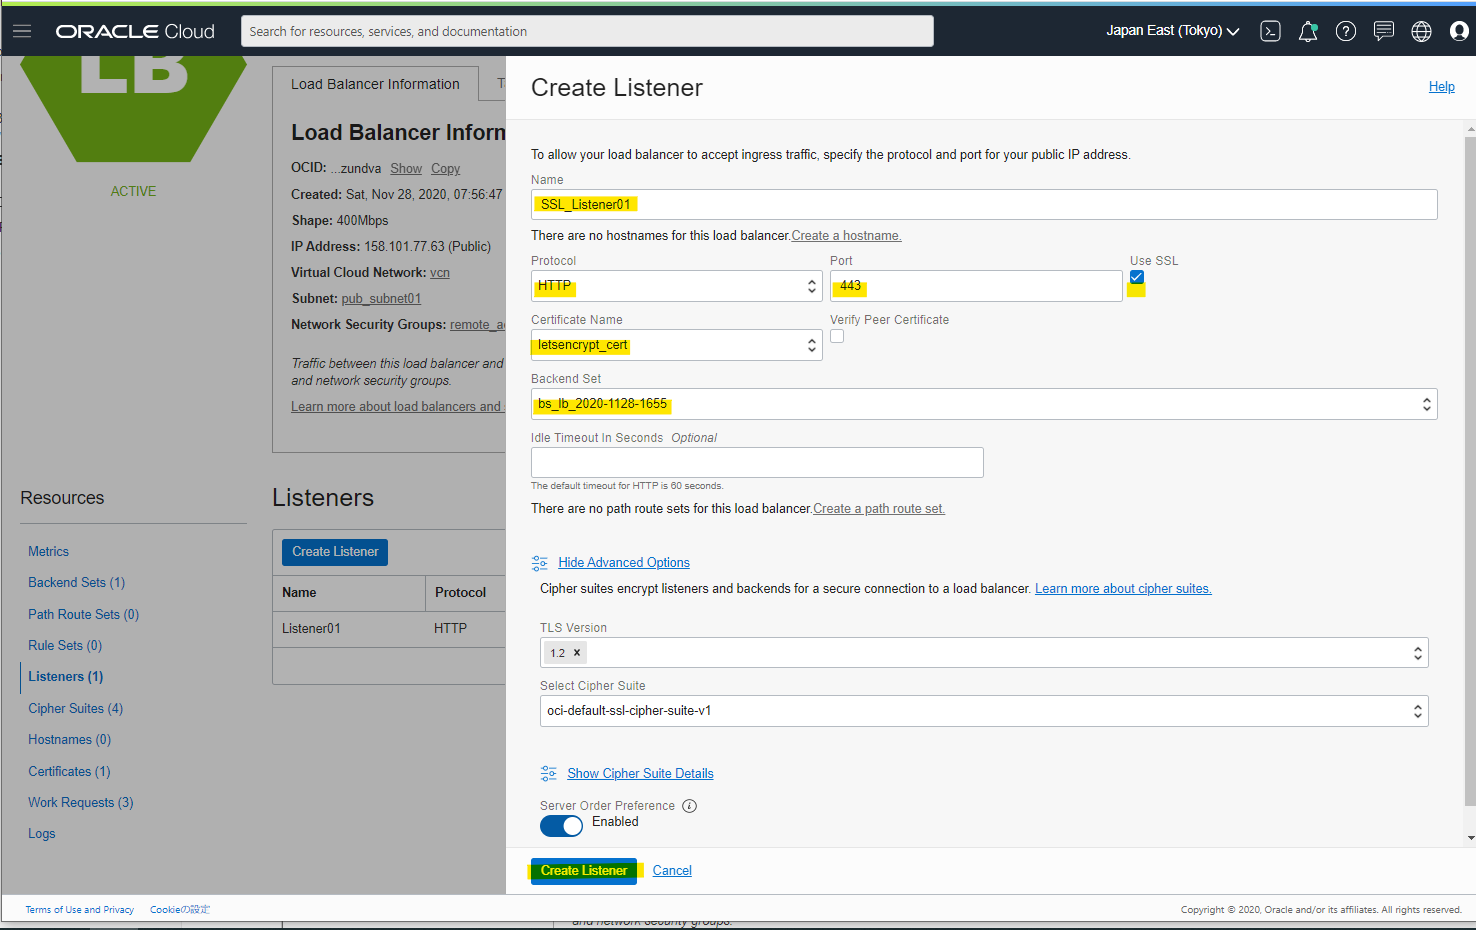
Load Balancer の Listener に HTTPS(443) を追加
create
create
1,2分後、反映される
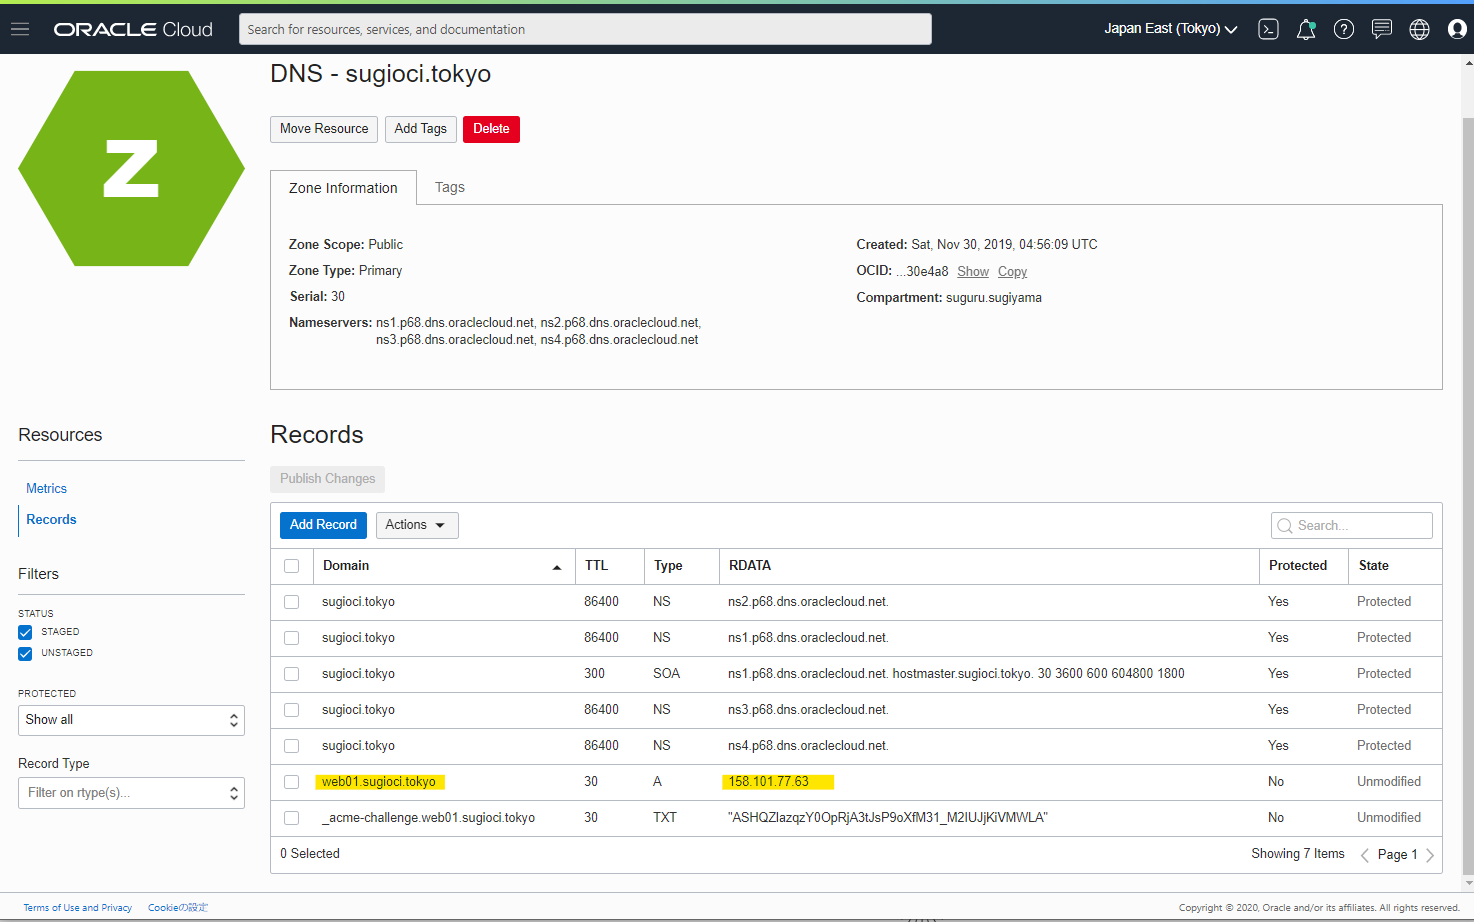
DNS にLBを紐づけ
DNS のレコードを追加して、Load Balancer に A レコードを紐づけます
確認
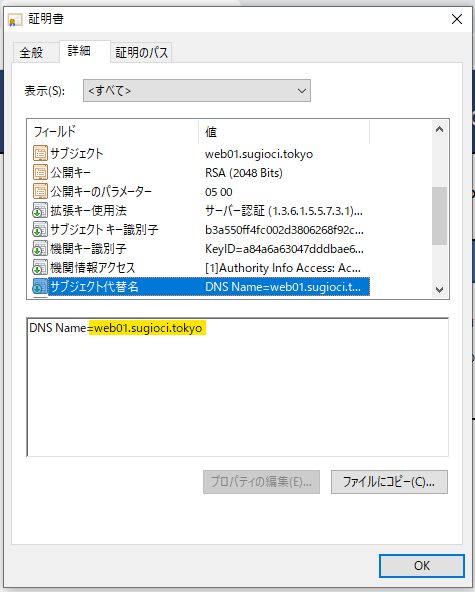
それではアクセス確認をしてみましょう。正常に HTTPS になっています
証明
DST Root CA X3 をルート認証局として、証明されている
参考URL
