Amazon Connect Streams とは
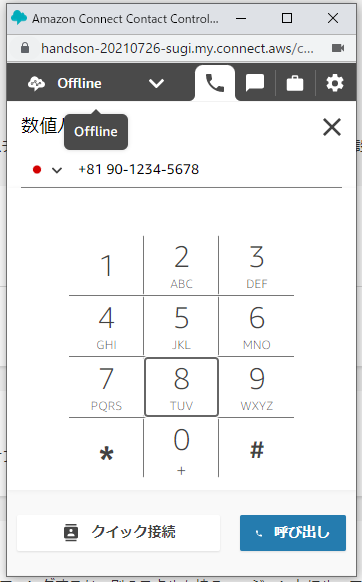
Amazon Connect では、お客様から電話を受け付けたり、電話を掛けることの出来るマネージドサービスで、操作画面として Contacl Control Panel(CCP) が利用できます。Amazon Connect に元から付属しているデフォルトの CCP で、電話を掛ける画面は次のような画面です。
デフォルトの CCP より、更に便利な機能を利用したいときに、自分たちで独自のカスタムCCPを構築できます。カスタムCCP は、Amazon Connect Streams という npm や GitHub で公開されているライブラリを活用して、自分たちの好きなようにカスタマイズできます。JavaScript を経由して Amazon Connect を利用するため、Web アプリケーションに比較的容易に組み込むことが出来ます。
構成図で表現するとこんな感じです。詳細な部分は省略して、わかりやすく表現している構成図です。

例えば、上記構成図の「独自アプリケーション」は、お客様の情報を管理する CRM だとすると、電話が掛かってきたときに自動的にお客様の情報を表示することも出来ます。例えば、Amazon Connect Streams では、電話を接続するときに独自のカスタムロジックを動かすことの出来るイベント contact.onConnecting() が用意されており、このイベントの中でお客様の情報を表示するロジックを自分たちで実装していく形ですね。Amazon Connect Streams で利用可能な API やイベントは次の URL をご確認ください。
それでは、Amazon Connect Streams を利用するための手順を確認していきましょう。
GitHub から Clone
Amazon Connect Streams は、npm からインストールもできますが、GitHub でも公開されています。今回は GitHub 上から利用していきましょう。まず、作業用ディレクトリを準備します
mkdir ~/temp/connectdir/
cd ~/temp/connectdir/
Amazon Connect Streams の GitHub ページを clone します。
git clone https://github.com/amazon-connect/amazon-connect-streams.git
clone してきたディレクトリに移動します
cd amazon-connect-streams/
clone してきた中に、release ディレクトリがあり、ここで Amazon Connect Stream のライブラリが格納されています。今回は容量が小さい connect-streams-min.js を利用していきます。どちらも機能の差はないので、容量の小さい方がダウンロードが速いメリットがあります。
> ls -lha release/
total 1.4M
drwxr-xr-x 2 ec2-user docker    62 Apr  3 14:17 .
drwxr-xr-x 9 ec2-user docker  4.0K Apr  3 14:17 ..
-rw-r--r-- 1 ec2-user docker 1004K Apr  3 14:17 connect-streams.js
-rw-r--r-- 1 ec2-user docker  416K Apr  3 14:17 connect-streams-min.js
HTML の作成
上記の connect-streams-min.js を利用する HTML ファイルを作成します。この HTML ファイルは、つぎの URL にサンプルとして公開されています。
URL : https://github.com/amazon-connect/amazon-connect-streams#initialization
<!DOCTYPE html>
<html>

<head>
    <meta charset="UTF-8">
    <script type="text/javascript" src="connect-streams-min.js"></script>
</head>
<!-- Add the call to init() as an onload so it will only run once the page is loaded -->

<body onload="init()">
    <div id="container-div" style="width: 400px; height: 800px;"></div>
    <script type="text/javascript">
        var containerDiv = document.getElementById("container-div");
        var instanceURL = "https://handson-20210726-sugi.my.connect.aws/connect/ccp-v2/";
        // initialize the streams api
        function init() {
            // initialize the ccp
            connect.core.initCCP(containerDiv, {
                ccpUrl: instanceURL,            // REQUIRED
                loginPopup: true,               // optional, defaults to `true`
                loginPopupAutoClose: true,      // optional, defaults to `false`
                loginOptions: {                 // optional, if provided opens login in new window
                    autoClose: true,              // optional, defaults to `false`
                    height: 600,                  // optional, defaults to 578
                    width: 400,                   // optional, defaults to 433
                    top: 0,                       // optional, defaults to 0
                    left: 0                       // optional, defaults to 0
                },
                region: "ap-northeast-1",         // REQUIRED for `CHAT`, optional otherwise
                softphone: {                    // optional, defaults below apply if not provided
                    allowFramedSoftphone: true,   // optional, defaults to false
                    disableRingtone: false,       // optional, defaults to false
                    ringtoneUrl: "./ringtone.mp3" // optional, defaults to CCP’s default ringtone if a falsy value is set
                },
                pageOptions: { //optional
                    enableAudioDeviceSettings: false, //optional, defaults to 'false'
                    enablePhoneTypeSettings: true //optional, defaults to 'true'
                },
                ccpAckTimeout: 5000, //optional, defaults to 3000 (ms)
                ccpSynTimeout: 3000, //optional, defaults to 1000 (ms)
                ccpLoadTimeout: 10000 //optional, defaults to 5000 (ms)
            });
        }
    </script>
</body>

</html>
サンプルから次の値を変更しています
-
region: ap-northeast-1 を指定 -
instanceURL: 自分がもっている Amazon Connect のインスタンスを指定
instanceURL を設定するために、Amazon Connect のページを開いて、Access URL を確認します。
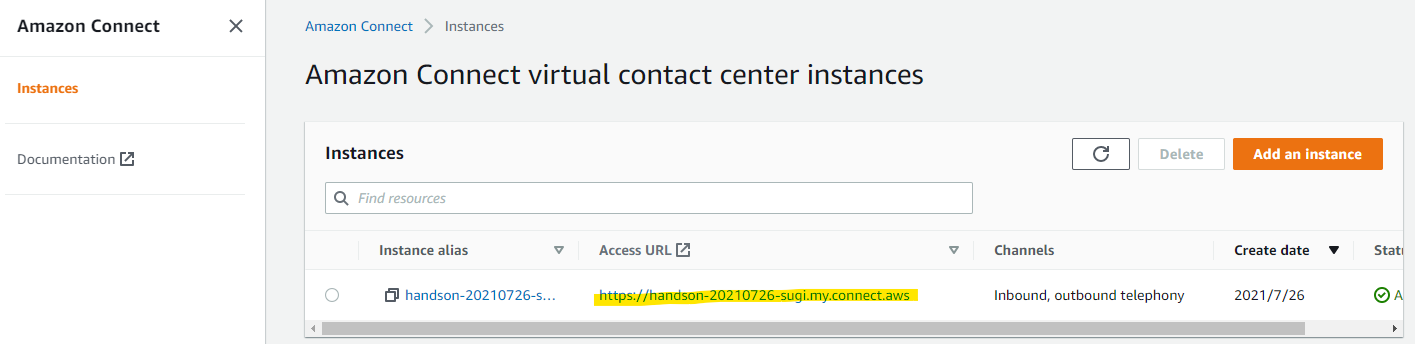
このURLの末尾に /connect/ccp-v2/ を追加して、instanceURL の完成です。
https://handson-20210726-sugi.my.connect.aws/connect/ccp-v2/
WebSite Hosting
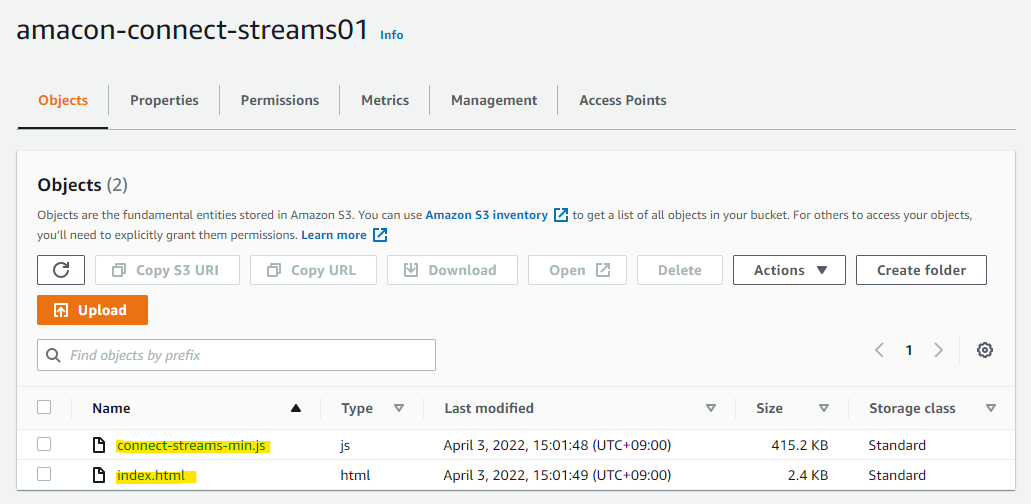
上記で作成した HTML と connect-streams-min.js を https で公開します。手順の詳細は省略しますが、S3 と CloudFront で公開しました。
S3 には、以下のように作成した HTML ファイルを、Amazon Connect Streams のライブラリファイルを格納しています。これを CloudFront で HTTPS で公開しています。
Amazon Connect でアクセス許可
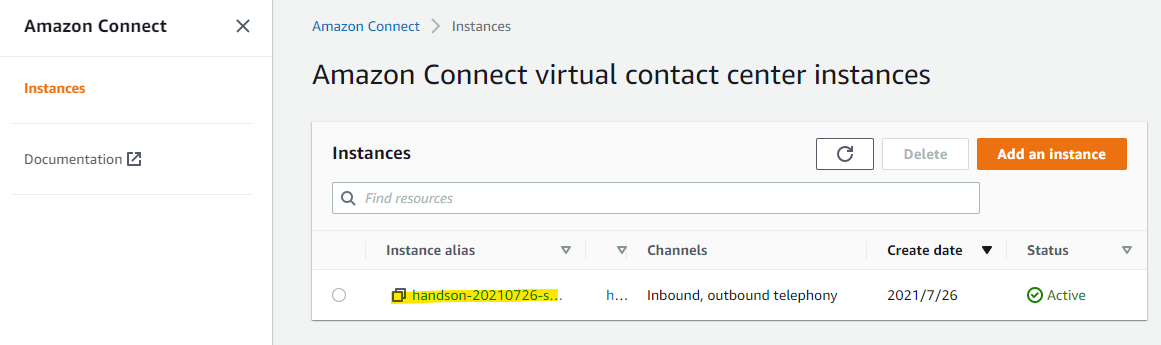
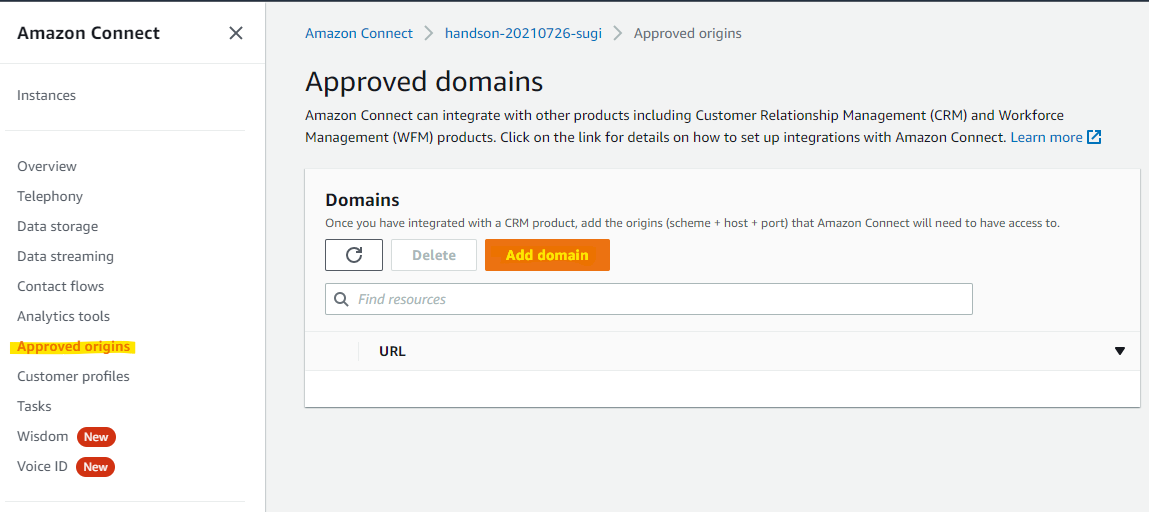
Amazon Connect 側で、CloudFront で公開している独自アプリケーションのドメインをアクセス許可に加えます。Amazon Connect のページを開いて、インスタンスを選択します。
Approved origins の機能から、Add domain を選択します。
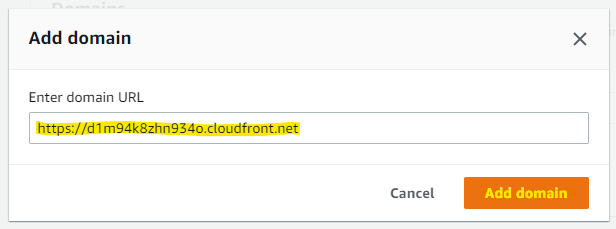
Add domain を押します
追加されました

動作確認
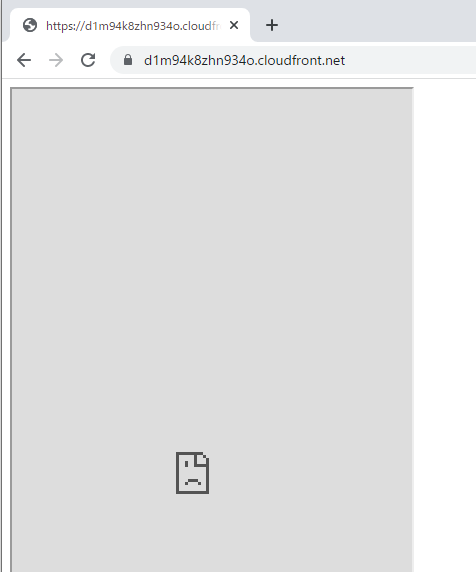
CloudFront で公開しているカスタムCCP (実際はデフォルトのまま) にアクセスしてみます。
Amazon Connect のインスタンスにログインしていないので、初めは何も表示されません。
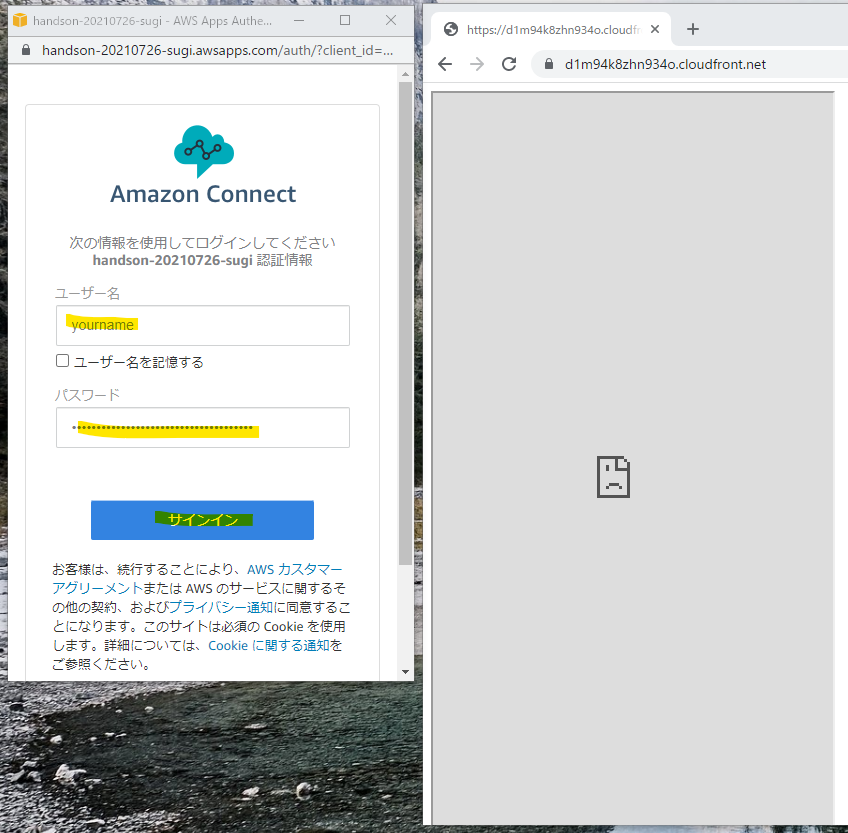
このページが開かれて数秒後、Amazon Connect インスタンスへのログイン画面が開かれます。ログイン情報をいれてログインを行います。(事前にログインしていても大丈夫です)
ポップアップされた方で、CCP が開かれました。カスタム CCP の方でも反映させるために更新を行います。

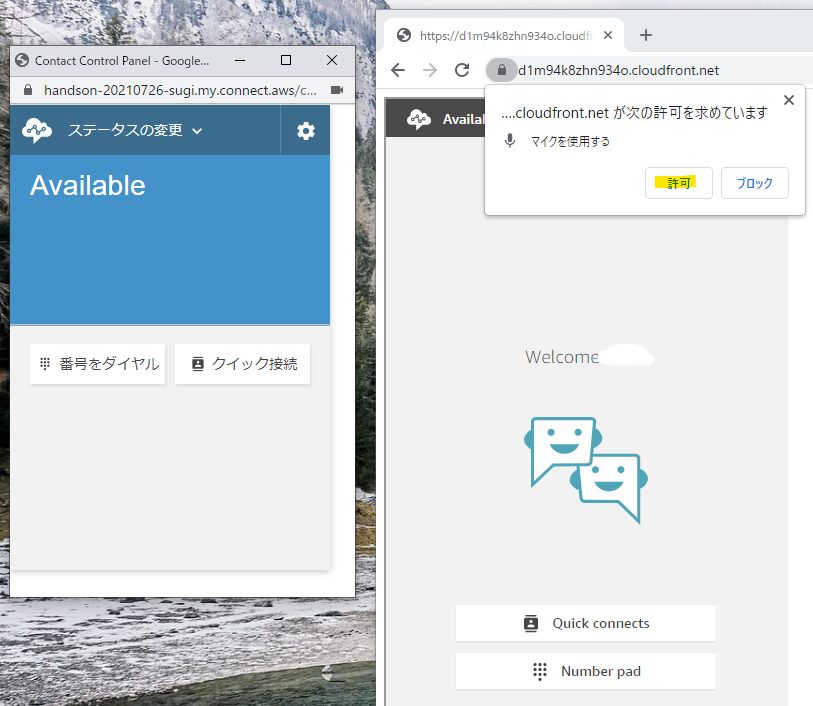
カスタム CCP の方でも、電話の操作画面が表示されました。マイクの使用許可が求められたので、許可を押します。
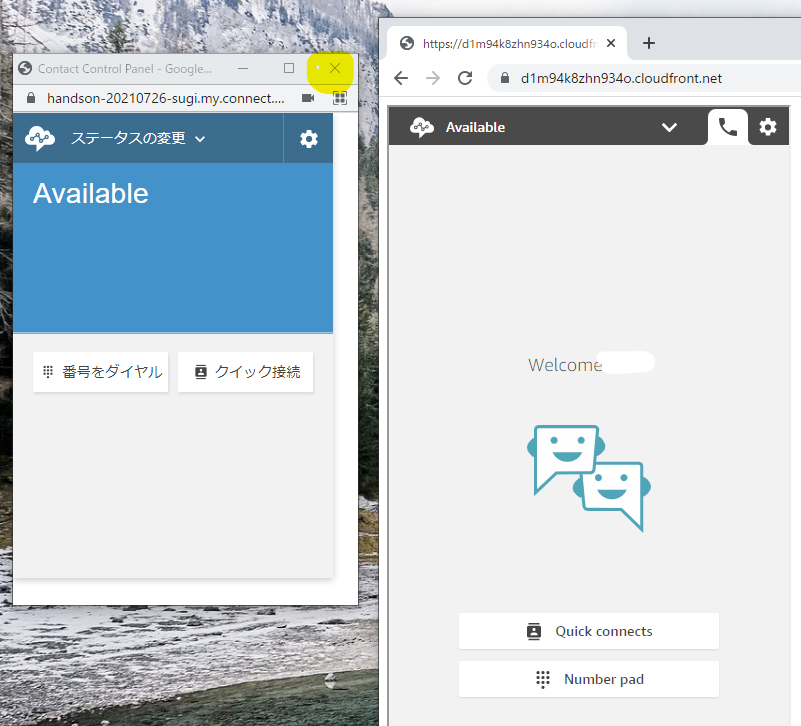
ポップアップの方は使わないので、閉じます。ちなみに、両方とも画面で電話を受けることもできますし、発信することも出来ます。
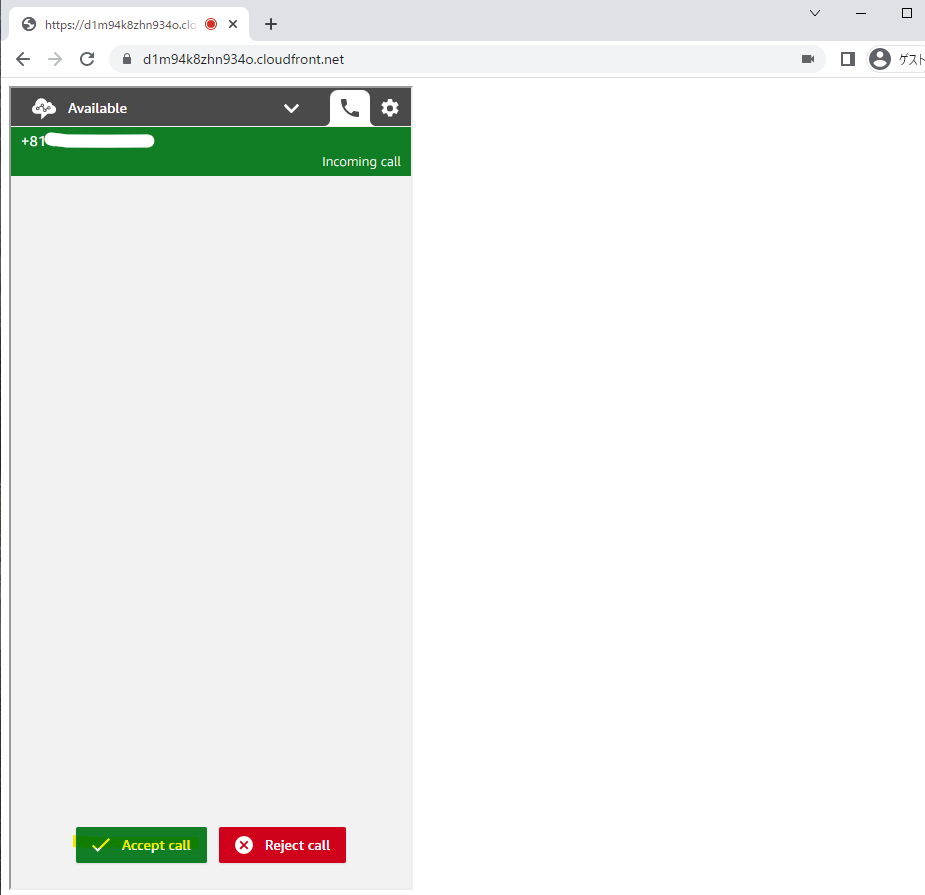
このカスタム CCP は、Amazon Connect の問い合わせフローの機能はもちろん使えるので、外部から電話が掛かってきたときに Accept することが出来ます
電話の受信と切断のイベント拾ってみる
ここまでデフォルトの CCP を、独自のアプリケーション上で動作確認してきました。ここからは、電話の着信や切断などのイベントを拾ってみて、どのように拾えるか確認してみましょう
クラスメソッドさんの記事を参考にしました、ありがとうございます!
URL : https://dev.classmethod.jp/articles/subscribe-various-events-with-amazon-connect-streams/
作成した index.html ファイルを次のように書き換えます。変更するポイントは次の通りです。
- Amazon Connect の着信や切断などのイベントを拾って、画面にイベントログを表示する
- 電話が掛かってきたときに、電話番号を拾う (CRM 連携などに使えそうですね)
-
initの関数の中で、各種イベントをどのように拾うか定義している。例えば、contact.onConnectingの部分で電話を着信するときのイベントを拾っている
<!DOCTYPE html>
<html>

<head>
    <meta charset="UTF-8">
    <script type="text/javascript" src="connect-streams-min.js"></script>
</head>
<!-- Add the call to init() as an onload so it will only run once the page is loaded -->

<body onload="init()">
    <table>
        <tr>
            <td>
                <div id="container-div" style="width: 400px; height: 800px;"></div>
            </td>
            <td>
                <div id="logDiv"><textarea id="logtextarea" rows="40" cols="140"></textarea></div>
            </td>
        </tr>
    </table>


    <script type="text/javascript">
        var containerDiv = document.getElementById("container-div");
        var instanceURL = "https://handson-20210726-sugi.my.connect.aws/connect/ccp-v2/";
        // initialize the streams api
        function init() {
            // initialize the ccp
            connect.core.initCCP(containerDiv, {
                ccpUrl: instanceURL,            // REQUIRED
                loginPopup: true,               // optional, defaults to `true`
                loginPopupAutoClose: true,      // optional, defaults to `false`
                loginOptions: {                 // optional, if provided opens login in new window
                    autoClose: true,              // optional, defaults to `false`
                    height: 600,                  // optional, defaults to 578
                    width: 400,                   // optional, defaults to 433
                    top: 0,                       // optional, defaults to 0
                    left: 0                       // optional, defaults to 0
                },
                region: "ap-northeast-1",         // REQUIRED for `CHAT`, optional otherwise
                softphone: {                    // optional, defaults below apply if not provided
                    allowFramedSoftphone: true,   // optional, defaults to false
                    disableRingtone: false,       // optional, defaults to false
                    ringtoneUrl: "./ringtone.mp3" // optional, defaults to CCP’s default ringtone if a falsy value is set
                },
                pageOptions: { //optional
                    enableAudioDeviceSettings: false, //optional, defaults to 'false'
                    enablePhoneTypeSettings: true //optional, defaults to 'true'
                },
                ccpAckTimeout: 5000, //optional, defaults to 3000 (ms)
                ccpSynTimeout: 3000, //optional, defaults to 1000 (ms)
                ccpLoadTimeout: 10000 //optional, defaults to 5000 (ms)
            });

            //エージェントイベントのサブスクライブ設定
            connect.agent(function (agent) {
                writeLog('エージェントイベントのサブスクライブ(connect.agent)!\n');
                writeLog('エージェントの基本情報の表示\n');

                //基本情報の表示
                var routingProfile = agent.getRoutingProfile();
                writeLog('routingProfile.name = ' + routingProfile.name + '\n');
                writeLog('routingProfile.queues = ' + JSON.stringify(routingProfile.queues) + '\n');
                writeLog('routingProfile.defaultOutboundQueue = ' + JSON.stringify(routingProfile.defaultOutboundQueue) + '\n');

                var name = agent.getName();
                writeLog('name = ' + name + '\n');

                var extension = agent.getExtension();
                writeLog('extension = ' + extension + '\n');


                //エージェントが受付可になったイベント
                agent.onRoutable(function (agent) {
                    writeLog('エージェントが受付可になった(agent.onRoutable)!\n');
                });

                //エージェントが受付可ではなくなったイベント
                agent.onNotRoutable(function (agent) {
                    writeLog('エージェントが受付可ではなくなった(agent.onNotRoutable)!\n');
                });

                //エージェントがオフラインになったイベント
                agent.onOffline(function (agent) {
                    writeLog('エージェントがオフラインになった(agent.onOffline)!\n');
                });

                //エージェントがACWになったイベント
                agent.onAfterCallWork(function (agent) {
                    writeLog('エージェントがACWになった(agent.onAfterCallWork)!\n');
                });
            });


            //コンタクトイベントのサブスクライブ設定
            connect.contact(function (contact) {
                //有効なコネクションがあるかどうかチェック
                if (contact.getActiveInitialConnection() && contact.getActiveInitialConnection().getEndpoint()) {
                    var conn = contact.getActiveInitialConnection();
                    var phoneNumber = contact.getActiveInitialConnection().getEndpoint().phoneNumber;
                }

                writeLog('コンタクトイベントのサブスクライブ(connect.contact)!\n');
                writeLog('contact.getActiveInitialConnection().getEndpoint().phoneNumber = ' + phoneNumber + '\n');
                writeLog('contact.getQueue().name = ' + contact.getQueue().name + '\n');
                writeLog('initialConn.getType() = ' + conn.getType() + '\n');


                //コンタクト情報がリフレッシュされたイベント
                contact.onRefresh(function (contact) {
                    writeLog('コンタクト情報がリフレッシュされた(connect.onRefresh)!\n');

                    //コンタクトのコネクションを確認する
                    var conns = contact.getConnections();
                    writeLog('コンタクトのコネクション = ' + JSON.stringify(conns) + '\n');

                    //保留中かどうかチェックする
                    var conn = contact.getActiveInitialConnection();
                    if (conn.isOnHold()) {
                        writeLog('保留中です!\n');
                    }
                });

                //コールを接続するイベント(発信・受信両方とも該当)
                contact.onConnecting(function (contact) {
                    writeLog('コール接続中(connect.onConnecting!\n');
                    writeLog('contactId =' + contact.getContactId() + '\n');
                    if (contact.isInbound()) {
                        //受信時に行う処理
                        writeLog('コールが着信した(connect.isInbound!\n');
                        writeLog('contactId =' + contact.getContactId() + '\n');
                    }
                });

                //コールバックイベント
                contact.onIncoming(function (contact) {
                    writeLog('コールバックイベント(connect.onIncoming)!\n');
                    writeLog('contactId =' + contact.getContactId() + '\n');
                });

                //コールに応答したイベント
                contact.onAccepted(function (contact) {
                    writeLog('コールに応答した(connect.onAccepted)!\n');
                    writeLog('contactId =' + contact.getContactId() + '\n');
                });

                //コールが切断された(もしくは切断した)イベント
                contact.onEnded(function (contact) {
                    writeLog('コールが切断された(もしくは切断した)(connect.onEnded)!\n');
                    writeLog('contactId =' + contact.getContactId() + '\n');
                });

                //コールが確立されたイベント
                contact.onConnected(function () {
                    writeLog('コールが確立された(connect.onConnected)!\n');
                    writeLog('contactId =' + contact.getContactId() + '\n');
                });
            });
        }

        //画面上のテキストエリアにログ出力する
        function writeLog(message) {
            var logtextarea = document.getElementById('logtextarea');
            var text = logtextarea.value;
            logtextarea.value = text + message;
        };


    </script>
</body>

</html>
動作確認をしていきます。
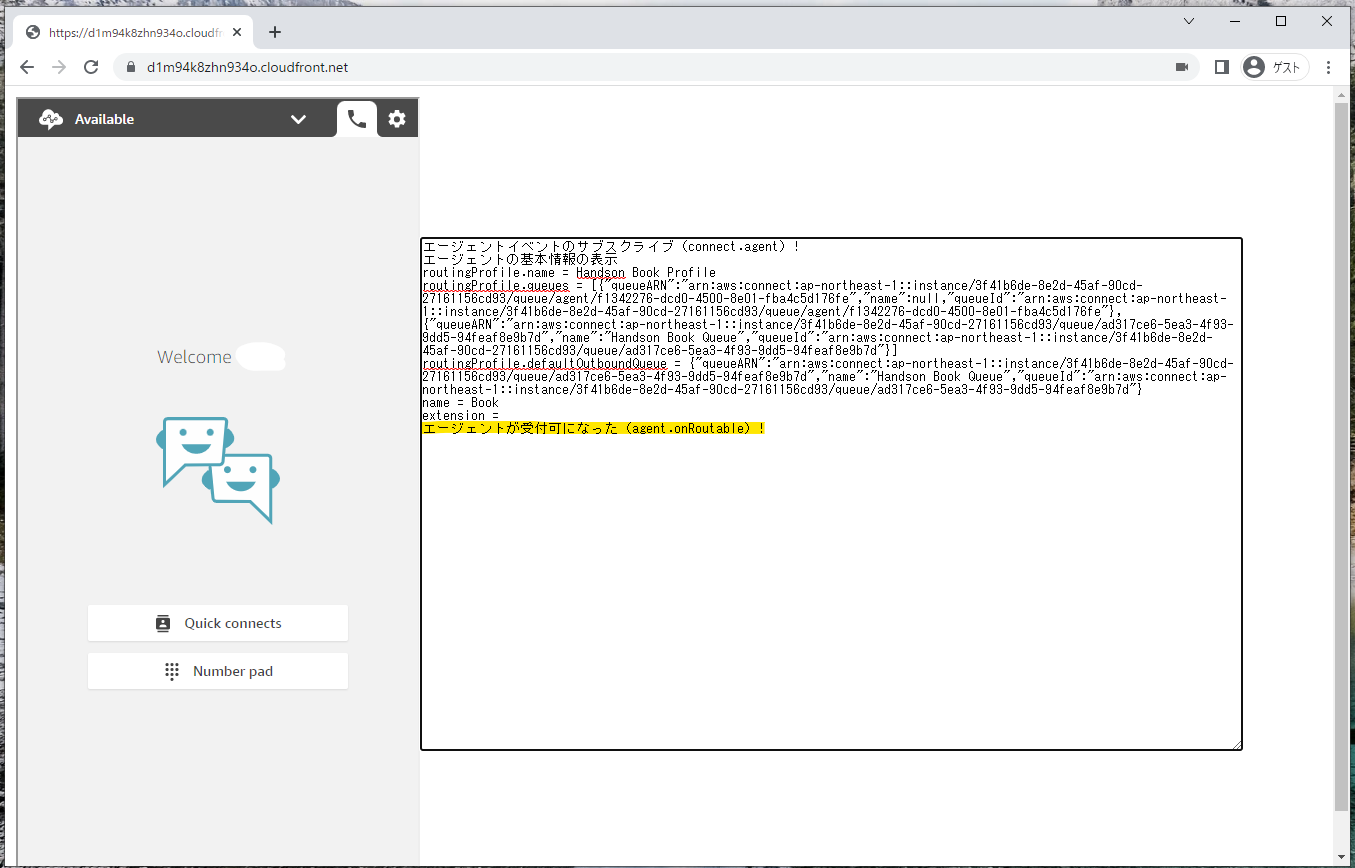
この HTML を CloudFront にアップロードして表示してみると、次のように右側のテキストエリアに各種イベントが拾えていることがわかります。電話を受ける人(エージェント)のステータスも拾っており、受付可能になっているイベントが表示されています。
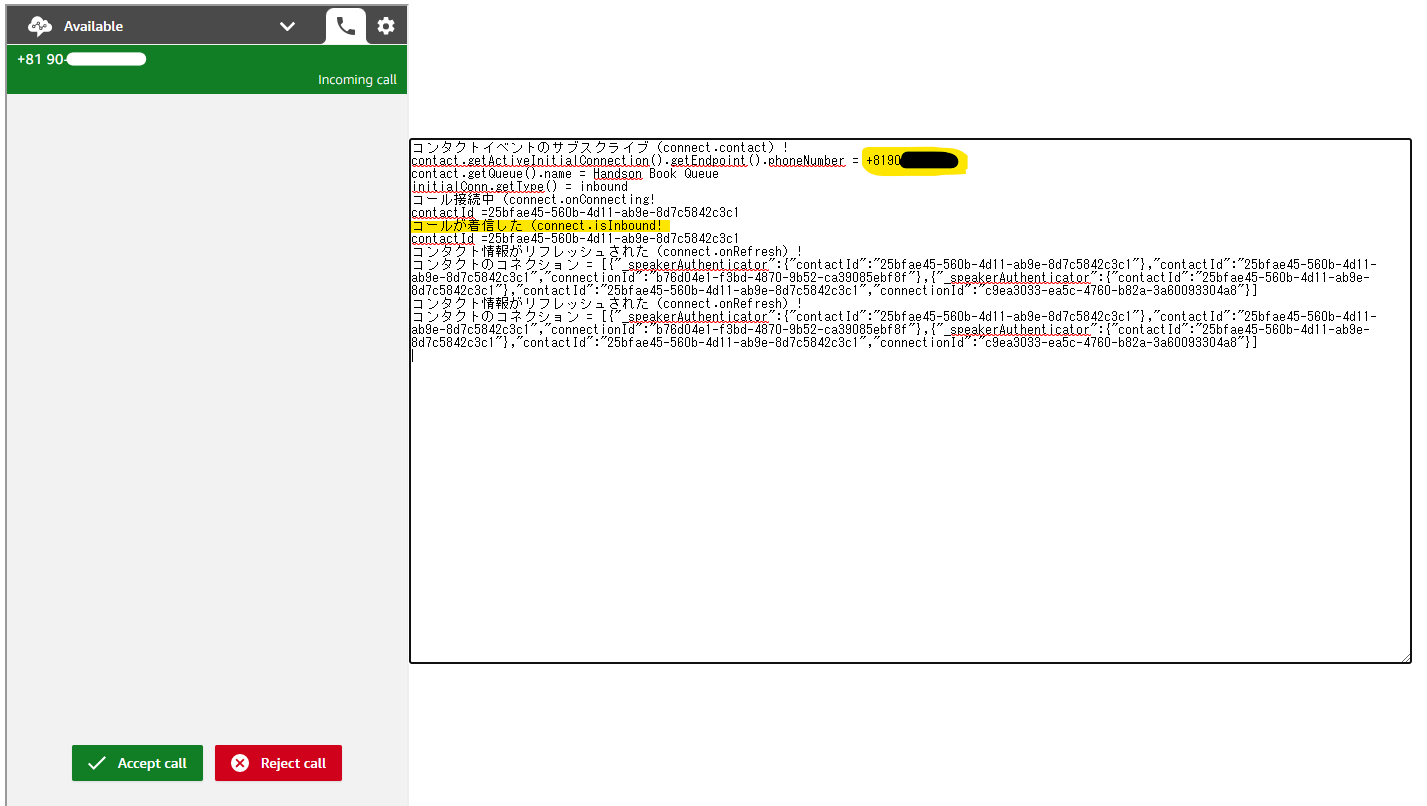
問い合わせフローを経由して、電話を受け付けてみましょう。電話が掛かってきたときに、コンタクトイベントから電話番号が拾えていることがわかります。
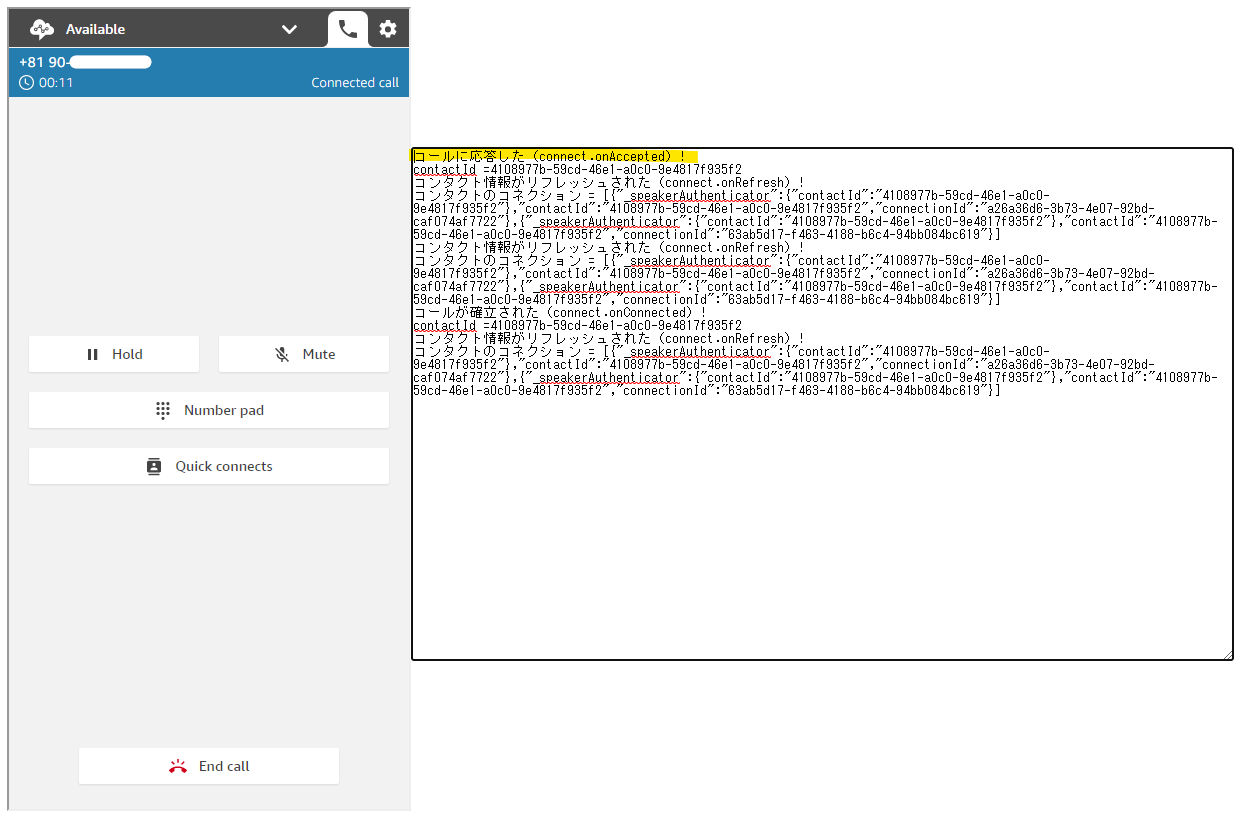
電話に出たときのイベントです
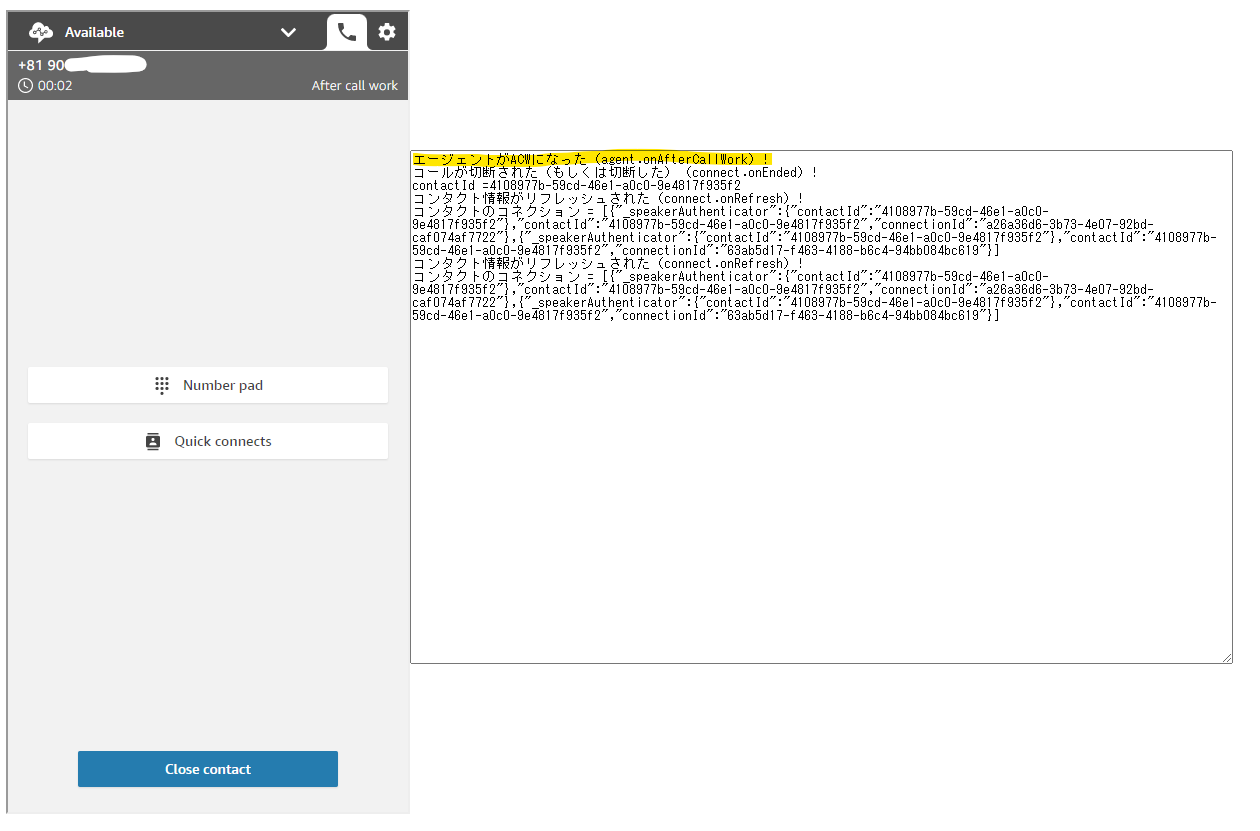
電話を切断したときの After Call Work 状態です。会話したログの整理などを行う時間ですね。
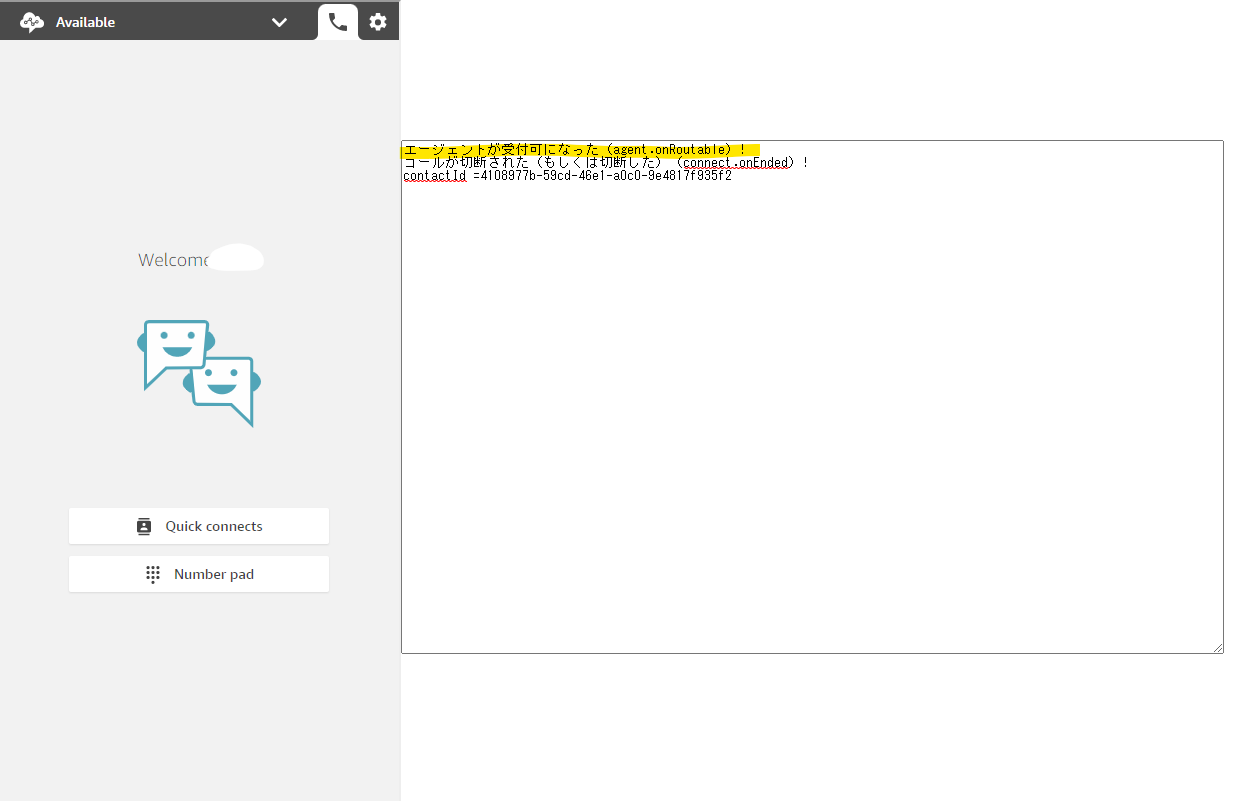
切断した時の状態です。
検証を通じてわかったこと
-
Amazon Connect Streams は、AWS が公開している JavaScript のライブラリのこと
-
自分たちが持っているアプリケーションと Amazon Connect を連携したい場合は、アプリケーションの中に Amazon Connect Streams のライブラリを組み込んで、独自実装を行う
-
Amazon Connect Streams は、JavaScript なのでフロントエンドで動作する。バックエンドサーバー側では、情報を提供するための REST API などを用意すると連携がやりやすそう
-
電話番号なども拾えるので、電話かけてきた方のお客様情報をカスタム CCP 上に表示することも可能
参考URL