はじめに
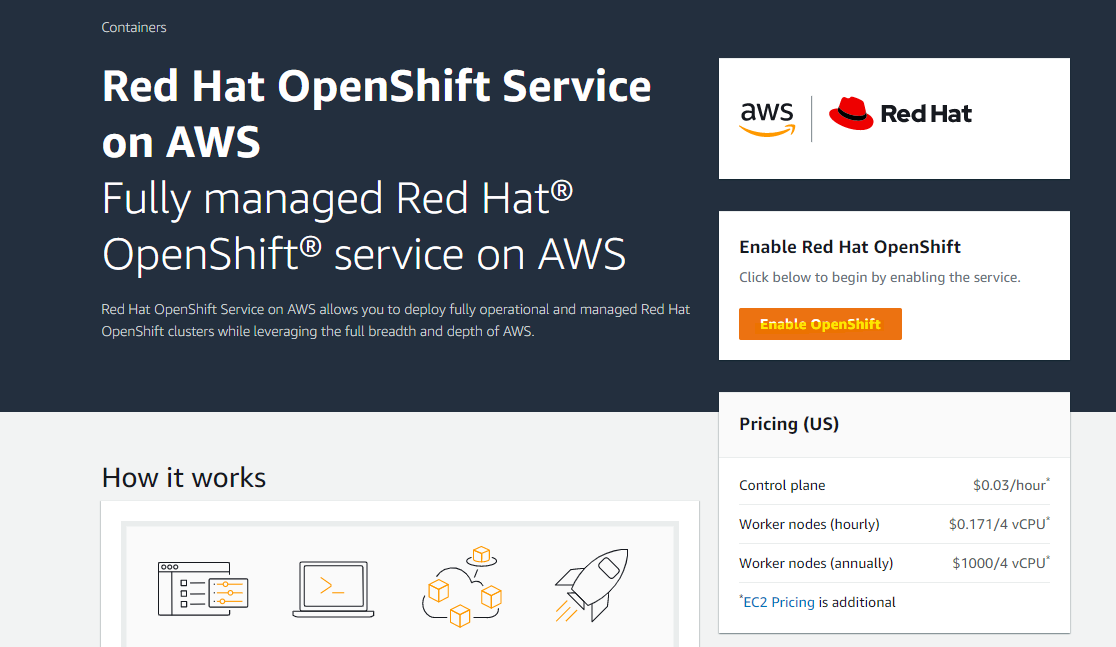
AWS では、ROSA(Red Hat OpenShift Service on AWS) が提供されています。OpenShift に慣れているユーザーが今までのナレッジを活かしながら、AWS 上で利用できるマネージドな OpenShift サービスとなっています。今までのナレッジを活かせるので、スムーズに AWS 上で OpenShift を活用できるメリットがあります。また、時間や年単位の従量課金モデルとなっており、特に時間単位の従量課金では柔軟性の高い料金体系になっています。
という概要は知りつつ、どうやって構築するのか不明だったので、ROSA の構成を試してみました。公式 Document や公式 Blog なども確認しつつ構築してみましょう。
公式 Document
https://docs.openshift.com/rosa/welcome/index.html
https://access.redhat.com/documentation/ja-jp/red_hat_openshift_service_on_aws/4
公式 Blog
https://aws.amazon.com/jp/blogs/news/whats-new-red-hat-openshift-service-on-aws/
ROSA を有効化する
AWS マネージメントコンソール上で Enable を押します。
Enable が完了すると、Download CLI の画面に切り替わります。Download CLI のボタンをクリックすると、
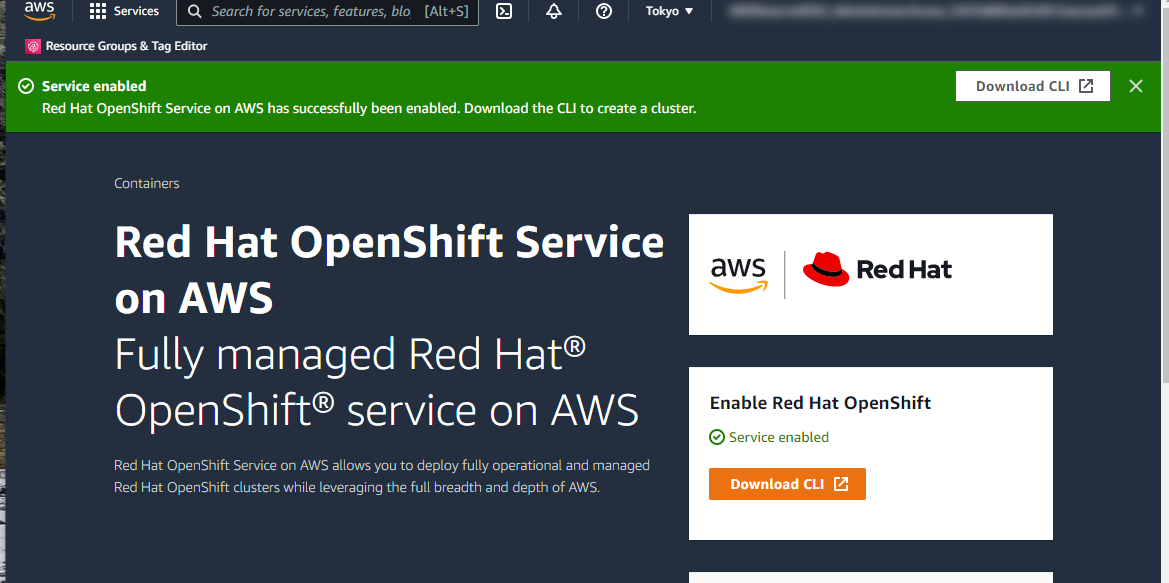
Red Hat アカウントを使ったログインを求められます。
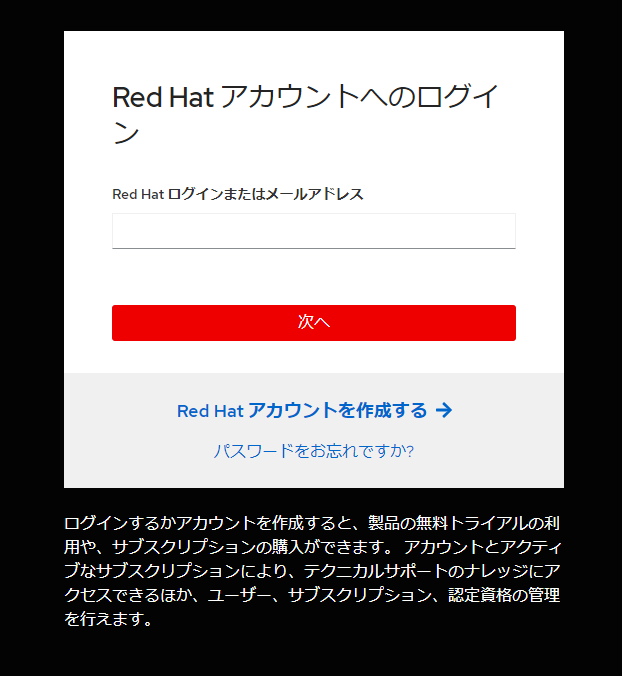
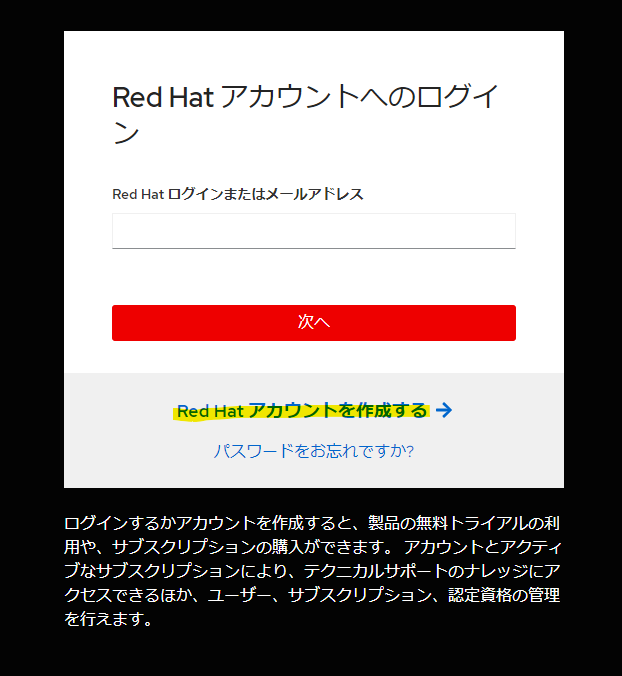
Red Hat アカウントを作成する
Red Hat アカウントを持っていない方は作成するを押して、アカウントを作成してログインをおこないましょう。
ROSA CLI をインストール
Red Hat アカウントを作成後、ダウンロードページへ移動します。Red Hat OpenShift Service on AWS command-line interface (rosa) のダウンロード URL をコピーします。右クリックでコピーしました。
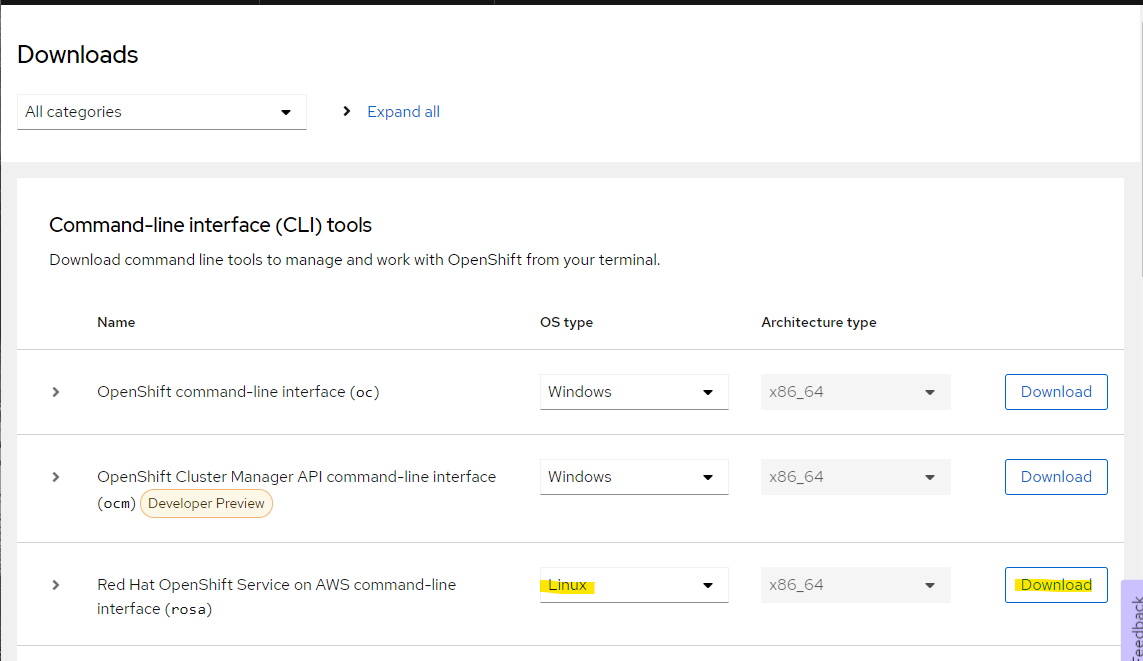
手元の端末へダウンロードしましょう。
wget https://mirror.openshift.com/pub/openshift-v4/clients/rosa/latest/rosa-linux.tar.gz
解凍します。
tar xfvz rosa-linux.tar.gz
rosa という 44MB のバイナリファイルが解凍されました
> ls -lah rosa
-rwxr-xr-x 1 ec2-user docker 44M Dec 15 20:49 rosa
環境変数 PATH 配下に移動します
sudo mv ./rosa /usr/local/bin/
rosa コマンドが実行できることを確認します
> rosa version
1.1.7
AWS CLI をインストール
ROSA の導入には、AWS CLI も必要です。Document などを見ながら適当にインストールします。
ROSA の事前設定
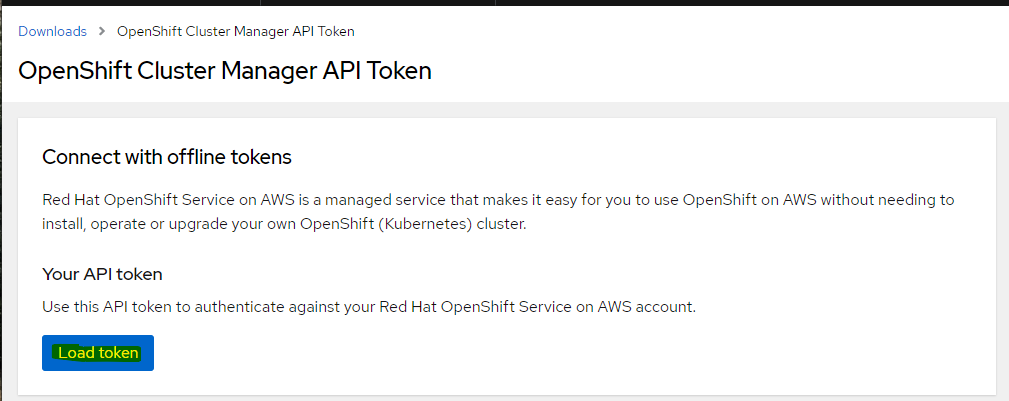
まず、ROSA 環境とRed Hat のアカウントを連携するために、Red Hat のサイト上で Token を取得します。次の URL にアクセスします。
Load token を押します。
JWT Token が生成されます。コピーボタンでコピーしましょう。
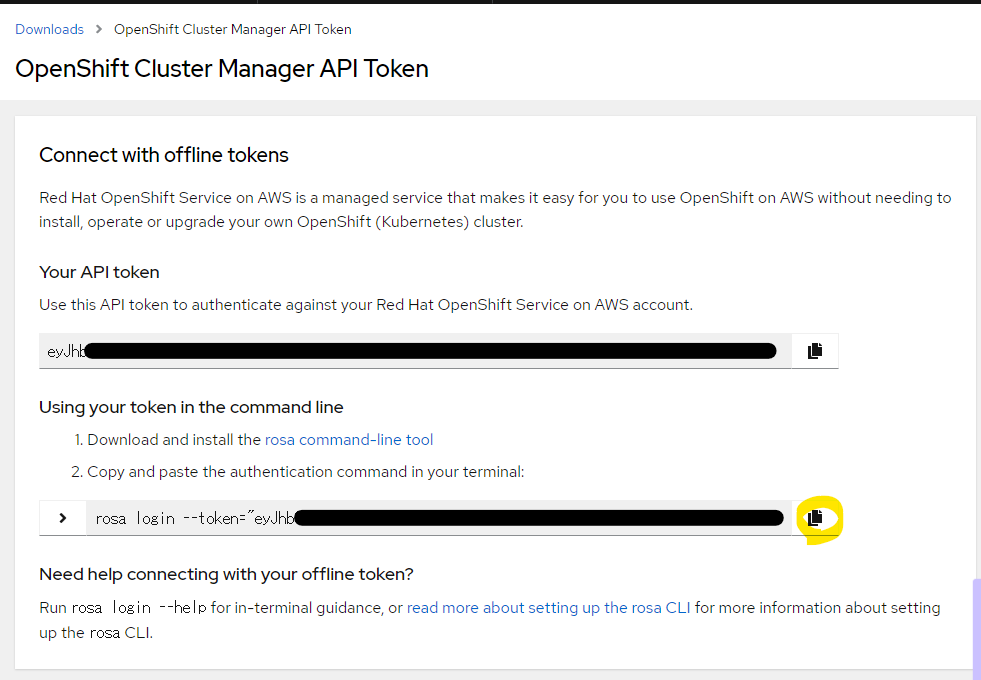
rosa login で、Red Hat アカウントと連携を行います。このようにログインが出来ます。
> rosa login --token="secret"
I: Logged in as 'yourname' on 'https://api.openshift.com'
実行環境が正しい権限を持っている確認します。
rosa verify permissions
実行例
> rosa verify permissions
I: Verifying permissions for non-STS clusters
I: Validating SCP policies...
I: AWS SCP policies ok
Service Quota の前提条件を確認します。
rosa verify quota --region=ap-northeast-1
正常に終了します
> rosa verify quota --region=ap-northeast-1
I: Validating AWS quota...
I: AWS quota ok. If cluster installation fails, validate actual AWS resource usage against https://docs.openshift.com/rosa/rosa_getting_started/rosa-required-aws-service-quotas.html
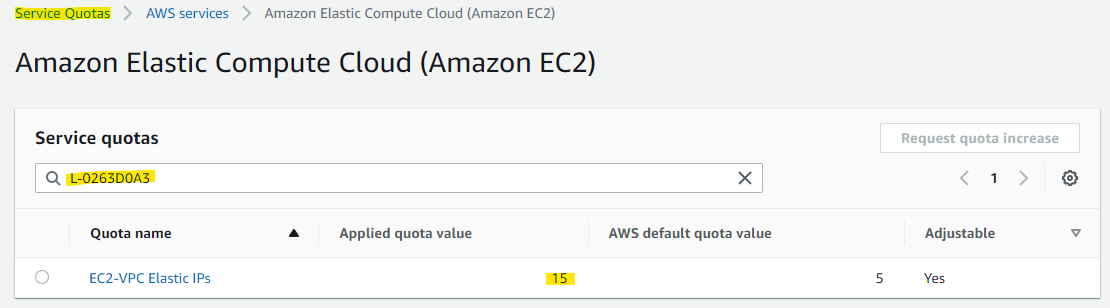
ROSA Cluster を作成したときにエラーになのを防ぐために、次の URL を確認して必要な分の上限緩和申請を行うと良いです。
https://docs.openshift.com/rosa/rosa_getting_started/rosa-required-aws-service-quotas.html
こんな感じに、Service code と Quota code が書かれています。
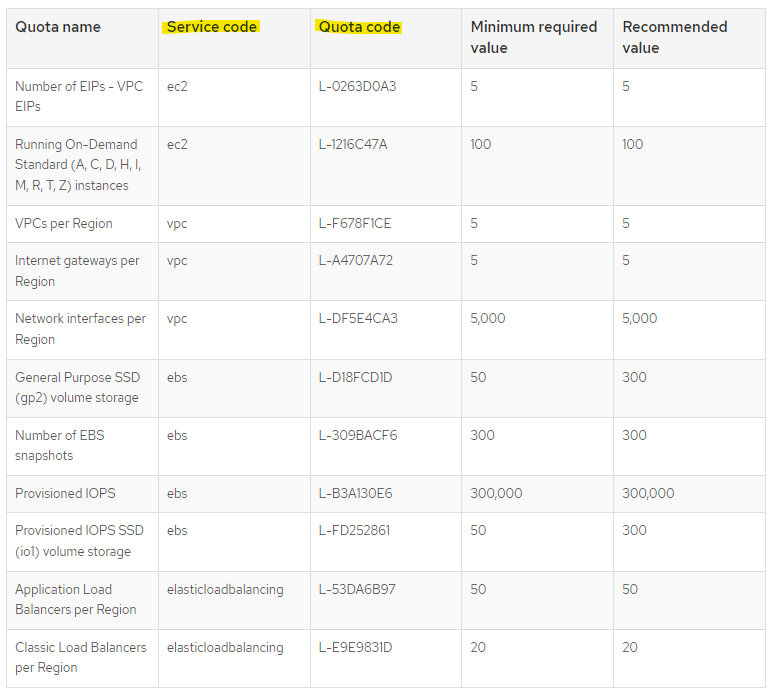
Service Quota の該当サービスで、Code を使って検索できます。それぞれの値を確認してみるとよいでしょう。
init 処理
rosa init で初期化処理を行います。
rosa init
実行例
- IAM User
osdCcsAdminが自動生成されています。 - OpenShift command-line tool がインストールされていないと Warning が表示されます。
> rosa init
I: Logged in as 'yourname' on 'https://api.openshift.com'
I: Validating AWS credentials...
I: AWS credentials are valid!
I: Verifying permissions for non-STS clusters
I: Validating SCP policies...
I: AWS SCP policies ok
I: Validating AWS quota...
I: AWS quota ok. If cluster installation fails, validate actual AWS resource usage against https://docs.openshift.com/rosa/rosa_getting_started/rosa-required-aws-service-quotas.html
I: Ensuring cluster administrator user 'osdCcsAdmin'...
I: Admin user 'osdCcsAdmin' created successfully!
I: Validating SCP policies for 'osdCcsAdmin'...
I: AWS SCP policies ok
I: Validating cluster creation...
I: Cluster creation valid
I: Verifying whether OpenShift command-line tool is available...
W: OpenShift command-line tool is not installed.
Run 'rosa download oc' to download the latest version, then add it to your PATH.
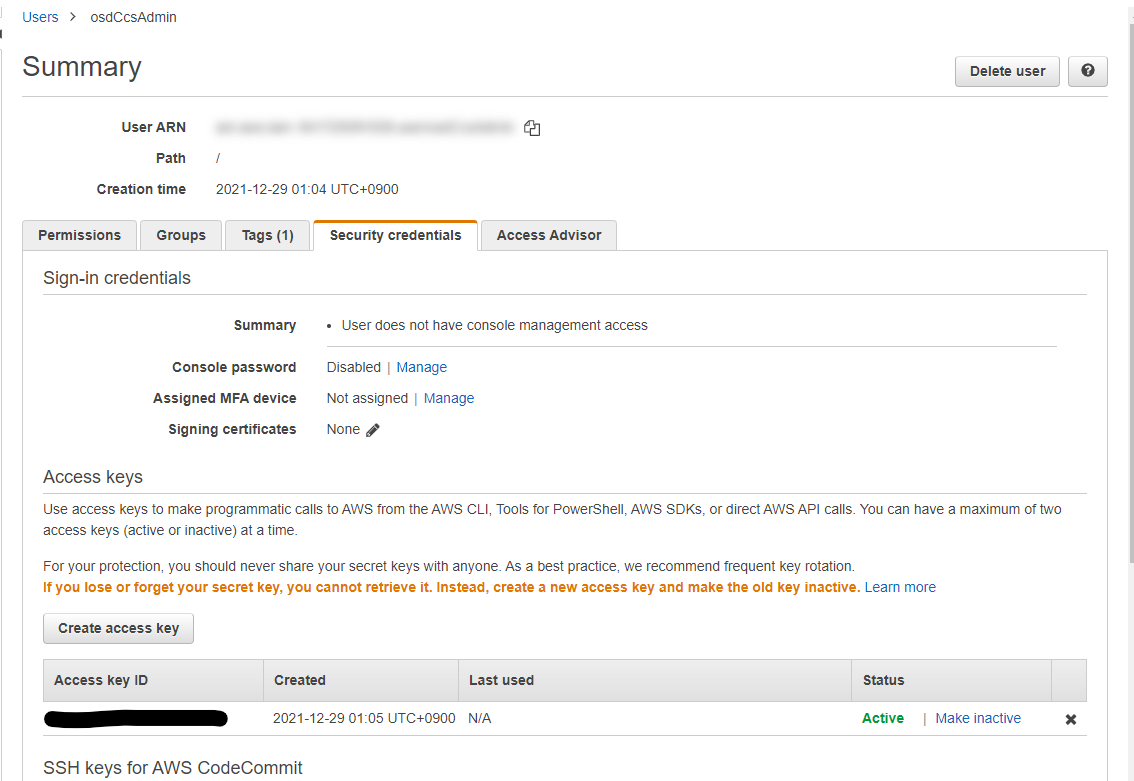
IAM User を見てみると osdCcsAdmin User が自動生成されています。権限は AdministratorAccess です。
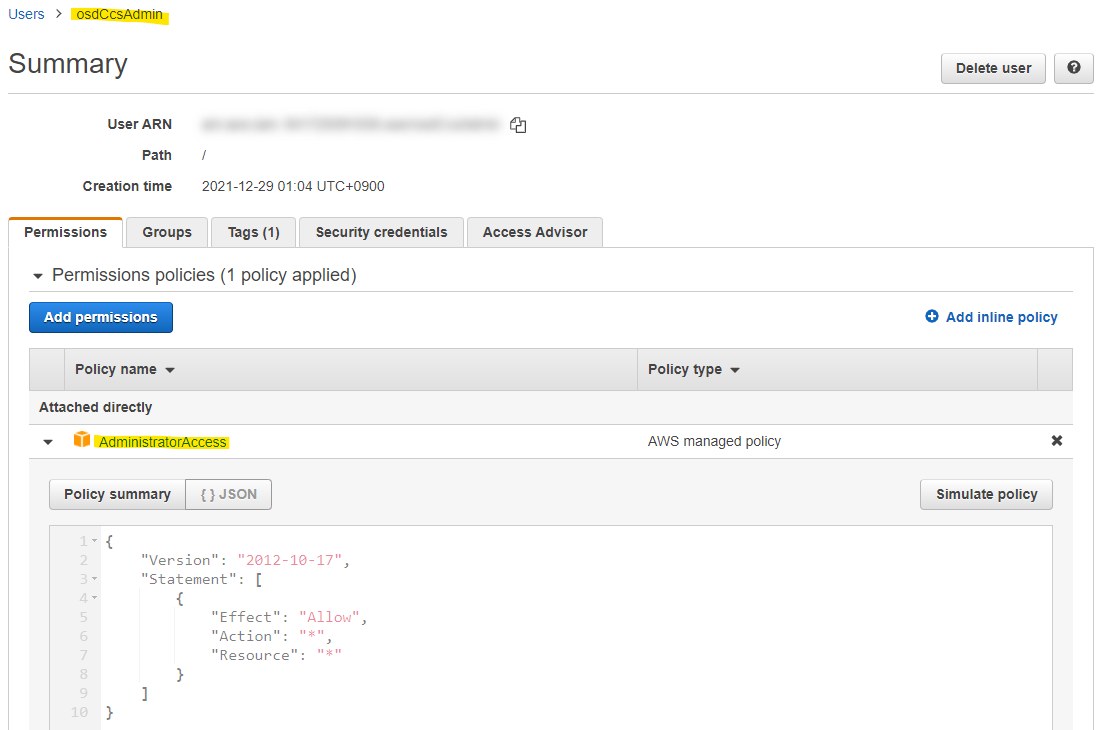
この User の AccessKey も自動的に発行されています。おそらく、この Access Key を利用して、Red Hat SRE がユーザーの運用作業の負担を軽減するためにアクセスしてくれると予想できます。
OpenShift CLI のインストール
oc コマンドをダウンロードします。rosa コマンドでダウンロードできるの便利ですね。
rosa download oc
実行例
> rosa download oc
I: Verifying whether OpenShift command-line tool is available...
W: OpenShift command-line tool is not installed.
Run 'rosa download oc' to download the latest version, then add it to your PATH.
I: Downloading https://mirror.openshift.com/pub/openshift-v4/clients/ocp/latest/openshift-client-linux.tar.gz
Downloading... 49 MB complete
I: Successfully downloaded openshift-client-linux.tar.gz
解凍してインストールを行います。tar.gz の中には、oc コマンドと一緒に kubectl コマンドも同梱されています。
sudo tar zxvf openshift-client-linux.tar.gz -C /usr/local/bin/
oc コマンドのバージョンを確認できます
$ oc version
Client Version: 4.9.11
ROSA Cluster の作成
rosa create cluster コマンドで、ROSA クラスターを作成します。今回は次のオプションを指定しています。
- Multi-AZ 構成を指定
- クラスター名を指定
rosa create cluster --multi-az --cluster-name=my-rosa01
なお、ヘルプを表示すると様々なコンフィグが出来そうなオプションがあります。気になったオプションを一部抜粋します。
-
compute-machine-type: Compute Node (たぶん Worker Node のこと) の EC2 Instance Type を指定可能 -
compute-nodes: Compute Node (たぶん Worker Node のこと) の台数を指定 -
private-link: PrivateLink を使って ROSA 上で動かすサービスをプライベートで提供するときに利用可能 -
subnet-ids: 既存の Subnet を指定したい場合に利用 -
enable-autoscaling: AutoScaling の指定 -
private: Private な ROSA Cluster を作成するときに指定
$ rosa create cluster -h
Create cluster.

Usage:
  rosa create cluster [flags]

Examples:
  # Create a cluster named "mycluster"
  rosa create cluster --cluster-name=mycluster

  # Create a cluster in the us-east-2 region
  rosa create cluster --cluster-name=mycluster --region=us-east-2

Flags:
  -c, --cluster-name string                   Name of the cluster. This will be used when generating a sub-domain for your cluster on openshiftapps.com.
      --sts                                   Use AWS Security Token Service (STS) instead of IAM credentials to deploy your cluster.
      --role-arn string                       The Amazon Resource Name of the role that OpenShift Cluster Manager will assume to create the cluster.
      --external-id string                    An optional unique identifier that might be required when you assume a role in another account.
      --support-role-arn string               The Amazon Resource Name of the role used by Red Hat SREs to enable access to the cluster account in order to provide support.
      --controlplane-iam-role string          The IAM role ARN that will be attached to control plane instances.
      --worker-iam-role string                The IAM role ARN that will be attached to worker instances.
      --operator-roles-prefix string          Prefix to use for all IAM roles used by the operators needed in the OpenShift installer. Leave empty to use an auto-generated one.
      --multi-az                              Deploy to multiple data centers.
      --version string                        Version of OpenShift that will be used to install the cluster, for example "4.3.10"
      --channel-group string                  Channel group is the name of the group where this image belongs, for example "stable" or "fast". (default "stable")
      --etcd-encryption                       Add etcd encryption. By default etcd data is encrypted at rest. This option configures etcd encryption on top of existing storage encryption.
      --http-proxy string                     A proxy URL to use for creating HTTP connections outside the cluster. The URL scheme must be http.
      --https-proxy string                    A proxy URL to use for creating HTTPS connections outside the cluster.
      --additional-trust-bundle-file string   A file contains a PEM-encoded X.509 certificate bundle that will be added to the nodes' trusted certificate store.
      --enable-customer-managed-key           Enable to specify your KMS Key to encrypt EBS instance volumes. By default account’s default KMS key for that particular region is used.
      --kms-key-arn string                    The key ARN is the Amazon Resource Name (ARN) of a CMK. It is a unique, fully qualified identifier for the CMK. A key ARN includes the AWS account, Region, and the key ID.
      --private-link                          Provides private connectivity between VPCs, AWS services, and your on-premises networks, without exposing your traffic to the public internet.
      --subnet-ids strings                    The Subnet IDs to use when installing the cluster. Format should be a comma-separated list. Leave empty for installer provisioned subnet IDs.
      --compute-machine-type string           Instance type for the compute nodes. Determines the amount of memory and vCPU allocated to each compute node.
      --compute-nodes int                     Number of worker nodes to provision per zone. Single zone clusters need at least 2 nodes, multizone clusters need at least 3 nodes. (default 2)
      --enable-autoscaling                    Enable autoscaling of compute nodes.
      --min-replicas int                      Minimum number of compute nodes. (default 2)
      --max-replicas int                      Maximum number of compute nodes. (default 2)
      --machine-cidr ipNet                    Block of IP addresses used by OpenShift while installing the cluster, for example "10.0.0.0/16".
      --service-cidr ipNet                    Block of IP addresses for services, for example "172.30.0.0/16".
      --pod-cidr ipNet                        Block of IP addresses from which Pod IP addresses are allocated, for example "10.128.0.0/14".
      --host-prefix int                       Subnet prefix length to assign to each individual node. For example, if host prefix is set to "23", then each node is assigned a /23 subnet out of the given CIDR.
      --private                               Restrict master API endpoint and application routes to direct, private connectivity.
      --disable-scp-checks                    Indicates if cloud permission checks are disabled when attempting installation of the cluster.
      --disable-workload-monitoring           Enables you to monitor your own projects in isolation from Red Hat Site Reliability Engineer (SRE) platform metrics.
      --watch                                 Watch cluster installation logs.
      --dry-run                               Simulate creating the cluster.
      --permissions-boundary string           The ARN of the policy that is used to set the permissions boundary for the operator roles in STS clusters.
  -m, --mode string                           How to perform the operation. Valid options are:
                                              auto: Resource changes will be automatic applied using the current AWS account

                                              manual: Commands necessary to modify AWS resources will be output to be run manually
  -i, --interactive                           Enable interactive mode.
  -o, --output string                         Output format. Allowed formats are [json yaml]
  -h, --help                                  help for cluster

Global Flags:
      --debug            Enable debug mode.
      --profile string   Use a specific AWS profile from your credential file.
      --region string    Use a specific AWS region, overriding the AWS_REGION environment variable.
  -y, --yes              Automatically answer yes to confirm operation.
[ec2-user@ip-10-0-0-5 temp]$
それでは、実際に ROSA Cluster 作成を進めます。
実行例
$ rosa create cluster --multi-az --cluster-name=my-rosa01
I: Creating cluster 'my-rosa01'
I: To view a list of clusters and their status, run 'rosa list clusters'
I: Cluster 'my-rosa01' has been created.
I: Once the cluster is installed you will need to add an Identity Provider before you can login into the cluster. See 'rosa create idp --help' for more information.
I: To determine when your cluster is Ready, run 'rosa describe cluster -c my-rosa01'.
I: To watch your cluster installation logs, run 'rosa logs install -c my-rosa01 --watch'.
Name:                       my-rosa01
ID:                         1pcn0pg6g52idkjnbol7j040larbnm67
External ID:
OpenShift Version:
Channel Group:              stable
DNS:                        my-rosa01.vna7.p1.openshiftapps.com
AWS Account:                xxxxxxxxxxxx
API URL:
Console URL:
Region:                     ap-northeast-1
Multi-AZ:                   true
Nodes:
 - Control plane:           3
 - Infra:                   3
 - Compute:                 3
Network:
 - Service CIDR:            172.30.0.0/16
 - Machine CIDR:            10.0.0.0/16
 - Pod CIDR:                10.128.0.0/14
 - Host Prefix:             /23
State:                      pending (Preparing account)
Private:                    No
Created:                    Dec 28 2021 16:34:48 UTC
Details Page:               https://console.redhat.com/openshift/details/s/22wJ1pqUPcNpcOlSyPzn5W5AaT5

[ec2-user@ip-10-0-0-5 temp]$
rosa list clusters コマンドで、インストールの状況を確認できます。30-40分ほど掛かります。
$ rosa list clusters
ID                                NAME       STATE
1pcet9u767p56kkuu0uiq9frh89bar0k  my-rosa01  installing
エラーになってしまいました。次の表示になります。
$ rosa list clusters
ID                                NAME       STATE
1pcet9u767p56kkuu0uiq9frh89bar0k  my-rosa01  error
エラーの原因を確認するために、次のコマンドで、インストールの状況を確認できます。
rosa logs install -c my-rosa01 --watch
こんな感じのエラーメッセージが確認できます。VPC の上限緩和をします!
msg=Error: Error creating VPC: VpcLimitExceeded: The maximum number of VPCs has been reached.\nlevel=error msg=\tstatus code: 400,
上限緩和完了後、削除して再作成します
rosa delete cluster --cluster my-rosa01
rosa create cluster --multi-az --cluster-name=my-rosa01
約40分後 State が ready になります。
$ rosa list clusters
ID                                NAME       STATE
1pcndrpeoopvacpohlhouf17bi592fb9  my-rosa01  ready
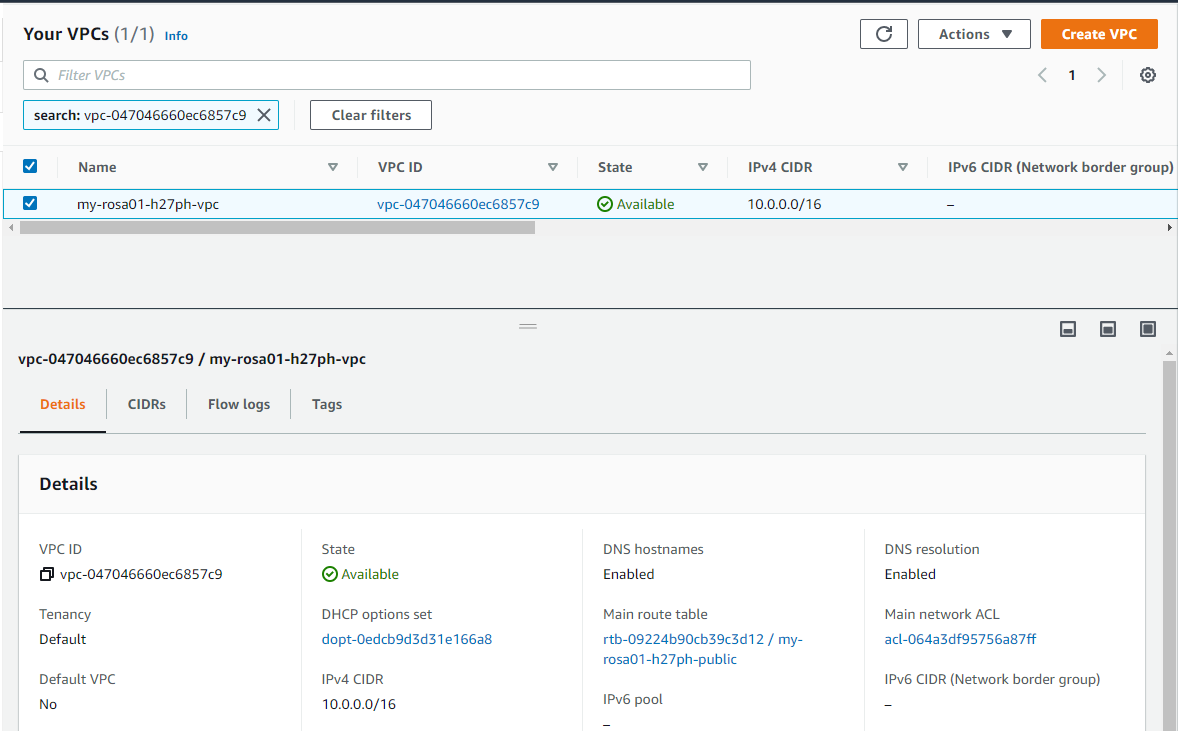
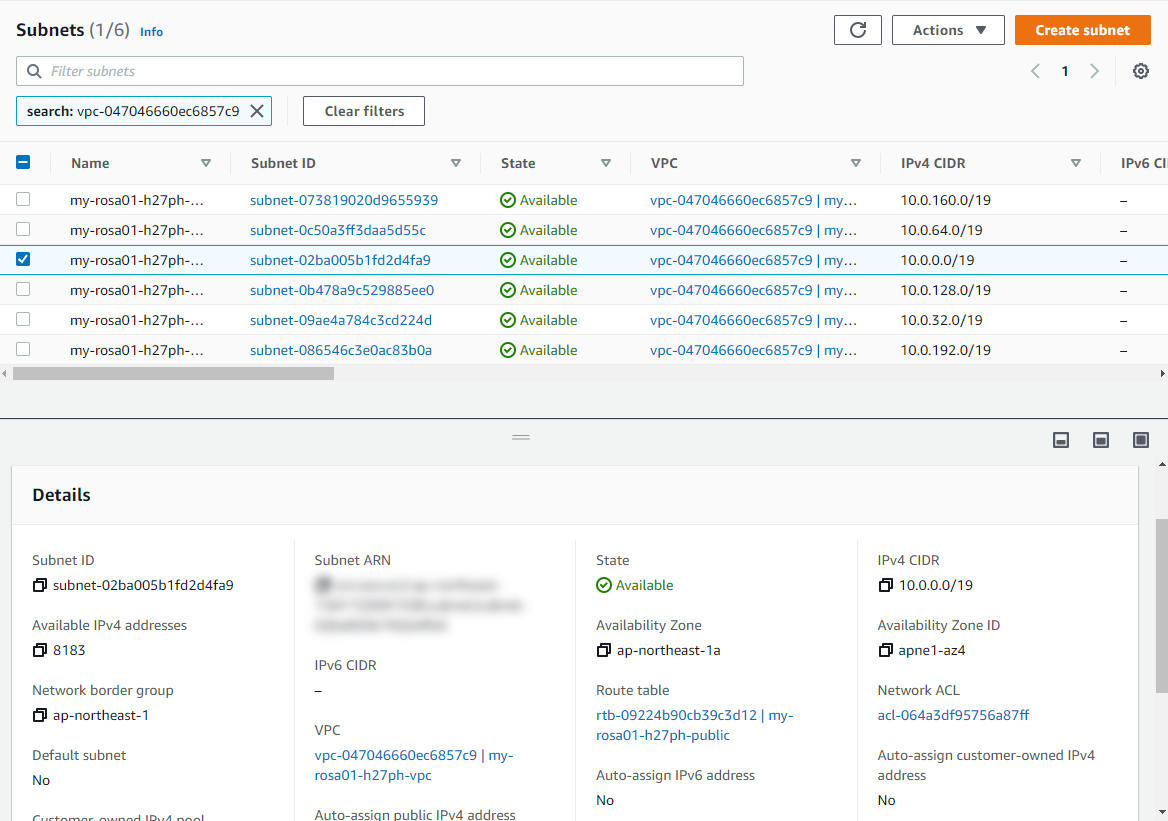
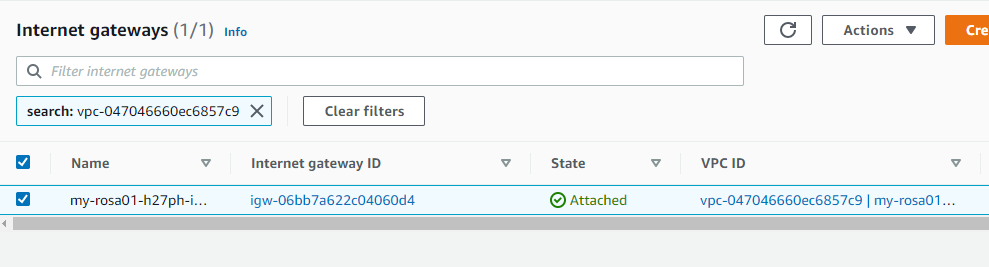
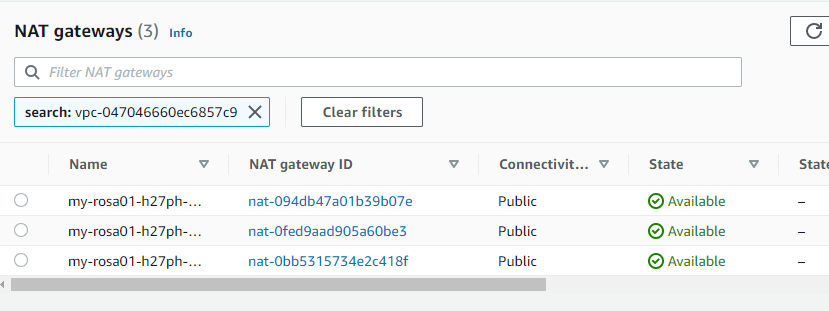
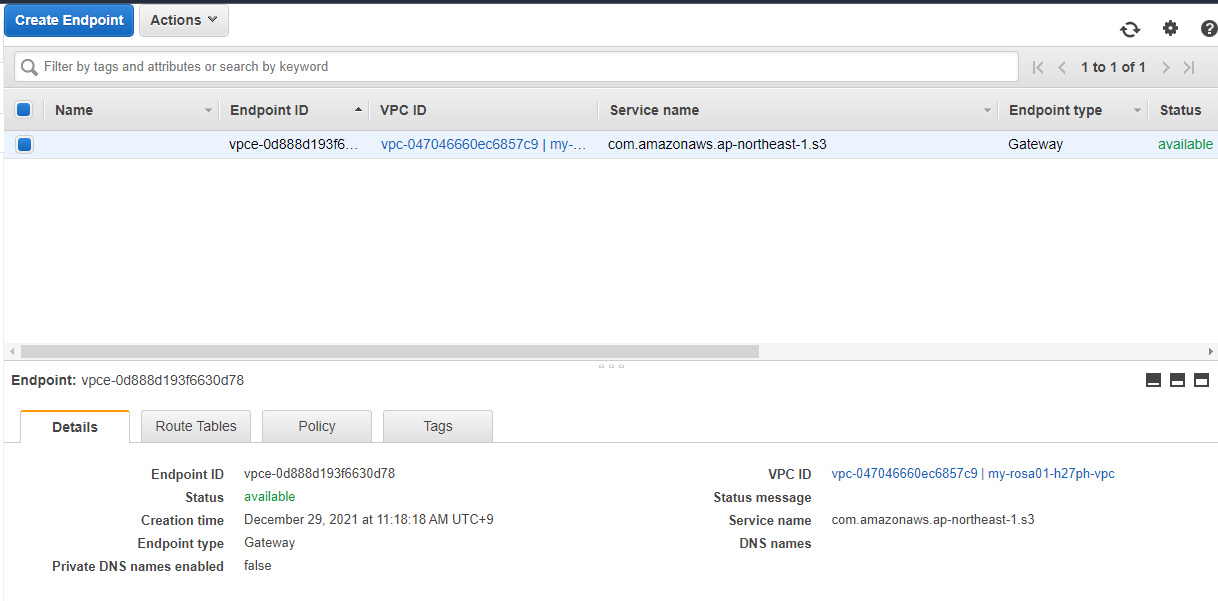
自動作成されたもの
rosa create cluster で自動作成されたものを抜粋してみます。AWS の公式 Blog にアーキテクチャ図が書かれており、この辺りも確認するとよいです。
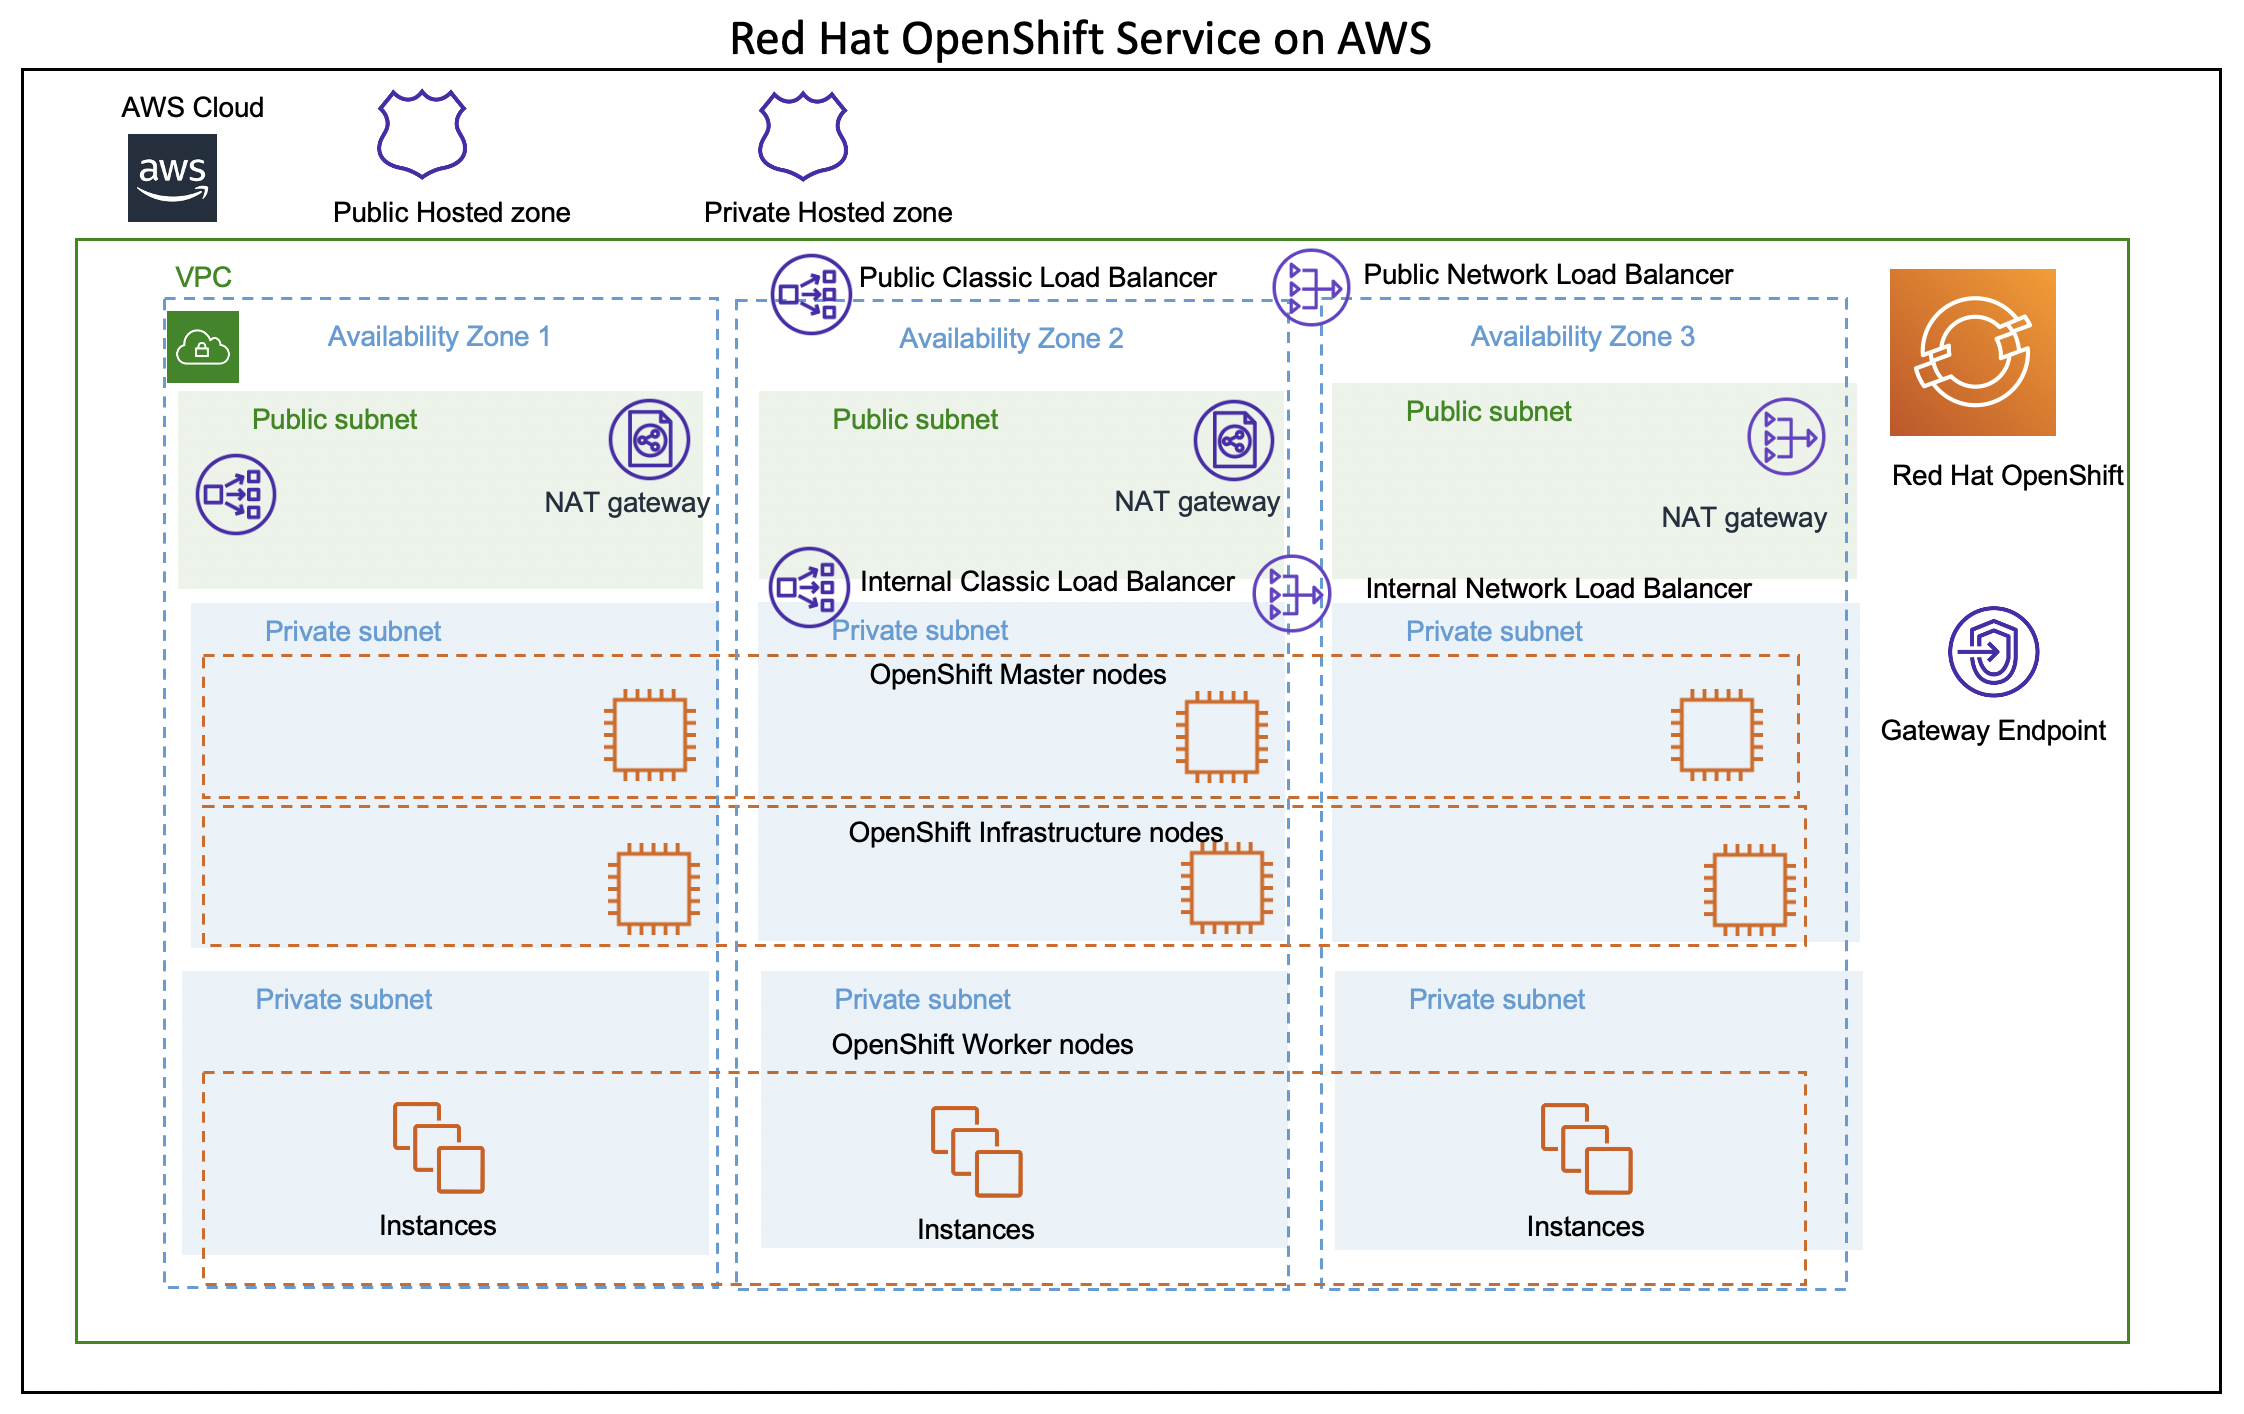
VPC
VPC
Subnet 6個
Internet Gateway
NAT Gateway
S3 Endpoint (Gateway Type)
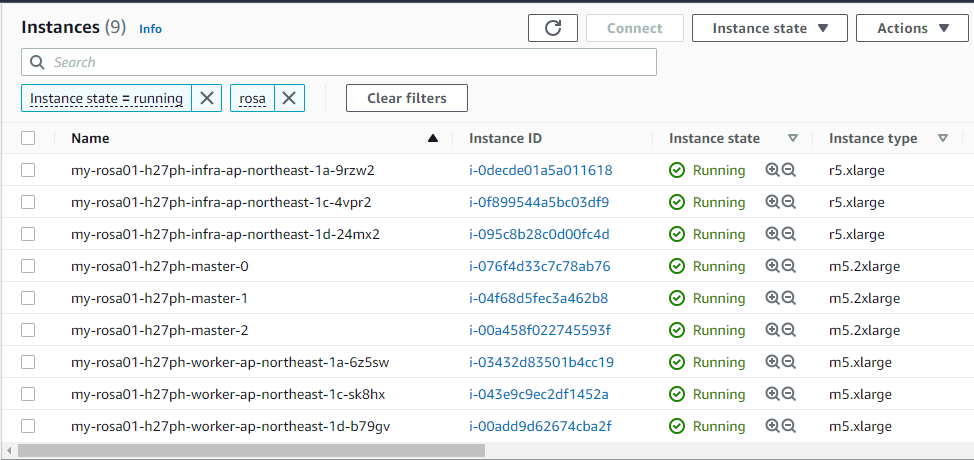
EC2
EC2 Instance が 9 台
- Master Node 3台
- Infrastructure Node 3台
- Worker Node 3台
ELB
CLB 2 個
NLB 2 個

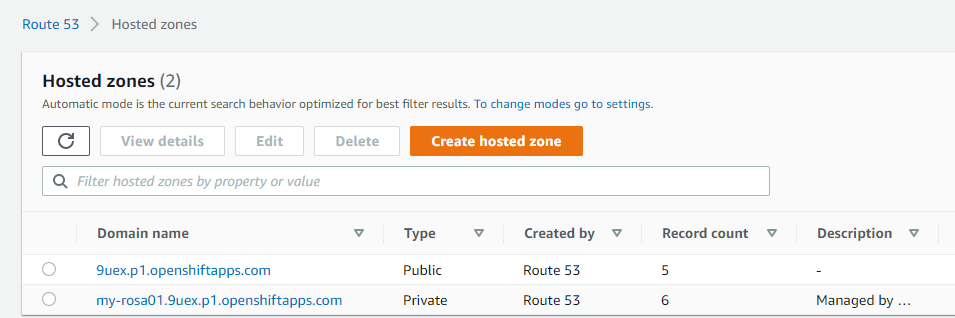
Route 53
Public Hosted Zone 1個
Private Hosted Zone 1個
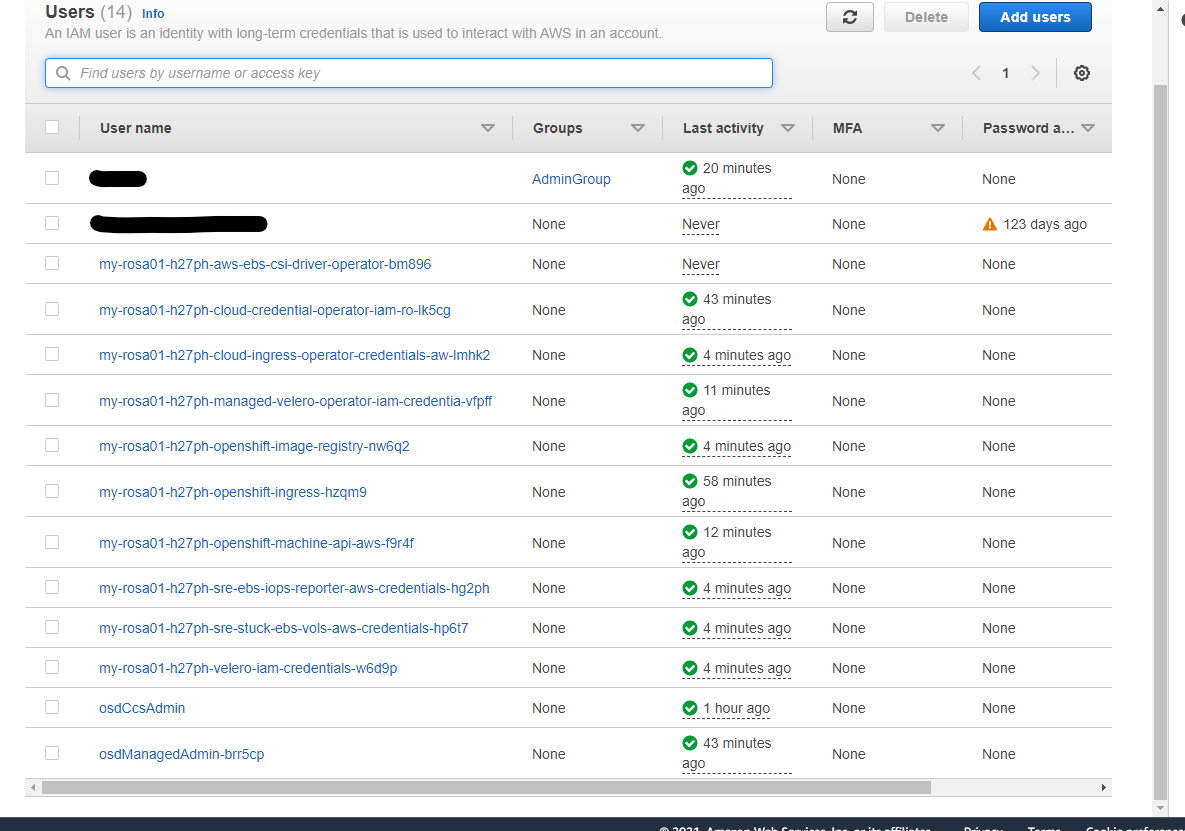
IAM
IAM User が 11 個作成されています
OpenShift の管理者を追加
ROSA CLI をつかって、OpenShift に管理者を追加できます。
rosa create admin -c my-rosa01
実行例
- パスワードが表示されています (secret の文字列にマスクしています)
$ rosa create admin -c my-rosa01
W: It is recommended to add an identity provider to login to this cluster. See 'rosa create idp --help' for more information.
I: Admin account has been added to cluster 'my-rosa01'.
I: Please securely store this generated password. If you lose this password you can delete and recreate the cluster admin user.
I: To login, run the following command:

   oc login https://api.my-rosa01.9uex.p1.openshiftapps.com:6443 --username cluster-admin --password secret

I: It may take up to a minute for the account to become active.
oc login
管理者を作成したあとに、oc コマンドでログインを行います。管理者作成直後にログインすると失敗することがありました。1~2分待ったあとにログインを試すと成功したので、失敗した方は若干待機してみると良いと思います。
$ oc login https://api.my-rosa01.9uex.p1.openshiftapps.com:6443 --username cluster-admin --password secret
Login successful.

You have access to 90 projects, the list has been suppressed. You can list all projects with 'oc projects'

Using project "default".
Welcome! See 'oc help' to get started.
oc コマンドの実行確認のために、oc get nodes -o wide を実行します。9 個の Node が確認できます。
- CoreOS を使っていることがわかる
$ oc get nodes -o=wide
NAME                                              STATUS   ROLES          AGE    VERSION           INTERNAL-IP    EXTERNAL-IP   OS-IMAGE                                                       KERNEL-VERSION                 CONTAINER-RUNTIME
ip-10-0-142-230.ap-northeast-1.compute.internal   Ready    infra,worker   86m    v1.22.3+ffbb954   10.0.142.230   <none>        Red Hat Enterprise Linux CoreOS 49.84.202112032104-0 (Ootpa)   4.18.0-305.28.1.el8_4.x86_64   cri-o://1.22.1-8.rhaos4.9.gite059965.el8
ip-10-0-154-126.ap-northeast-1.compute.internal   Ready    master         117m   v1.22.3+ffbb954   10.0.154.126   <none>        Red Hat Enterprise Linux CoreOS 49.84.202112032104-0 (Ootpa)   4.18.0-305.28.1.el8_4.x86_64   cri-o://1.22.1-8.rhaos4.9.gite059965.el8
ip-10-0-159-179.ap-northeast-1.compute.internal   Ready    worker         109m   v1.22.3+ffbb954   10.0.159.179   <none>        Red Hat Enterprise Linux CoreOS 49.84.202112032104-0 (Ootpa)   4.18.0-305.28.1.el8_4.x86_64   cri-o://1.22.1-8.rhaos4.9.gite059965.el8
ip-10-0-165-207.ap-northeast-1.compute.internal   Ready    worker         109m   v1.22.3+ffbb954   10.0.165.207   <none>        Red Hat Enterprise Linux CoreOS 49.84.202112032104-0 (Ootpa)   4.18.0-305.28.1.el8_4.x86_64   cri-o://1.22.1-8.rhaos4.9.gite059965.el8
ip-10-0-170-203.ap-northeast-1.compute.internal   Ready    master         117m   v1.22.3+ffbb954   10.0.170.203   <none>        Red Hat Enterprise Linux CoreOS 49.84.202112032104-0 (Ootpa)   4.18.0-305.28.1.el8_4.x86_64   cri-o://1.22.1-8.rhaos4.9.gite059965.el8
ip-10-0-182-146.ap-northeast-1.compute.internal   Ready    infra,worker   86m    v1.22.3+ffbb954   10.0.182.146   <none>        Red Hat Enterprise Linux CoreOS 49.84.202112032104-0 (Ootpa)   4.18.0-305.28.1.el8_4.x86_64   cri-o://1.22.1-8.rhaos4.9.gite059965.el8
ip-10-0-205-222.ap-northeast-1.compute.internal   Ready    infra,worker   85m    v1.22.3+ffbb954   10.0.205.222   <none>        Red Hat Enterprise Linux CoreOS 49.84.202112032104-0 (Ootpa)   4.18.0-305.28.1.el8_4.x86_64   cri-o://1.22.1-8.rhaos4.9.gite059965.el8
ip-10-0-214-186.ap-northeast-1.compute.internal   Ready    worker         109m   v1.22.3+ffbb954   10.0.214.186   <none>        Red Hat Enterprise Linux CoreOS 49.84.202112032104-0 (Ootpa)   4.18.0-305.28.1.el8_4.x86_64   cri-o://1.22.1-8.rhaos4.9.gite059965.el8
ip-10-0-220-160.ap-northeast-1.compute.internal   Ready    master         117m   v1.22.3+ffbb954   10.0.220.160   <none>        Red Hat Enterprise Linux CoreOS 49.84.202112032104-0 (Ootpa)   4.18.0-305.28.1.el8_4.x86_64   cri-o://1.22.1-8.rhaos4.9.gite059965.el8
コンソールログイン
rosa describe cluster コマンドで、ROSA Cluster の詳細を表示できます。
$ rosa describe cluster --cluster my-rosa01
Name:                       my-rosa01
ID:                         1pcndrpeoopvacpohlhouf17bi592fb9
External ID:                a09fadda-34f8-4d12-b5f8-76ad9433d3e2
OpenShift Version:          4.9.11
Channel Group:              stable
DNS:                        my-rosa01.9uex.p1.openshiftapps.com
AWS Account:                xxxxxxxxxxxx
API URL:                    https://api.my-rosa01.9uex.p1.openshiftapps.com:6443
Console URL:                https://console-openshift-console.apps.my-rosa01.9uex.p1.openshiftapps.com
Region:                     ap-northeast-1
Multi-AZ:                   true
Nodes:
 - Control plane:           3
 - Infra:                   3
 - Compute:                 3
Network:
 - Service CIDR:            172.30.0.0/16
 - Machine CIDR:            10.0.0.0/16
 - Pod CIDR:                10.128.0.0/14
 - Host Prefix:             /23
State:                      ready
Private:                    No
Created:                    Dec 29 2021 02:16:16 UTC
Details Page:               https://console.redhat.com/openshift/details/s/22wMQ1YFeNo3Anv5x5Nm7o5rPIS
Console URL にアクセスします (この環境は既に削除済みです)
https://console-openshift-console.apps.my-rosa01.9uex.p1.openshiftapps.com
Cluster-Admin でログインします。
ログインします。OpenShift の管理者を作成したときに表示されたパスワードを入れます。

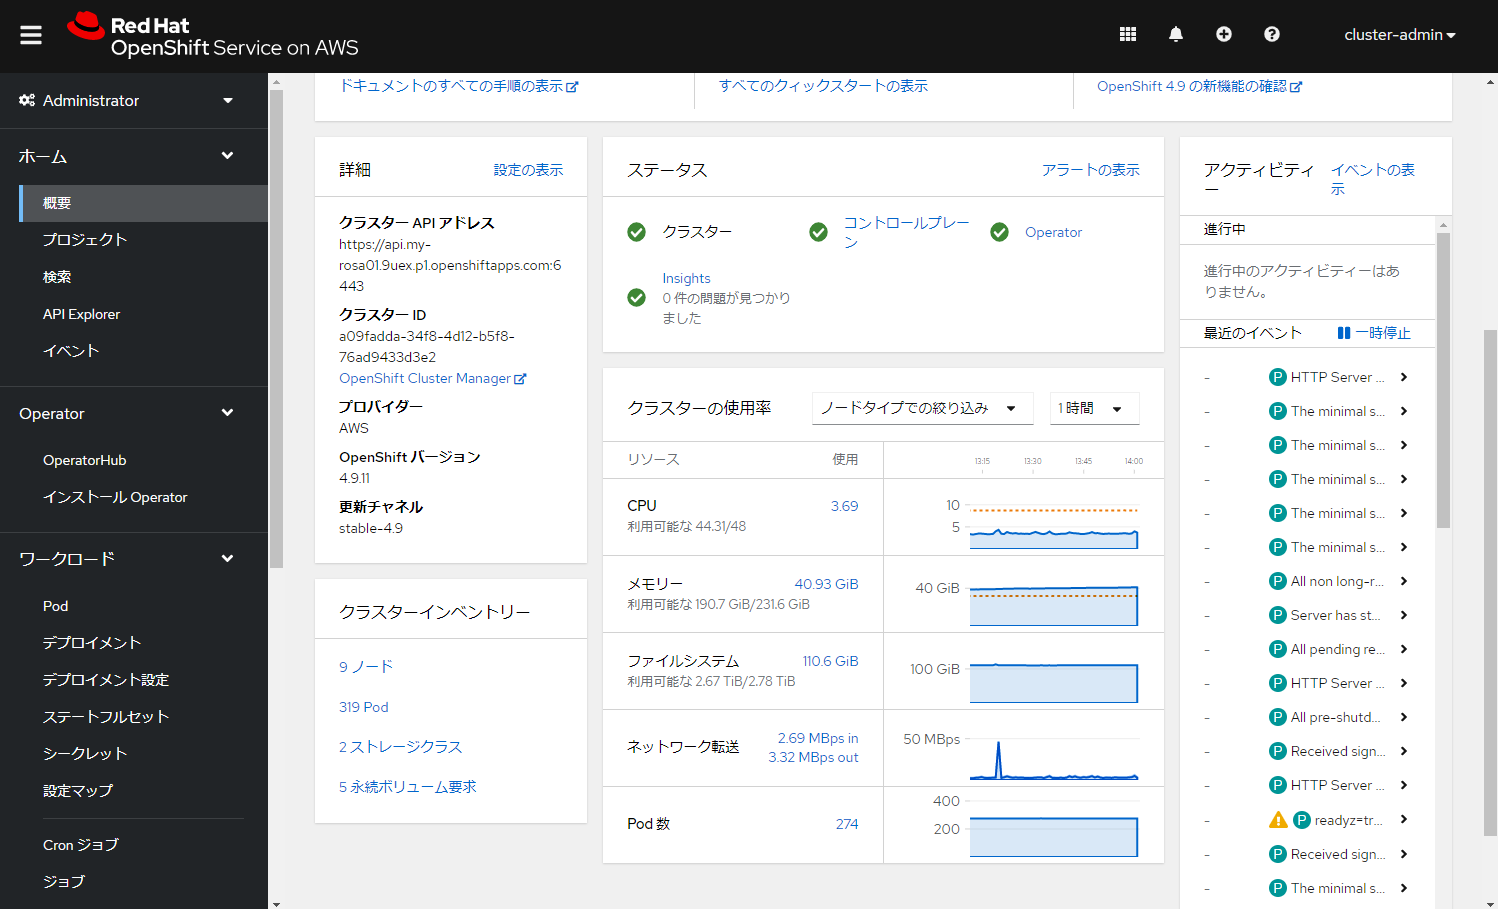
こんな感じの見た目になっています。わかりやすそう。
他、なにやら興味のある画面スクリーンショットを備忘録的に載せておきます。
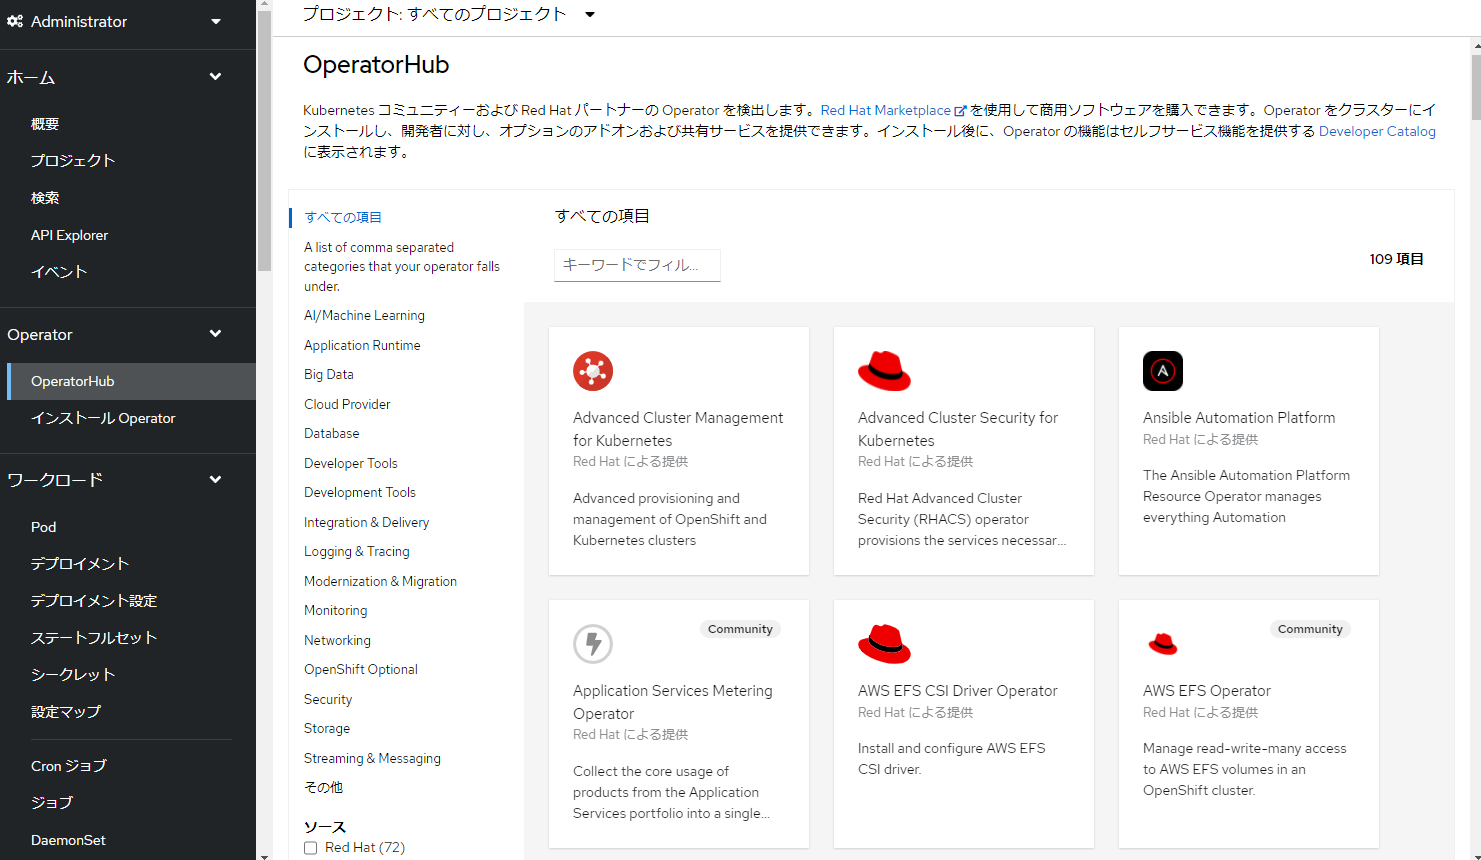
OperatorHub で、好きな Operator をインストールできそう。
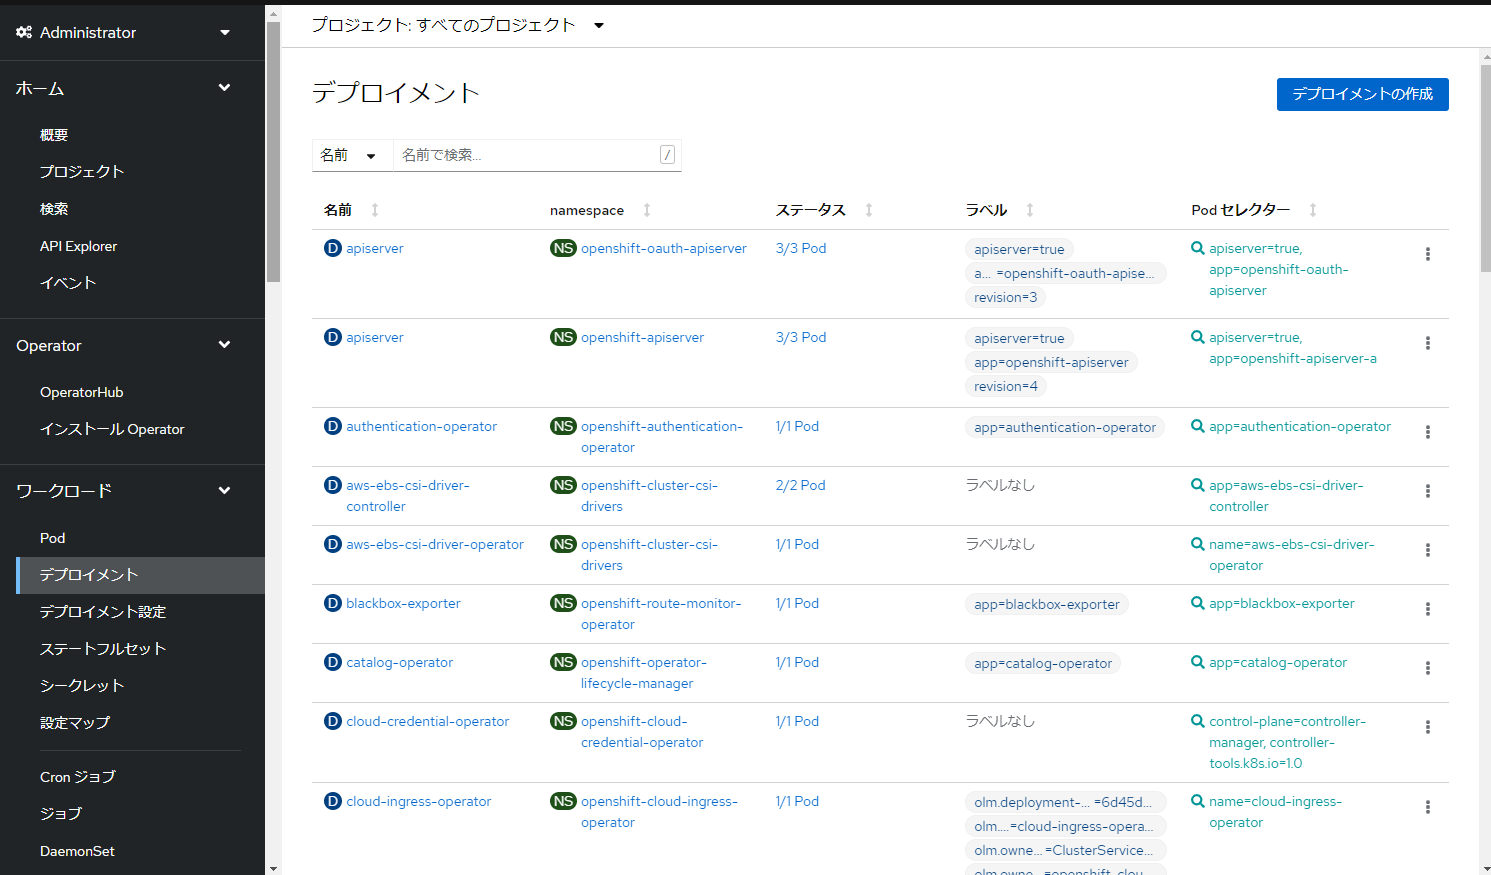
k8s リソースである Deployment の画面
参考URL
- https://aws.amazon.com/jp/blogs/news/whats-new-red-hat-openshift-service-on-aws/
- https://rheb.hatenablog.com/entry/2021/06/07/AWS%E4%B8%8A%E3%81%A7%E3%81%AE%E3%83%9E%E3%83%8D%E3%83%BC%E3%82%B8%E3%83%89_OpenShift_%E3%82%B5%E3%83%BC%E3%83%93%E3%82%B9_ROSA_%28%E3%82%8D%E3%81%95%29_%E3%81%AE%E6%8F%90%E4%BE%9B%E9%96%8B%E5%A7%8B
- https://dev.classmethod.jp/articles/red-hat-openshift-service-on-aws-now-generally-availably/
- https://qiita.com/1ksen/items/d4f41cb0c1dfab25d327