TL;DR:
標準OSがWindows7 、標準ブラウザはIE11という環境はまだまだ残っていると思います。
既存システムの機能追加の際にコンポーネント志向にしたいけれども、React, Vue, Angularにはできないような環境にIE11でも動作するWeb Componentsはどうでしょうか?
作り方をメモしました。
Setup
Installation
まずはVue CLI3のインストールから
npm install -g @vue/cli
# OR
yarn global add @vue/cli
完了したらVersionを表示してインストール完了チェック
vue --version
vue serve vue buildを使うためにアドオンを追加
npm install -g @vue/cli-service-global
Vueプロジェクト作成
vue create
vue create コマンドでプロジェクトを作成する。
vue create first-component
以下のようにプリセットを使うか、マニュアルで作成するか選択を促される。
Vue CLI v3.2.1
? Please pick a preset: (Use arrow keys)
> default (babel, eslint)
  Manually select features
ひとまずここはデフォルトのプリセット(babel, eslint)を使う。
しばらく待つと完了する。
🎉  Successfully created project first-component.
👉  Get started with the following commands:

 $ cd first-component
 $ yarn serve
プロジェクト起動確認
yarn serveコマンドで起動する。
cd first-component
yarn serve --open
以下のような画面が出たら成功してる。

Using the GUI
以下コマンドでGUIベースで確認等ができるようだが、ここでは割愛する。
vue ui
web-component化
それでは実際にweb-component化をやってみよう。
1. ビルドコマンドの変更
とはいえ、難しいことはなく、package.jsonのbuildを以下のように変更する。
  "scripts": {
    "build": "vue-cli-service build",
  },

    ↓
  "scripts": {
    "build": "vue-cli-service build --target wc --name my-first-component",
  },
※ my-first-componentは自由な名前に置き換えてよい。
2. ビルド
yarn run buildコマンドでコンポーネントを作成する
yarn run build
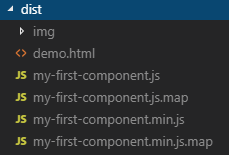
しばらく待つとdistフォルダ配下にコンポーネントが作成される。
3. ビルド結果確認
demo.htmlの中身は以下になっていて、<my-first-component>タグだけで構成されている。
<meta charset="utf-8">
<title>my-first-component demo</title>
<script src="https://unpkg.com/vue"></script>
<script src="./my-first-component.js"></script>

<my-first-component></my-first-component>
demo.htmlをChrome等のブラウザで開いてみると<my-first-component>タグだけで当初に起動確認した画面が表示されるはずである。
※ IE、Edgeでは表示されない。(まっしろ画面になる)
IE11、Edge対応
IE11でもWeb Componentを使うことが目的でしたが、VueのWeb Componentsの説明には以下のようにIE11に非対応とはっきり書いてあります。
Note on Compatibility
Web Component mode does not support IE11 and below. More details
さらにVue.js における次のイテレーションの計画 - IE11 サポートにもIE11には今後サポートと書いてあります。(2018.12.27現在)
TL;DR: サポートされる予定ですが、Vue 2.x と同じリアクティブ制限を持つ別のビルドになります。
さて、どうしたものかというところで、Babelとpolyfillの登場です。
babel
1. babel/coreの追加
yarn add --dev @babel/core @babel/cli
2. babel pluginモジュールの追加
モジュールを追加します。
追加モジュールは以下
- babel-plugin-transform-custom-element-classes
- babel-plugin-transform-es2015-shorthand-properties
- babel-plugin-transform-es2015-template-literals
- @babel/plugin-transform-arrow-functions
- @babel/plugin-transform-regenerator
yarn add --dev babel-plugin-transform-custom-element-classes babel-plugin-transform-es2015-shorthand-properties babel-plugin-transform-es2015-template-literals @babel/plugin-transform-arrow-functions @babel/plugin-transform-regenerator
3. babel.config
babel.config.jsに以下のようにプラグインを使うように追加します。
module.exports = {
  presets: [
    '@vue/app',
  ],
  plugins: [
    'transform-custom-element-classes',
    'transform-es2015-shorthand-properties',
    'transform-es2015-template-literals',
    "@babel/plugin-transform-arrow-functions",
    "@babel/plugin-transform-regenerator"
  ]
}
4. prebuildの追加
package.jsonのscriptsにprebuildを追加します。
これにより、vue-wc-wrapper.jsのES6形式をIE11でも実行可能なJSに変更します。
  "scripts": {
    ...
    "prebuild": "babel node_modules/@vue/web-component-wrapper/dist/vue-wc-wrapper.js -o node_modules/@vue/web-component-wrapper/dist/vue-wc-wrapper.js",

    "build": "vue-cli-service build --target wc --name my-first-component",
    ...

  },
例えば
const camelize = str => {...}

は以下のように変換されます
var camelize = function camelize(str) {};
5. ビルド
yarn run buildコマンドでビルドします。
yarn run build
dist配下にコンポーネントとdemo.htmlが作成されます。
polyfill
IE11で実行可能な形にビルドできましたが、このままでもIE11では動作しないので、polyfillを読み込みます。
demo.htmlに以下を追加します。
<script src="https://unpkg.com/core-js-bundle@3.0.0-alpha.1"></script>
<script src="https://unpkg.com/@webcomponents/webcomponentsjs/webcomponents-loader.js"></script>
<script src="https://unpkg.com/vue"></script>
以下のようになります。
<meta charset="utf-8">
<title>my-first-component demo</title>
<script src="https://unpkg.com/core-js-bundle@3.0.0-alpha.1"></script>
<script src="https://unpkg.com/@webcomponents/webcomponentsjs/webcomponents-loader.js"></script>
<script src="https://unpkg.com/vue"></script>
<script src="./my-element.js"></script>

<my-element></my-element>
実行
IE11で起動すると以下の画面が表示されます。
必要に応じてdemo.htmlを以下のように変えてもよいでしょう。
<!DOCTYPE html>
<html>
<head>
    <meta charset="utf-8" />
    <meta http-equiv="X-UA-Compatible" content="IE=edge" />
    <title>my-first-component demo</title>
    <script src="https://unpkg.com/core-js-bundle@3.0.0-alpha.1"></script>
    <script src="https://unpkg.com/@webcomponents/webcomponentsjs/webcomponents-loader.js"></script>
    <script src="https://unpkg.com/vue"></script>
    <script src="./my-first-component.js"></script>
</head>

<body>
    <my-first-component></my-first-component>
</body>
</html>
確認用フォルダ作成
distはビルドの度に再作成されるので、確認用フォルダを作成してみます。
dist-previewフォルダを作成し、index.htmlを作成
<!DOCTYPE html>
<html>
<head>
    <meta charset="utf-8" />
    <meta http-equiv="X-UA-Compatible" content="IE=edge" />
    <title>my-first-component demo</title>
    <script src="https://unpkg.com/core-js-bundle@3.0.0-alpha.1"></script>
    <script src="https://unpkg.com/@webcomponents/webcomponentsjs/webcomponents-loader.js"></script>
    <script src="https://unpkg.com/vue"></script>
    <script src="../dist/my-first-component.js"></script>
</head>

<body>
    <my-first-component></my-first-component>
</body>
</html>
リポジトリ
ソースは↓のStep1に置きました。
sugasaki/vue-cli3-webcomponent