はじめに
こんにちは。Flutter開発をいている3年目エンジニアです。
先日、TextFormFieldの表示数をユーザ側のアクションで動的に増やす実装をしました。
これがまた便利で簡単だったので、紹介します。
この記事で実装すること
- TextButtonの実装
- TextFormFieldの実装
- 動的処理実装
TextButtonの実装
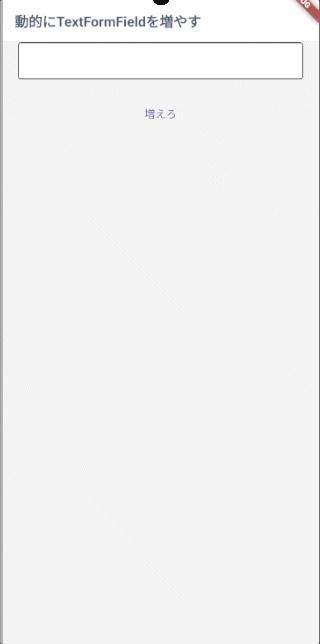
まずは、TextFormFieldの表示数を変化させるTextButtonを用意します。
ここは難しいことないので、サンプルコードだけ。
Widget _textButton({required void Function() onPressed}) {
  return TextButton(
    onPressed: onPressed,
    child: const Text("増えろ"),
  );
}
TextFormFieldの実装
今度は、TextFormFieldを用意しましょう。
ここで1つ注意が必要なのは、TextEditingControllerを受け取れるようにしておくこと。
今回の場合、複数のデータをまとめて管理する必要があり、そのデータの最大値が決まっていません。
したがって、あらかじめ用意した変数への格納が難しいため、各フォームに設置したコントローラでこれを管理します。
Widget _textFormField({required TextEditingController textEditingController}) {

  return TextFormField(
    controller: textEditingController, // コントローラを受け取る

    // ここから下は各々の実装に合うデザインにして大丈夫です。
    maxLength: null,
    decoration: const InputDecoration(
      contentPadding: EdgeInsets.symmetric(horizontal: 10.0, vertical: 6.0),
      fillColor: Colors.white,
      filled: true,
      enabledBorder: OutlineInputBorder(
        borderSide: BorderSide(
          color: Colors.black,
        ),
      ),
      focusedBorder: OutlineInputBorder(
        borderSide: BorderSide(
          color: Colors.black,
        ),
      ),
    ),
  );
}
動的処理実装
さあ本番ですね。
まずは、どう実装していくかを簡潔にまとめます。
- TextEditingControllerをListで管理する変数を用意(※1)
- initState()で初期データを追加
- ListView.builderで用意したTextFormFieldを表示
- itemCountを※1のlengthにしておく
- TextButtonで※1にTextEditingControllerを追加する
とこんな流れです。
それではやって行きましょう
TextEditingControllerをListで管理する変数を用意(※1)
List<TextEditingController> _textEditingControllers = [];
initState()で初期データを追加
void initState() {
    _textEditingControllers.add(TextEditingController());
    super.initState();
}
ListView.builderで用意したTextFormFieldを表示
ListView.builder(
  shrinkWrap: true,
  physics: const NeverScrollableScrollPhysics(),
  itemCount: _textEditingControllers.length, // コントローラのリスト数分表示
  padding: const EdgeInsets.symmetric(horizontal: 20.0),
  itemBuilder: (context, index) {
    return Column(
      children: [
        _textFormField(
          textEditingController: _textEditingControllers[index], // リストのインデックスに合わせてコントローラを渡す
        ),
        const SizedBox(height: 20.0)
      ],
    );
  },
),
TextButtonで※1にTextEditingControllerを追加する
_textButton(
  onPressed: () {
    setState(() { // setStateを使用しないと動的に変わってくれないので必須!
      _textEditingControllers.add(TextEditingController());
    });
  },
),
コード全体
class Sample extends StatefulWidget {
  const Sample({super.key});

  @override
  State<Sample> createState() => _SampleState();
}

List<TextEditingController> _textEditingControllers = [];

class _SampleState extends State<Sample> {
  @override
  void initState() {
    _textEditingControllers.add(TextEditingController());
    super.initState();
  }

  @override
  Widget build(BuildContext context) {
    return Scaffold(
      appBar: AppBar(
        title: const Text("動的にTextFormFieldを増やす"),
      ),
      body: SingleChildScrollView(
        child: Column(
          children: [
            ListView.builder(
              shrinkWrap: true,
              physics: const NeverScrollableScrollPhysics(),
              itemCount: _textEditingControllers.length,
              padding: const EdgeInsets.symmetric(horizontal: 20.0),
              itemBuilder: (context, index) {
                return Column(
                  children: [
                    _textFormField(
                      textEditingController: _textEditingControllers[index],
                    ),
                    const SizedBox(height: 20.0)
                  ],
                );
              },
            ),
            _textButton(
              onPressed: () {
                setState(() {
                  _textEditingControllers.add(TextEditingController());
                });
              },
            ),
          ],
        ),
      ),
    );
  }
}

Widget _textFormField({required TextEditingController textEditingController}) {
  return TextFormField(
    controller: textEditingController,
    maxLength: null,
    decoration: const InputDecoration(
      contentPadding: EdgeInsets.symmetric(horizontal: 10.0, vertical: 6.0),
      fillColor: Colors.white,
      filled: true,
      enabledBorder: OutlineInputBorder(
        borderSide: BorderSide(
          color: Colors.black,
        ),
      ),
      focusedBorder: OutlineInputBorder(
        borderSide: BorderSide(
          color: Colors.black,
        ),
      ),
    ),
  );
}

Widget _textButton({required void Function() onPressed}) {
  return TextButton(
    onPressed: onPressed,
    child: const Text("増えろ"),
  );
}
画面動作
確認
最後にログを出して全ての入力されたデータが管理できているか確認しましょう!
for (var i = 0; i < _textEditingControllers.length; i++) {
  print(_textEditingControllers[i].text);
}
結果、きちんとそれぞれの入力したデータを出力することができました。
I/flutter ( 4265): aaa
I/flutter ( 4265): bbb
I/flutter ( 4265): ccc
以上、ぜひ使ってみてください。