JavaScript で矢印キーで移動する枠を簡単につくってみる
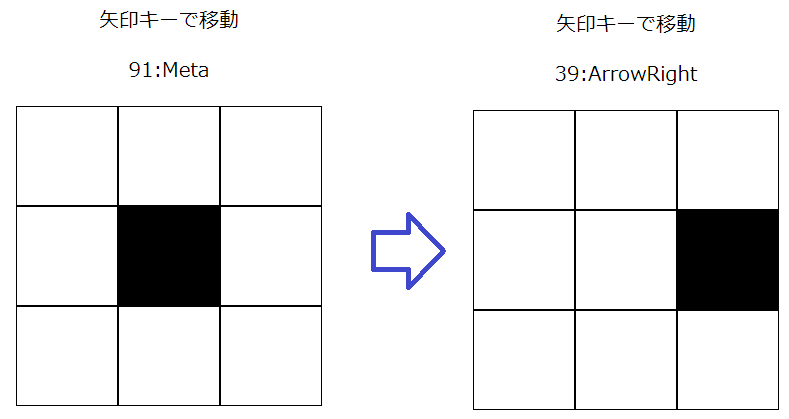
出来上がったやつのサンプルページのリンク、イメージはこんな感じ
See the Pen Untitled by sueasen (@sueasen) on CodePen.
- HTML 3×3 のマス用意
index.html
<!doctype html>
<html>

<head>
    <meta charset="UTF-8">
    <meta name="viewport" content="width=device-width,initial-scale=1">
    <link rel="stylesheet" href="./style_posmove.css">
</head>

<body>
    <div class="title">
        <p>矢印キーで移動</p>
        <p class="keyret">押したキー</p>
    </div>
    <div class="flex-row">
	    <div class="box"></div>
	    <div class="box"></div>
	    <div class="box"></div>
    </div>
    <div class="flex-row">
	    <div class="box"></div>
	    <div class="box"></div>
	    <div class="box"></div>
    </div>
    <div class="flex-row">
	    <div class="box"></div>
	    <div class="box"></div>
	    <div class="box"></div>
    </div>
</body>

<script src="script_posmove.js"></script>

</html>
- CSS マス設定
style.css
@charset "utf-8";

.title {
  text-align:center;
  font-size: 20px;
}

.flex-row {
  display: flex;
  justify-content: center;
  height: 100px;
}
.box {
  width: 100px;
  border: 1px solid black;
  background-color: white;
}
.box-now {
  background-color: black;
}
- JavaScript で矢印キーの動きを設定
script.js
// 枠クラスリスト取得
const getGridClassList = (pos) => document.querySelectorAll('.flex-row')[pos.y]?.children[pos.x]?.classList;

// 最初の枠
const now = {x: 1, y: 1};
const nowGrid = {pos: now, classList: getGridClassList(now)};
nowGrid.classList.add('box-now');

// 矢印キー
const keyArrows = {
    ArrowUp   : {y: -1, x:  0},
    ArrowDown : {y:  1, x:  0},
    ArrowLeft : {y:  0, x: -1},
    ArrowRight: {y:  0, x:  1},
};


// キーイベントで矢印キーの操作
document.querySelector('body').addEventListener('keydown', (e) => {

    console.log(e);
    document.querySelector('.keyret').textContent = e.keyCode + ':' + e.key;

    const keyArrow = keyArrows[e.key];
    if (!keyArrow) return;

    const after = {x: nowGrid.pos.x + keyArrow.x, y: nowGrid.pos.y + keyArrow.y};
    const afterGridClassList = getGridClassList(after);
    if (!afterGridClassList) return;

    nowGrid.classList.remove('box-now');
    nowGrid.pos = after;
    nowGrid.classList = afterGridClassList;
    nowGrid.classList.add('box-now');
});
