jenkins-backup-scriptとは?
Jenkinsの設定ファイルやプラグイン一式を全部tar.gzに固めるスクリプトです
この辺のファイルをバックアップします
$JENKINS_HOME/*.xml$JENKINS_HOME/jobs/*/*.xml$JENKINS_HOME/nodes/*$JENKINS_HOME/plugins/*.jpi$JENKINS_HOME/secrets/*$JENKINS_HOME/users/*
使い方
単体実行
./jenkins-backup.sh にJENKINS_HOMEの場所と作成したいアーカイブファイルの場所を渡すだけです
./jenkins-backup.sh /path/to/jenkins_home archive.tar.gz
Jenkinsのジョブで1日1回動かす
1. Exclusive Execution Plugin をインストールする
バックアップ中に他のジョブが実行されないよう排他制御を行うためにExclusive Execution Pluginをインストールしてください
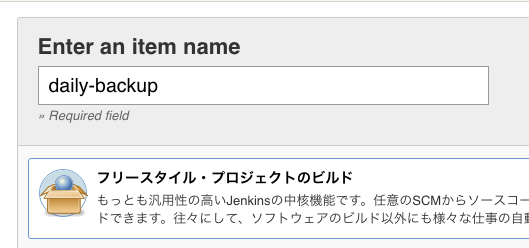
2. フリースタイル・プロジェクトで新しいジョブを作る
3. ジョブの設定
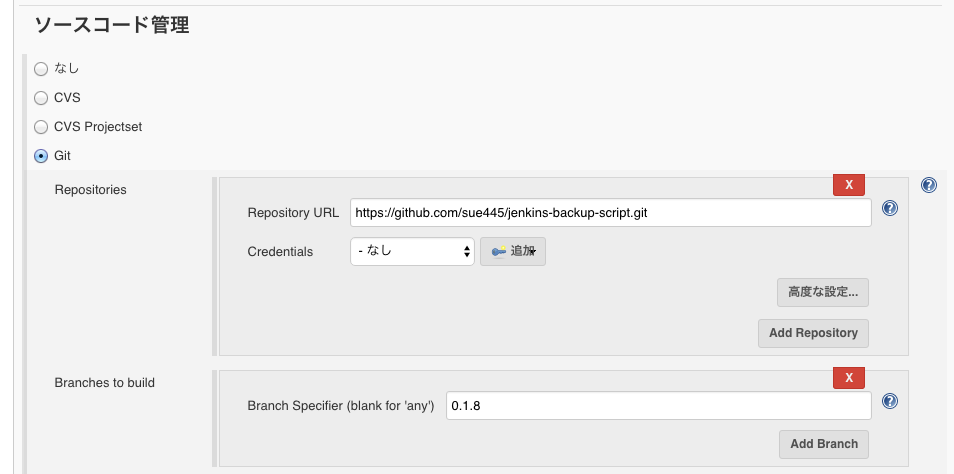
ソースコード管理 -> リポジトリ
- Repository URL:
https://github.com/sue445/jenkins-backup-script.gitを設定 - Branch Specifier: masterだと突然挙動が変わることがあるので基本的には最新のtagを入れるのを推奨です
ビルド・トリガ
「定期的に実行」にチェックを入れて実行したい時間を入力してください。(上のスクショだと午前3時台)
ビルド -> シェルの実行
何でもいいですが僕が実際に使ってるコマンドはこれです
./jenkins-backup.sh $JENKINS_HOME /data/backup/settings/backup_`date +"%Y%m%d_%H%M%S"`.tar.gz

find /data/backup/settings/backup_* -mtime +30 | xargs rm -f
backup_YYYYMMDD_HHMMSS.tar.gz というような名前でバックアップファイルを作りつつも、バックアップファイルが作られすぎないように直近30日分だけ残してそれより古いのは全部消しています。
バックアップとった後は
Jenkinsサーバがいつ死んでもいいように物理的に別のサーバ(S3など)に送るのがいいでしょう。
バックアップから復旧したい
雑ですがこんな感じ。tar.gzを展開してJENKINS_HOMEに上書きするだけです
sudo /etc/init.d/jenkins stop
cd /path/to/backup_dir
tar xzvf backup.tar.gz
sudo cp -R jenkins-backup/* /path/to/jenkins/
sudo chown jenkins:jenkins -R /path/to/jenkins/
sudo /etc/init.d/jenkins start
【ポエム】 テストの変遷
jenkins-backup-scriptはいくつかテストの変遷があります
1. ノーテスト期
雑に作って雑に公開したのでテストはありませんでした。
2. test-unitでテストを書いた
しばらくはノーテストでやっていたものの、有難いことにたくさんの人からPullRequestが飛んできてその度に動作確認するのが大変だったので途中でテストコードを書きました。
一時ディレクトリに テストに必要なファイルやディレクトリ一式 をコピーし、 実際に jenkins-backup.sh 動かしてテストを実行していました。
rspecではなくtest-unitを使ったのは確か「rspecだとRuby以外の言語の人がPRでテストを修正しづらいだろう」と思ったためです。
3. Vagrant + itamaeで環境構築し、Serverspecでテストを実行するようにした
今の形式です
test-unitだとruby以外のセットアップは不要でお手軽に実行できるのですが、テストコードが膨大になりすぎてメンテしづらくなってきたので一念発起してVagrantで作ったVM内にitamaeでテストのための環境構築のレシピを流して、serverspecでテストするようにしました。
Vagrantを導入することで複数OSのテストが用意になりました。
テストでやってることはこんな感じ
- テストの環境構築(JENKINS_HOMEの再現)を行うレシピ
-
jenkins-backup.shを実行するレシピ
-
jenkins-backup.sh実行後のアーカイブファイルに期待したファイルが含まれていることを確認するテスト
「テストのための環境構築」というテストとは直接関係ないものを全部itamaeのレシピに押し込めたおかげで、テストコードは割とスッキリしたと思います。
describe tar_file("/tmp/relative_archive.tar.gz") do
  ARCHIVED_FILES.each do |file|
    it { should include file }
  end
end

describe tar_file("/tmp/absolute_archive.tar.gz") do
  ARCHIVED_FILES.each do |file|
    it { should include file }
  end
end
ちなみに tar_file というのは、tarの中に含まれているファイルをいい感じに取り出すための独自resourceです。
module Serverspec
  module Type
    class TarFile < Base
      def initialize(tar_file)
        # NOTE: @name is used in Serverspec::Type::Base
        @name = tar_file
      end

      def files
        return @files if @files

        command = "tar tfz #{@name}"
        result = Specinfra.backend.run_command(command)
        raise "FAILED: #{command}\n#{result.stderr}" if result.failure?

        @files = result.stdout.split(/[\r\n]+/)
      end

      def include?(file)
        files.include?(file)
      end
    end

    def tar_file(tar_file)
      TarFile.new(tar_file)
    end
  end
end

include Serverspec::Type


