絶賛執筆中です、間に合わなくてすいません🙇♂️
はじめに
上記の記事で紹介しているアセットを作ったときに得られた知見をまとめました。
割と実装の解説というか作る時にハマったこと一覧みたいな内容になってますが、どうぞ最後までお付き合いください。
Gameウィンドウの情報を取得する
UnityのGameウィンドウはGameViewというクラスで実装されていて、このクラスはinternalになっています。
AutoScreen では「GameViewで選択されている解像度」(↓の画像参照)を取得したかったのですが、クラスがinternalなので通常の方法ではアクセスできません。

上記の値に限って言えばpublicなUnityEditor.UnityStats.screenResというAPIで取得できるのですが、UnityStatsはなぜか公式のドキュメントに載っていません。
- no API docs for UnityEditor.UnityStats(Unityフォーラムの投稿)
質問:
the API docs for UnityEditor.UnityStats are nowhere to be found, or at least my googling is not string enough to find them.
中の人の回答(2017/1/28):
The UnityEditor.UnityStats do exist... but are marked as undoc="true", so they are excluded from the docs. I'm not 100% sure why... Will ask some question internally...
しかも[InitializeOnLoadMethod]内でアクセスすると正しい値が返って来ず、1フレーム待つ必要がありました。
「ドキュメントに載ってなくて微妙に使いづらいAPIを使うくらいなら...」ということで、 AutoScreen ではリフレクションを使って直接GameViewから値を取り出しています。
[GameViewProxy.cs](https://github.com/su10/AutoScreen/blob/master/Assets/Jagapippi/AutoScreen/Scripts/Editor/GameViewProxy.cs)
# if UNITY_EDITOR
using System;
using System.Reflection;
using UnityEditor;
using UnityEngine;

namespace Jagapippi.AutoScreen
{
    public static class GameViewProxy
    {
        private const BindingFlags InstanceFlag = BindingFlags.Instance | BindingFlags.NonPublic;
        private const BindingFlags StaticFlag = BindingFlags.Static | BindingFlags.NonPublic;

        private static readonly Type GameView = Assembly.Load("UnityEditor.dll").GetType("UnityEditor.GameView");
        private static readonly PropertyInfo HasFocus = GameView.GetProperty("hasFocus", InstanceFlag);
        private static readonly PropertyInfo CurrentSizeGroupType = GameView.GetProperty("currentSizeGroupType", StaticFlag);
        private static readonly PropertyInfo SelectedSizeIndex = GameView.GetProperty("selectedSizeIndex", InstanceFlag);
        private static readonly PropertyInfo CurrentGameViewSize = GameView.GetProperty("currentGameViewSize", InstanceFlag);

        internal static EditorWindow instance => EditorWindow.GetWindow(GameView, false, "Game", false);
        public static bool isOpen => (0 < Resources.FindObjectsOfTypeAll(GameView).Length);
        public static bool hasFocus => (isOpen && (bool) HasFocus.GetValue(instance, null));
        public static GameViewSizeGroupType currentSizeGroupType => (GameViewSizeGroupType) CurrentSizeGroupType.GetValue(instance, null);
        public static int selectedSizeIndex => (int) SelectedSizeIndex.GetValue(instance, null);

        public static GameViewSize currentGameViewSize
        {
            get
            {
                if (isOpen == false) return null;

                var gameViewSize = CurrentGameViewSize.GetValue(instance, null);
                var json = JsonUtility.ToJson(gameViewSize);
                return JsonUtility.FromJson<GameViewSize>(json);
            }
        }

        public static void Repaint() => instance.Repaint();
    }
}
# endif
最初は GameViewSizeHelper を使おうと思ったのですが、やりたいことに対してミニマムなものではなかったので自分で処理を書きました。
GameViewProxyはリフレクションを使用していますが、安全のために公開されているプロパティなどはすべて読み取り専用で値の書き換えは提供していません。
また、内部的にinstanceでGameウィンドウにアクセス可能にしてありますが、EditorWindow.GetWindow()を呼び出すとウィンドウが開かれていなくても強制的に開いてしまうので、isOpenやhasFocusでは極力ウィンドウが意図せず開かれることがないようにしています。
GameView同様、解像度についてもGameViewSizeというinternalなクラスが情報を保持しています。
このクラスに関して GameViewSizeHelper ではコンストラクタをリフレクション経由で使用しているみたいだったのですが、取り回しづらいと感じたので AutoScreen では「同じ(デ)シリアライズ結果になるpublicなクラス」を作ってJsonUtility経由でコンバートして使っています。
[GameViewSize.cs](https://github.com/su10/AutoScreen/blob/master/Assets/Jagapippi/AutoScreen/Scripts/GameViewSize.cs)
using System;
using UnityEngine;

namespace Jagapippi.AutoScreen
{
    public enum GameViewSizeType
    {
        AspectRatio,
        FixedResolution
    }

    [Serializable]
    public sealed class GameViewSize
    {
        [SerializeField] private string m_BaseText;
        [SerializeField] private GameViewSizeType m_SizeType;
        [SerializeField] private int m_Width;
        [SerializeField] private int m_Height;

        public string baseText => m_BaseText;
        public GameViewSizeType sizeType => m_SizeType;
        public int width => m_Width;
        public int height => m_Height;

        public GameViewSize(string baseText, GameViewSizeType sizeType, int width, int height)
        {
            m_BaseText = baseText;
            m_SizeType = sizeType;
            m_Width = width;
            m_Height = height;
        }
    }
}
Hierarchyやゲームに影響を与えずにゲーム画面に何か描画する
AutoScreen ではGameウィンドウに実機のフレーム画像を表示していますが、似たようなことをしたい場合の基本的な流れは以下のようになります。
- ランタイムで表示する実装を書く
-
[ExecuteAlways]とMonoBehaviourの各種コールバックを組み合わせて非再生時も描画できるようにする -
HideFlagsを使って見えなくしたり保存やビルド時に除外する
1.についてはIMGUIとuGUIのどちらを使っても構いませんが、試してみたらCanvasのOverlayよりもOnGUI()のほうが手前に描画されたので、AutoScreen ではOnGUI()を使ってフレーム画像を描画しています。
また、以下のような違いもあります。
-
OnGUI():ゲームビューだけに表示される -
Canvas:シーンビューにも(UIとしてではなく普通のオブジェクトとして)表示される-
Render ModeがScreen Space - Overlayだと割と邪魔になる
-
ちなみに「HideFlagsのHideInHierarchyやHideInInspectorを使うとGetComponentsInChildren<T>()などの走査からコンポーネントを隠蔽できるのでは?🤔」と思ってやってみたのですがそんなことはありませんでした。残念。
PrefabUtility, PrefabStage
(執筆中...)
Git差分が発生しないようにする
ファイルに保存される直前に毎回RectTransformのアンカーをリセットしたかったので、保存前と後に実行されるコールバックをいくつか併用しています。
- EditorSceneManager
- PrefabStage
- AssetPostprocessor.OnPostprocessAllAssets(string[],string[],string[],string[])
実際に使用しているコード↓
[SafeAreaBase.cs](https://github.com/su10/AutoScreen/blob/master/Assets/Jagapippi/AutoScreen/Scripts/SafeAreaBase.cs)(シーン保存時にリセット&復元)
//(省略)
        void OnEnable()
        {
            GameViewEvent.resolutionChanged += this.OnResolutionChanged;
            EditorSceneManager.sceneSaving += this.OnSceneSaving;
            EditorSceneManager.sceneSaved += this.OnSceneSaved;
            PrefabStage.prefabSaving += this.OnPrefabSaving;
            PrefabStage.prefabSaved += this.OnPrefabSaved;

            this.LockRect();
        }

        void OnDisable()
        {
            GameViewEvent.resolutionChanged -= this.OnResolutionChanged;
            EditorSceneManager.sceneSaving -= this.OnSceneSaving;
            EditorSceneManager.sceneSaved -= this.OnSceneSaved;
            PrefabStage.prefabSaving -= this.OnPrefabSaving;
            PrefabStage.prefabSaved -= this.OnPrefabSaved;

            this.UnlockRect();
        }
//(省略)
[SafeAreaPrefabPostprocessor.cs](https://github.com/su10/AutoScreen/blob/master/Assets/Jagapippi/AutoScreen/Scripts/Editor/SafeAreaPrefabPostprocessor.cs)(プレハブ保存時にリセット&復元)
# if UNITY_EDITOR
using System.Collections.Generic;
using System.IO;
using UnityEditor;
using UnityEngine;

namespace Jagapippi.AutoScreen
{
    class SafeAreaPrefabPostprocessor : AssetPostprocessor
    {
        private static readonly List<string> _processedPathList = new List<string>();

        private static void OnPostprocessAllAssets(string[] importedAssets, string[] deletedAssets, string[] movedAssets, string[] movedFromAssetPaths)
        {
            foreach (var path in importedAssets)
            {
                if (Path.GetExtension(path) != ".prefab") continue;
                if (_processedPathList.Remove(path)) continue;

                var prefab = AssetDatabase.LoadAssetAtPath<GameObject>(path);

                foreach (var safeArea in prefab.GetComponentsInChildren<ISafeAreaUpdatable>(true))
                {
                    safeArea.ResetRect();
                    _processedPathList.Add(path);
                }
            }
        }
    }
}
# endif
プレハブの保存時については最初AssetPostprocessorではなくISerializationCallbackReceiverやカスタムエディタ(インスペクタの拡張)でやろうとしたのですが、短い時間でかなり頻繁にメソッドが呼ばれるようだったので不採用にしました。
インスペクタ拡張のほうは自分の実装が悪かった可能性があるのですが、ISerializationCallbackReceiverのほうはインスタンスがインスペクタに表示されてるだけで頻繁に(デ)シリアライズが走っているようなので使用する際はパフォーマンスに注意が必要です。
GameウィンドウにUIを追加する
最初の発想としては「GameViewのOnGUIに処理を追加できれば可能だな」と思ってたのですが、そもそもinternalなクラスなのでそんな口は用意されていませんでした。
ですが、以下の記事でUIElementsを使えば既存のウィンドウ上にもUIが置けることがわかったのでUIElementsを使うことにしました。
ちなみに今だとGameウィンドウにUIを配置するサンプルもコガネブログ様で公開されてました。
後述するUIElements Debuggerを使用することで、既存のIMGUIと比べてUIElementsによるUIのほうが手前に配置できることがわかります(下にあるものほど手間に描画される)。
また、「Unityの既存ウィンドウクラスのOnGUIに処理を追加する」という発想での実装もだいぶトリッキーですが一応可能みたいで、自分が知る限りではUnityの再生ボタン群の左右にボタンを追加するスクリプトでそういった実装がなされています。
[unity-toolbar-extender/ToolbarCallback.cs](https://github.com/marijnz/unity-toolbar-extender/blob/master/Assets/ToolbarExtender/Scripts/Editor/ToolbarCallback.cs)
using System;
using UnityEngine;
using UnityEditor;
using System.Reflection;

# if UNITY_2019_1_OR_NEWER
using UnityEngine.UIElements;
# else
using UnityEngine.Experimental.UIElements;
# endif

namespace UnityToolbarExtender
{
	public static class ToolbarCallback
	{
		static Type m_toolbarType = typeof(Editor).Assembly.GetType("UnityEditor.Toolbar");
		static Type m_guiViewType = typeof(Editor).Assembly.GetType("UnityEditor.GUIView");
		static PropertyInfo m_viewVisualTree = m_guiViewType.GetProperty("visualTree",
			BindingFlags.Public | BindingFlags.NonPublic | BindingFlags.Instance);
		static FieldInfo m_imguiContainerOnGui = typeof(IMGUIContainer).GetField("m_OnGUIHandler",
			BindingFlags.Public | BindingFlags.NonPublic | BindingFlags.Instance);
		static ScriptableObject m_currentToolbar;

		/// <summary>
		/// Callback for toolbar OnGUI method.
		/// </summary>
		public static Action OnToolbarGUI;

		static ToolbarCallback()
		{
			EditorApplication.update -= OnUpdate;
			EditorApplication.update += OnUpdate;
		}

		static void OnUpdate()
		{
			// Relying on the fact that toolbar is ScriptableObject and gets deleted when layout changes
			if (m_currentToolbar == null)
			{
				// Find toolbar
				var toolbars = Resources.FindObjectsOfTypeAll(m_toolbarType);
				m_currentToolbar = toolbars.Length > 0 ? (ScriptableObject) toolbars[0] : null;
				if (m_currentToolbar != null)
				{
					// Get it's visual tree
					var visualTree = (VisualElement) m_viewVisualTree.GetValue(m_currentToolbar, null);

					// Get first child which 'happens' to be toolbar IMGUIContainer
					var container = (IMGUIContainer) visualTree[0];

					// (Re)attach handler
					var handler = (Action) m_imguiContainerOnGui.GetValue(container);
					handler -= OnGUI;
					handler += OnGUI;
					m_imguiContainerOnGui.SetValue(container, handler);
				}
			}
		}

		static void OnGUI()
		{
			var handler = OnToolbarGUI;
			if (handler != null) handler();
		}
	}
}
UIElements
まともにUIElementsを触るのは今回が初めてだったのですが、スタイルの記述はCSSと同じだったのでWeb系の開発してた人はuGUIよりも簡単なんじゃないかなと思いました。Yogaというレイアウトエンジンが使われていて、Flexboxにも対応してるようです。
HTML,CSS,JavaScriptのようにUXML,USS,C#(.cs)という風にファイルを分けることも可能ですが、使いまわしを考えなければC#だけで全部書いてもいいかなと思ったのでそうしてます(いちいちUQuery書くの面倒だしショウガナイヨネ..)。
[GameViewUI.cs](https://github.com/su10/AutoScreen/blob/master/Assets/Jagapippi/AutoScreen/Scripts/Editor/GameViewUI.cs)(ゲームビューに歯車と設定パネルを表示)
# if UNITY_EDITOR
using UnityEditor;
using UnityEngine;
# if !UNITY_2019_1_OR_NEWER
using UnityEngine.Experimental.UIElements;
using PopupWindow = UnityEngine.Experimental.UIElements.PopupWindow;
# else
using UnityEngine.UIElements;
using PopupWindow = UnityEngine.UIElements.PopupWindow;
# endif

namespace Jagapippi.AutoScreen
{
    public static class GameViewUI
    {
        private static readonly GearImage gearImage = new GearImage();
        private static readonly SettingsWindow settingsWindow = new SettingsWindow();

        [InitializeOnLoadMethod]
        static void Initialize()
        {
            GameViewEvent.opened += OnOpen;
            GameViewEvent.closed += OnClose;
            CurrentGameViewScreen.changed += OnScreenChanged;
            OnScreenChanged(CurrentGameViewScreen.value);
        }

        private static VisualElement GetRoot() => GameViewProxy.instance.GetRootVisualElement();
        private static VisualElement root;

        private static void OnOpen()
        {
            root = GetRoot();

            if (gearImage.image.parent == null)
            {
                root.Add(gearImage.image);

                var style = gearImage.style;
                style.SetPositionAbsolute();
                style.SetTop(15);
# if !UNITY_2019_1_OR_NEWER
                style.SetLeft(3);
# elif UNITY_2019_3_OR_NEWER
                style.SetTop(20);
# endif

                gearImage.image.RegisterCallback<MouseDownEvent>(e =>
                {
                    gearImage.image.visible = false;
                    settingsWindow.visible = true;

                    settingsWindow.deviceFrameToggle.Focus();
                });
            }

            if (settingsWindow.window.parent == null)
            {
                settingsWindow.AddTo(root);

                var style = settingsWindow.window.style;
                style.SetPositionAbsolute();
                style.SetTop(12);
# if !UNITY_2019_1_OR_NEWER
                style.SetLeft(-4);
# elif !UNITY_2019_3_OR_NEWER
                style.SetLeft(-6);
# else
                style.SetTop(21);
                style.SetLeft(1);
# endif

                settingsWindow.background.RegisterCallback<MouseDownEvent>(e =>
                {
                    gearImage.image.visible = true;
                    settingsWindow.visible = false;
                });
            }
        }

        private static void OnClose()
        {
            root.Remove(gearImage.image);
            root.Remove(settingsWindow.window);
        }

        private static void OnScreenChanged(GameViewScreen screen)
        {
            if (screen != null)
            {
                gearImage.image.visible = true;
                settingsWindow.visible = false;
            }
            else
            {
                gearImage.image.visible = false;
                settingsWindow.visible = false;
            }
        }

        private class GearImage
        {
            private static readonly Texture texture = EditorGUIUtility.IconContent("_Popup").image;

            public Image image { get; }
            public IStyle style => this.image.style;

            public GearImage()
            {
                this.image = new Image {image = texture};
                this.style.width = 15;
# if !UNITY_2019_3_OR_NEWER
                this.style.height = 14;
# else
                this.style.height = 15;
# endif
            }
        }

        private class SettingsWindow
        {
            public VisualElement background { get; }
            public PopupWindow window { get; }
            public Toggle deviceFrameToggle { get; }
            public Toggle safeAreaBorderToggle { get; }

            public bool visible
            {
                set { this.background.visible = this.window.visible = value; }
            }

            public SettingsWindow()
            {
                this.background = new VisualElement();
                this.background.style.flexGrow = 1;

                this.window = new PopupWindow {text = "AutoScreen"};
                this.window.style.width = 140;

                this.deviceFrameToggle = new Toggle
                {
                    text = "Device Frame",
                    value = AutoScreenSettings.deviceFrame.enabled
                };
                this.deviceFrameToggle.RegisterValueChangedCallback(e => AutoScreenSettings.deviceFrame.enabled = e.newValue);

                this.safeAreaBorderToggle = new Toggle
                {
                    text = "Safe Area Border",
                    value = AutoScreenSettings.safeAreaBorder.enabled
                };
                this.safeAreaBorderToggle.RegisterValueChangedCallback(e => AutoScreenSettings.safeAreaBorder.enabled = e.newValue);

                this.window.Add(deviceFrameToggle);
                this.window.Add(safeAreaBorderToggle);
            }

            public void AddTo(VisualElement parent)
            {
                parent.Add(this.background);
                parent.Add(this.window);
            }
        }
    }
}
# endif
イベントのハンドリングは要素のイベントに直接コールバックをバインドしていますが、Manipulatorを使う方法もあります。
また、Unity2018から2019へはAPIの破壊的変更があったので両方対応するには注意が必要です。
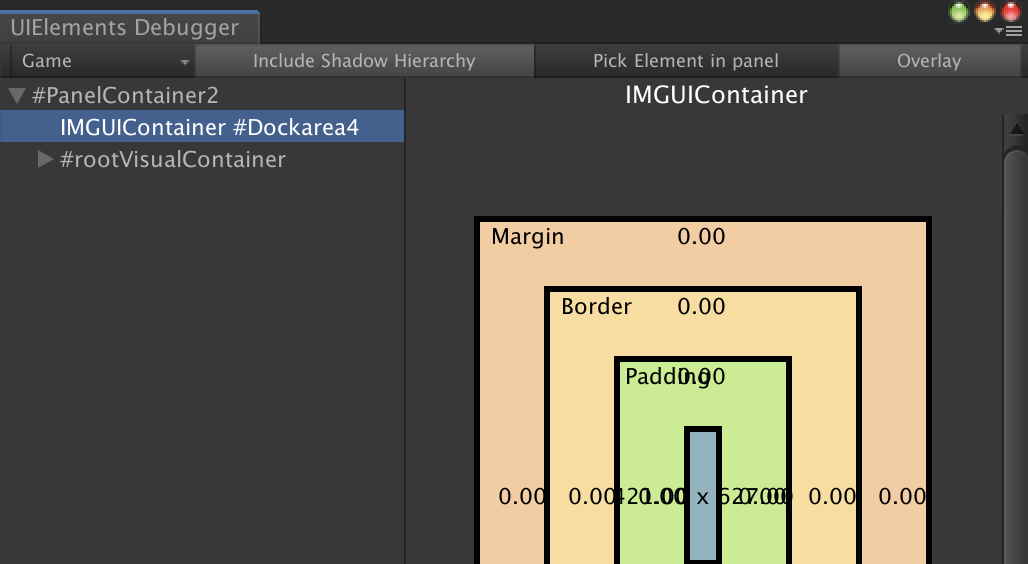
UIElements Debugger
UIElementsにはGoogle Chromeの開発者ツール、FirefoxでいうところのFirebugみたいなツールがあって、スタイルの各種値をウィンドウ上で変更しつつそのプレビューも確認できます。
自分がアセット開発に使用したUnity2018.3.14ではウィンドウから直接要素の追加・削除はできなかったのですが、今後はUIを作るのにいちいちコードを書いてコンパイルを待つ必要がなくなりそうなので期待大です。
その他
(執筆中...)