1. やりたいこと
最近SPAモードが追加されたRemixについて一通り覚えたい
https://remix.run/docs/en/main/start/quickstart
2. Remix SPAモードについて
SPA勢がRemix SPAモードを喜んでる理由は以下のスライドを読めば分かります
https://speakerdeck.com/nkzn/the-spas-chronicle-reaches-to-remix
RemixはSSRとCSRを使い分けできるフレームワークとして登場しましたが、昨年SPAモードが追加されたことでFile-system based routingを使ってSPAが書けるようになりました。SPAで書いていって途中からSSRにすることも出来るので、SEOが関係ない用途では選択肢の筆頭に挙がってきそうです。Next.jsだとSPAの静的ファイルとしてビルド出来ないみたいなので、SPA勢のとしては一気にRemixに傾くところだと思います
https://remix.run/docs/en/main/future/spa-mode
本記事ではRemixの基本的な使い方を学びつつ、最後にSPAとして書いてビルドするにはどうするのかという順で学んだ過程を書いていきます。Reactはだいたい分かっている人向けに書くのでReact まだの人はReactチュートリアルをやってから読んでもらえればと思います
https://ja.react.dev/blog/2023/03/16/introducing-react-dev
3. プロジェクトの作成
reactやnextと同様、1コマンドで環境を作るコマンドが用意されています
npx create-remix@latest
このコマンドが何をやっているかについては公式ページに書かれています。本番環境では色々変更したくなる筈なのでviteの設定など変更して運用する際にはそこだけ変更して実行することが出来そうです
https://remix.run/docs/en/main/start/quickstart
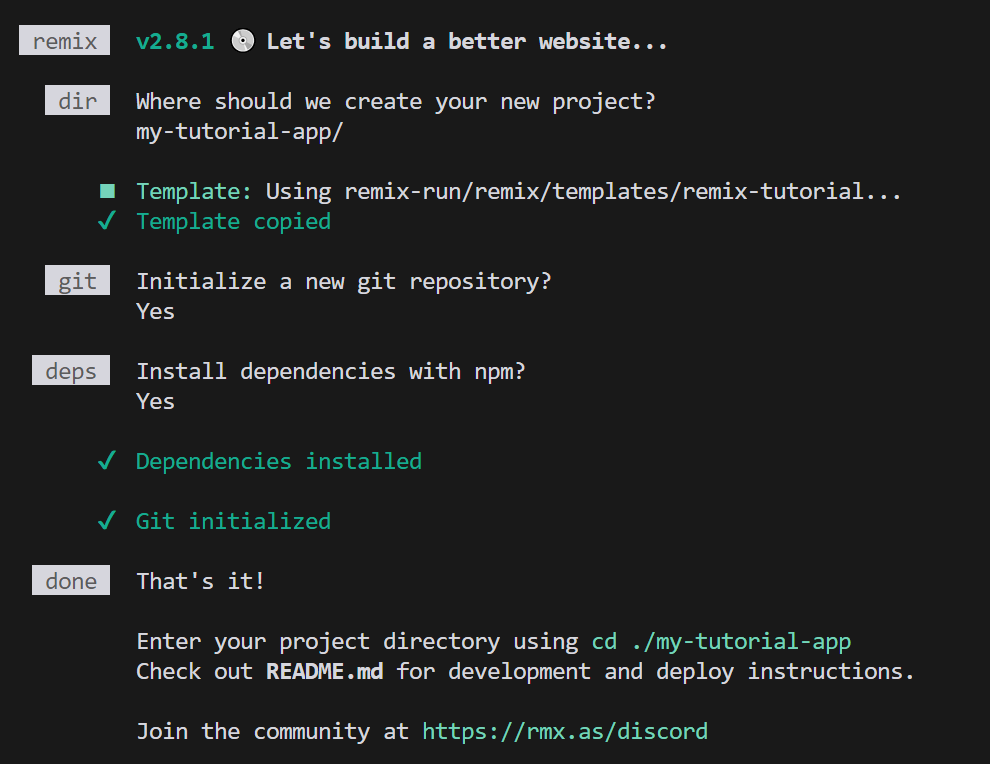
実行すると今どきのフレームワークらしく作成条件を聞いてきますので選んでいきます

全部デフォルトで実行したところ以下のようなフォルダが作成されました

必要なライブラリをnpm installでインストールして、npm run devすればviteが開発サーバーを起動してくれます
npm install
npm run dev

サンプルアプリが起動します
デフォルトだと http://localhost:5173 に待機するようです

4. ビルドとデプロイ
ビルドするには以下を実行するようです
npx remix vite:build
そうするとbuildというフォルダにビルドファイルが生成されます
client側とserver側でフォルダ分けしてビルドしてくれるようです

ビルドしたコードはremix-serveにより実行することができます
npx remix-serve build/server/index.js
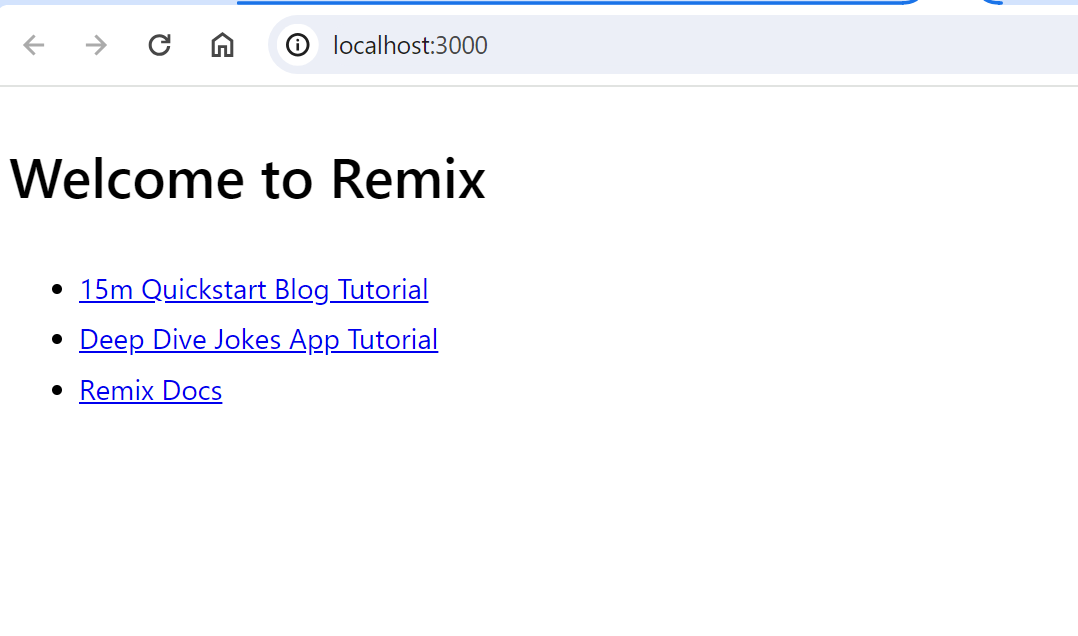
今度は3000番ポートに待機してくれています
多分ポート指定とかもできるんだと思いますがとりあえずこれで良いですね
remix-serveはExpressベースで作られた環境なので本番環境として運用しても良いようですが、実際のサービスではセキュリティ機能を追加したり設定を変更してパフォーマンスの最適化を図ったりするようですので以下を読んでおきましょう
https://remix.run/docs/en/main/start/quickstart#bring-your-own-server
5. tutorial
公式のチュートリアルをやっていきます
https://remix.run/docs/en/main/start/tutorial
公式ページの説明が分かりにくかったので結局あちこちのブログを読んで理解するような感じになりましたが、その辺の情報も足して書いていきたいと思います
完成したコードは以下に置いてありますのでエラーが出た時などに参照してください
https://github.com/haneya-studio/remix_tutorial
5-1. 環境をつくる
以下の1行でチュートリアル用のサンプルコードを準備してくれます
npx create-remix@latest --template remix-run/remix/templates/remix-tutorial
チュートリアルというと初期のサンプルページからスタートして書き足していくものが多いですが、Remixの場合はチュートリアル用のサンプルコードからスタートして足りないところを書き直してやるというやり方のチュートリアルになっています。僕はこういうタイプのチュートリアルは分かりにくいだけだと思うんですが、まあともかくやっていきましょう
npm run dev
なんか出ました
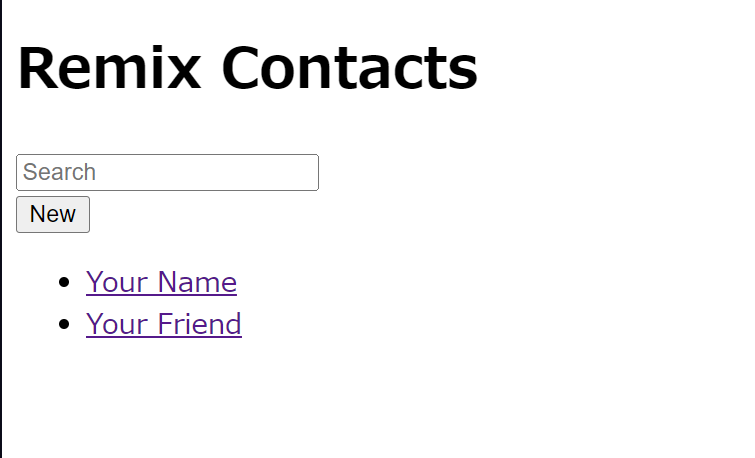
これが最終的に下のようになります
5-2. 生成されたサンプルコード
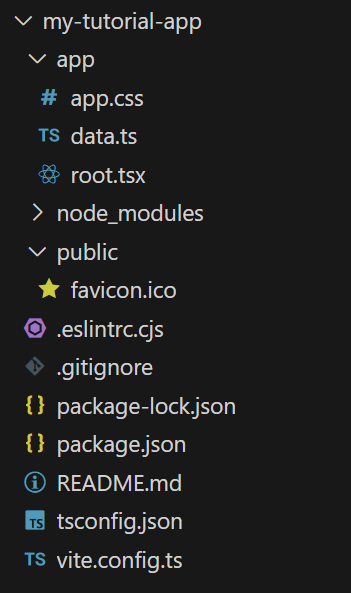
この時点で以下のようなファイル構成になっていて、appフォルダ内のroot.tsxにページの内容が書かれています
Remixで最初に読み込まれる/app/root.tsxをRootRouteと呼ぶんだそうです
root.tsxには以下のように書かれていて、from "@remix-run/react"でremixのモジュールを読み込んで、export default function App内にTSXでビューの内容が書かれています。TSXで書かれたAppコンポーネントについては基本的にReactと同様の書き方になっていて、その中にRemixコンポーネントがちょこちょこ混ざっているという書き方になっていますので、Remixコンポーネントについて理解すれば読んで理解できるようになります
import {
  Form,
  Links,
  Meta,
  Scripts,
  ScrollRestoration,
} from "@remix-run/react";

export default function App() {
  return (
    <html lang="en">
      <head>
        <meta charSet="utf-8" />
        <meta name="viewport" content="width=device-width, initial-scale=1" />
        <Meta />
        <Links />
      </head>
      <body>
        <div id="sidebar">
          <h1>Remix Contacts</h1>
          <div>
            <Form id="search-form" role="search">
              <input
                id="q"
                aria-label="Search contacts"
                placeholder="Search"
                type="search"
                name="q"
              />
              <div id="search-spinner" aria-hidden hidden={true} />
            </Form>
            <Form method="post">
              <button type="submit">New</button>
            </Form>
          </div>
          <nav>
            <ul>
              <li>
                <a href={`/contacts/1`}>Your Name</a>
              </li>
              <li>
                <a href={`/contacts/2`}>Your Friend</a>
              </li>
            </ul>
          </nav>
        </div>

        <ScrollRestoration />
        <Scripts />
      </body>
    </html>
  );
}
上記でimportしているRemixコンポーネントは以下の5つですが、2024年4月時点で11種類のコンポーネントがあり、htmlの要素の機能をRemix用に拡張したり、書くことでRemixの機能を制御したり出来るようになっています
詳しくは公式ドキュメントを参照してください
https://remix.run/docs/en/main/components/link
5-3. CSSの適用
まずCSSを適用しましょう
RemixではCSSファイルからimportしたstyleappStyleHrefをLinksFunctionに渡すことで従属するすべてのURLに適用するということができます
https://remix.run/docs/en/main/styling/css
import type { LinksFunction } from "@remix-run/node";

// existing imports

import appStylesHref from "./app.css?url";

export const links: LinksFunction = () => [
  { rel: "stylesheet", href: appStylesHref },
];
変更前がこれ
CSSが適用されてこうなりました

見て分かるように現在表示されているのはサイドバーのみですので右側にメインの表示が出ますが、その表示ごとにURLが変わっても同じCSSが適用されるようにしてくれます
5-4. Nested RouteとFile-system based routing
では右側のメイン表示の内容を書いていきましょう
まず、RemixコンポーネントのOutletをimportします。OutletはNested Routesする為のコンポーネントで、親コンポーネント側にOutlet要素を配置すると同じ階層のroutesフォルダ内のビューが表示される際にセットで表示してくれるようになります
import {
  Form,
  Links,
  Meta,
  Scripts,
  ScrollRestoration,
+  Outlet,
} from "@remix-run/react";
importしたOutlet要素をid="sidebar"の下に入れてやれば、後はOutletのお作法通りにルーティングしてくれます
// existing imports
export default function App() {
  return (
    <html lang="en">
      {/* other elements */}
      <body>
        <div id="sidebar">{/* other elements */}</div>
+        <div id="detail">
+          <Outlet />
+        </div>
        {/* other elements */}
      </body>
    </html>
  );
}
後はOutlet要素に表示するビューを書けば完成です
import React from "react";
import { Form } from "@remix-run/react";
import type { FunctionComponent } from "react";

import type { ContactRecord } from "../data";

export default function Contact() {
  const contact = {
    first: "Your",
    last: "Name",
    avatar: "https://placekitten.com/g/200/200",
    twitter: "your_handle",
    notes: "Some notes",
    favorite: true,
  };

  return (
    <div id="contact">
      <div>
        <img
          alt={`${contact.first} ${contact.last} avatar`}
          key={contact.avatar}
          src={contact.avatar}
        />
      </div>

      <div>
        <h1>
          {contact.first || contact.last ? (
            <>
              {contact.first} {contact.last}
            </>
          ) : (
            <i>No Name</i>
          )}{" "}
          <Favorite contact={contact} />
        </h1>

        {contact.twitter ? (
          <p>
            <a
              href={`https://twitter.com/${contact.twitter}`}
            >
              {contact.twitter}
            </a>
          </p>
        ) : null}

        {contact.notes ? <p>{contact.notes}</p> : null}

        <div>
          <Form action="edit">
            <button type="submit">Edit</button>
          </Form>

          <Form
            action="destroy"
            method="post"
            onSubmit={(event) => {
              const response = confirm(
                "Please confirm you want to delete this record."
              );
              if (!response) {
                event.preventDefault();
              }
            }}
          >
            <button type="submit">Delete</button>
          </Form>
        </div>
      </div>
    </div>
  );
}

const Favorite: FunctionComponent<{
  contact: Pick<ContactRecord, "favorite">;
}> = ({ contact }) => {
  const favorite = contact.favorite;

  return (
    <Form method="post">
      <button
        aria-label={
          favorite
            ? "Remove from favorites"
            : "Add to favorites"
        }
        name="favorite"
        value={favorite ? "false" : "true"}
      >
        {favorite ? "★" : "☆"}
      </button>
    </Form>
  );
};
これで http://localhost:5173/contacts/xxx に以下のように表示されるようになります

http://localhost:5173/contacts/1 でも http://localhost:5173/contacts/2 でも http://localhost:5173/contacts/hoge でも同様に上の表示になりますが、この挙動はrouteフォルダによるFile-system based routingとOutletコンポーネントを使ったNested Routeによって理解できます
まず、File-system based routingですが、routeフォルダ内にファイル名とURLを対応させて書くことができる仕組みで、.がURLに/を作り、$はセグメントを動的にしてくれます。したがって、先ほど作った/app/routes/contacts.$contactID.tsxは http://localhost:5173/contacts/xxx に対応するわけです
しかしながら、contacts.$contactID.tsxには表示の右側についての記載しかありません。それなのに/app/root.tsxのサイドバーを表示するのがOutletコンポーネントによるNested Route機能で、root.tsxにOutlut要素を置くことで、子コンポーネントをOutletに置き換えて表示することが出来ます
これにより、root.tsxに書いたOutlet要素がrouteフォルダ内のtsxファイルで置き換わった表示となり、サイドバーやヘッダーなどを使いまわすことが可能となります。また、適用するCSSもroot.tsxにだけ書いてあればすべてに適用してくれるというわけです
5-5. Client Side Rendering
この画面でサイドバーのYour NameやYour Friendをクリックすると、毎回サーバーにページ全体を読みに行ってしまいます。何故かというと a href でリンクしているからで、ブラウザが普通にそのURLをフルで取りに行っちゃうからですね。これをRemixのLinkコンポーネントで置き換えると、React Routerを使ってClient Sideで処理してくれて、必要なところだけサーバーに取りに行くように出来ます
やり方は簡単で、Linkをimportしておいてa href=でなくLink to=でリンクするだけです
import { Link } from "@remix-run/react";
<nav>
  <ul>
    <li>
      <a href={`/contacts/1`}>Your Name</a>
    </li>
    <li>
      <a href={`/contacts/2`}>Your Friend</a>
    </li>
  </ul>
</nav>
<nav>
  <ul>
    <li>
      <Link to={`/contacts/1`}>Your Name</Link>
    </li>
    <li>
      <Link to={`/contacts/2`}>Your Friend</Link>
    </li>
  </ul>
</nav>
表示される内容は変わりませんが、Client Side Routingで処理されるようになりました
5-6. Remixのデータフロー
この後、LoaderとActionが登場するのですが、LoaderはともかくActionを理解するにはモデルを理解していないと難しいので、ここでRemixのデータフローモデルをRemixブログの記事に基づいて解説したいと思います
https://remix.run/blog/remix-data-flow
Reactではボタン操作などのActionがあると、Stateが変更されて、Stateに応じてViewの更新が行われるという動作になっていました。これにより高度な宣言型UIを簡単に書くことが出来るようになりましたが、バックエンドへの読み書きはモデルに含まれていませんでした
実際のところ、Actionに伴いStateだけでなくバックエンドのDBも更新される筈ですので、それを簡潔に書けるモデルとしてRemixではDBやファイルから読み込むLoader、表示を担当するReact Component、ユーザー操作に対する動作とDBやファイルへの書き込みを記述するActionの3つの要素で書くことを提案しています。下の画像の3枚目のようなイメージですね
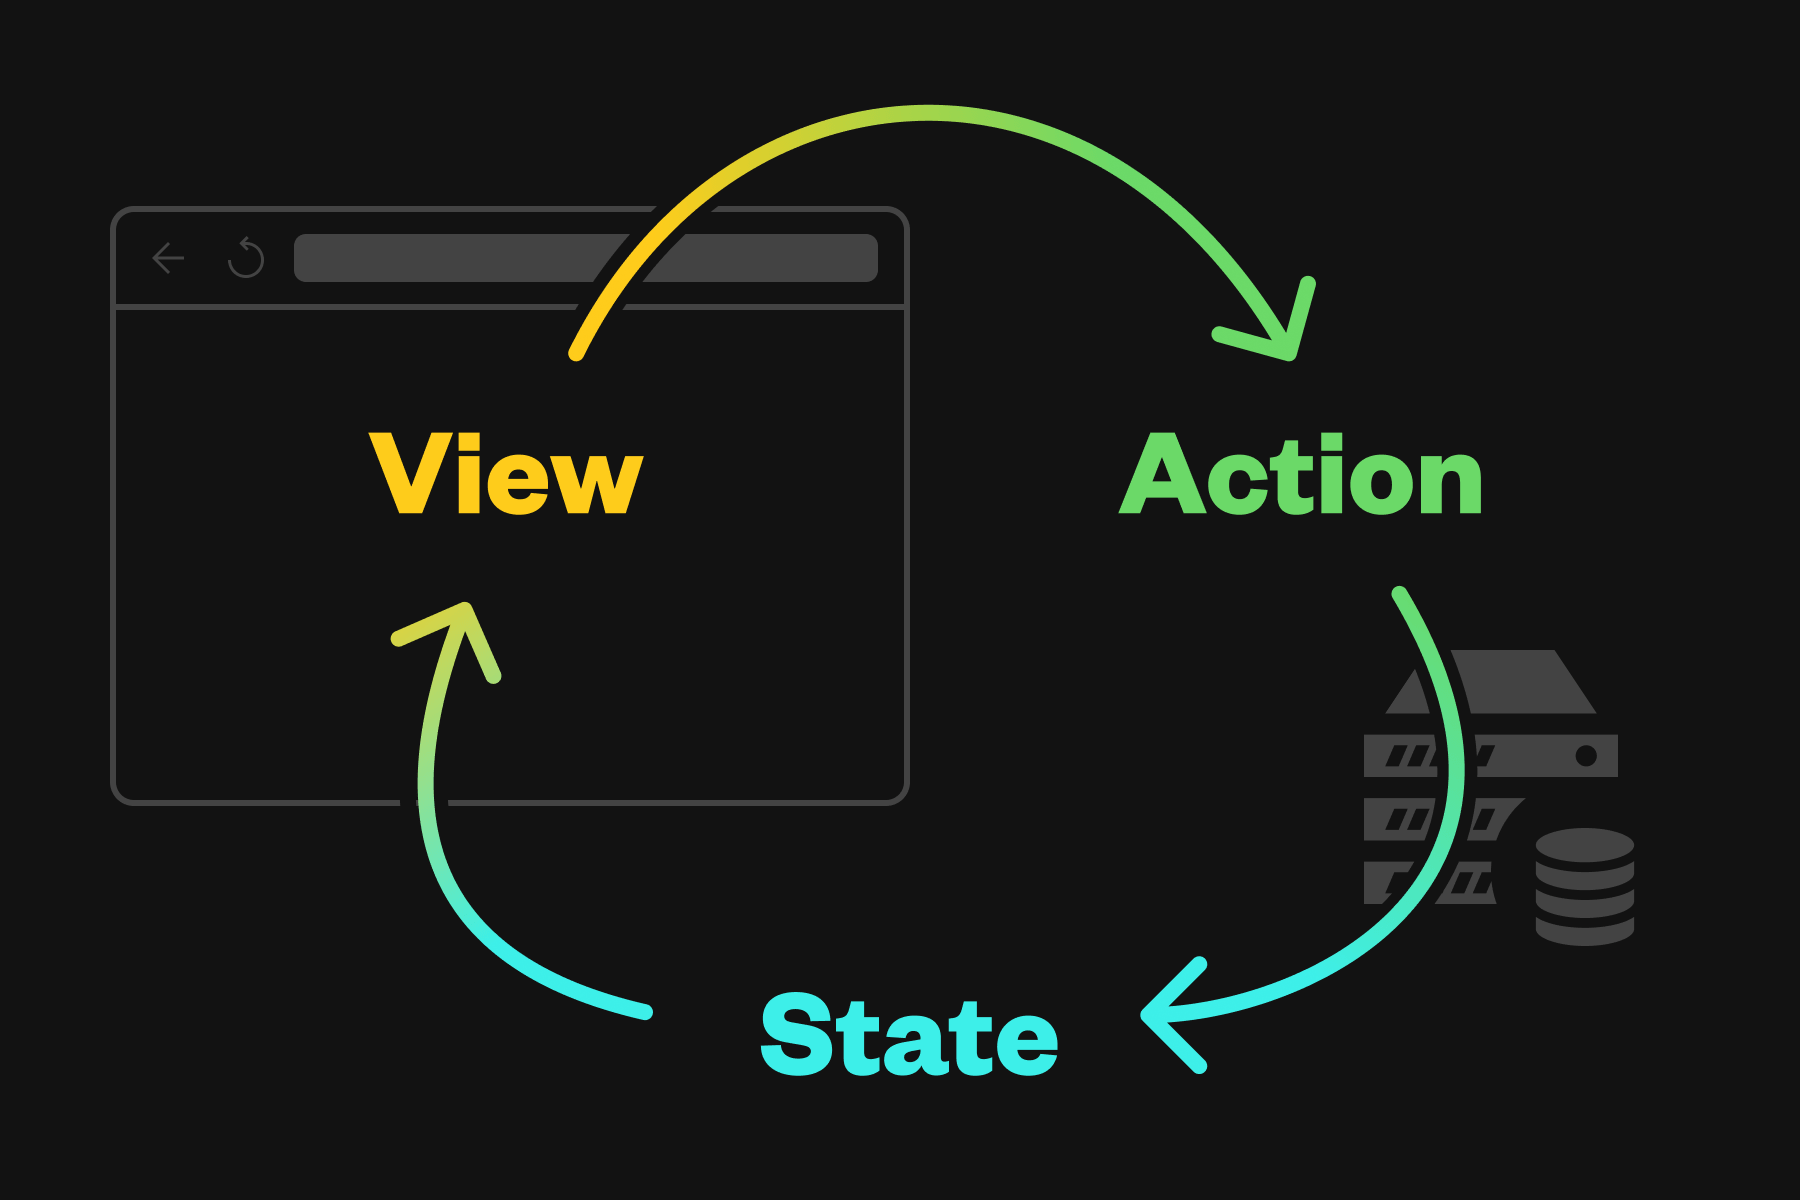

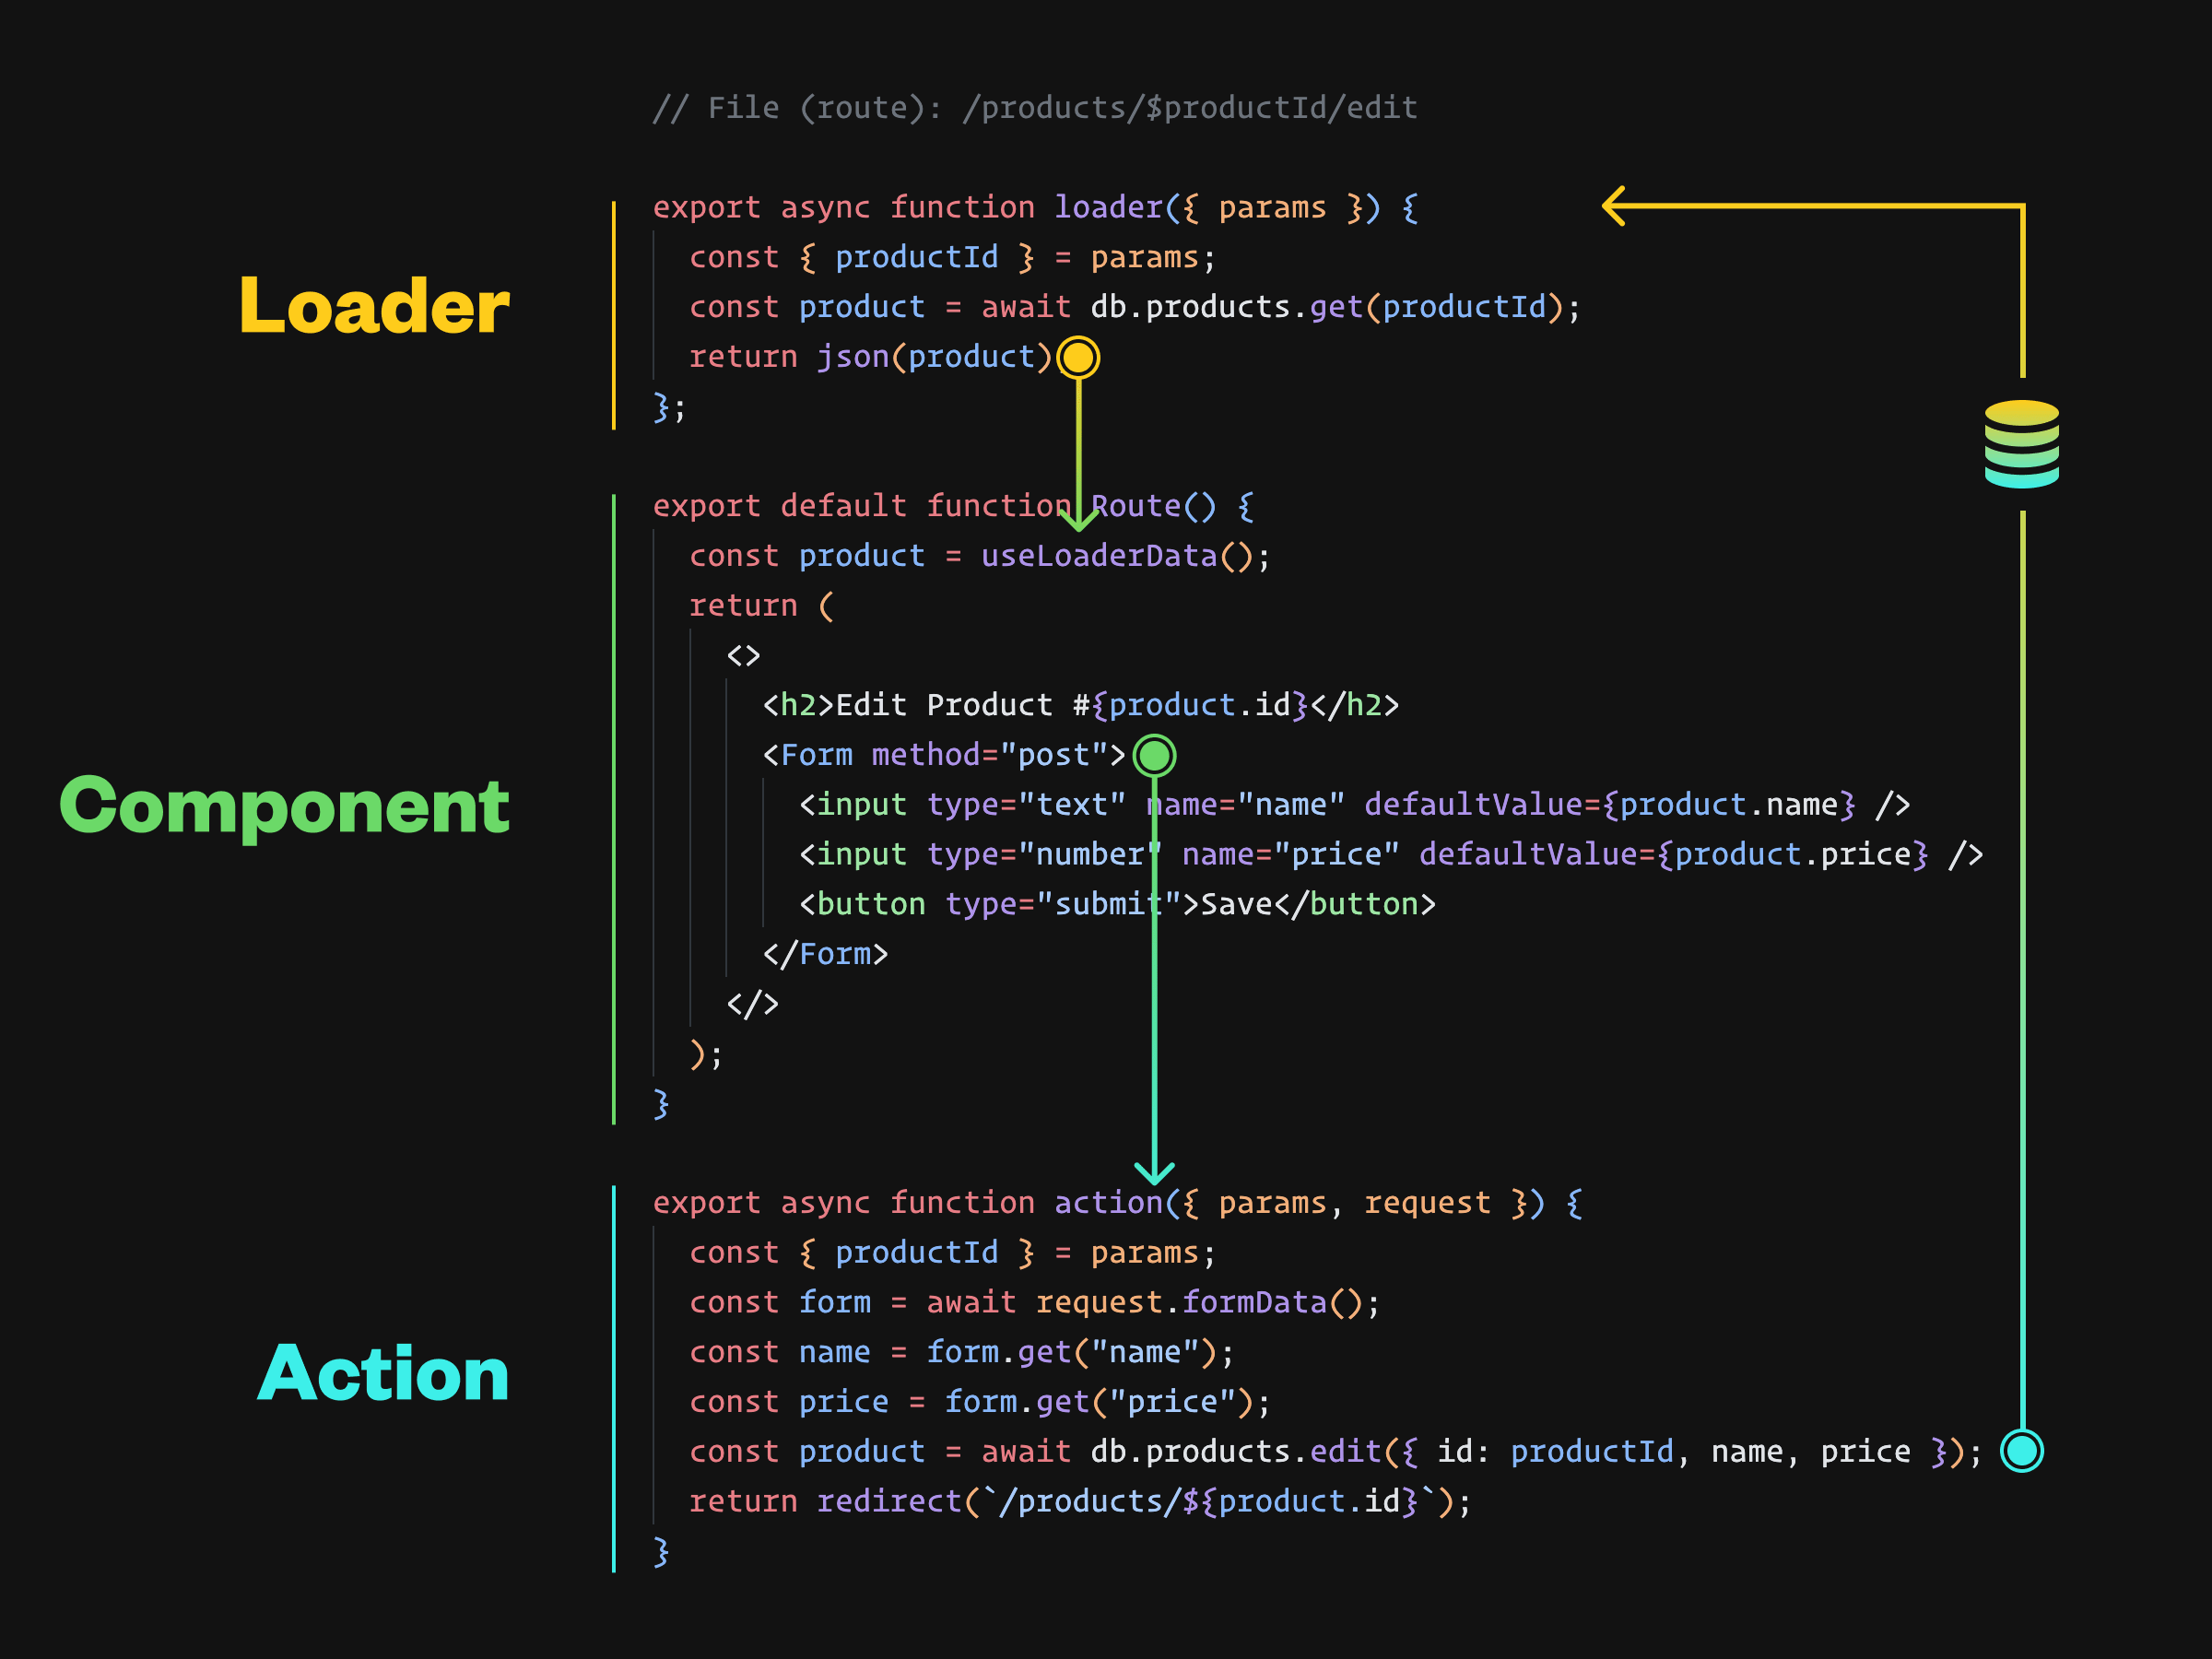
モデルと書き方が直結しているというのがシンプルですごく良いですね
5-7. Loaderで読み込む
サイドバー
今のところ固定の画像が表示されるだけですので、loaderを使って /app/data.ts から情報を読んできて表示するようにしてみます。loaderという名前でasync functionを作っておいて、コンポーネント内でuseLoaderData()を呼ぶとloaderの返り値を上手く受け取って使うことが出来ます
// existing imports

+ import { json } from "@remix-run/node";
import {
  Form,
  Link,
  Links,
  Meta,
  Outlet,
  Scripts,
  ScrollRestoration,
+  useLoaderData,
} from "@remix-run/react";

// existing imports
+ import { getContacts } from "./data";

// existing exports

+ export const loader = async () => {
+   const contacts = await getContacts();
+   return json({ contacts });
+ };

export default function App() {
+  const { contacts } = useLoaderData<typeof loader>();

  return (
    <html lang="en">
      {/* other elements */}
      <body>
        <div id="sidebar">
          {/* other elements */}
          <nav>
 +           {contacts.length ? (
 +             <ul>
 +               {contacts.map((contact) => (
 +                 <li key={contact.id}>
 +                   <Link to={`contacts/${contact.id}`}>
 +                     {contact.first || contact.last ? (
 +                       <>
 +                         {contact.first} {contact.last}
 +                       </>
 +                     ) : (
 +                       <i>No Name</i>
 +                     )}{" "}
 +                     {contact.favorite ? (
 +                       <span>★</span>
 +                     ) : null}
 +                   </Link>
 +                 </li>
 +               ))}
 +             </ul>
 +           ) : (
 +             <p>
 +               <i>No contacts</i>
 +             </p>
 +           )}
          </nav>
        </div>
        {/* other elements */}
      </body>
    </html>
  );
}
これでloaderで読んだcontactsがサイドバーに表示されます

メイン画面
同様にoutlet側もloaderとuseLoaderDataで書いてやります
+ import { json } from "@remix-run/node";
+ import { Form, useLoaderData } from "@remix-run/react";
// existing imports

+ import { getContact } from "../data";

+ export const loader = async ({ params }) => {
+   const contact = await getContact(params.contactId);
+   return json({ contact });
+ };

export default function Contact() {
+  const { contact } = useLoaderData<typeof loader>();

  // existing code
}

// existing code
出来ました

存在しないURLに404を出す
RemixのDynamic Routingでは、$から始まるファイルにRoutingされるので存在しないページでも表示しようとしてエラーが出てしまいます。存在しない場合は明示的にステータスコード404で返すように処理を追加します。今回のコードでは当該contactIdがなければcontactがnullで返ってくるのでif (!contact)がfalseである場合に404 Not Foundを返すようにしています
+ import type { LoaderFunctionArgs } from "@remix-run/node";
+ import invariant from "tiny-invariant";

+ export const loader = async ({
+   params,
+ }: LoaderFunctionArgs) => {
+   invariant(params.contactId, "Missing contactId param");
  const contact = await getContact(params.contactId);
+  if (!contact) {
+    throw new Response("Not Found", { status: 404 });
+  }
  return json({ contact });
};
これで存在しないURL (http://localhost:5173/contacts/aaa など) は404表示が返ってくるようになりました

5-8. actionで書き込む
Newボタンクリックでcontactを追加する
続いてactionを使って登録機能を作っていきましょう
以下のコードを/app/root.tsxに追加すると、data.tsのcreateEmptyContactを実行してfakeContactsインスタンスを作ってActionとして待機してくれます。fakeContactsインスタンスはgetやcreateなどのメソッドを持っていて、既に/app/root.tsxに書いてある<Form method="post"><button type="submit">New</button></Form>で表示されるNewと書かれたボタンを押すとfakeContacts.create()メソッドが実行されて新たなレコードを作ってくれます。このインスタンスはオンメモリで動いてるだけなのでRemixアプリを再起動すれば消えますが、とりあえずチュートリアル用に挙動を見るだけなら十分ですね
// existing imports

+ import { createEmptyContact, getContacts } from "./data";

+ export const action = async () => {
+   const contact = await createEmptyContact();
+   return json({ contact });
+ };

// existing code
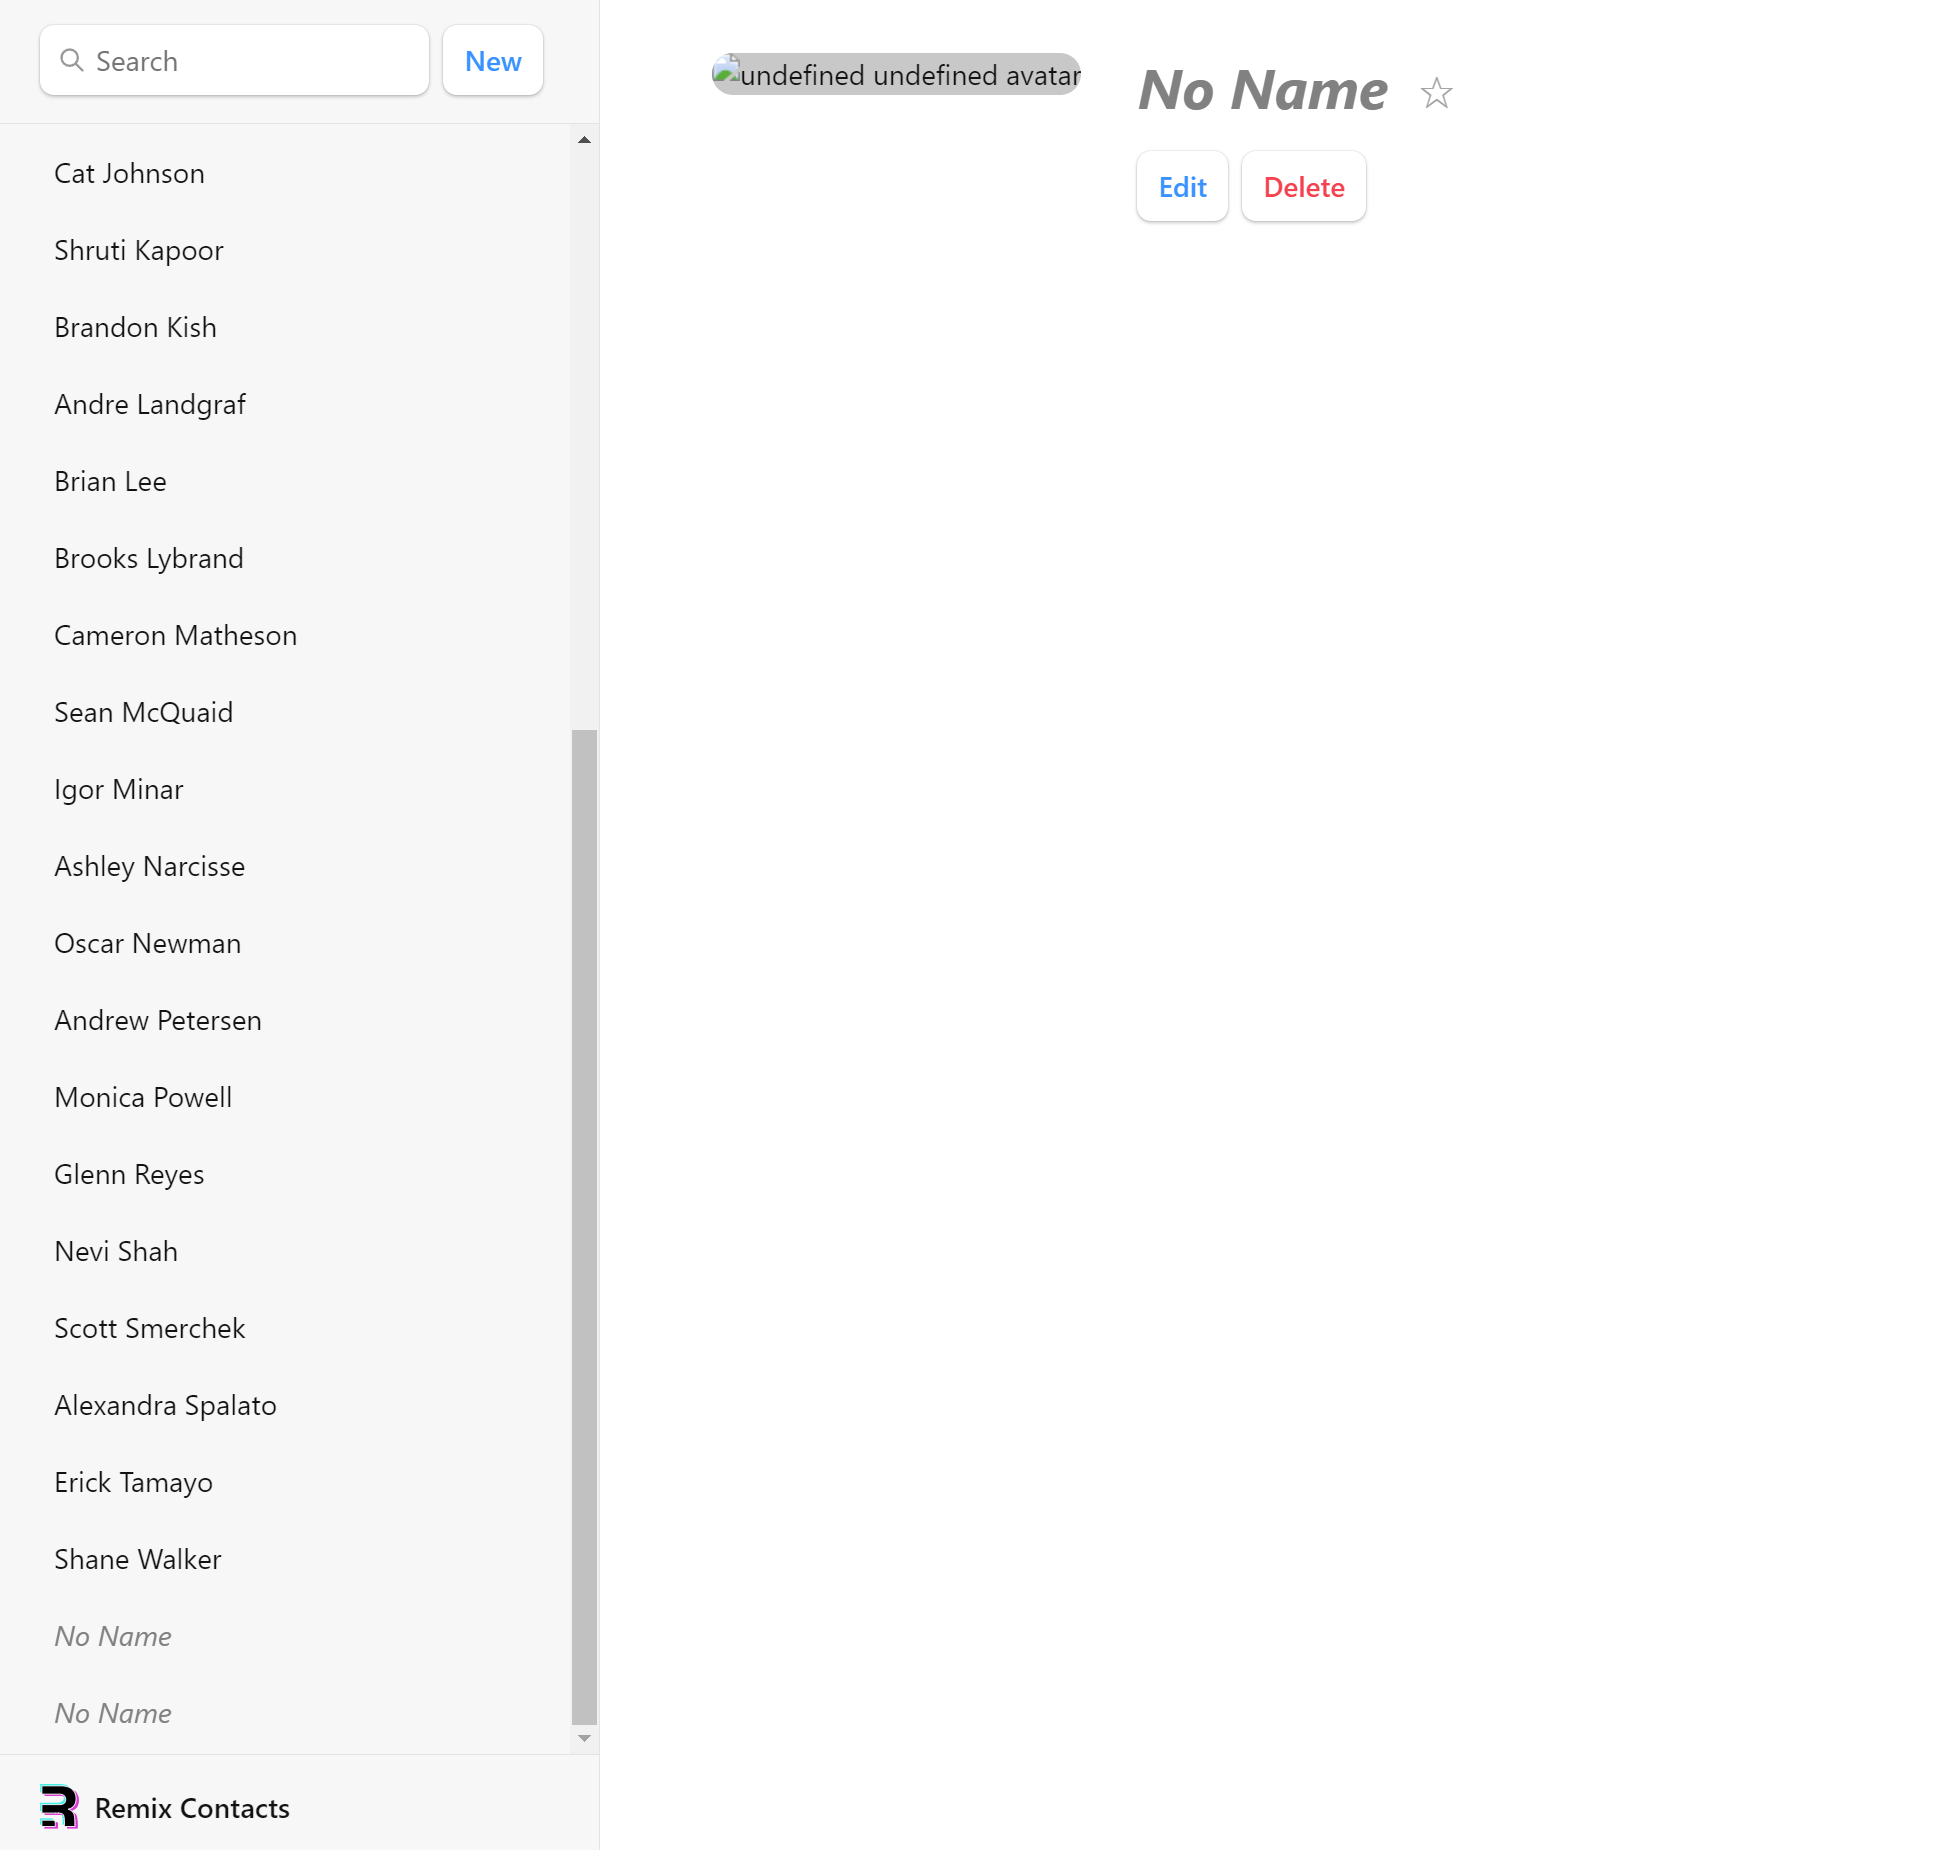
NewボタンクリックでNo Nameという名前のcontactが追加されるようになりました
編集画面をつくる
続いて編集用のViewを作ります
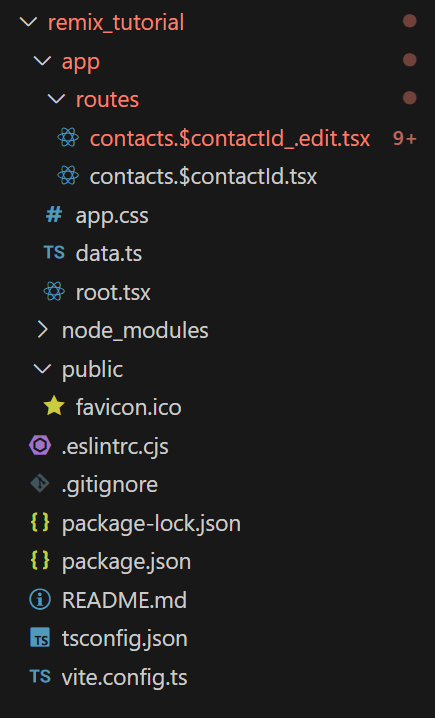
編集用画面は以下のような表示にしたいので、サイドバーを表示する為にcontacts.tsxにネストしたいのですが、URLとしては http://localhost:5173/contacts/alex-anderson/edit? のような表示にしたいので、ファイルPATHを/app/router/contacts.$contactId_.edit.tsxとします。_を入れるとネストをスキップすることが出来るので/app/router/contacts.tsxにネストすることになり、下のような表示にすることが出来ます

ファイル構成は以下のようになります
以下のように中身を書いてやれば編集用の入力フォームが表示されるようになります
import type { LoaderFunctionArgs } from "@remix-run/node";
import { json } from "@remix-run/node";
import { Form, useLoaderData } from "@remix-run/react";
import invariant from "tiny-invariant";

import { getContact } from "../data";

export const loader = async ({
  params,
}: LoaderFunctionArgs) => {
  invariant(params.contactId, "Missing contactId param");
  const contact = await getContact(params.contactId);
  if (!contact) {
    throw new Response("Not Found", { status: 404 });
  }
  return json({ contact });
};

export default function EditContact() {
  const { contact } = useLoaderData<typeof loader>();

  return (
    <Form key={contact.id} id="contact-form" method="post">
      <p>
        <span>Name</span>
        <input
          defaultValue={contact.first}
          aria-label="First name"
          name="first"
          type="text"
          placeholder="First"
        />
        <input
          aria-label="Last name"
          defaultValue={contact.last}
          name="last"
          placeholder="Last"
          type="text"
        />
      </p>
      <label>
        <span>Twitter</span>
        <input
          defaultValue={contact.twitter}
          name="twitter"
          placeholder="@jack"
          type="text"
        />
      </label>
      <label>
        <span>Avatar URL</span>
        <input
          aria-label="Avatar URL"
          defaultValue={contact.avatar}
          name="avatar"
          placeholder="https://example.com/avatar.jpg"
          type="text"
        />
      </label>
      <label>
        <span>Notes</span>
        <textarea
          defaultValue={contact.notes}
          name="notes"
          rows={6}
        />
      </label>
      <p>
        <button type="submit">Save</button>
        <button type="button">Cancel</button>
      </p>
    </Form>
  );
}
編集画面に登録機能を追加
actionとActionFunctionArgsを使って入力チェックを入れて、問題なければdata.tsからimportしたupdateContactによって情報を更新するようにします
import type {
+  ActionFunctionArgs,
  LoaderFunctionArgs,
} from "@remix-run/node";
+ import { json, redirect } from "@remix-run/node";
// existing imports

+ import { getContact, updateContact } from "../data";

+ export const action = async ({
+   params,
+   request,
+ }: ActionFunctionArgs) => {
+   invariant(params.contactId, "Missing contactId param");
+   const formData = await request.formData();
+   const updates = Object.fromEntries(formData);
+   await updateContact(params.contactId, updates);
+   return redirect(`/contacts/${params.contactId}`);
+ };

// existing code
編集できるようになりました

redirect
Editボタンを押したらcontct表示画面にリダイレクトする
actionの最後にredirectにURLを渡せばリダイレクトしてくれます
// existing imports

+ import { json, redirect } from "@remix-run/node";

// existing imports

export const action = async () => {
  const contact = await createEmptyContact();
+ return redirect(`/contacts/${contact.id}/edit`);
};
Newボタンを押すと追加したcontactの編集画面に移動するようになりました

Saveボタンを押したらcontact画面にリダイレクトする
編集完了したらcontactの詳細画面にリダイレクトしてやります
export const action = async ({
  params,
  request,
}: ActionFunctionArgs) => {
  invariant(params.contactId, "Missing contactId param");
  const formData = await request.formData();
  const updates = Object.fromEntries(formData);
  await updateContact(params.contactId, updates);
  return redirect(`/contacts/${params.contactId}`);
};
リダイレクトできました

Newボタンで編集画面にリダイレクトする
// existing imports
+ import { json, redirect } from "@remix-run/node";
// existing imports

+ export const action = async () => {
+   const contact = await createEmptyContact();
+   return redirect(`/contacts/${contact.id}/edit`);
+ };

// existing code

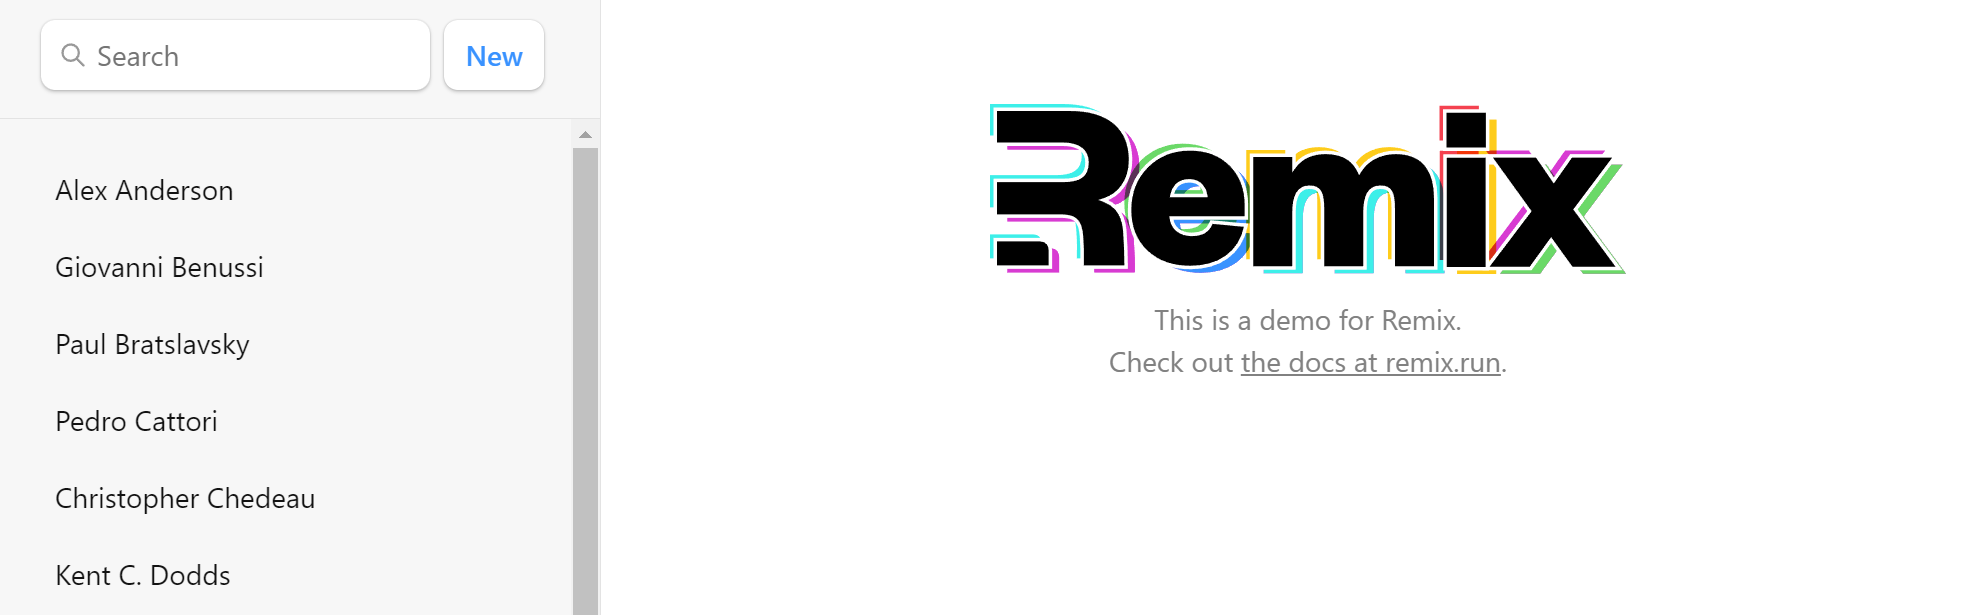
選択中のcontactを分かるようにする
Active Link Stylingを使ってサイドバーのどれを表示中なのか分かるようにします
LinkをNavLinkに置き換えてやれば、謎の仕組みでisActiveを引数として受け取ってclassNameを書き換えたりできます。classNameごとにCSSを設定しておけば色を変えて表示したりできるわけです

// existing imports
import {
  Form,
  Links,
  Meta,
  NavLink,
  Outlet,
  Scripts,
  ScrollRestoration,
  useLoaderData,
} from "@remix-run/react";

// existing imports and exports

export default function App() {
  const { contacts } = useLoaderData<typeof loader>();

  return (
    <html lang="en">
      {/* existing elements */}
      <body>
        <div id="sidebar">
          {/* existing elements */}
          <ul>
            {contacts.map((contact) => (
              <li key={contact.id}>
                <NavLink
                  className={({ isActive, isPending }) =>
                    isActive
                      ? "active"
                      : isPending
                      ? "pending"
                      : ""
                  }
                  to={`contacts/${contact.id}`}
                >
                  {contact.first || contact.last ? (
                    <>
                      {contact.first} {contact.last}
                    </>
                  ) : (
                    <i>No Name</i>
                  )}{" "}
                  {contact.favorite ? (
                    <span>★</span>
                  ) : null}
                </NavLink>
              </li>
            ))}
          </ul>
          {/* existing elements */}
        </div>
        {/* existing elements */}
      </body>
    </html>
  );
}
ちなみに、公式チュートリアルのこの部分のコードの記載は分かりにくすぎると思います
5-9. 読み込み中表示 (Global Pending UI)
useNavigationフックでloading画面への切り替えを行えるようにします
useNavigationを使うことで、読み込み書き込み状況をnavigation.stateにより確認できるようになり、下のコードではclassNameをloading中か否かで変更することでloading表示を出せるようにしています
// existing imports
import {
+  useNavigation,
} from "@remix-run/react";

// existing imports & exports

export default function App() {
  const { contacts } = useLoaderData<typeof loader>();
+ const navigation = useNavigation();
  return (
    <html lang="en">
      {/* existing elements */}
      <body>
        {/* existing elements */}
        <div
+          className={
+            navigation.state === "loading" ? "loading" : ""
+          }
          id="detail"
        >
          <Outlet />
        </div>
        {/* existing elements */}
      </body>
    </html>
  );
}
navigation.stateの値は以下のいずれかになります
"idle": ナビゲーションがアクティブではないか進行中でない
"loading": ナビゲーションが開始されページのデータがロード中
"submitting": フォームの送信処理が進行中の状態
"restoring": ブラウザの前へ/後へのナビゲーションによりページが復元されている
Next.jsのApp Routerだとloading用のファイル名が指定されていますが、Remixだとそこの処理は自分で書くスタイルになるわけです。ただし、ローカルサーバーが早すぎてloading表示は確認できないと思います
5-10. 削除機能を追加
$contactId.tsx内でDeleteボタンにdestoryメソッドが紐づけてあるので、actionから実行するdestroy.tsxを作成してdeleteContactを呼ぶようにしてやります
import type { ActionFunctionArgs } from "@remix-run/node";
import { redirect } from "@remix-run/node";
import invariant from "tiny-invariant";

import { deleteContact } from "../data";

export const action = async ({
  params,
}: ActionFunctionArgs) => {
  invariant(params.contactId, "Missing contactId param");
  await deleteContact(params.contactId);
  return redirect("/");
};

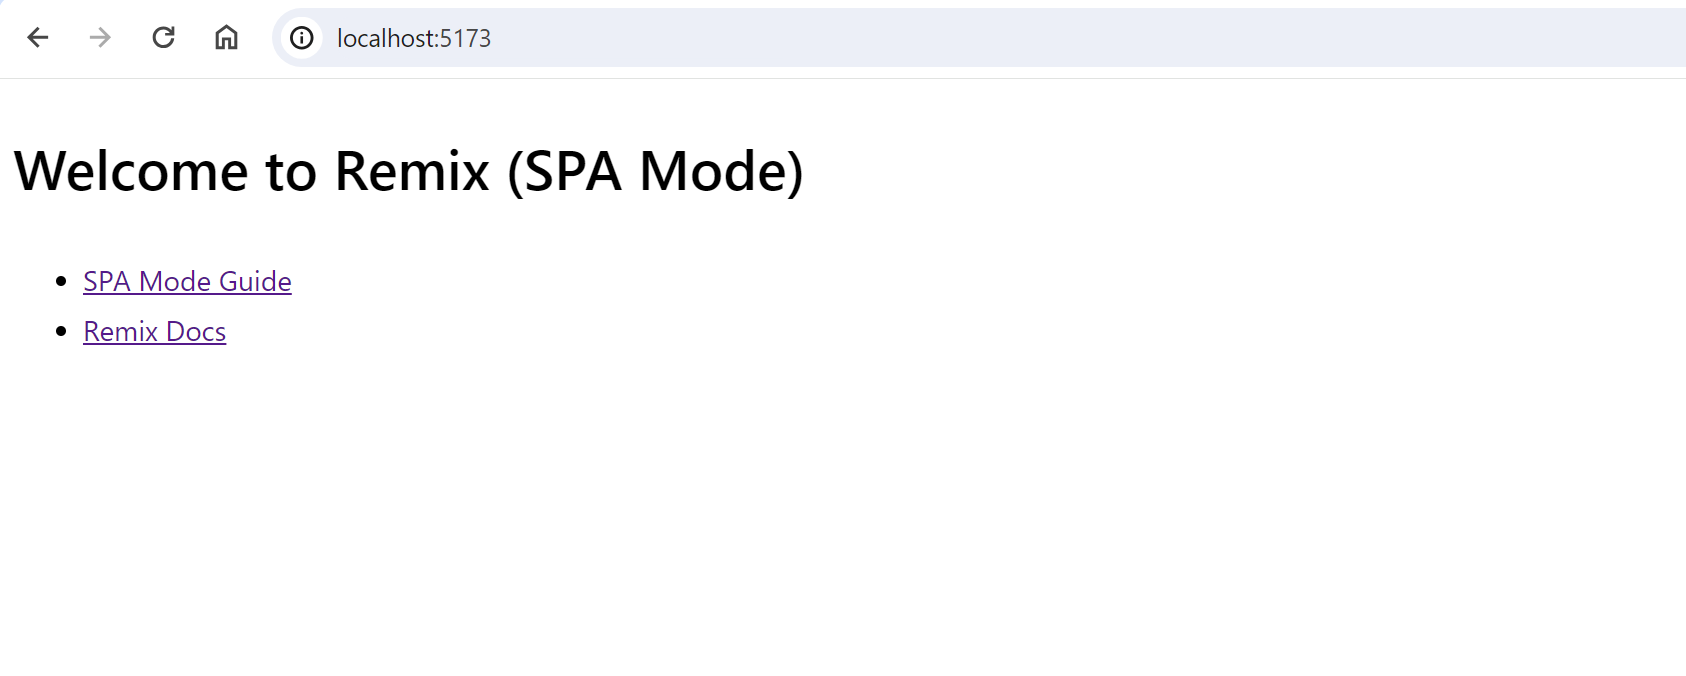
5-11. デフォルト表示を作成
contactIdを選択する前の表示では右側に何も表示されていないのがさみしいので、/app/routes/_index.tsxを作って http://localhost:5173/ で表示されるようにしてやります

export default function Index() {
  return (
    <p id="index-page">
      This is a demo for Remix.
      <br />
      Check out{" "}
      <a href="https://remix.run">the docs at remix.run</a>.
    </p>
  );
}
5-12. edit画面のキャンセルボタンを有効にする
edit画面にあるキャンセルボタンが機能しない状態になっているので、クリックしたら1つ前の画面に戻るようにしてやります。navigate(-1)で1つ戻れるのは便利ですね
// existing imports
import {
  Form,
  useLoaderData,
+  useNavigate,
} from "@remix-run/react";
// existing imports & exports

export default function EditContact() {
  const { contact } = useLoaderData<typeof loader>();
+  const navigate = useNavigate();

  return (
    <Form key={contact.id} id="contact-form" method="post">
      {/* existing elements */}
      <p>
        <button type="submit">Save</button>
+        <button onClick={() => navigate(-1)} type="button">
+          Cancel
+        </button>
      </p>
    </Form>
  );
}
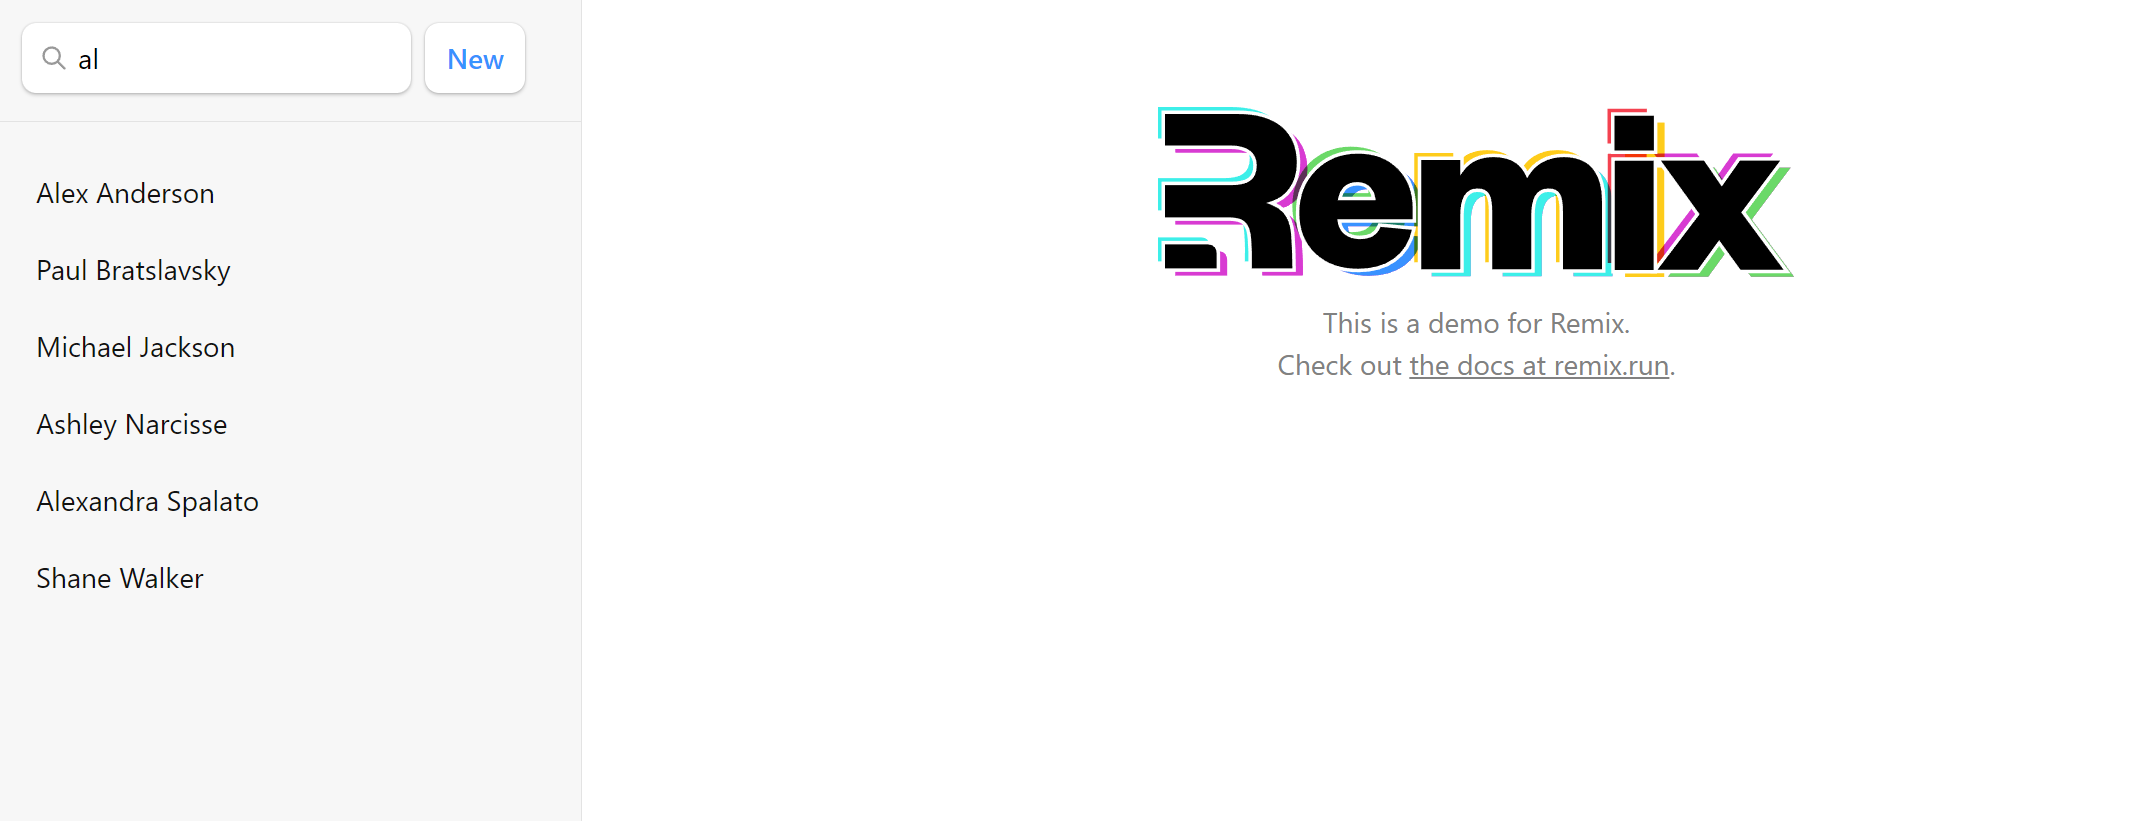
5-13. 検索機能を実装する
contactsを絞り込む
以下の3つの動作をloaderに仕込んで検索が実行されるようにします
- 検索窓に入力された文字列を末尾に追加したURLを作って検索時に移動する
- 検索窓に入力された文字列をqに代入する
- 検索窓に入力された文字列をgetContactsに渡してcontactsを絞り込む
import type {
  LinksFunction,
+  LoaderFunctionArgs,
} from "@remix-run/node";

// existing imports & exports

+ export const loader = async ({
+   request,
+ }: LoaderFunctionArgs) => {
+   const url = new URL(request.url);
+   const q = url.searchParams.get("q");
+   const contacts = await getContacts(q);
+   return json({ contacts });
+ };

// existing code
ブラウザの戻るボタン操作への対応
戻るボタン操作などでリストのフィルタリングが解除されたときに検索窓に入力が入ったままになってしまいますので、useEffectを使ってqが変更されたら検索窓の値をqになるように更新するようにしてやります
// existing imports & exports

export const loader = async ({
  request,
}: LoaderFunctionArgs) => {
  const url = new URL(request.url);
  const q = url.searchParams.get("q");
  const contacts = await getContacts(q);
+ return json({ contacts, q });
};

export default function App() {
+ const { contacts, q } = useLoaderData<typeof loader>();
  const navigation = useNavigation();

  return (
    <html lang="en">
      {/* existing elements */}
      <body>
        <div id="sidebar">
          {/* existing elements */}
          <div>
            <Form id="search-form" role="search">
              <input
                aria-label="Search contacts"
+               defaultValue={q || ""}
                id="q"
                name="q"
                placeholder="Search"
                type="search"
              />
              {/* existing elements */}
            </Form>
            {/* existing elements */}
          </div>
          {/* existing elements */}
        </div>
        {/* existing elements */}
      </body>
    </html>
  );
}
ちゃんとフィルタリングが解除されました

ブラウザのページ更新操作への対応
ブラウザでページ更新ボタンを押すと、qがクリアされてしまって検索窓が空欄になってしまいます。検索の為にURLに検索文字列をつけてあるので、逆にURLから検索文字列を受け取って検索窓に入れてやりましょう
// existing imports
import { useEffect } from "react";

// existing imports & exports

export default function App() {
  const { contacts, q } = useLoaderData<typeof loader>();
  const navigation = useNavigation();

  useEffect(() => {
    const searchField = document.getElementById("q");
    if (searchField instanceof HTMLInputElement) {
      searchField.value = q || "";
    }
  }, [q]);

  // existing code
}
1文字入力するごとに検索する
現時点では検索窓に入力してENTERしないとcontactsの絞り込みが実行されませんので、1文字入力するごとに絞り込みを実施するようにしましょう。以下ではReactコンポーネントのuseSubmitを使ってonChangeイベントに応じてFormがsubmitされるようにしています
+ import { useSubmit } from "@remix-run/react";

// existing imports & exports

export default function App() {
+ const submit = useSubmit();

  // existing code

  return (
    <html lang="en">
      {/* existing elements */}
      <body>
        <div id="sidebar">
          {/* existing elements */}
          <div>
            <Form
              id="search-form"
+              onChange={(event) =>
+                submit(event.currentTarget)
+              }
              role="search"
            >
              {/* existing elements */}
            </Form>
検索スピナーを追加する
検索処理中である間はloadingと表示するようにします
useNavigationで作ったnavigationから検索中かどうかをsearchingに格納して
// existing imports & exports

export default function App() {
  const { contacts, q } = useLoaderData<typeof loader>();
  const navigation = useNavigation();
  const submit = useSubmit();
+  const searching =
+    navigation.location &&
+    new URLSearchParams(navigation.location.search).has(
+      "q"
+    );

  // existing code
}
searchingの値に応じてclassNameを変更するようにします
// existing imports & exports

export default function App() {
  // existing code

  return (
    <html lang="en">
      {/* existing elements */}
      <body>
        <div id="sidebar">
          {/* existing elements */}
          <div>
            <Form
              id="search-form"
              onChange={(event) =>
                submit(event.currentTarget)
              }
              role="search"
            >
              <input
                aria-label="Search contacts"
+               className={searching ? "loading" : ""}
                defaultValue={q || ""}
                id="q"
                name="q"
                placeholder="Search"
                type="search"
              />
              <div
                aria-hidden
+               hidden={!searching}
                id="search-spinner"
              />
            </Form>
            {/* existing elements */}
          </div>
          {/* existing elements */}
        </div>
        {/* existing elements */}
      </body>
    </html>
  );
}
// existing imports & exports

export default function App() {
  // existing code

  return (
    <html lang="en">
      {/* existing elements */}
      <body>
        {/* existing elements */}
        <div
+         className={
+           navigation.state === "loading" && !searching
+             ? "loading"
+             : ""
+         }
          id="detail"
        >
          <Outlet />
        </div>
        {/* existing elements */}
      </body>
    </html>
  );
}
スピナーの挙動はCSSに既に書いてあるので、classNameが適用されると検索窓にスピナーがぐるぐるするようになります

履歴を置き換える
1文字ずつsubmitするようにしたので、このままだと1文字ずつ変更したURLが履歴に入ってしまいます

これだとちょっとイマイチなので最後に踏んだ検索URLのみを残すようにします。これをやる為の機能がuseSubmitにあるのでこれを使えば簡単で、submitの第2引数に{replace: true}を与えればURL遷移しつつ履歴は最後のものを置き換えるような動作になります
// existing imports & exports

export default function App() {
  // existing code

  return (
    <html lang="en">
      {/* existing elements */}
      <body>
        <div id="sidebar">
          {/* existing elements */}
          <div>
            <Form
              id="search-form"
+             onChange={(event) => {
+               const isFirstSearch = q === null;
+               submit(event.currentTarget, {
+                 replace: !isFirstSearch,
+               });
+             }}
              role="search"
            >
              {/* existing elements */}
            </Form>
            {/* existing elements */}
          </div>
          {/* existing elements */}
        </div>
        {/* existing elements */}
      </body>
    </html>
  );
}

5-14. URLの変更のないNavigation
Formからactionを起こすがURLを変更したくない場合はuseFetcherを使います
// existing imports
import {
  Form,
+ useFetcher,
  useLoaderData,
} from "@remix-run/react";
// existing imports & exports

// existing code

const Favorite: FunctionComponent<{
  contact: Pick<ContactRecord, "favorite">;
}> = ({ contact }) => {
+ const fetcher = useFetcher();
  const favorite = contact.favorite;

  return (
+   <fetcher.Form method="post">
      <button
        aria-label={
          favorite
            ? "Remove from favorites"
            : "Add to favorites"
        }
        name="favorite"
        value={favorite ? "false" : "true"}
      >
        {favorite ? "★" : "☆"}
      </button>
+   </fetcher.Form>
  );
};
actionを作ります
import type {
+ ActionFunctionArgs,
  LoaderFunctionArgs,
} from "@remix-run/node";
// existing imports

+ import { getContact, updateContact } from "../data";
// existing imports

+ export const action = async ({
+   params,
+   request,
+ }: ActionFunctionArgs) => {
+   invariant(params.contactId, "Missing contactId param");
+   const formData = await request.formData();
+   return updateContact(params.contactId, {
+     favorite: formData.get("favorite") === "true",
+   });
+ };

// existing code
星をクリックすると色が変わって表示されるようになりました

5-15. Optimistic UI
通信完了までの待機時間があると反応がないように感じられてユーザーが不安になってしまいます。Favなんかは押したらすぐ表示を切り替えてしまって支障がないので、useFetcherを使って押したらすぐ表示が変わるようにします
// existing code

const Favorite: FunctionComponent<{
  contact: Pick<ContactRecord, "favorite">;
}> = ({ contact }) => {
  const fetcher = useFetcher();
+ const favorite = fetcher.formData
+   ? fetcher.formData.get("favorite") === "true"
+   : contact.favorite;

  return (
    <fetcher.Form method="post">
      <button
        aria-label={
          favorite
            ? "Remove from favorites"
            : "Add to favorites"
        }
        name="favorite"
        value={favorite ? "false" : "true"}
      >
        {favorite ? "★" : "☆"}
      </button>
    </fetcher.Form>
  );
};
6. SSRとCSR
(調べたら追記予定です)
7. SPAモード
ようやくチュートリアルも完走したので、SPAモードの使い方とビルド方法を確認していきます。SPAモードについては公式ページに説明ページがあるので、こちらに沿ってやっていきたいと思います
https://remix.run/docs/en/main/guides/spa-mode
7-1. SPAモードのプロジェクトを作成する
新規にプロジェクトを作成する場合
新たに作る場合は以下のコマンドでSPAモードのプロジェクトを作成できます
npx create-remix@latest --template remix-run/remix/templates/spa
既存のプロジェクトをSPAモードにする
vite.config.tsに remix({ ssr: false }) を書けばSPAモードになるようです。上記の方法でSPAモードのプロジェクトを作ると最初から書かれています。わりと簡単に変更できるので、途中からSSRに変更するというのも出来るようです
import { vitePlugin as remix } from "@remix-run/dev";
import { defineConfig } from "vite";

export default defineConfig({
  plugins: [
    remix({
      ssr: false,
    }),
  ],
});
7-2. 開発サーバーを起動する
SPAモードのプロジェクトは以下で開発サーバーを開けます
npx remix vite:dev
7-3. ビルドする
以下でビルドすることができます
ビルドされたファイルはbuild/client/フォルダ内に生成されるので、従来のSPAのビルドファイルと同様にhtmlサーバーで配信できます
npx remix vite:build
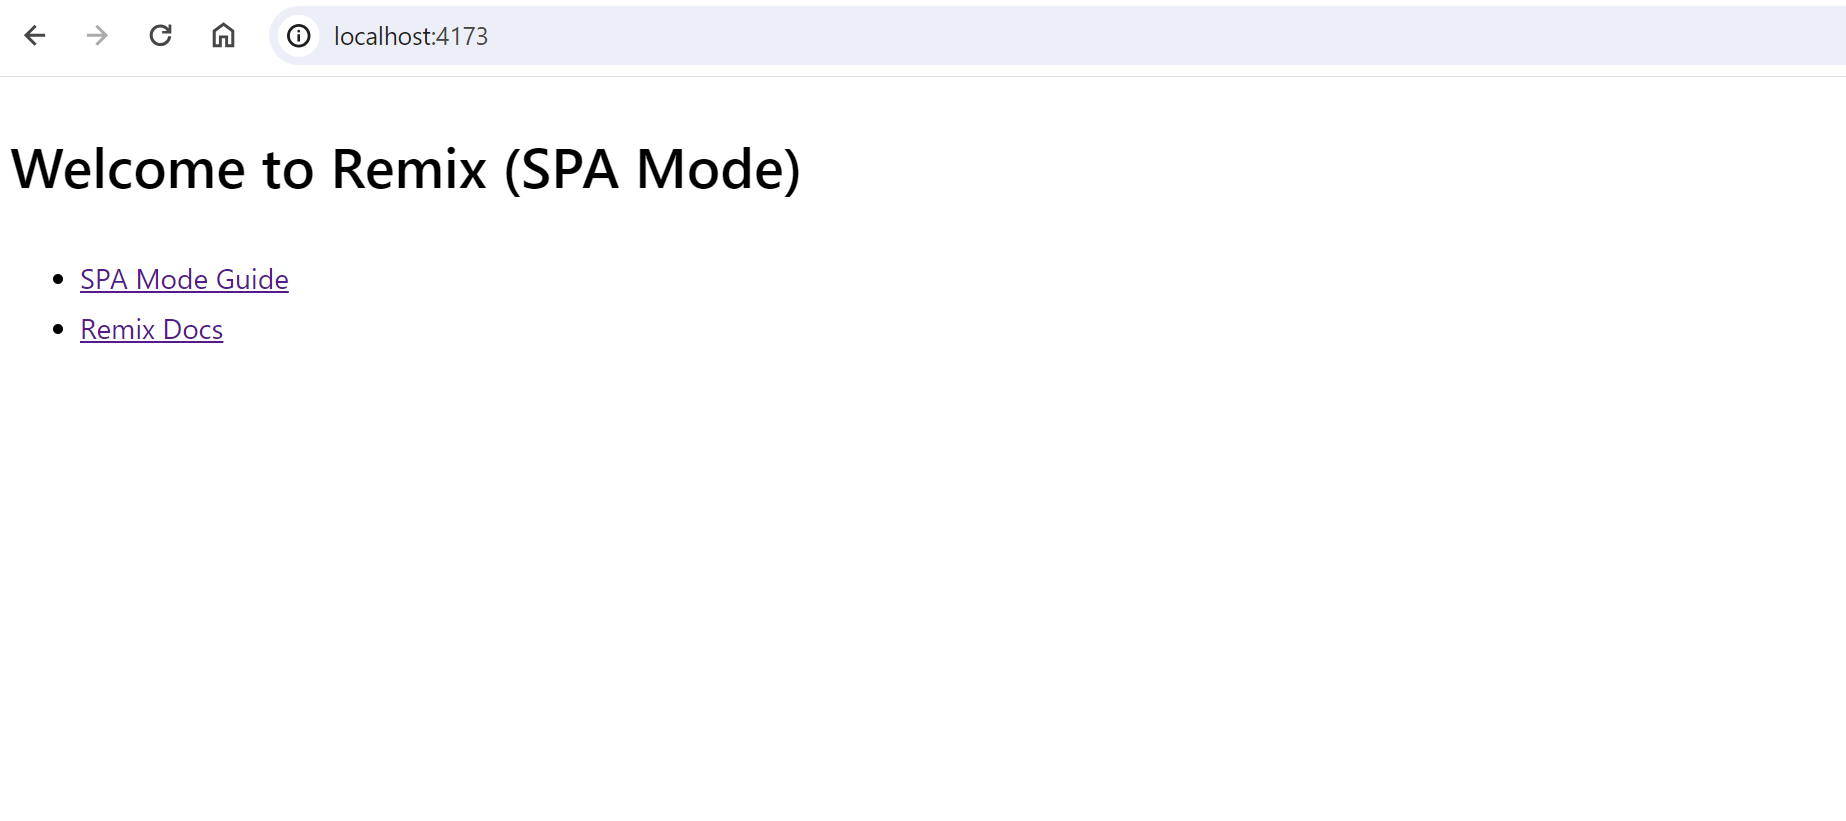
7-4. ビルドしたファイルをプレビューする
以下のコマンドで作成したビルドファイルをプレビューできます
npx vite preview
8. まとめ
SPAアプリをビルドできて、React RouterがFile-system based routingで出来て、loader/component/actionモデルで読み書きがシンプルに整理されていて、画面遷移の挙動をRemixコンポーネントの使い方次第で制御できて、いざとなったらSSRに切り替えることが出来るなど、良いところがたくさんある良いフレームワークだと思います
一方で、たくさんあるRemixコンポーネントのお作法を覚えないといけないところが大変な部分であり、またloaderの中でconsole.logしても表示が出なかったりと慣れるまで苦労する部分が結構あるフレームワークでもあると思います。公式のチュートリアルがちょっと分かりにくいのも含めて、そこを乗り越えればSPAをメインで書く人の選択肢上位には確実に入ってくると思います
ビルドが簡単に出来て、プレビューサーバーで確認できるのは地味に嬉しいですし、試しに何か作ってみようと思うだけの魅力があります
レッツトライ