ゴール設定
「AngularアプリをLighthouseのPWA監査で100点にする」
Lighthouseは、chromeで標準搭載されている上に、段階的にアプリの達成状況と修正方法を提案してくれて手軽なため取り上げました。
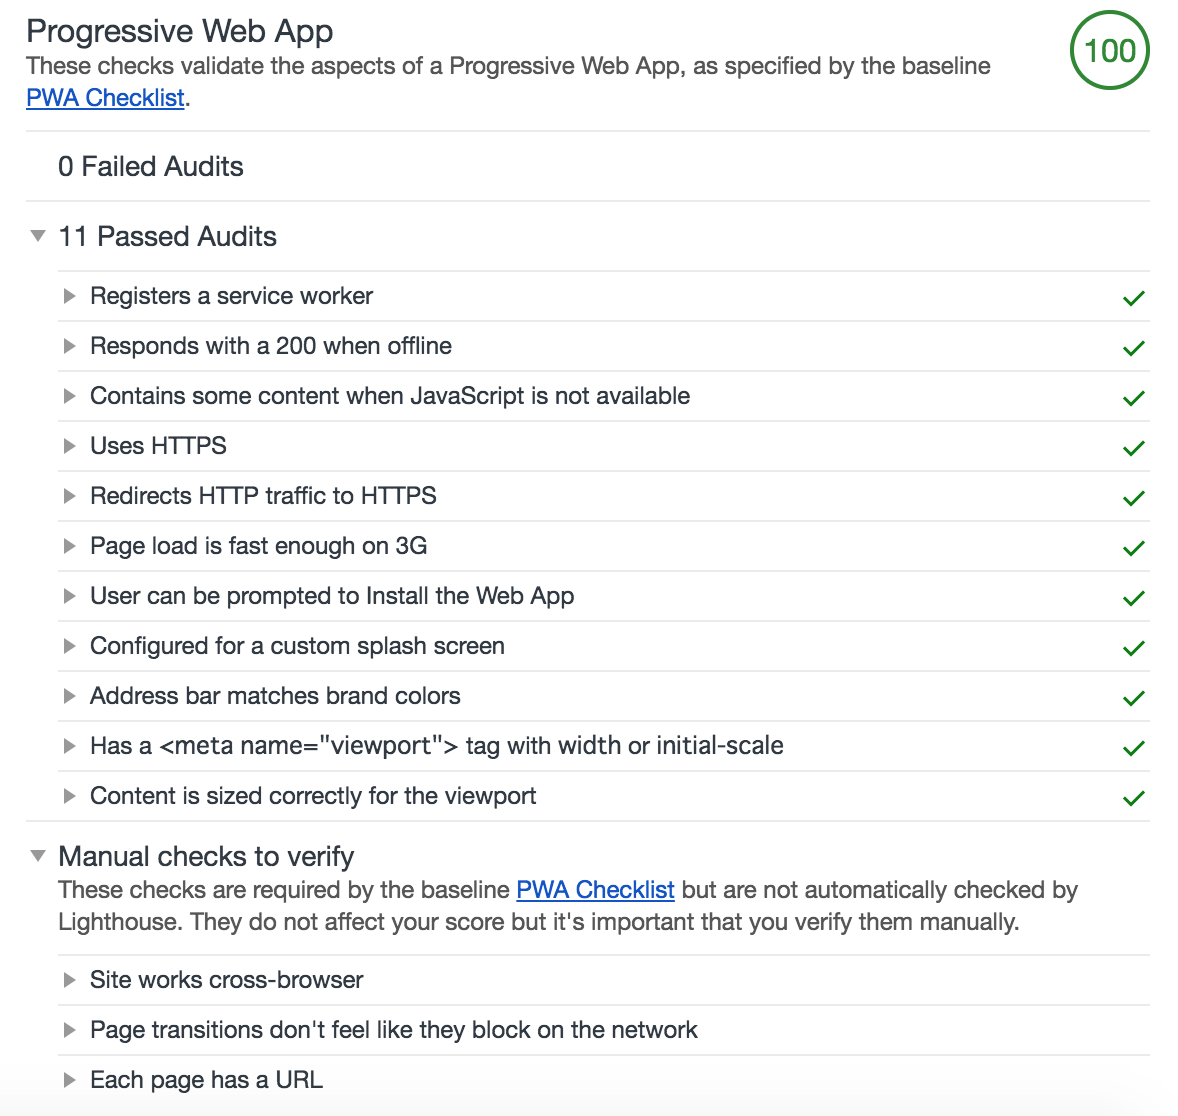
項目と詳細リンク先の一覧です。2018/1/16時点では全部で11個の監査項目があります。カテゴリは筆者が適当に付けています。
| カテゴリ | 監査項目 | 日本語 |
|---|---|---|
| ネイティブ体験 | User can be prompted to install the Web App | ユーザーにWebアプリをインストールするように誘導できる |
| ネイティブ体験 | Configured for a custom splash screen | スプラッシュスクリーンを構成している |
| ネイティブ体験 | Address bar matches brand colors | ブランドカラーのアドレスバーにする |
| ネイティブ体験 | Contains some content when JavaScript is not available | ページでスクリプトが利用できない場合に表示するコンテンツを用意する |
| レスポンシブ | Has a <meta name="viewport">tag with width or initial-scale |
HTMLにビューポートのメタタグを含める |
| レスポンシブ | Content is sized correctly for the viewport | ビューポートのサイズに適合したコンテンツである |
| ネットワーク | Uses HTTPS | サイトをHTTPSで配信する |
| ネットワーク | Redirects HTTP traffic to HTTPS | サイトで HTTP トラフィックを HTTPS にリダイレクトする |
| ネットワーク | Page load is fast enough on 3G | 3G回線でも十分な速度でページロードする |
| キャッシュ | Registers a service worker | Service Worker を登録する |
| キャッシュ | Responds with a 200 when offline | オフライン時に URL でステータスコード 200 を返す |
Angularアプリで必要になる項目
個々のアプリ実装状況に依るところもありますが、Angular-CLIで作成している標準的なアプリなら、大きく3つの実装機能になるはずです。
- ServiceWorkerを導入する
- "Register a service worker"
- "Respond with a 200 when offline"
- "User can be prompted to install the web app"(※serviceWorkerも必要になります。)
- WebManifestを作る
- "User can be prompted to install the web app"
- "Configured for a custom splash screen"
- "Address bar matches brand colors"
- NoScript環境でのviewを用意する
- "Contains some content when JavaScript is not available."
ネットワーク系項目(HTTPS、回線速度)は、クライアント外での設定になるため、本記事では割愛します。(main.budleファイルの削減例については別の記事にしています。)
参考までに、筆者の場合、上記の対応+HTTPトラフィックのリダイレクトをしていない状況で44点でした。
localHostで計測すると27点です。(HTTPS対応と3G回線速度が減点になりました。)
もしこれ以下の点数なら、Angular-CLIの標準構成から何かしら変えている可能性が高いため、先に上記以外のNG項目を見直した方が良いかもしれません。
ServiceWorkerを導入する
@angular/service-workerを追加するのがファーストチョイスだと思います。@angular/service-workerを導入してリソースキャッシュを行うだけで、Lighthouseの監査は達成できます(push通知は監査対象外です)。リソースキャッシュの導入の方法は、別の記事を書いているのでそちらをご参照ください。
WebManifestを作る
WebManifestは手作りします。(一時期Angular-CLIのmobileオプションがサポートしていたが、アップデートが止まっている)
-
src/にmanifest.jsonという名前でファイルを作ります。 - アイコン画像を用意します。
- 次のようなアイコン生成サイトを利用すると簡単です。
- 監査では
w512×h512の画像まで要求されます。 - アイコン画像をassetsフォルダに保存します。
-
manifest.jsonに以下のような記述します。
{
  "name": "Sample App",
  "short_name": "Sample",
  "theme_color": "#000000",
  "background_color": "#e0e0e0",
  "start_url": "/",
  "display": "standalone",
  "orientation": "portrait",
  "icons": [
    {
      "src": "\/assets\/images\/android-chrome-36x36.png",
      "sizes": "36x36",
      "type": "image\/png",
      "density": "0.75"
    },
    {
      "src": "\/assets\/images\/android-chrome-48x48.png",
      "sizes": "48x48",
      "type": "image\/png",
      "density": "1.0"
    },
    {
      "src": "\/assets\/images\/android-chrome-72x72.png",
      "sizes": "72x72",
      "type": "image\/png",
      "density": "1.5"
    },
    {
      "src": "\/assets\/images\/android-chrome-96x96.png",
      "sizes": "96x96",
      "type": "image\/png",
      "density": "2.0"
    },
    {
      "src": "\/assets\/images\/android-chrome-144x144.png",
      "sizes": "144x144",
      "type": "image\/png",
      "density": "3.0"
    },
    {
      "src": "\/assets\/images\/android-chrome-192x192.png",
      "sizes": "192x192",
      "type": "image\/png",
      "density": "4.0"
    },
    {
      "src": "\/assets\/images\/android-chrome-256x256.png",
      "sizes": "256x256",
      "type": "image\/png"
    },
    {
      "src": "\/assets\/images\/android-chrome-384x384.png",
      "sizes": "384x384",
      "type": "image/png",
      "density": "8.0"
    },
    {
      "src": "\/assets\/images\/android-chrome-512x512.png",
      "sizes": "512x512",
      "type": "image/png"
    },
    {
      "src": "\/assets\/images\/apple-touch-icon.png",
      "sizes": "180x180",
      "type": "image\/png"
    }
  ]
}
各プロパティの詳細は、こちらを参照ください。
https://developers.google.com/web/fundamentals/web-app-manifest/
最後に、ビルドに含めるように.angular-cli.jsonに追記します。
{
  "apps": [
    {
      "assets": [
        "assets",
        "favicon.ico",
        "manifest.json" // ←追記する
      ]
    }
  ]
}
NoScript環境でのviewを用意する
監査自体はindex.htmlに<p>loading...</p>でも埋め込めば合格します。
セマンティクスを考えると、<noscript>タグを用いて、javascriptに誘導することが推奨されています。
例
  <noscript>
    <h1>Welcome To The App</h1>
    <p style="color: red;">JavaScriptを有効にしてください。</p>
  </noscript>
完成!
ちなみにPWAのcheckListには他にも項目があります。
Lighthouseの監査には取り上げられていないけど、検索エンジン系、UI系、Push Notifications、Credential Management API、Payment Request APIといずれも重要な項目が並んでいるので、徐々に進めていくと良いと思います。
PWA checkList
https://developers.google.com/web/progressive-web-apps/checklist