はじめに
前回はwacherの生成とwacther↔depsが追加されるタイミングについてみていきました。
今回は実際にmessageに新しい値を入れてどのような動きをするか見ていきましょう。
実際の動きを見ていく
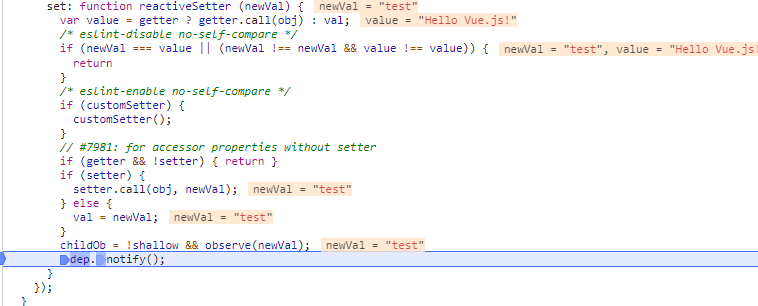
vm._data._message="test"とconsoleに入力してデバッグを開始します。
するとmessageのsetterが起動してvm.messageが"test"になり、dep.notify()へ
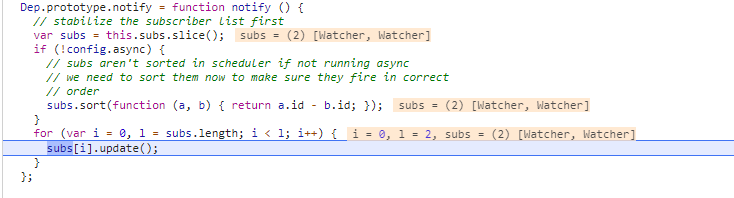
まず一つ目のcomputedのwatcher.update()
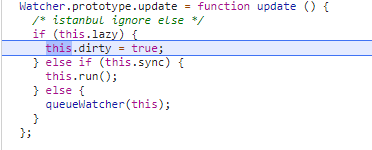
computedのwacther.lazy=trueだったのでdirty.trueにするだけです。
二つ目の全体のwactherはqueueWactherに行きます。
ただ、処理が複雑なうえに、本筋とはほとんど関係ないのでここは飛ばします。
そのまま全体のwacther.run()→wacther.get()へ
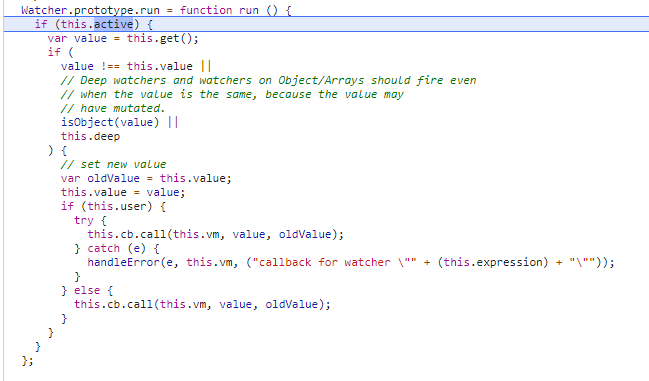
wacther.get()周りの動きは前回やりました。
今回のpushTargetやらpopTarget()、dep.depend()はすでにmessageのdepが二つのwatcherに、wactherのdepsにはmessageのdepがもう入っているため特に何もしません。
全体のwatcherのgetterなのでvm._update(vm._render())へ
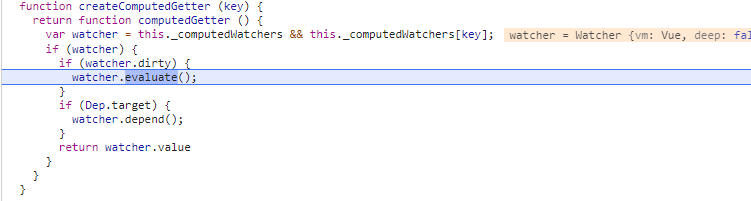
comp_messageのgetterであるcomputedGetterが呼ばれ、computedのwatcherをdirtyに設定していたのでwacth.evaluate()へ
wacth.evaluate()→wacther.get()→comp_message()→messageのgetterの流れで進み、messageのgetterからvalueである"test"が返ります。
comp_message()からは"comp test"となって返り、
watcher.evaluate()に戻ってcomputedのwatcher.valueが"comp test"に。
そして
(function anonymous(
) {
with(this){return _c('div',{attrs:{"id":"vue_example"}},[_v("\n  "+_s(comp_message)+"\n")])}
})
ここのcomp_messageが"comp_test"になり、後の処理は①astを中心にとほとんど同じで、違いはvm._updateのdiffアルゴリズムだけです。
このdiffアルゴリズムは④diffアルゴリズムでやっていきましょう。
ここまでで②wactherは終わりです。
次回からはv-系の処理について見ていきます。