はじめに
今回勉強会でLINEボットを初心者・未経験者向けに作ることになったので
その人たち向けに資料を作る際にまとめた備忘録となります。
一応書いてある通りにやればLINEボットは作れるはずです・・・。
以下にリポジトリが格納してあります。
https://github.com/stkzk3110/aws-cloud9-rails-bot
※ちなみにローカル環境でも動くのは確認しました。
前提
前提として満たす必要があるものについては実際自分が作ってみて参考にしたサイトのリンクを貼っておくのでそちらを参考にしていただければと・・・
LINE Developersの登録
LINE Developersでの設定は以下を参考。
channelを作成までやる。
LINEのBot開発 超入門(前編) ゼロから応答ができるまで
AWSアカウントの登録
以下を参考にAWSアカウントの取得とIAMユーザーの作成を実施。
※以下記事の「AWS Cloud9 環境を作成する」まで実施してあればOK!
AWS Cloud9でRuby on Railsを始める
Herokuアカウントの登録
以下を参考にHerokuアカウントの取得を実施。
※以下記事のHeroku登録までできてればOK!
Heroku初心者がHello, Herokuをしてみる
Cloud9上でのRailsの環境構築
AWSアカウントの登録で「AWS Cloud9 環境を作成する」までやると以下画面に遷移するはずです。
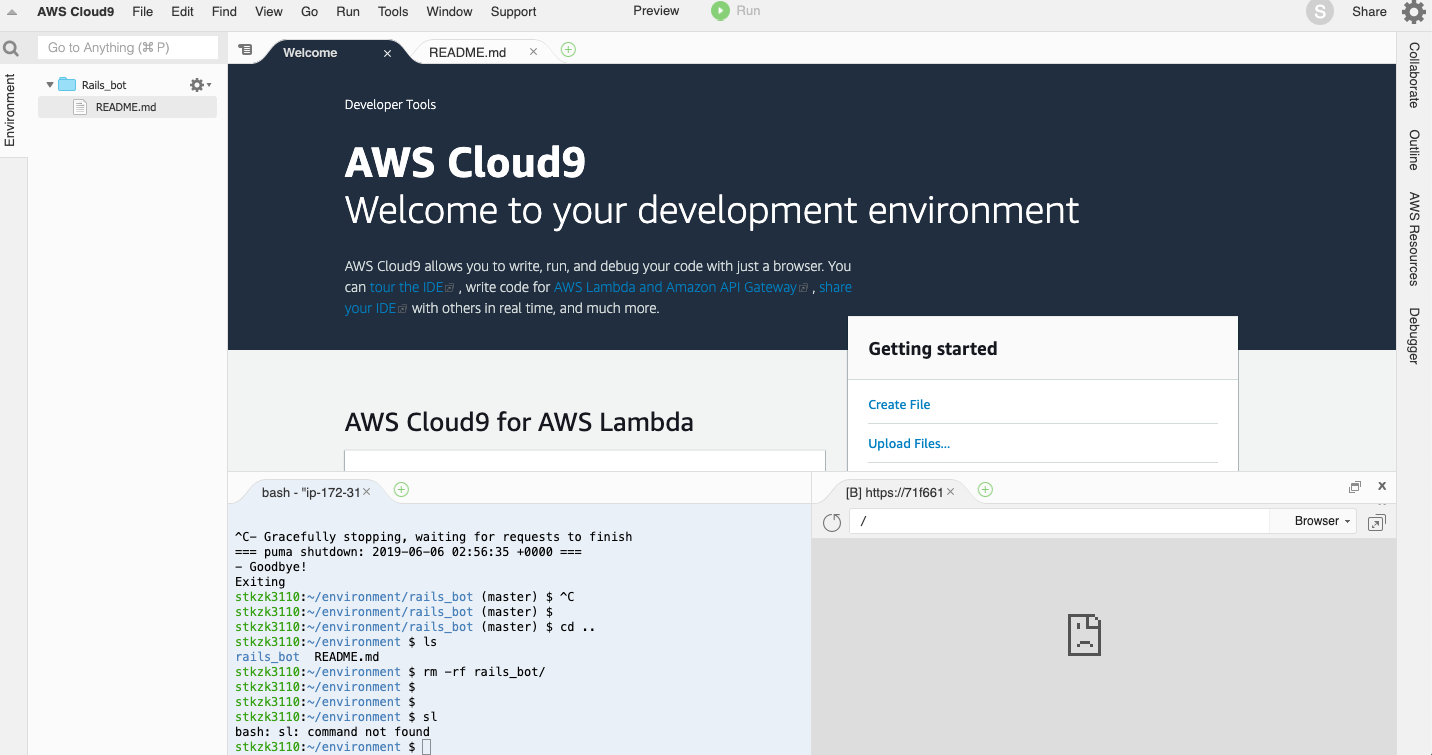
この画面に下にコマンドを入力するところがあるのでterminalと今後記載する部分はここでコマンド入力していってみてください。
:~/environment $ ruby -v
ruby 2.6.3p62 (2019-04-16 revision 67580) [x86_64-linux]
:~/environment $ rails -v
Rails 5.0.0
:~/environment $ rails new rails_bot
:~/environment $ cd rails_bot/
:~/environment/rails_bot (master) $ rails s
=> Booting Puma
=> Rails 5.2.3 application starting in development
=> Run `rails server -h` for more startup options
Puma starting in single mode...
* Version 3.12.1 (ruby 2.6.3-p62), codename: Llamas in Pajamas
* Min threads: 5, max threads: 5
* Environment: development
* Listening on tcp://localhost:8080
Use Ctrl-C to stop
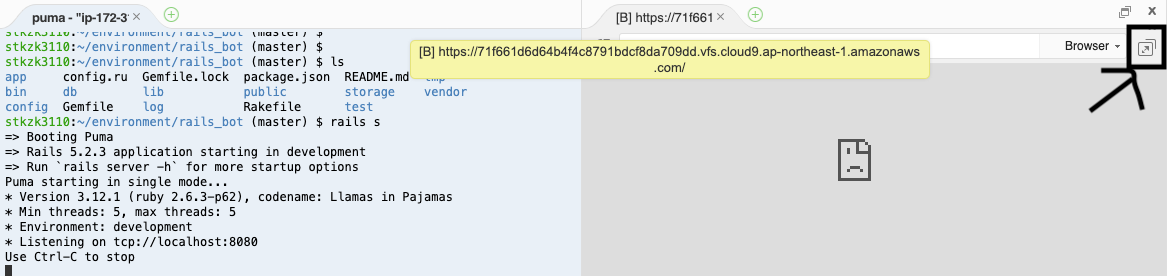
rails sコマンドをした後に上の黒い四角で囲ってあるところをクリックしてみると・・・
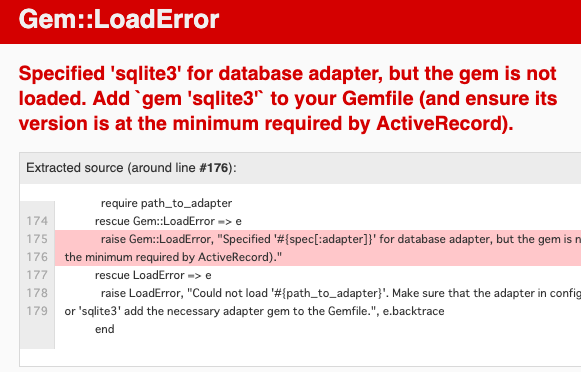
このような画面が開きます。
この問題については以下にまとめてありますね。。。
Railsを始めてsqlite3まわりのエラーで躓いている人たちへ
ということでrailsのバージョンを以下に合わせます。
gem 'rails', '~> 5.2.3'
Gemfileを変更しているのでbundle updateを実施してrailsのバージョンを変えた後、rm -rfコマンドでファイルを削除して再度作り直します。(この時点でバージョンを確認しておくと良い)
:~/environment $ rm -rf line_bot/
:~/environment $ rails -v
Rails 5.2.3
:~/environment $ rails new line_bot
:~/environment $ cd line_bot/
:~/environment/line_bot (master) $ rails s
=> Booting Puma
=> Rails 5.2.3 application starting in development
=> Run `rails server -h` for more startup options
Puma starting in single mode...
* Version 3.12.1 (ruby 2.6.3-p62), codename: Llamas in Pajamas
* Min threads: 5, max threads: 5
* Environment: development
* Listening on tcp://localhost:8080
Use Ctrl-C to stop
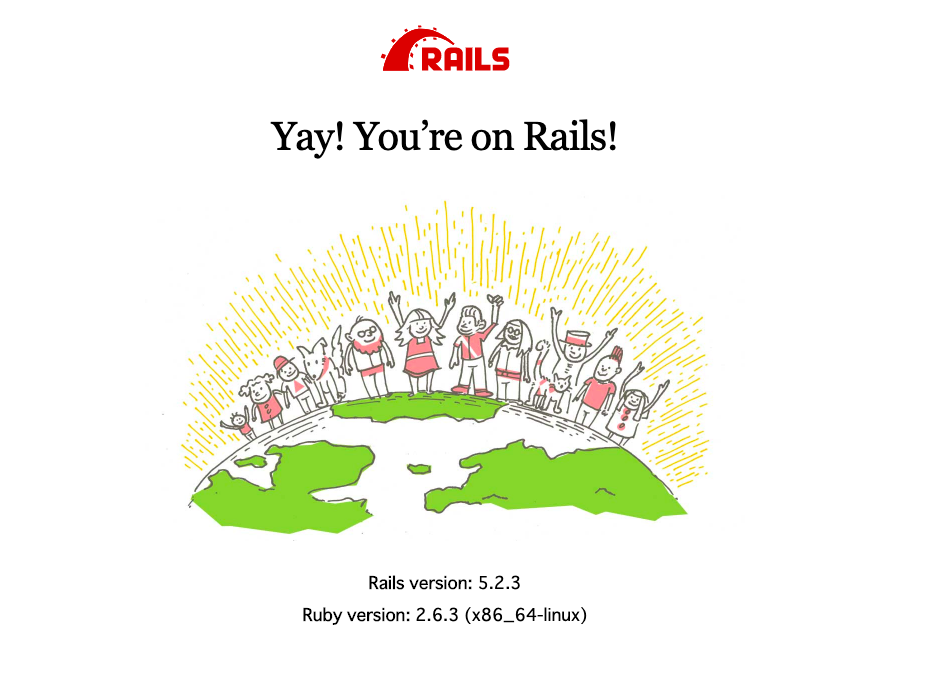
このような画面が表示されてたら成功です。
Heroku環境構築
次はHerokuにログインします。
rails sコマンドでサーバー起動してるのとは別のターミナルを新規で開いてherokuにログインします。
:~/environment/rails_bot (master) $ heroku login
bash: heroku: command not found
あれ、、、herokuコマンドが使えないって言ってますね・・・
以下記事に対処法が載ってるので参考にしてみてください。
※「以下のコマンドを順に実行した」っていうところまででOK!
では再度、heroku loginしてみます。
:~/environment/rails_bot (master) $ heroku login
 ›   Warning: login is not a heroku command.
Did you mean join? [y/n]: y
 ›   Error: Missing required flag:
 ›     -a, --app APP  app to run command against
 ›   See more help with --help
:~/environment/rails_bot (master) $
どうもうまくいかないみたいです。。。
エラーメッセージで検索してみると以下の記事に良さそうな情報が書いてありました。
https://teratail.com/questions/134853
:~/environment/rails_bot (master) $ npm uninstall -g heroku-cli
:~/environment/rails_bot (master) $ npm i -g heroku
ではもう一度、heroku loginを試してみます。
:~/environment/rails_bot (master) $ heroku login
heroku: Press any key to open up the browser to login or q to exit:
Opening browser to https://cli-auth.heroku.com/auth/browser/253f1b63-fc1b-4723-a39f-e97bed2f8366
 ›   Warning: Cannot open browser.
heroku: Waiting for login... !
JSONError: Unexpected end of JSON input while parsing near ' '
    at module.exports (~/.nvm/versions/node/v8.16.0/lib/node_modules/heroku/node_modules/parse-json/index.js:26:19)
    at HTTP._parse (~/.nvm/versions/node/v8.16.0/lib/node_modules/heroku/node_modules/@heroku-cli/command/node_modules/http-call/lib/http.js:343:25)
    at <anonymous>
なんかJSONErrorが出てますね・・・
これもエラーメッセージを検索してみると良さげの記事がありました!!
ではこの記事の通り、heroku loginにオプションをつけてやってみます。
:~/environment/rails_bot (master) $ heroku login --interactive
heroku: Enter your login credentials
Email: Email: Email: xxx@xxx.co.jp
Password: ***
Logged in as xxx@xxx.co.jp
お、行けたみたいですね!!
Git管理
Cloud9上でソースコードをGitで管理してみます。
:~/environment/rails_bot (master) $ git init
Reinitialized existing Git repository in /home/ec2-user/environment/rails_bot/.git/
:~/environment/rails_bot (master) $ git status
:~/environment/rails_bot (master) $ git add -A
:~/environment/rails_bot (master) $ git commit -m "initial commit"
GitHubの方でリポジトリを作成します。
以下を参考にするといいかもです。
Cloud9で作成したソースコードをGitHubに保存する手順
:~/environment/rails_bot (master) $ git remote add origin https://github.com/アカウント名/リポジトリ名.git
:~/environment/rails_bot (master) $ git push origin master
git pushコマンドでソースコードをプッシュする際、GitHubのユーザー名(登録したメールアドレス)とパスワードが聞かれるのでこれを入力したらプッシュができるはずです!!
Herokuへデプロイ
じゃあ実際にpushした内容をherokuにも反映させましょう。
:~/environment/rails_bot (master) $ heroku create
:~/environment/rails_bot (master) $ git push heroku master
・・・
remote:  !
remote:  !     Failed to install gems via Bundler.
remote:  !     Detected sqlite3 gem which is not supported on Heroku:
remote:  !     https://devcenter.heroku.com/articles/sqlite3
・・・
herokuはsqlite3のサポートをしておらず、postgresqlを使用しているので・・・
group :development do
  gem 'sqlite3'
end
・・・
group :production do
  gem 'pg', '0.20.0'
end
sqlite3は開発環境のみの使用にして本番環境はpostgresqlを使用するようにGemfileを変更します。
:~/environment/rails_bot (master) $ bundle install
An error occurred while installing pg (0.20.0), and Bundler cannot continue.
Make sure that `gem install pg -v '0.20.0' --source 'https://rubygems.org/'` succeeds before bundling.
なんかエラー出てますね。
PostgreSQLがインストールされていないって言われてますね。。。
以下コマンドでインストールして解消可能です。
:~/environment/rails_bot (master) $ sudo yum install postgresql-devel
それで再度addしてcommitしてpushします。
:~/environment/rails_bot (master) $ git add -A
:~/environment/rails_bot (master) $ git commit -m "modify how to handle DB"
:~/environment/rails_bot (master) $ git push heroku master
これでいけてますね!!
LINE BOT作成
おうむ返しBOT
では実際にここからLINE BOTを本格的に作っていきます。
まずはおうむ返しBOTです。
gem 'line-bot-api'
gem 'dotenv-rails'
上記をGemfileに追加してbundle install
:~/environment/rails_bot (master) $ bundle install
:~/environment/rails_bot (master) $ rails g controller linebot
:~/environment/rails_bot (master) $ heroku config:set LINE_CHANNEL_ID=<LINE_DeveloperのプロバイダーリストのChannel_IDを記載>
:~/environment/rails_bot (master) $ heroku config:set LINE_CHANNEL_SECRET=<LINE_DeveloperのプロバイダーリストのChannel Secretの暗号を記載>
:~/environment/rails_bot (master) $ heroku config:set LINE_CHANNEL_TOKEN=<LINE_Developerのプロバイダーリストのアクセストークンの暗号を記載>
ではおうむ返しbotをまず作ります。
以下の修正を実施。
class LinebotController < ApplicationController
    require 'line/bot'  # gem 'line-bot-api'

    # callbackアクションのCSRFトークン認証を無効
    protect_from_forgery :except => [:callback]

    def client
      @client ||= Line::Bot::Client.new { |config|
        config.channel_secret = ENV["LINE_CHANNEL_SECRET"]
        config.channel_token = ENV["LINE_CHANNEL_TOKEN"]
      }
    end

    def callback
      body = request.body.read

      signature = request.env['HTTP_X_LINE_SIGNATURE']
      unless client.validate_signature(body, signature)
        head :bad_request
      end

      events = client.parse_events_from(body)

      events.each { |event|
        case event
        when Line::Bot::Event::Message
          case event.type
          when Line::Bot::Event::MessageType::Text
            message = {
              type: 'text',
              text: event.message['text']
            }
            client.reply_message(event['replyToken'], message)
          end
        end
      }
      head :ok
    end
  end
Rails.application.routes.draw do
  # For details on the DSL available within this file, see http://guides.rubyonrails.org/routing.html
  post '/callback' => 'linebot#callback'
end
これでaddしてcommitしてpushすれば・・・
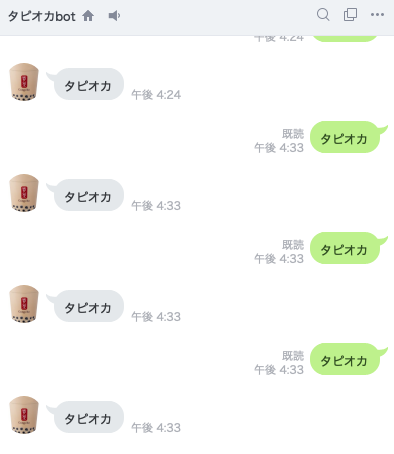
できましたね!
これでとりあえずおうむ返しbotはできたことになります。
処理を見ていけば分かると思うのですがevent.message['text']にLINEから入力したテキストが入ってます。
以降は処理を追加します。
指定したキーワードには異なるメッセージを返す
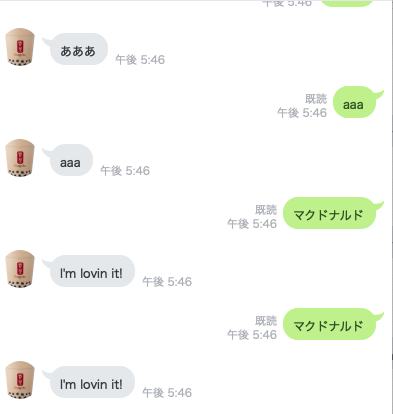
タイトルの通り今回は"マクドナルド"というメッセージに対して"I'm lovin it!"と返す処理を追加します。
    def callback
      body = request.body.read

      signature = request.env['HTTP_X_LINE_SIGNATURE']
      unless client.validate_signature(body, signature)
        head :bad_request
      end

      events = client.parse_events_from(body)

      events.each { |event|
        case event
        when Line::Bot::Event::Message
          case event.type
          when Line::Bot::Event::MessageType::Text
            msg = event.message['text']
            if send_msg(msg)
              msg = "I'm lovin it!"
              client.reply_message(event['replyToken'], {
                type: 'text',
                text: msg});
            else
              client.reply_message(event['replyToken'], {
                type: 'text',
                text: msg});
            end
          end
        end
      }
      head :ok
    end

    def send_msg(msg)
      if msg == 'マクドナルド'
        return true
      else
        false
      end
    end

    private

    def client
      @client ||= Line::Bot::Client.new { |config|
        config.channel_secret = ENV["LINE_CHANNEL_SECRET"]
        config.channel_token = ENV["LINE_CHANNEL_TOKEN"]
      }
    end
主に大きく変えてるのは、send_msgメソッドの追加とそれに伴うcallbackメソッドの条件分岐です。
先ほど説明しましたがevent.message['text']はLINEから入力したテキストが入ってます。
なのでこの値の中身を判定してやれば簡単に実装できますね。
イメージとしては以下になります。(トップ画像はタピオカのままですが・・・)
お天気を返す
最後にAPIを使って実際に天気を返すBOTを作ってみましょう。
今回は無料で開発者用APIを提供しているOpenWeatherMapを使ってみました。
OpenWeatherMap
サインアップで登録してサインインするとAPI keysって項目があります。
そこの中に後ほど使うAPI keysが書かれていますので覚えておきましょう。
それでは今回は東京というキーワードで東京の今日の天気を返すBotを作成しましょう。
以下ソースコードになります。
class LinebotController < ApplicationController
    require 'line/bot'  # gem 'line-bot-api'
    require "json"
    require "open-uri"
    require "date"
    API_KEY = "OpenWeatherMapのAPI keysに書かれてたKeyを入力"
    BASE_URL = "http://api.openweathermap.org/data/2.5/forecast"

    # callbackアクションのCSRFトークン認証を無効
    protect_from_forgery :except => [:callback]

    def callback
      body = request.body.read

      signature = request.env['HTTP_X_LINE_SIGNATURE']
      unless client.validate_signature(body, signature)
        head :bad_request
      end

      events = client.parse_events_from(body)

      events.each { |event|
        case event
        when Line::Bot::Event::Message
          case event.type
          when Line::Bot::Event::MessageType::Text
            message = event.message['text']
            if send_msg(message)
              message = change_msg(message)
              result_msg = message.join
              client.reply_message(event['replyToken'], {
                type: 'text',
                text: result_msg});
            else
              client.reply_message(event['replyToken'], {
                type: 'text',
                text: message});
            end
          end
        end
      }
      head :ok
    end

    def send_msg(msg)
      if msg == '東京'
        return true #天気を返す
      else
        false
      end
    end

    def change_msg(msg)
      case msg
      when "東京"
        response = open(BASE_URL + "?q=Tokyo,jp&APPID=#{API_KEY}")
        data = JSON.parse(response.read, {symbolize_names: true})
        result = weather_text(data)
        return result
      end
    end

    def weather_text(weather_data)
      item = weather_data[:list]
      result = Array.new
      forecastCityname = weather_data[:city][:name]
      (0..7).each do |i|
        forecastDatetime = item[i][:dt_txt]
        logger.debug(forecastDatetime)
        forecasttemp = (item[i][:main][:temp] - 273.15).round(1)
        weather_id = item[i][:weather][0][:id]
        weather = get_weather(weather_id)
        #weather_icon = item[i][:weather][i][:icon]
        result[i] = "#{forecastCityname}の天気をお知らせします。\n#{forecastDatetime}の天気は#{weather}\n温度は#{forecasttemp}\n"
      end
      return result
    end

    def get_weather(weather_id)
      logger.debug(weather_id)
      case weather_id
      when 200, 201, 202, 210, 211, 212, 221, 230, 231, 232,
        300, 301, 302, 310, 311, 312, 313, 314, 321,
        500, 501, 502, 503, 504, 511, 520, 521, 522, 523 ,531 then
        weather = '雨'
        return weather
      when 601, 602, 611, 612, 615, 616, 620, 621, 622 then
        weather = '雪'
        return weather
      when 701, 711, 721, 731, 741, 751, 761, 762, 771, 781 then
        weather = '異常気象'
        return weather
      when 800 then
        weather = '晴れ'
        return weather
      when 801, 802, 803, 804 then
        weather = '曇り'
        return weather
      else
        weather = '不明'
        return weather
      end
    end

    private

    def client
      @client ||= Line::Bot::Client.new { |config|
        config.channel_secret = ENV["LINE_CHANNEL_SECRET"]
        config.channel_token = ENV["LINE_CHANNEL_TOKEN"]
      }
    end
end
これで以下のようにbotが返してくるはずです。

このように返事が返ってこれば成功です。
まとめ
今回、勉強会開催に伴ってLINEボットを結構がっつり自分で調べて作り込む事でAPIの使い方や配列操作が学べたり結構得られるものが多かったです。
簡単に作れるのでぜひLINEボット開発してみてはいかがでしょうか???
備考
今回、LINE BOTのテストをする際、いちいちHerokuにデプロイして確認するのもめんどくさいのでローカル環境でBOTのテストができるngrokやserveoを使ってテストしてました。
以下参考資料↓
Ngrokを用いた簡単Botテスト作成
試しにngrokからserveoに乗り換えてみた