はじめに
Vue.js + Firebaseで自己紹介用の静的サイトを作ってみた 第2弾 実装編(ルーティング)の続きとなります。
過去の記事はこちら・・・
Vue.js + Firebaseで自己紹介用の静的サイトを作ってみた 第1弾 環境構築編
Vue.js + Firebaseで自己紹介用の静的サイトを作ってみた 第2弾 実装編(ルーティング)
実装
bootstrap4適用
では前回に引き続き実装の方を進めていきます。
ここからCSSも書いていくのでCSSフレームワークとしてbootstrap4を使っていきたいと思います。
使い方は以下公式ドキュメント参照
https://bootstrap-vue.js.org/docs/
公式ドキュメントにしたがって設定していきます。
$ npm i bootstrap-vue
import Vue from 'vue'
import BootstrapVue from 'bootstrap-vue'
import App from './App.vue'
import router from './router'

import 'bootstrap/dist/css/bootstrap.css'
import 'bootstrap-vue/dist/bootstrap-vue.css'

Vue.config.productionTip = false

Vue.use(BootstrapVue)

new Vue({
  router,
  render: h => h(App)
}).$mount('#app')
これだけでbootstrapの適用は完了です。
早速ナビゲーションをbootstrapを使って設定し直します。
<template>
  <div id="app">
    <nav id="gnav">
      <ul>
        <li><router-link to="/">HOME</router-link></li>
        <li><router-link to="/about">ABOUT</router-link></li>
        <li><router-link to="/skill">SKILL</router-link></li>
        <li><router-link to="/contact">CONTACT</router-link></li>
      </ul>
    </nav>
    <router-view/>
  </div>
</template>
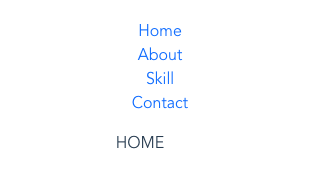
見て分かる通りスタイルがグチャグチャです。
この後これは一つずつ整えていきます。
bootstrapのカスタマイズ
bootstrapの設定もデフォルトからカスタマイズできるようにします。
$ npm i sass-loader node-sass --save-dev
とりあえず黒丸表示が気になるので
タグのlist-style-typeがデフォルトだと黒丸表示なのでこれを表示なしにするためスタイル指定用のscssを作成します。@charset 'utf-8';
li {
list-style: none;
}
main.jsに作ったスタイル用のscssをimportします。
import './assets/scss/style.scss'
左側の黒丸は確認できないと思います。
これでスタイルの反映は確認できました。
今後共通スタイルの設定はstyle.scssの方に書いていきます。
scssについては以前自分が作ったものがあるのでそれをそのままコピーします。(cssについては今回はあまり説明しない予定なのでそのまま使う予定です)
この後についてはこのscssありきでclass名やid名を指定するのでコピーしないで1から作る人は注意してください。
以下を参照
style.scss(https://github.com/stkzk3110/portfolio/blob/master/src/scss/style.scss)
軽量化
bootstrapをカスタマイズするなら、不要な機能を削って軽量化も図りたいです。
そのため、以下に置き換え、不要なファイルのimportを削除します。
参考記事:Bootstrap 4 をカスタマイズする
// Your variable overrides
$body-bg: #000;
$body-color: #111;

// Required
@import "../node_modules/bootstrap/scss/functions";
@import "../node_modules/bootstrap/scss/variables";
@import "../node_modules/bootstrap/scss/mixins";

// Optional
@import "../node_modules/bootstrap/scss/root";
@import "../node_modules/bootstrap/scss/reboot";
//@import "../node_modules/bootstrap/scss/type";
//@import "../node_modules/bootstrap/scss/images";
//@import "../node_modules/bootstrap/scss/code";
@import "../node_modules/bootstrap/scss/grid";
//@import "../node_modules/bootstrap/scss/tables";
//@import "../node_modules/bootstrap/scss/forms";
//@import "../node_modules/bootstrap/scss/buttons";
@import "../node_modules/bootstrap/scss/transitions";
@import "../node_modules/bootstrap/scss/dropdown";
//@import "../node_modules/bootstrap/scss/button-group";
//@import "../node_modules/bootstrap/scss/input-group";
@import "../node_modules/bootstrap/scss/custom-forms";
@import "../node_modules/bootstrap/scss/nav";
@import "../node_modules/bootstrap/scss/navbar";
//@import "../node_modules/bootstrap/scss/card";
//@import "../node_modules/bootstrap/scss/breadcrumb";
//@import "../node_modules/bootstrap/scss/pagination";
//@import "../node_modules/bootstrap/scss/badge";
//@import "../node_modules/bootstrap/scss/jumbotron";
//@import "../node_modules/bootstrap/scss/alert";
//@import "../node_modules/bootstrap/scss/progress";
//@import "../node_modules/bootstrap/scss/media";
//@import "../node_modules/bootstrap/scss/list-group";
//@import "../node_modules/bootstrap/scss/close";
@import "../node_modules/bootstrap/scss/modal";
//@import "../node_modules/bootstrap/scss/tooltip";
//@import "../node_modules/bootstrap/scss/popover";
//@import "../node_modules/bootstrap/scss/carousel";
@import "../node_modules/bootstrap/scss/utilities";
//@import "../node_modules/bootstrap/scss/print";
ヘッダーとヘッダーナビゲーションメニューの設定
じゃあbootstrapを設定してカスタマイズが行える状態にしたのでヘッダーとナビゲーションメニューをヘッダーナビゲーションとしてスタイルを整えていきます。
<template>
  <div id="app">
    <div class="header-outer">
      <header>
        <h1 class="site-title">
          <router-link to="/">cube's portfolio</router-link>
        </h1>
      </header>
      <nav id="gnav" class="header-nav">
        <ul>
          <li><router-link to="/">HOME</router-link></li>
          <li><router-link to="/about">ABOUT</router-link></li>
          <li><router-link to="/skill">SKILL</router-link></li>
          <li><router-link to="/contact">CONTACT</router-link></li>
        </ul>
      </nav>
    </div>
    .
    .
    .
  </div>
</template>
画面を確認してみると以下のようになっていたらOKです。
ヘッダーナビゲーションメニューは、共通部分なので実際に各画面に遷移するかどうかや各画面遷移時にスタイルが崩れていないかなども確認しておくといいですね。
フッターとフッターナビゲーションメニューの設定
ヘッダーと同じ要領でフッターとフッターナビゲーションメニューを実装していきます。
App.vueにfooterを追加。
<template>
  <div id="app">
    .
    .
    .
    <router-view/>
    <nav class="footer-nav">
      <ul>
        <li><router-link to="/">HOME</router-link></li>
        <li><router-link to="/about">ABOUT</router-link></li>
        <li><router-link to="/skill">SKILL</router-link></li>
        <li><router-link to="/contact">CONTACT</router-link></li>
      </ul>
    </nav>
    <footer>
      <div class="copyright-box">©️ 2019 cube</div>
    </footer>
  </div>
</template>
copyrightについては色々書き方がありますが、自分は以下を参考に書いてます。
正しい”コピーライト”の書き方とその理由
画面を確認してみて以下のようになっていたらOKです。
フッターナビゲーションメニューもヘッダーナビゲーションメニューと同じく共通部分なので実際に各画面に遷移するかどうかや各画面遷移時にスタイルが崩れていないかなども確認しておくといいですね。

SNSリンクの設置
では要件にもあったSNSへのリンクをフッターに設置したいと思います。
classで言うとsns-boxの部分を追加しています。
<template>
  <div id="app">
    .
    .
    .
    <router-view/>
    <nav class="footer-nav">
      <ul>
        <li><router-link to="/">HOME</router-link></li>
        <li><router-link to="/about">ABOUT</router-link></li>
        <li><router-link to="/skill">SKILL</router-link></li>
        <li><router-link to="/contact">CONTACT</router-link></li>
      </ul>
    </nav>
   <div class="sns-box">
      <a href="https://twitter.com/fisherman3110se" target="_blank" class="sns-link">
          <i class="fab twitter-icon"></i>
      </a>
      <a href="https://github.com/stkzk3110" target="_blank" class="sns-link">
          <i class="fab github-icon"></i>
      </a>
      <a href="https://instagram.com/stkzk_aioaui" target="_blank" class="sns-link">
          <i class="fab instagram-icon"></i>
      </a>
      <a href="https://qiita.com/fisherman3110se" target="_blank" class="sns-link">
          <i class="fab qiita-icon"></i>
      </a>
      <a href="https://note.mu/fisherman0825" target="_blank" class="sns-link">
          <i class="fab note-icon"></i>
      </a>
    </div>
    <footer>
      <div class="copyright-box">©️ 2019 cube</div>
    </footer>
  </div>
</template>
画面を確認してみて以下のようになっていたらOKです。
SNSアイコンはfontawesomeから取る形もありますが、Qiitaとnoteのアイコンはないため、2つだけアイコンじゃなくて画像なのも変だしという意味で全部画像をアイコンにしています。
(Twitter, Instagram, GitHubだけならアイコンあるのでそれだけでいいという人はfontawesomeを使うのをオススメします。)
※Qiitaは僕のフォロワーさんがfontawesomeにIssue立ててアイコンリクエストを送っていて自分もnoteのアイコンはfontawesomeの方にIssue立ててアイコンリクエストを送っています。
Qiita
https://github.com/FortAwesome/Font-Awesome/issues/14857
note
https://github.com/FortAwesome/Font-Awesome/issues/14888
fontawesomeのアイコンについては以下参照
https://fontawesome.com/icons
まとめ
今回の対応で3つあるうちの2つの機能を実装しました。
・各ページへのルーティングをヘッダー、フッターにナビゲーション配置
・SNS(Twitter, Instagram, GitHub, Qiita, note)ページへのリンク(フッターにSNSアイコン配置)
次回は各ページをそれぞれ仕上げていきたいと思います。
後前回伝え忘れましたがビルドはこまめにやっていきましょう。(ビルドコマンド:npm run build)
※実際に実装しながら備忘録として手順やポイントを記事に残している手前、もしかしたら今後他の実装をやっていく上で今までの実装を変える恐れもあるのでご容赦ください。
○リポジトリ
https://github.com/stkzk3110/vue_firebase-project
今回のコミット部分
Create Header and Footer and SNS link


