Windows10から搭載されたWindows Subsystem for Linuxを使ってRuby on Railsの開発環境を作れないかと思ってやってみました。
手軽にやるにはまぁありかなという印象。
すでに同様のことをされている先人様がいっぱいいらっしゃいますね。
たぶん他記事との違いは後半のDドライブに入れようとして失敗した部分ぐらい。
WSLの導入
昔は"Bash on Windows"と言われていたのものが進化して、いろんなlinuxディストリビューションが導入できるようになっています。
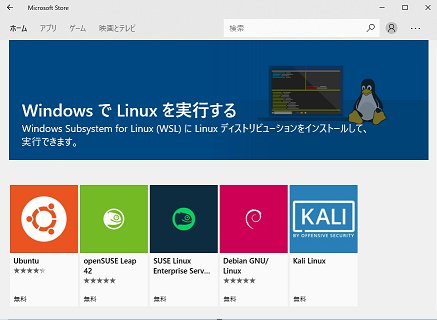
Windows Storeで"bash on windows"とか"ubuntu"とか"linux on windows"とか適当に検索すると”WindowsでLinuxを実行する”というページにたどり着けます。
ここでお好みのディストリビューションを選んで、ポチッとインストールを押すと導入されます。
随分楽になってますね。
今回はUbuntuを選択しました。
Rails環境構築
各種アップデート
Ubuntuを起動すると、まずはパスワード設定が求められるので入力します。
その後、各種アップデートと必要なライブラリを導入しておきます。
sudo apt update
sudo apt upgrade

sudo apt install -y build-essential

sudo apt-get install -y libssl-dev libreadline-dev zlib1g-dev libsqlite3-dev
rbenvの導入
Rubyの導入・複数バージョンの管理を楽にしてくれるrbenvを導入します。
rbenv
git clone https://github.com/sstephenson/rbenv.git ~/.rbenv
git clone https://github.com/sstephenson/ruby-build.git ~/.rbenv/plugins/ruby-build

echo 'export PATH="$HOME/.rbenv/bin:$PATH"' >> ~/.bash_profile
echo 'eval "$(rbenv init -)"' >> ~/.bash_profile

source ~/.bash_profile
rbenv --version
バージョンが表示されればOK
Node入れておく
NodeJSの最新のものも入れておきましょう。
curl -sL https://deb.nodesource.com/setup_9.x | sudo -E bash -
sudo apt-get install -y nodejs
Ruby
rbenvを使ってRubyの導入を行います。
# インストールできるものリスト
rbenv install --list
# バージョンを指定してインストール
rbenv install 2.5.1
# 確認
rbenv versions
# 利用するバージョンの設定
rbenv global 2.5.1
gemを管理するbundlerも入れておきます
gem install bundler
Rails
Rails自体も複数バージョンが混在することを想定して
Railsが動く環境を構築 → その中でRailsアプリケーションを構築の手順で導入してみます。
気にしない場合はgem install railsで入れてしまってもOK
# testディレクトリ内に設定してみる
mkdir test
cd test

bundle init
# 作成されたGemfileの
gem "rails" #を有効にする

bundle install --path vendor/bundle
bundle exec rails new rails_test

cd rails_test
bundle install --path vendor/bundle
bundle exec rails s
Windows管理化部分でRails動かす場合
WSLではWindowsが管理している領域にもアクセス可能です。
/mnt/に各ドライブがマウントされているので、そちらで作業することもできます。
Windows側からソースコードの参照や開発する場合その方が便利ですね。
ただ、bundle installする先がwindows管理下の場合、失敗する場合が多い(おそらくビルドする必要があるライブラリとかが正しくビルドされない)ので、ライブラリのインストール先はlinux管理下にします。
# Dドライブ下に作ってみる
cd /mnt/d
mkdir test
cd test

bundle init
# 作成されたGemfileの
gem "rails" #を有効にする

bundle install --path ~/tmp/vendor/bundle

bundle exec rails new rails_test

cd rails_test
bundle install --path ~/tmp/rails/vendor/bundle
bundle exec rails s
これで、D://test/rails_testのソースコードをお好みのエディタでがりがり書いていくとRailsアプリケーションが作れますね。
