#A2019 での基本的なAPIの使い方については以下を参考にしてください。
A2019でAPI<基本の4選>
**A2019 では V11 から API の仕様が変わっています。**そこで、V11 では botVariables で指定していた値の引き渡しですが、A2019 ではどう指定すれば良いかを自身のメモ用も兼ねて。ちなみに、何が実装されているかはドキュメントサイトかSwagger(http://a2019Url/swagger/ )にて基本的なところは確認できます。
まずは、BotDeploy(/v3/automations/deploy)時に、以下を追加してください。
この意味は(正直)不明なのですが、これを入れないと引き渡してくれない...
"runWithRdp": false,
次に引き渡したい値の指定の仕方はこちらです。
こちらで指定した値は、実行時には Bot 側の変数にセットされますので、あらかじめ API を実行する前に変数を作成しておく必要があります。
    "string1": {         <--変数名
      "type": "STRING",  <--変数タイプ
      "string": "TEST"   <--引き渡したい値
    },
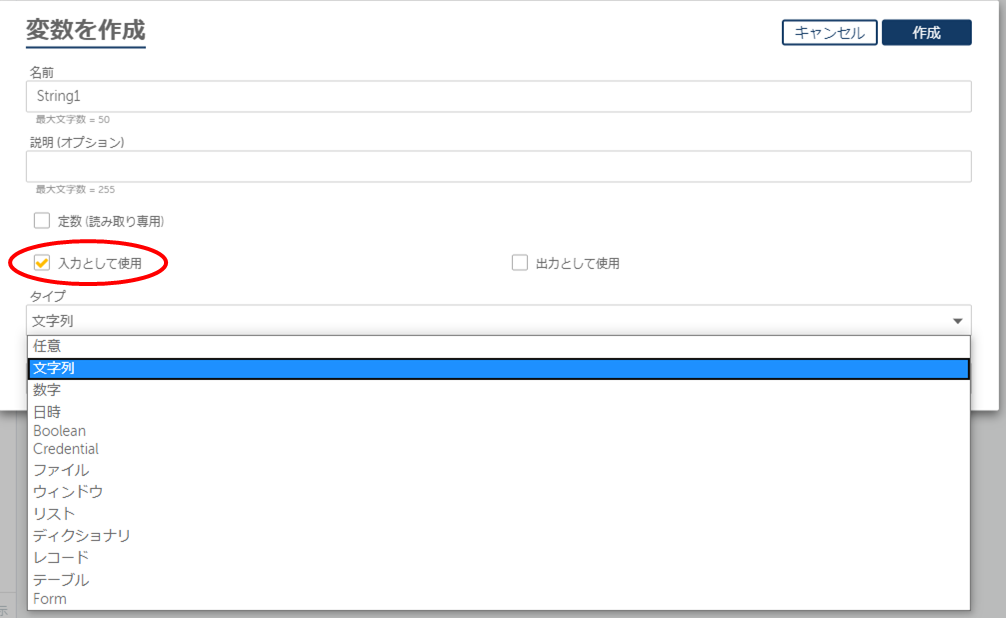
例ではStringですが、もちろん、他の型も指定可能です(全部は試していませんが...)。変数を設定する際は必ず、”入力として使用”をチェックしてください。

変数にさえ入ってしまえば、あとは自由自在に Bot 内で扱えますね。
サンプルとしては以下の感じです(一部抜粋)。
{
  "fileId": "23282",
  "runWithRdp": false,
  "botInput": {
    "sInputString1": {
      "type": "STRING",
      "string": "rgdfg"
    },
    "string1": {
      "type": "STRING",
      "string": "TEST"
    },
    "bBooleanInput": {
      "type": "BOOLEAN",
      "boolean": true
(2020.06.03)変数設定時の”入力として使用”チェックボックスに関する記述を追記。