例
説明に使ったリポジトリ
https://github.com/sterashima78/vue-ts-sonarqube-example
はじめに
コードの品質を評価するために多くに静的解析手法が提案されている。
これらの解析によって得られる指標を常に観察することで、コードの品質悪化をいち早く検知することが期待できる。
JavaScriptではPlato でいくつかの指標を算出することができると知っていたが、
メンテナンスが滞っていることに加えて、現在私がよく利用しているVueやTypescriptには対応していなかった。
そんななかで、SonarQube それに代わるということを知ったので、 Vue + Typescript のプロジェクトに導入した。
本文書は、その導入方法を示したものになる。
サンプルプロジェクトの準備
$ vue create vue-ts-sonerqube-example
Vue CLI v4.0.4
? Please pick a preset: Manually select features
? Check the features needed for your project: Babel, TS, Vuex, CSS Pre-processors, Linter, Unit
? Use class-style component syntax? No
? Use Babel alongside TypeScript (required for modern mode, auto-detected polyfills, transpiling JSX)? Yes
? Pick a CSS pre-processor (PostCSS, Autoprefixer and CSS Modules are supported by default): Sass/SCSS (with node-sass)
? Pick a linter / formatter config: Prettier
? Pick additional lint features: Lint on save, Lint and fix on commit
? Pick a unit testing solution: Jest
? Where do you prefer placing config for Babel, PostCSS, ESLint, etc.? In dedicated config files
SonarQube serverの準備
SonarQube は Java製のソフトウェアでJava11以上を要求する。
Docker imageもあるのだが、今回は以下のページでコミュニティーバージョン(ver 8.0)をダウンロードして実行することにした。
https://www.sonarqube.org/downloads/
ダウンロードしてきた zip を解凍したら、bin以下に各OSごとの実行用ファイルがあるのでそれを実行する
windowsの場合は sonarqube-8.0\bin\windows-x86-64\StartSonar.bat を実行すればいい。
http://localhost:9000 を listenするのでブラウザからアクセスできる。
SonarQube のための設定
SonerQubeはソフトウェアのスキャン機能をもっており、そのスキャン結果をサーバに送信することで結果の閲覧ができる。
この時別のツールの結果を読み取らせることができるので、単体テスト結果とlint結果を読み取らせる。以下でそのための設定を行う。
依存パッケージインストール
$ npm i -D jest-sonar-reporter sonarqube-scanner npm-run-all
lint の設定
以下のタスクを追加する
{
   "scripts": {
       "lint:sonar": "eslint -f json -o report.json ."
   }
}
unit testの設定
以下を追加する
module.exports = {
  testResultsProcessor: "jest-sonar-reporter",
  collectCoverageFrom: [
    "src/**/*.{js,jsx,ts,tsx,vue}",
    "!<rootDir>/node_modules/"
  ]
};
以下のタスクを追加する
{
   "scripts": {
       "test:unit:sonar": "npm run test:unit -- --coverage"
   }
}
sonar-scannerの設定
SonerQubeの静的解析とデータ送信を行うsonar-scannerの設定をする。
以下のタスクを追加する
{
   "scripts": {
       "sonar:scan": "sonar-scanner",
       "sonar": "run-s test:unit:sonar lint:sonar sonar:scan"
   }
}
以下の設定ファイルを追加する
sonar.projectKey=vue-ts-sonerqube-example
sonar.projectName=vue-ts-sonerqube-example

sonar.sources=src
sonar.tests=tests

sonar.test.inclusions=**/*tests*/**
sonar.exclusions=**/*tests*/**

sonar.testExecutionReportPaths=test-report.xml

sonar.javascript.file.suffixes=.js,.jsx
sonar.typescript.file.suffixes=.ts,.tsx,.vue

sonar.typescript.lcov.reportPaths=coverage/lcov.info
sonar.javascript.lcov.reportPaths=coverage/lcov.info
sonar.eslint.reportPaths=report.json
そのほかの設定は以下を参照する
Scanの実行
$ npm run sonar
以下にアクセスすると結果を閲覧できる。
http://localhost:9000/dashboard?id=vue-ts-sonerqube-example
結果閲覧と対応
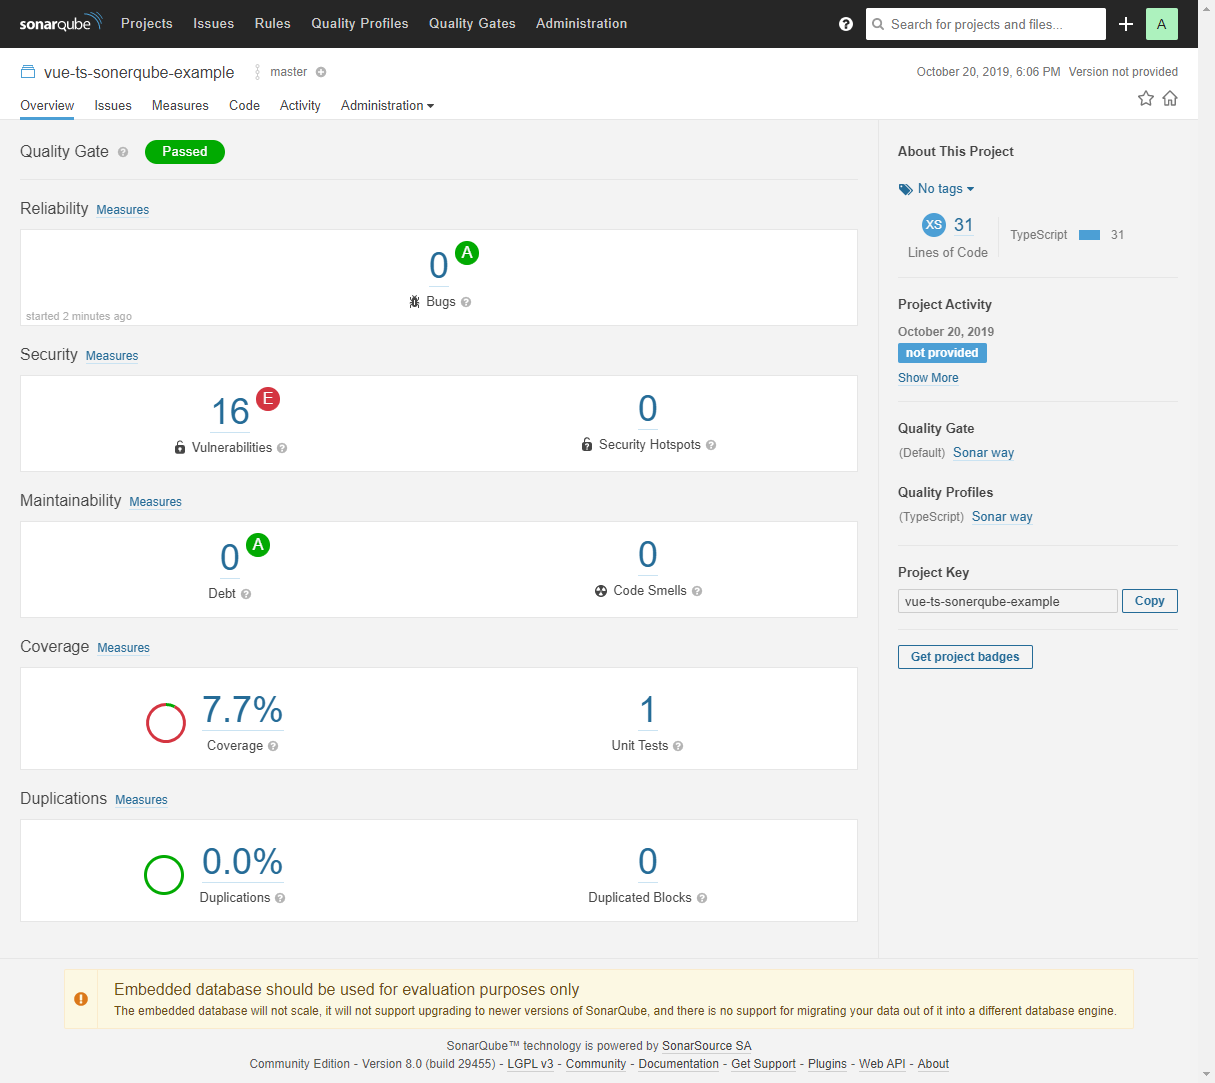
16件のセキュリティ警告があるので見てみる。
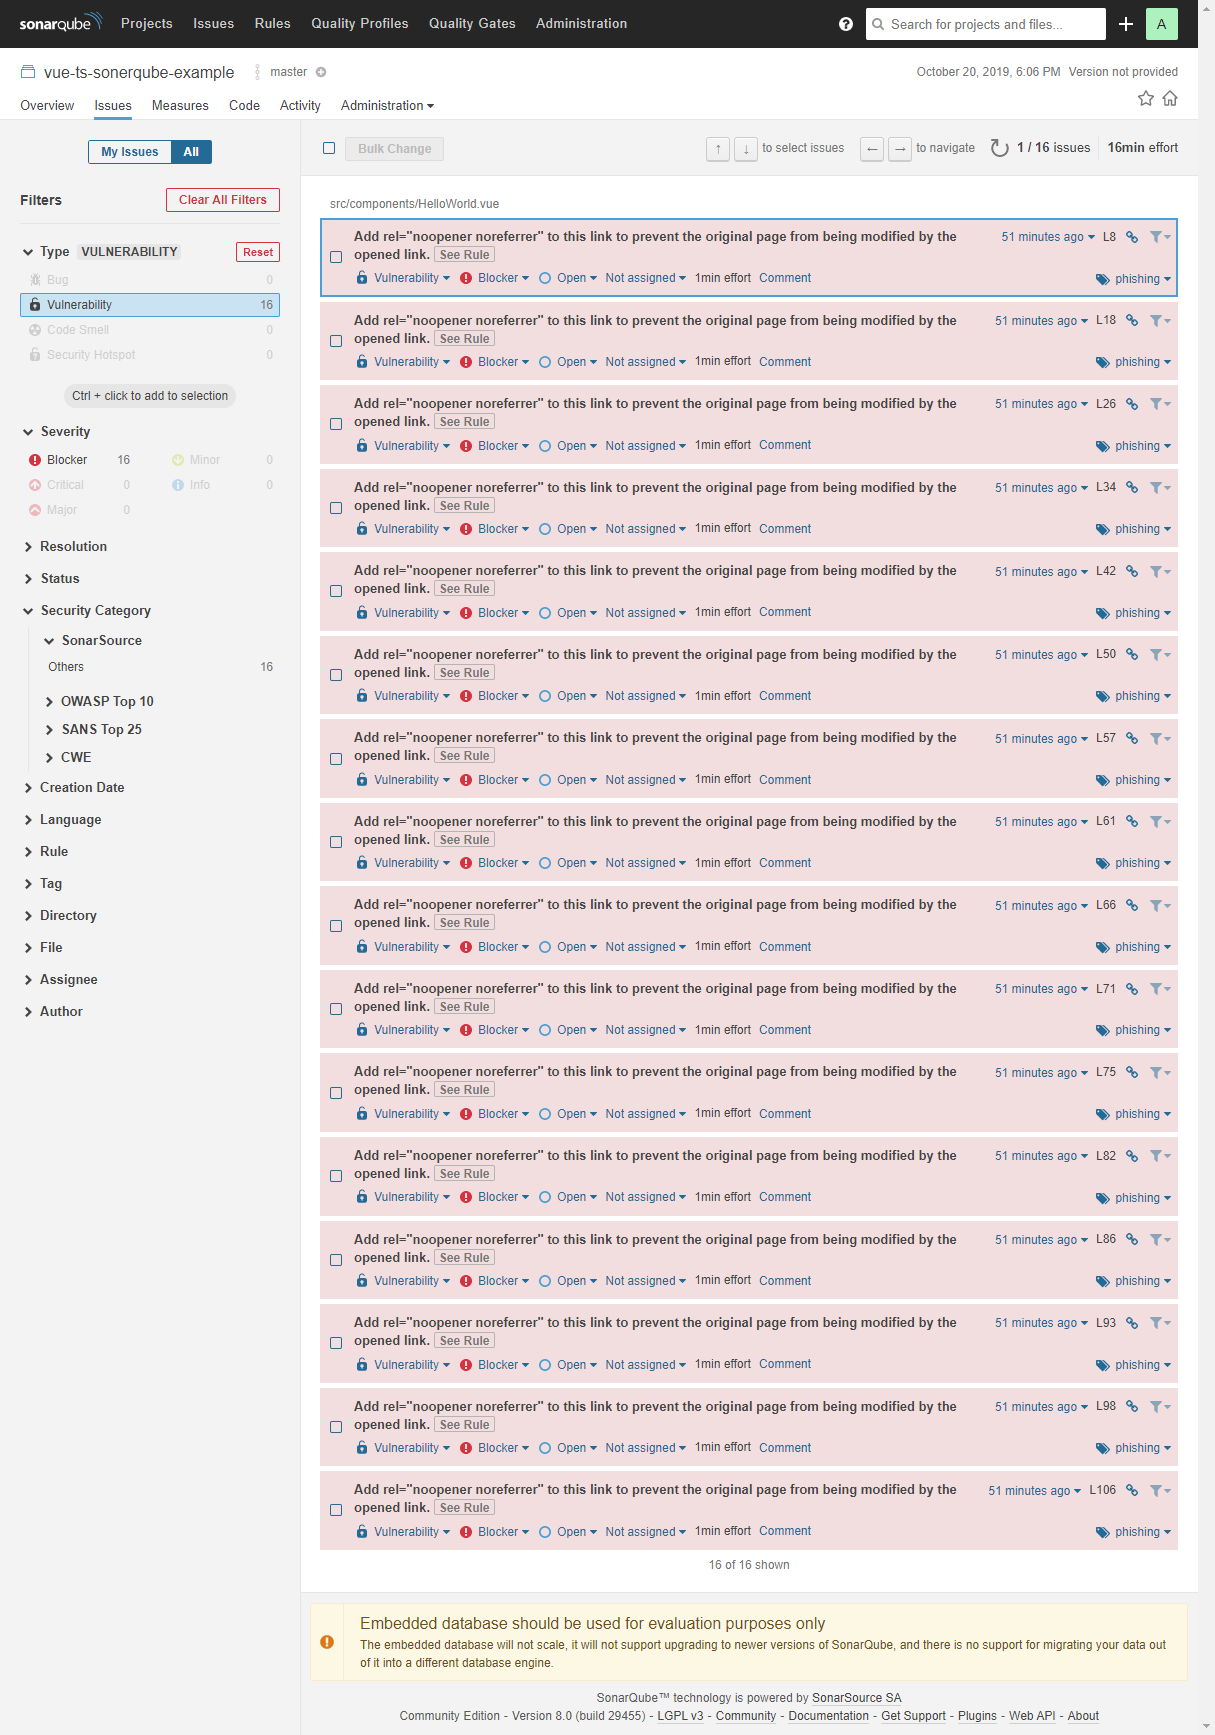
See Ruleを見ると警告についての詳細が出る。
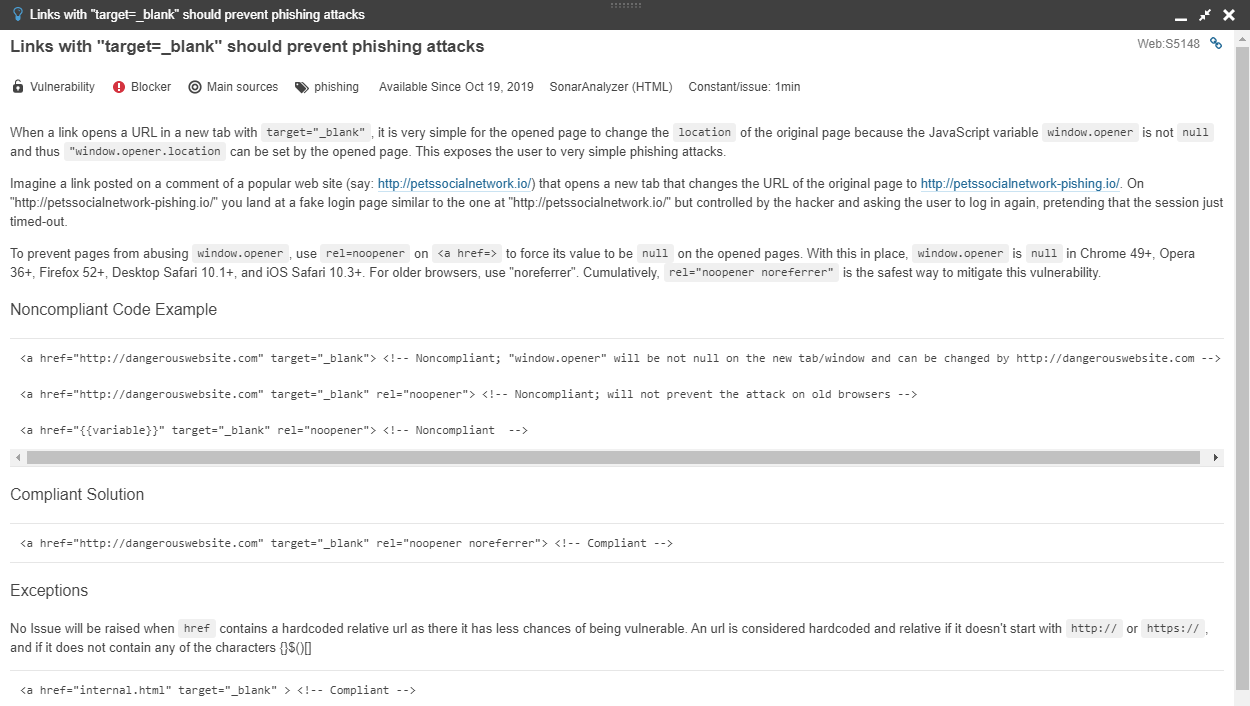
遷移先から元ページにアクセスさせなくするためらしい。
指摘通りに修正をして再度確認する。
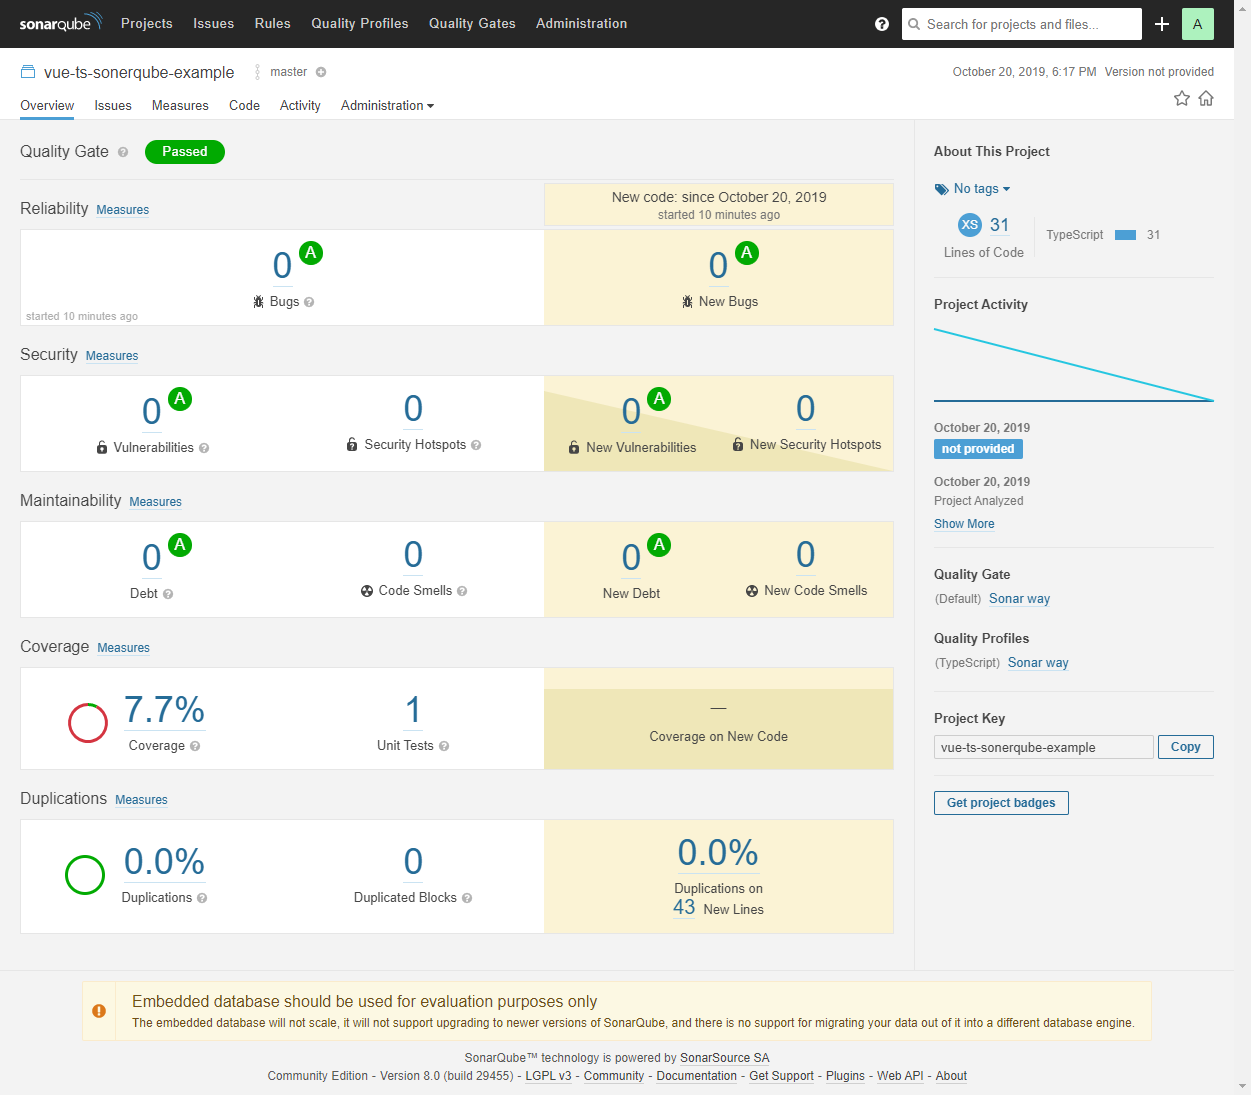
指摘が消えた。
また、新たに生じた誤りなどはないことも示されている。
終わりに
上記のような設定をCIに組み込むことで例えばレビュー前に誤りが作りこまれていないかを確認することができる。
これによってレビュー負荷も減ることが期待できる。