はじめに
前回までにExastro IT Automation(以下ITAと表記)のインストールを行ってきました。
今回は、引き続き2021年7月16日にリリースされたITAバージョン1.8.0のインストールを行ってみたいと思います。
Exastro IT Automationとは
ITAは、システム設定をIaC(Infrastructure as Code)化して一元管理するためのオープンソースフレームワークです。
機器情報、設定値、作業履歴などシステム構成に関する情報を管理することが可能で、その値をExcelデータとして出力することができます。また、各機器のシステム構築や、運用設定などをワークフローとして管理、または実行する機能を備え、様々なPF構築ツールと連携が可能になっています。
作業環境
- Exastro IT Automation 1.8.0
- CentOS Linux 7(サーバ用)
- Windows 10(クライアント)
- Google Chrome(Win10側)

作業手順
今回、ITAv1.8.0をCentOS7上にオールインワン構成でオンラインインストールを行っていきます。
(コミュニティサイトではこの他に、オフラインインストールとバージョンアップ、Docker、HAの手順が用意されています)
具体的な手順は以下のとおりです。
1.ITA(v1.8.0)のダウンロード
2.アンサーファイルの設定
3.ITA(v1.8.0)のインストール
4.動作確認
また、環境構築にはrootユーザが実施する必要があります。
1.ITA(v1.8.0)のダウンロード
今回はCentOS7上にExastroSuiteコミュニティページにあるITAオールインワン(online)インストールマニュアルを参考にしてインストールします。
まずはじめに、Githubから必要な資材をダウンロードします。
# curl -OL https://github.com/exastro-suite/it-automation/releases/download/v1.8.0/exastro-it-automation-1.8.0.tar.gz
次に、ダウンロードしたZipファイルを解凍します。
# tar zxf exastro-it-automation-1.8.0.tar.gz
資材をダウンロードしたディレクトリにit-automation-1.8.0 というディレクトリが展開されていれば完了です。
2.アンサーファイルの設定
ITAのアンサーファイルを編集し、インストールモードの設定や連携ドライバのインストール設定を行います。
アンサーファイルとインストールシェルのあるディレクトリに移動します。
# cd it-automation-1.8.0/ita_install_package/install_scripts
エディタでアンサーファイル(ita_answers.txt)を開きます。
# vi ita_answers.txt
アンサーファイルを開いたら、各項目の設定を行っていきます。
以下は今回設定した値と、各項目についての説明です。
各項目の詳細についてはITAオールインワン(online)インストールマニュアル等を参考にするといいです。
ita_answers.txt(1/2)
# Select install mode.
# ("Install_Online","Install_Offline","Gather_Library","Install_ITA",
# "Versionup_All","Versionup_ITA","Uninstall")
# e.g) install_mode:Install_Online
# *This installer operates according to the inputted values below.
#  Install_Online: ITA will be installed after the necessary libraries
#                  has been installed via internet.
#  Install_Offline: ITA will start installing using the package created
#                   in Gather Library.
#  Gather_Library: Gathers the necessary libraries via internet and creates
#                  the package necessary to execute Install_Offline.
#                  (Execute this before executing Install_Offline)
#  Install_ITA: Installs ITA without installing any libraries.
#  Versionup_All: Installs ITA after installing the necessary libraries for
#                 the desired ITA version via internet.
#  Versionup_ITA: Updates ITA without installing any libraries.
#  Uninstall: ITA Uninstalls ITA.(Libraries will not be uninstalled)
install_mode:Install_Online

# Enter install directory.
# e.g) ita_directory:/exastro
ita_directory:/exastro

# Select language. ("en_US" or "ja_JP")
# e.g) ita_language:en_US
ita_language:ja_JP

# Select Operation System. ("CentOS7","CentOS8","RHEL7","RHEL8")
# e.g) linux_os:RHEL8
# * If registering a subscription is needed in order to acquire
#   the RHEL7 and RHEL8 libraries, please do so in advance.
linux_os:CentOS7

# Install MariaDB provided by distro or not.
#   yes : Install MariaDB provided by distro
#   no  : Install Official MariaDB (https://mariadb.org/)
# Note: If "linux_os" is "CentOS7" or "RHEL7", ignore this flag and install distro's one.
distro_mariadb:yes
linux_os:CentOS7
install_mode
ITAのインストールモードの設定です。
ITAバージョン1.7.2以下を既にインストールしている場合は
モードをVersionup_AllまたはVersionup_ITAにすることでITAを1.8.0にバージョンアップすることが可能です。
インストールモードについて....(詳細)
ita_directory
ITAをインストールするディレクトリを絶対パスで指定します。
ITAをインストールするディレクトリの親ディレクトリ全てに、その他ユーザの実行権限を与える必要があります。
ita_language
ITA表示画面の言語設定です。
distro_mariadb
この値がyesならば、OSディストリビューションに含まれているMariaDBをインストールし、noであれば公式のMariaDB( https://mariadb.org/ )のパッケージをインストールします。
ただし、CentOS7/RHEL7の場合は、distro_mariadbの値は無視されて、必ず公式のMariaDBがインストールされます。
linux_os
ITAサーバのOS設定です。
ita_answers.txt(2/2)
# Enter the MariaDB root user's password
# e.g) db_root_password:sample_root_password
db_root_password:password

# Decide the database name, username, and password for ITA.
# e.g) db_name:sample_db_name
db_name:ITA
# e.g) db_username:sample_db_username
db_username:admin
# e.g) db_password:sample_db_password
db_password:password

# Select the target you need to install.
# yes : need
# no  : no need
ita_base:yes
createparam:yes
hostgroup:yes
ansible_driver:yes
cobbler_driver:no
terraform_driver:yes
cicd_for_iac:no

# Enter the ita domain name.
# e.g) ita_domain:exastro-it-automation.local
ita_domain:exastro-it-automation.local

################################################################################
# Enter when using user-specified certificates and private keys.
# If no file path is entered for both "certificate_path" and "private_key_path",
# the ITA installer creates and installs a self-certificate and private key
# using the values entered in "ita_domain".

# Enter the file path where the certificate to be install.
# e.g) certificate_path:/temp/etc_pki_tls_certs/exastro-it-automation.crt
certificate_path:

# Enter the file path where the private key to be install.
# e.g) private_key_path:/temp/etc_pki_tls_certs/exastro-it-automation.key
private_key_path:

################################################################################
db_root_password, db_name, db_username, db_password
MariaDBの設定です。
各項目適宜編集します。
ita_base, material, createparam, hostgroup, ansible_driver, cobbler_driver, terraform_driver,cicd_for_iac
ITAの本体、機能、連携ドライバの本体設定です。
各項目必要なものを設定します。
ita_domain
ITAドメイン名の指定です。
初期値の「exastro-it-automation.local」のままで、以下の「certificate_path」と「private_key_path」を空欄にしておくと、HTTPSで接続するための自己署名証明書を作成してくれます。
certificate_path
ユーザ指定のSSL/TLSサーバ証明書に使用するファイルのファイルパスを指定します。
(ユーザ指定のSSL/TLS証明書使用時のみ入力します。絶対パスで指定。)
中間証明書がある場合は、サーバ証明書に中間証明書を連結したファイルを作成し、指定します。
private_key_path
ユーザ指定のSSL/TLS証明書の秘密鍵に使用するファイルのファイルパスを指定します。
(ユーザ指定のSSL/TLS証明書使用時のみ入力します。絶対パスで指定。)
アンインストール時は「certificate_path」と「private_key_path」
に指定があると、そのファイルを消してしまうようなので、
オリジナルは別途ちゃんと保管しておいたほうがいいですね。
3.ITA(v1.8.0)のインストール
アンサーファイルの編集が完了したら、インストールシェルを実行します。
# sh ita_installer.sh
INFO:Installation complete!と表示されればインストール完了です。
エラー等発生する場合は、ログファイル格納ディレクトリ(/(インストール資材展開先)/ita_install_package/install_scripts/log/)下にあるログファイル(ita_builder.log、ita_installer.log)を参照するといいようです。
4.動作確認
インストール完了後、動作確認を行ってみます。
前回までと同様にHTTPで接続可能ですが、セキュリティを考慮して今回はHTTPSで接続します。
4.1 hostsファイル設定
hostsファイルにアンサーファイルで「ita_domain」に設定したホスト名を追加します。
hostsファイル(C:\Windows\System32\drivers\etc\hosts)を管理者権限で開き、以下を追加します。
(サーバのIPアドレス) exastro-it-automation.local
4.2 自己署名証明書のインポート
ITAが発行した自己署名証明書をWebブラウザにインポートします。
この作業は必須ではありませんが、自己署名証明書を信頼する証明書として登録することで、ブラウザからの警告が出なくなります。
ユーザ指定のSSL/TLS証明書を使用してない場合、自己署名証明書はITAインストールパッケージの以下のパスに格納されています。
| ディレクトリ | ファイル名 |
|---|---|
| /etc/pki/tls/certs | exastro-it-automation.local.crt |
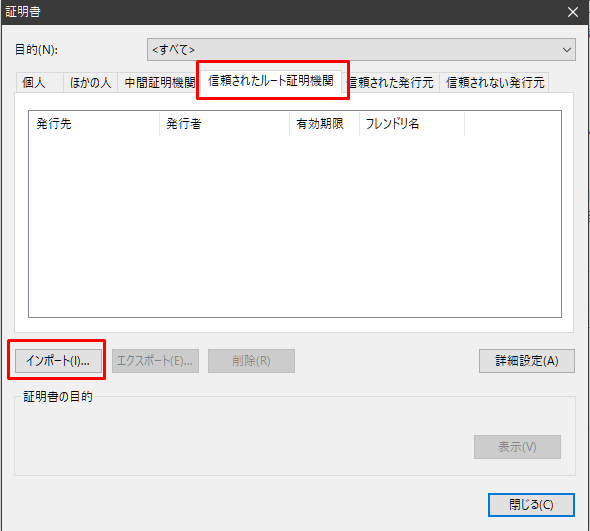
Google Chromeに証明書をインポートします。
Chromeの右上ボタンから
「設定」→「プライバシーとセキュリティ」→「セキュリティ」→「証明書の管理」
を選択します。
「信頼されたルート証明機関」タブへ進み、左下の「インポート」からexastro-it-automation.local.crt
を選択して証明書をインポートします。
4.3 動作確認
https://exastro-it-automation.localに接続し、ITAがインストールされているかどうか確認します。
正常にITAがインストールされている場合、以下のようなログイン画面がブラウザ上に表示されます。
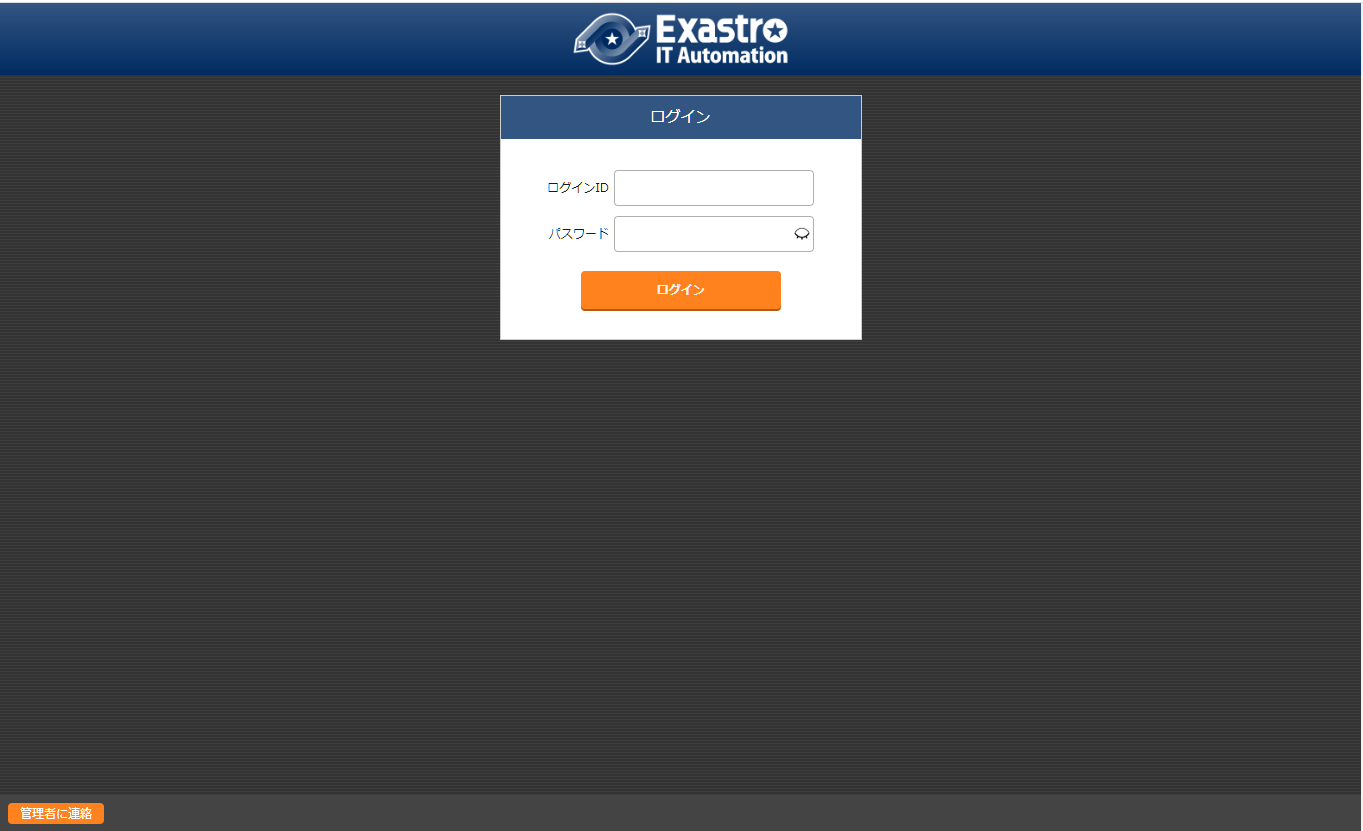
以上の画面が表示されたら、
- ログインID:administrator
- パスワード:password
を入力し、[ログイン]ボタンをクリックします。
インストール後に初めてログインした場合は、「パスワード変更画面」に遷移しますので、適宜初期パスワードを変更します。
ログイン後、以下の画面が正常に表示されることを確認します。

まとめ
今回は、ITAバージョン1.8.0のインストールと動作確認を行いました。
尚、各画面機能の詳細についてはマニュアルを読むとわかりやすいです。