本記事は NECソリューションイノベータ Advent Calendar 2021の12/9の記事です。
最近reactを書く機会が多く、Webサイトにアニメーションとか入れてみたくreactのアニメーションのライブラリとして有名なreact-springを使ってみましたのでその紹介です。
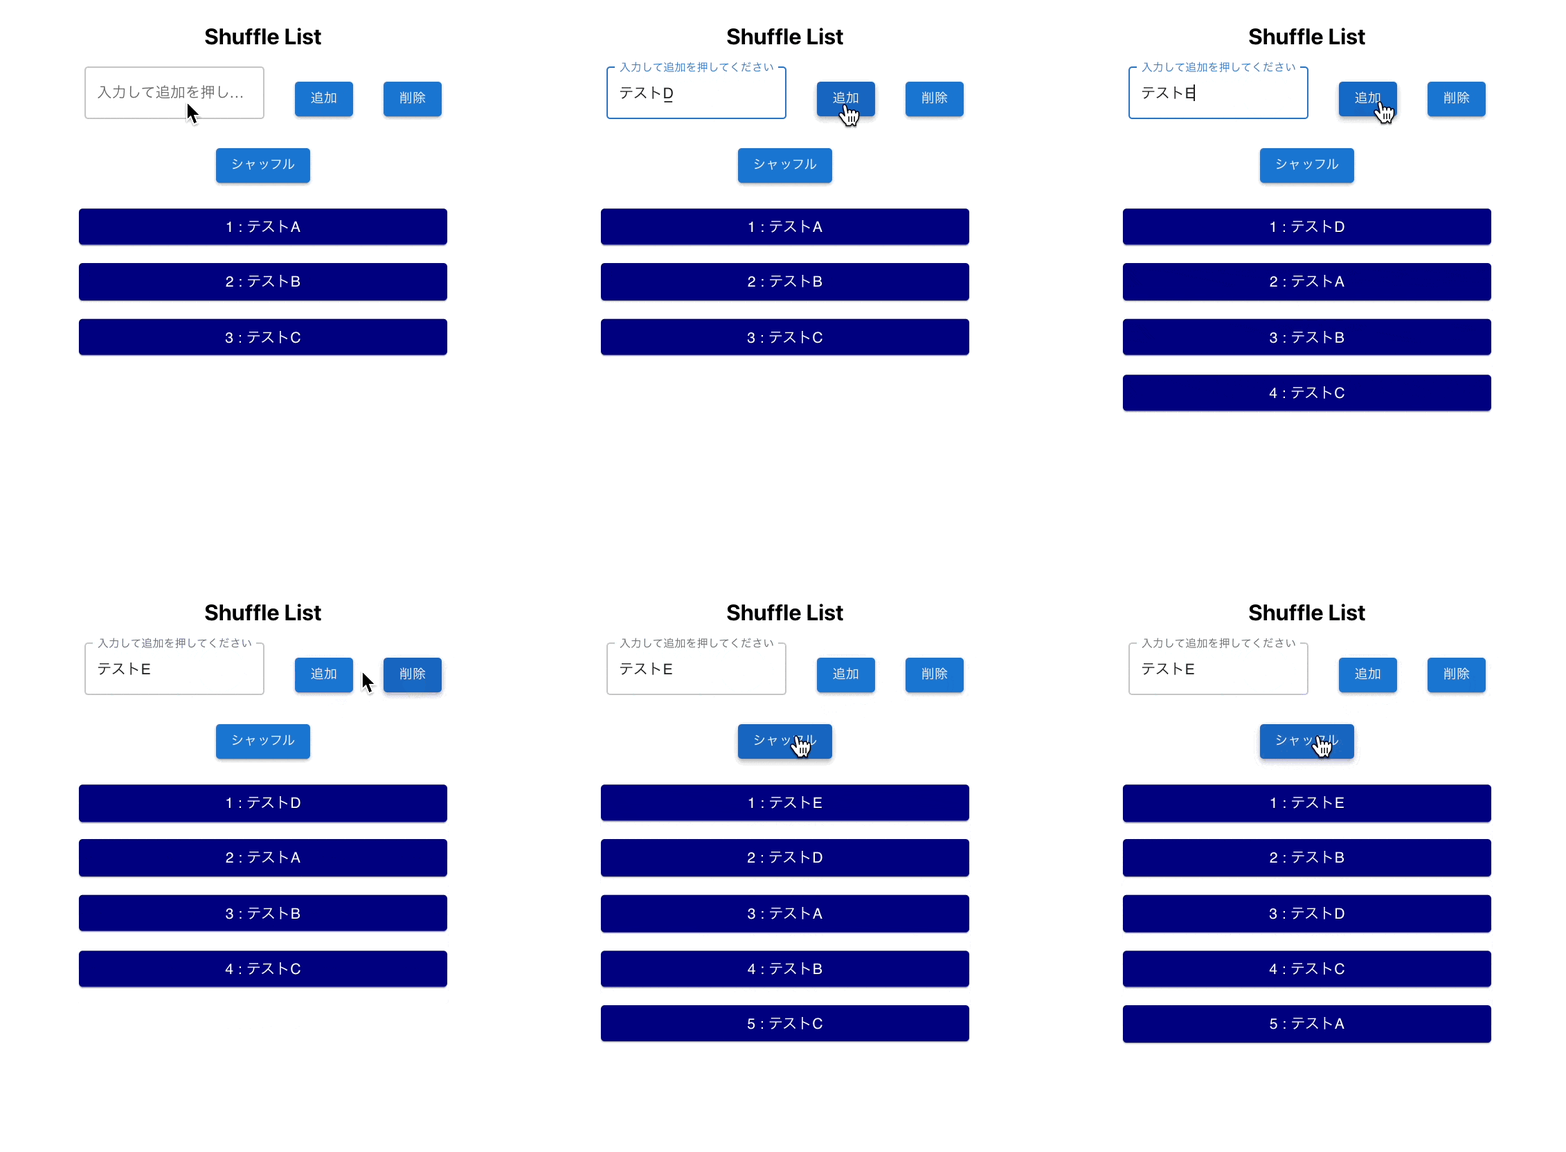
今回、リストをシャッフルするアプリを作ってみました。動作はこんな感じです。

react-springについて
react-springはHook APIベースでアニメーションの設定が可能です。useChainやuseSpringなど提供されるhooksを利用して作成します。細かくは公式HPに説明があり、サンプルも公開されているのでそちらをご覧ください。
また、基本的な考え方等はこちらの記事がまとまっていて、わかりやすかったです。
ただ、react-springは汎用的な反面、アニメーションに対して知識がない私にとっては学習コストが高いように感じました。今回のように機能が限られているような場合はreact-flip-toolkitのようなライブラリを使うのも1つの手だと思います。
サンプル作成手順
冒頭で表示していたアプリを作成する手順を以下に記載します。
まずreactプロジェクトを作成します。
npx create-react-app react-spring-arrayshuffle --template typescript
次にプロジェクトフォルダに移動し、react-springを追加します。
cd react-spring-shufflelist
yarn add react-spring
見栄えをちょっとよくするために Material UIを入れます。
yarn add @mui/material @emotion/react @emotion/styled
今回シャッフルするロジックはlodashに任せるのでlodash.suffuleも追加します。
yarn add lodash.shuffle @types/lodash.shuffle
サンプルコード
動作を1つ1つ説明するのは難しいので今回作成したコードを以下に記載します。
react-springを利用している部分は、useTransitionでアニメーションを定義している部分と<animated.div>で描画している部分です。
コピペで動くと思いますが、バージョン等が更新されると動かなくなるかもしれません。動作確認時ライブラリのバージョンを以下に記載します。
- react:17.0.2
- react-spring:9.3.2
- mui(Material UI):5.2.2
- lodash.shuffle:4.0.2
また、ボタン連打対策やバリデーション、エラー処理等は含んでいませんのであくまで参考程度でご利用お願いします。
import React, { useState } from "react";
import "./App.css";
import { useTransition, animated } from "react-spring";
import shuffle from "lodash.shuffle";
import { Box, Button, Grid, Paper, TextField } from "@mui/material";

import { styled } from "@mui/material/styles";

const Item = styled(Paper)(({ theme }) => ({
  ...theme.typography.body1,
  textAlign: "center",
  color: "white",
  background: "navy",
  width: 400,
  height: 40,
  lineHeight: "40px",
}));

let data = [{ name: "テストA" }, { name: "テストB" }, { name: "テストC" }];

function App() {
  const [rows, setRows] = useState(data);
  const [value, setValue] = useState("");

  let height = 0;
  let itemHeight = 40;

  const transitions = useTransition(
    rows.map((data) => ({
      ...data,
      y: (height += itemHeight * 0.5) - itemHeight,
      height: itemHeight,
    })),
    {
      key: (item: any) => item.name,
      from: { height: 0, opacity: 0 },
      leave: { height: 0, opacity: 0 },
      enter: ({ y, height }) => ({ y, height, opacity: 1 }),
      update: ({ y, height }) => ({ y, height }),
    }
  );

  return (
    <div className="App">
      <Box m={4}>
        <h2>Shuffle List</h2>
        <Grid container justifyContent="center" rowSpacing={2}>
          <Grid item xs={12}>
            <TextField
              label="入力して追加を押してください"
              variant="outlined"
              onChange={(event) => setValue(event.target.value)}
              sx={{ mr: 4 }}
            />
            <Button
              variant="contained"
              onClick={() => setRows([{ name: value }, ...rows])}
              sx={{ mr: 4, mt: 2 }}
            >
              追加
            </Button>
            <Button
              variant="contained"
              onClick={() => setRows(rows.slice(1))}
              sx={{ mt: 2 }}
            >
              削除
            </Button>
          </Grid>
          <Box m={1} />
          <Grid item xs={12}>
            <Button variant="contained" onClick={() => setRows(shuffle(rows))}>
              シャッフル
            </Button>
            <Box m={4} />
          </Grid>
          <Grid item>
            {transitions((style, item, t, index) => (
              <animated.div style={{ zIndex: data.length - index, ...style }}>
                <Item>
                  {index + 1} : {item.name}
                </Item>
              </animated.div>
            ))}
          </Grid>
        </Grid>
      </Box>
    </div>
  );
}

export default App;