Fitbitとは、「歩数」「移動距離」「消費カロリー」「運動強度」「睡眠状態」「心拍数」を測定してくれる、有名どころのウェアブル端末ですがガシェット好きにはたまらない、自分でデータを取得したり操作したりを可能にするAPIを公開してくれている。
https://dev.fitbit.com/
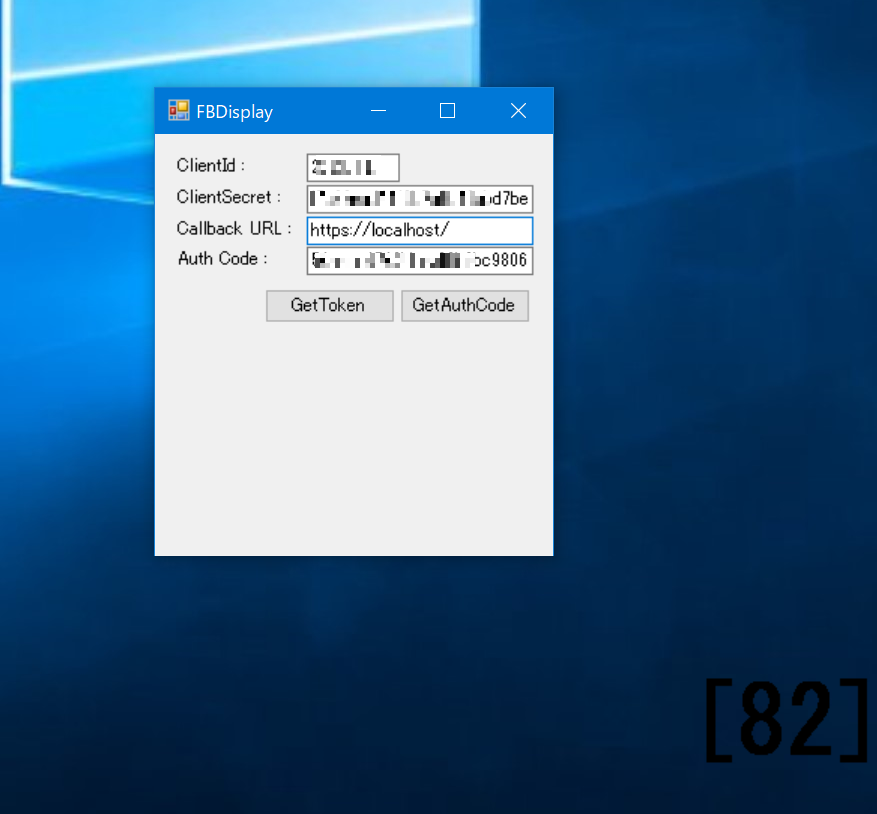
今回は、FitbitAPIからデータを取得して、デスクトップに表示するWindowsアプリを作成してみた。
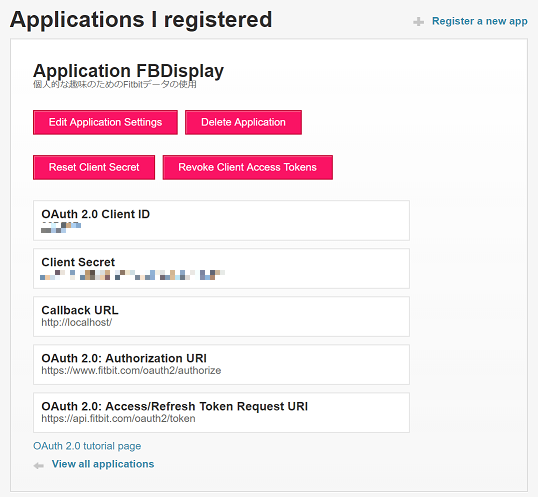
ステップ1 - アプリケーションを登録する
最初に行うことは、Fitbit開発者サイトに移動し、アプリケーションを登録して、アクセスキーを取得します。
「REGISTER AN APP」タブを選択し、詳細を入力します。
基本的には適当な入力でかまいませんが、今回はリアルタイムに自分の個人データ全部にアクセスするためにOAuth 2.0 Application Typeの項目だけは、Personalを選択してください。

Application Name - 「FBDisplay」
Description - 「個人的な趣味のためのFitbitデータの使用」(適当でOK)
Application Website - (https://localhost/)
Organization - (localhost)
Organization Website - (https://localhost/)
Terms Of Service Url - (https://localhost/)
Privacy Policy Url - (https://localhost/)
OAuth 2.0 Application Type - Personal
Callback URL - (https://localhost/)
Default Access Type - Read-Only
登録が完了すると「MANAGE MY APPS」タブに必要になるClient ID、Client Secret項目が表示されます。
ステップ2 - 認証コード、心拍数を取得
Fitbit APIは OAuth 2.0のAuthorization Code Grant Flowで認証認可を行うことで各データにアクセスする事ができる。
今回作成したアプリでは、アプリケーション登録時のClient ID、Client Secret入力後にGetAuthCodeを押下するとブラウザが起動して
アプリケーションのアクセス許可を求められます。
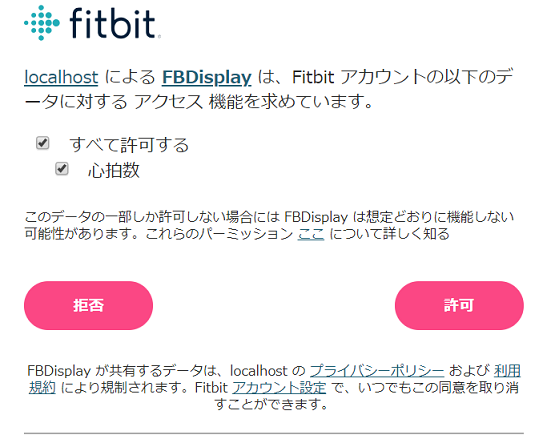
許可すると、画面遷移してlocalhostへアクセスしてエラーとなります。
この時のURL(code=XXXXXXXXXXXXX#=)のXXXXXXXXXXXXX部分をアプリのAuth Codeに入力します。
以下に画面部分のコードを示すが、FitBitのデータ取得部分に関しては、Fitbit.NETというライブラリが使えるという事で使用した。
しかし、Nugetでインストールできる現在のバージョンだと心拍数が取得できない。なので開発者Gitで最新版を自前でコンパイルして利用しなければならない。
using Fitbit.Api.Portable;
using Fitbit.Api.Portable.OAuth2;
using Fitbit.Models;
using System;
using System.Collections.Generic;
using System.ComponentModel;
using System.Data;
using System.Diagnostics;
using System.Drawing;
using System.Linq;
using System.Text;
using System.Threading;
using System.Threading.Tasks;
using System.Windows.Forms;

namespace FBDisplay
{
    public partial class MainForm : Form
    {
        FitbitAppCredentials credentials = new FitbitAppCredentials();
        FitbitClient fitbitClient = null;
        OAuth2AccessToken token = null;
        string result = "";

        public MainForm()
        {
            InitializeComponent();

            loadProperties();
        }

        private void saveProperties()
        {
            Properties.Settings.Default.ClientId = this.textBoxClientId.Text;
            Properties.Settings.Default.ClientSecret = this.textBoxClientSecret.Text;
            Properties.Settings.Default.CallbackURL = this.textBoxCallbackURL.Text;

            Properties.Settings.Default.Save();
        }

        private void loadProperties()
        {
            this.textBoxClientId.Text = Properties.Settings.Default.ClientId;
            this.textBoxClientSecret.Text = Properties.Settings.Default.ClientSecret;
            this.textBoxCallbackURL.Text = Properties.Settings.Default.CallbackURL;
        }

        //GetAuthCodeボタン押下
        private void buttonAuthCode_Click(object sender, EventArgs e)
        {
            saveProperties();

            credentials.ClientId = this.textBoxClientId.Text;
            credentials.ClientSecret = this.textBoxClientSecret.Text;

            // authenticate
            OAuth2Helper helper = new OAuth2Helper(credentials, this.textBoxCallbackURL.Text);
            string authUrl = helper.GenerateAuthUrl(new[] { "heartrate" });

            //ブラウザ起動
            Process.Start(authUrl);
        }

        //GetTokenボタン押下
        private void buttonToken_Click(object sender, EventArgs e)
        {
            saveProperties();

            Task.Run(async () =>
            {
                if (!String.IsNullOrEmpty(this.textBoxAuthCode.Text))
                {
                    if (this.fitbitClient == null)
                    {
                        //アクセストークンを取得する
                        OAuth2Helper helper = new OAuth2Helper(credentials, this.textBoxCallbackURL.Text);
                        this.token = await helper.ExchangeAuthCodeForAccessTokenAsync(this.textBoxAuthCode.Text);
                        this.fitbitClient = new FitbitClient(credentials, token);
                    }
                }


            }).Wait();


        }

        private void MainForm_FormClosed(object sender, FormClosedEventArgs e)
        {
            Application.Exit();
        }

        //心拍数取得(外部から呼び出す)
        public string GetHeartRate()
        {
            Task.Run(async () =>
                {
                    if (!String.IsNullOrEmpty(this.textBoxAuthCode.Text))
                    {
                        if (this.fitbitClient != null)
                        {
                            DateTime dt = DateTime.Now;
                            HeartActivitiesIntraday heart = await fitbitClient.GetHeartRateIntraday(dt, HeartRateResolution.oneSecond);

                            this.result = string.Format("[{0}], ", heart.Dataset.Last().Value);
                        }
                    }
                    Thread.Sleep(500);


            }).Wait();

            return result;
        }
    }
}
ステップ3 - 心拍数表示
心拍数の表示部分に関しては、DxLibDLLを利用して表示した。(MainLoopAsyncがフレーム毎に呼び出される)
なぜDxLibDLLかというと、当初の予定ではMMDモデルを心拍数に応じてモーションを早くする等したかったからだが今回は大人の事情で数値のみとした。
using System;
using System.Collections.Generic;
using System.ComponentModel;
using System.Data;
using System.Drawing;
using System.Linq;
using System.Text;
using System.Threading.Tasks;
using System.Windows.Forms;

using DxLibDLL;
using System.Threading;

namespace FBDisplay
{
    public partial class DisplayForm : Form
    {
        public DisplayForm()
        {
            InitializeComponent();

            ClientSize = new Size(Screen.PrimaryScreen.Bounds.Width, Screen.PrimaryScreen.Bounds.Height);

            DX.SetOutApplicationLogValidFlag(DX.FALSE);
            DX.SetUserWindow(Handle);


            DX.DxLib_Init();
            DX.SetDrawScreen(DX.DX_SCREEN_BACK);

            FormBorderStyle = FormBorderStyle.None;
            TransparencyKey = Color.FromArgb(1, 1, 1);
            //TopMost = true;
        }

        public void MainLoopAsync(String heart)
        {
            DX.ClearDrawScreen();
            DX.DrawBox(0, 0, Screen.PrimaryScreen.Bounds.Width, Screen.PrimaryScreen.Bounds.Height, DX.GetColor(1, 1, 1), DX.TRUE);


            int ScreenWidth = Screen.PrimaryScreen.WorkingArea.Width;
            int Screenheigth = Screen.PrimaryScreen.WorkingArea.Height;

            int AppLeftXPos = ScreenWidth - 150;
            int AppLeftYPos = Screenheigth - 100;

            DX.SetFontSize(64);
            if (!String.IsNullOrEmpty(heart))
            {
                DX.DrawString(AppLeftXPos, AppLeftYPos, heart, DX.GetColor(0, 0, 0));
            } else
            {
                DX.DrawString(AppLeftXPos, AppLeftYPos, "-", DX.GetColor(0, 0, 0));
            }

            //ESCキーを押したら終了
            if (DX.CheckHitKey(DX.KEY_INPUT_ESCAPE) != 0)
            {
                Close();
            }

            DX.ScreenFlip();
        }

        private void DisplayForm_FormClosed(object sender, FormClosedEventArgs e)
        {
            DX.DxLib_End();
        }
    }
}
これで、プレゼン中に自分の心拍数を表示できる。
(取得間隔を短くしすぎるとリクエストが多すぎるとロックされるし、完全にリアルタイムデータが取得できるわけではないので注意が必要です)