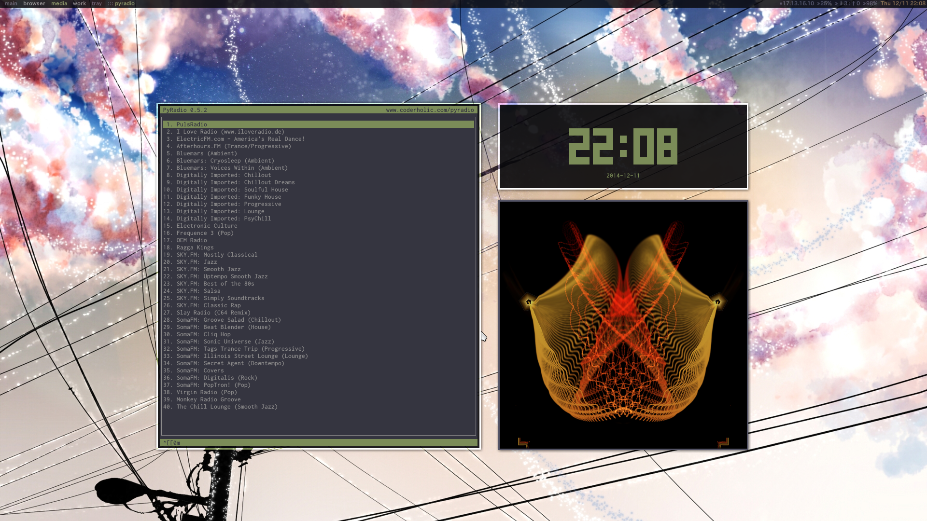
題名の通り、Compositeマネージャの一つであるComptonの設定を晒します。
使っているOSはUbuntuです。
Unityではcompizが透過処理や影の描画に使われていますが、今はXmonadを使っているので、ターミナルの(擬似透過でない本当の)透過処理をするのに、何かしらCompositeマネージャが必要です。選択肢としてはxcompmgrかcomptonかといった感じ。
XFCE向けですが
などをみれば大体の設定はできます。
toggle_composite.sh
まず、いろいろ試す前にあったほうがいいスクリプト。
# !/bin/bash

if pgrep compton &> /dev/null; then
    echo "Turning compton OFF"
    pkill compton &
else
    echo "Turning compton ON"
    compton -b --config $HOME/.config/compton/compton.conf
fi

exit 0
これを適当なショートカットにして、手動でComptonを起動/キルできるようにしておく。
設定
Comptonはコマンドラインからいろいろオプションをつけて起動することもできるが、上のように設定ファイルを一つにまとめてからいじったほうがやりやすい。
以下は普段使いの設定(#後にスペースのないものは、使う可能性のあるもの)。
その後にいくつかの項目について大事な順に説明を加えます。
# Shadow
shadow = true;
# no-dnd-shadow = true;
# no-dock-shadow = true;
clear-shadow = true;
shadow-radius = 4;
shadow-offset-x = -5;
shadow-offset-y = -5;
shadow-opacity = 0.7;
# shadow-red = 0.0;
# shadow-green = 0.0;
# shadow-blue = 0.0;
shadow-exclude = [
    "name *= 'Notification'",
    "name *= 'Firefox'",
    "name *= 'mozc_renderer'",
    "name *= 'xmobar'",
    "class_g = 'Conky'",
    "class_g ?= 'Notify-osd'",
    "class_g = 'Cairo-clock'",
    "_GTK_FRAME_EXTENTS@:c"
];
# shadow-exclude = "n:e:Notification";
# shadow-exclude-reg = "x10+0+0";
# xinerama-shadow-crop = true;

# Opacity
menu-opacity = 0.95;
# inactive-opacity = 0.9;
# active-opacity = 0.9;
# frame-opacity = 0.9;
# inactive-opacity-override = false;
alpha-step = 0.06;
# inactive-dim = 0.2;
# inactive-dim-fixed = true;
blur-background = false;
# blur-background-frame = true;
# blur-kern = "5x5box"
# blur-kern = "5,5,1,1,1,1,1,1,1,1,1,1,1,1,1,1,1,1,1,1,1,1,1,1,1,1"
# blur-background-fixed = true;
# blur-background-exclude = [
#    "window_type = 'dock'",
#    "window_type = 'desktop'",
#    "_GTK_FRAME_EXTENTS@:c"
# ];
opacity-rule = [
#    "90:class_g = 'Thunar'",
#    "99:class_g = 'mplayer2'",
#    "99:class_g = 'Firefox'",
#    "99:class_g = 'Plugin-container'"
    "70:name *= 'ibus-ui-gtk3'",
    "85:name *= 'xmobar'"
];

# Fading
fading = true;
fade-delta = 3;
fade-in-step = 0.04;
fade-out-step = 0.03;
# no-fading-openclose = true;
# no-fading-destroyed-argb = true;
fade-exclude = [ ];

# Other
# backend glx or xrender
backend = "glx";
# mark-wmwin-focused = true;
# mark-ovredir-focused = true;
# use-ewmh-active-win = true;
detect-rounded-corners = true;
# detect-client-opacity = true;
refresh-rate = 0;
# vsync = "none";
# dbe = false;
paint-on-overlay = true;
# sw-opti = true;
# unredir-if-possible = true;
# unredir-if-possible-delay = 5000;
# unredir-if-possible-exclude = [ ];
# focus-exclude = [ "class_g = 'Cairo-clock'" ];
# detect-transient = true;
# detect-client-leader = true;
# invert-color-include = [ ];
# resize-damage = 1;

# GLX backend
glx-no-stencil = true;
# glx-copy-from-front = false;
# glx-use-copysubbuffermesa = true;
glx-no-rebind-pixmap = true;
# glx-swap-method = "undefined";
# glx-use-gpushader4 = true;
# xrender-sync = true;
# xrender-sync-fence = true;

# Window type settings
wintypes:
{
  tooltip = { fade = true; shadow = true; opacity = 0.9; focus = true; };
  dock = { shadow = false; };
};
まず
backend = "glx";
でOpenGLのバックエンドを有効にします。自分の環境ではxrenderだとフェードがラグりまくり、動画を再生すると描画遅れの縞がでる(tearing)など使い物になりません。
次
clear-shadow = true;
にすると、透過処理したウィンドウの下には自分の影を描画しません。これをつけてないと、透過率100にしたときとかに変なことになります。
あとは(1)shadow-excludeと(2)opacity-ruleをお好みで変更しましょう。
(1)にfirefoxを含めれば、オートスクロール時のボタンの変な影もなくなります。
ibus-ui-gtk3は、全角半角切り替えの時なんかにポッとでるアイツです。入力中に邪魔な位置に出てマウスで掴んでやらないといけないのが鬱陶しいので、これくらいの透過率がちょうど良さげでした。
「ターミナルだけじゃなくて、俺はもっとスケスケが好きなんだぜ!」という方は
# inactive-opacity = 0.9;
# active-opacity = 0.9;
のコメントを外した上で、(2)の他のコメントアウトも解除してください。ちなみに
opacity-exclude = [
    "class_g = 'mplayer2'",
    "class_g = 'Firefox'"
];
のようにしても反映されません。
"100:class_g = 'mplayer2'"
もダメみたいでした。99でも壁紙によっては若干後ろが透けるんですが、気にならないくらいです。むしろ動画とか全然透けてていいんだぜ!って方は、この設定は必要ありません。
あと個人的に最適解だと思ってるのは
fade-delta = 3;
fade-in-step = 0.04;
fade-out-step = 0.03;
です。まぁ、試してみてくださいよ。
スクリーンショット
まとめ
自分なりにはこれで快適な気がします。また気に入らなくなったらいろいろ試してみよう。
