今回解説すること
Copilot Studioは、手軽にTeamsボットを作成できるMicrosoftのサービスです。
今回は、Copilot StudioでOpenAI APIを扱った時につまづいたポイントを解説していきます。
特にHTTPリクエストを送信する「HTTP要求」の設定と、受け取ったレスポンスをどのように扱えばいいかを中心に解説します。
HTTP要求の送信の呼び出し
新しいトピックを作成し、「HTTP要求の送信」をクリックします。
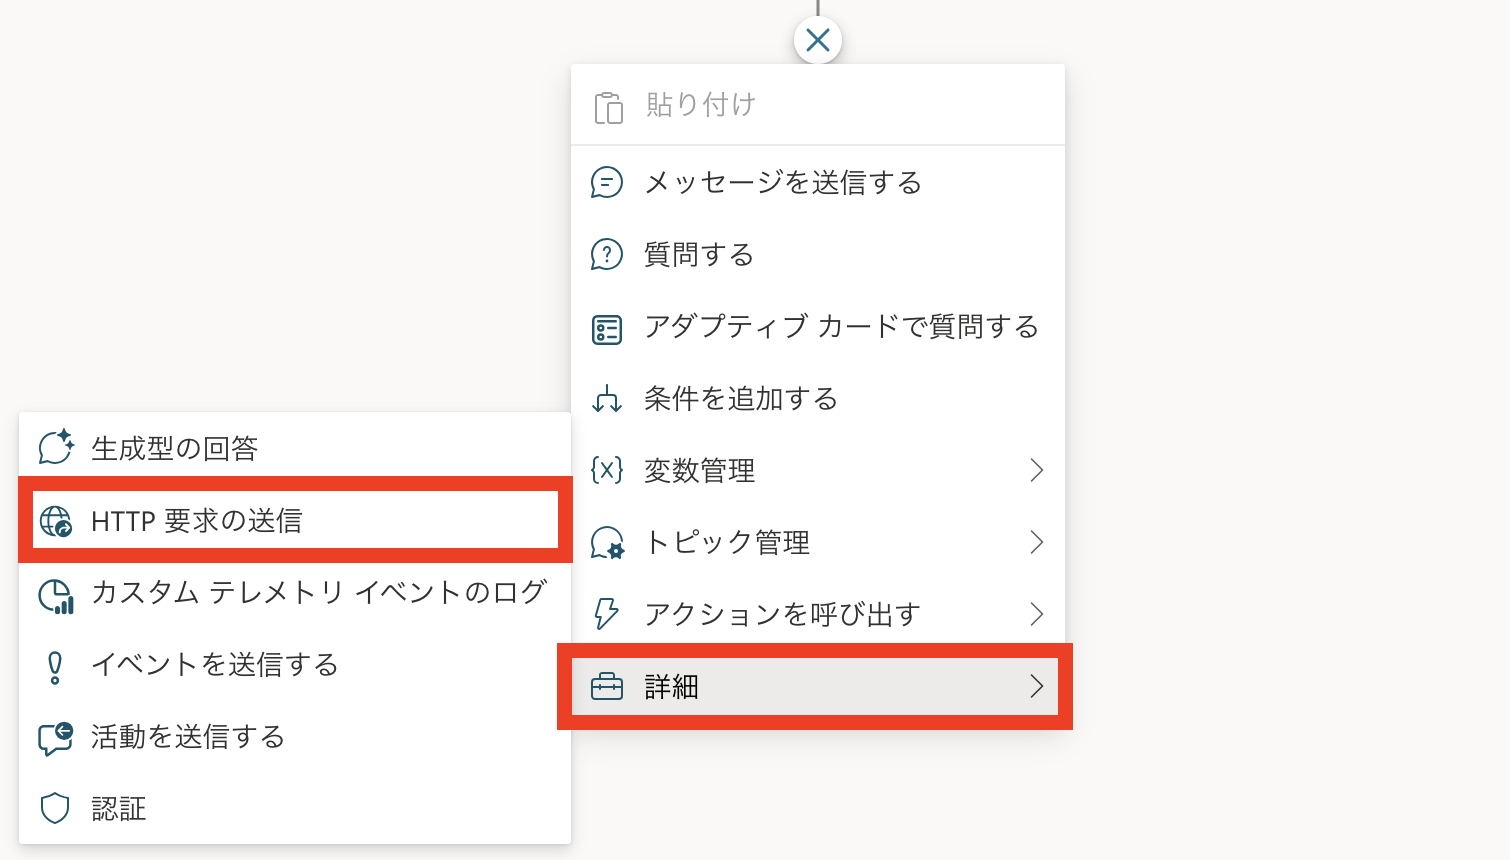
HTTP要求の送信の設定
HTTP要求のカードが出てきたら以下を設定してください。
- URLは
https://api.openai.com/v1/chat/completions - メソッドは
POST - ヘッダーにキー:
Authorization、値:Bearer sk-*******←OPENAIのAPI KEYを入力してください

本文には、JSONコンテンツを設定し、JSONの編集を式の編集に変え、以下を入力します。System.Activity.Textにはユーザーの入力の値が入っているので、それをそのままAPIに投げています。
{
  messages: [
    {
      role: "system",
      content: "あなたは質問に回答するAIです。"
    },
    {
      role: "user",
      content: System.Activity.Text
    }
  ],
  model: "gpt-3.5-turbo",
  temperature: 0.2
}
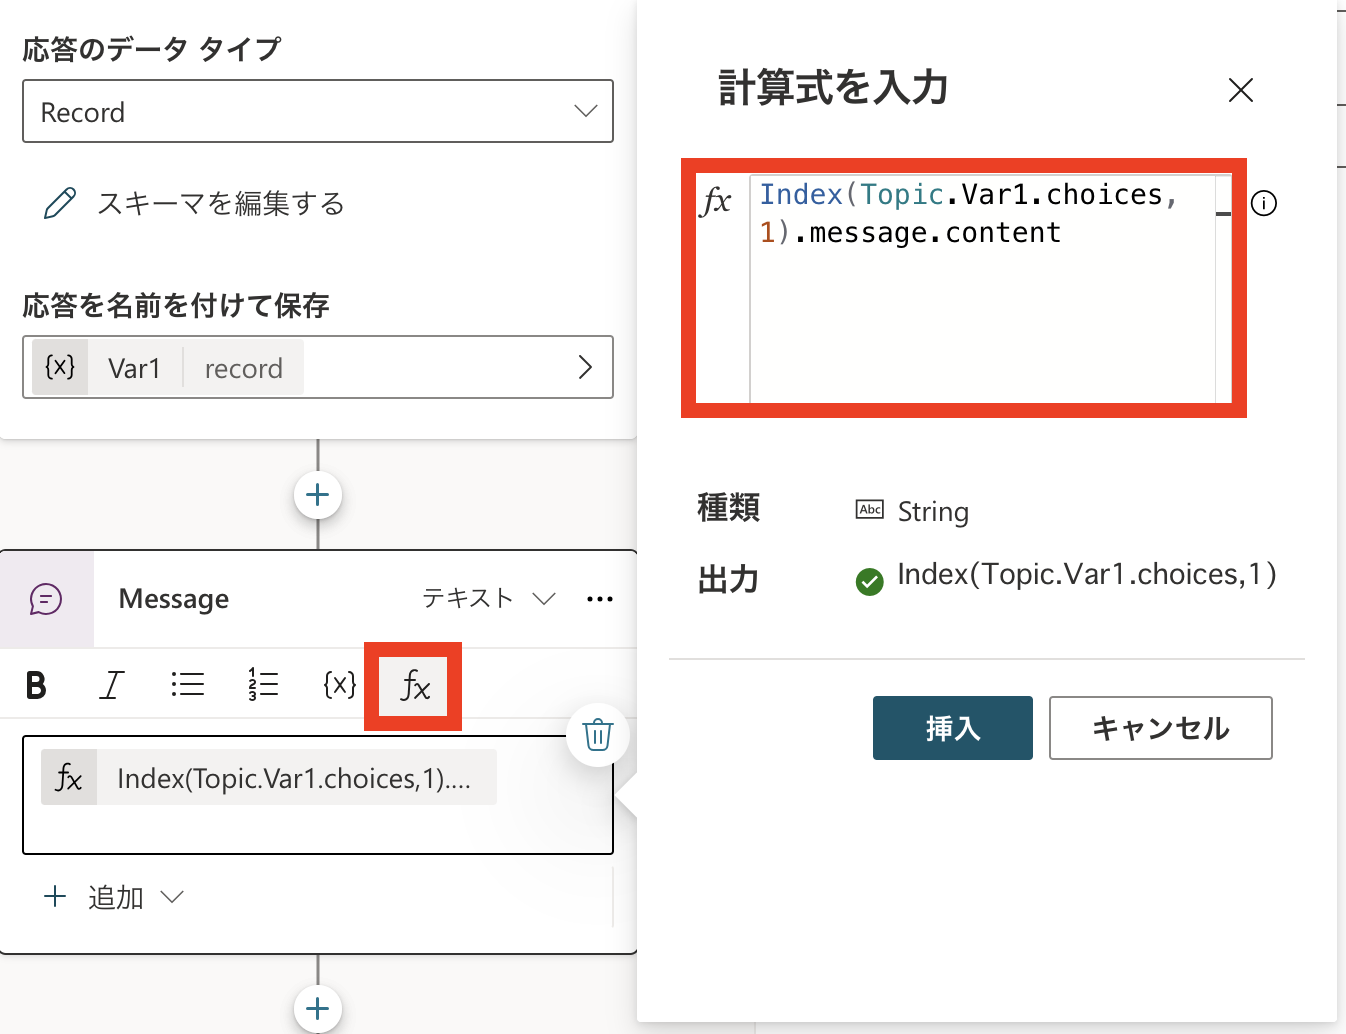
応答のデータタイプはRecordとしスキーマを編集するを押し、以下を設定する
kind: Record
properties:
  choices:
    type:
      kind: Table
      properties:
        finish_reason: String
        index: Number
        logprobs: Blank
        message:
          type:
            kind: Record
            properties:
              content: String
              role: String

  created: Number
  id: String
  model: String
  object: String
  system_fingerprint: String
  usage:
    type:
      kind: Record
      properties:
        completion_tokens: Number
        prompt_tokens: Number
        total_tokens: Number
応答に名前をつけて保存をクリックし、新しい変数Var1を作成します
受け取ったレスポンスを扱う。
レスポンスは以下のような形式です。
{
   "choices":[
      {
         "finish_reason":"stop",
         "index":0,
         "logprobs":null,
         "message":{
            "content":"ここに返答が入ります。",
            "role":"assistant"
         }
      }
   ],
   "created":1713846594,
   "id":"chatcmpl-9H24wFfltmmY8jN3iTquNhBjAZpHw",
   "model":"gpt-3.5-turbo-0125",
   "object":"chat.completion",
   "system_fingerprint":"fp_c2295e73ad",
   "usage":{
      "completion_tokens":117,
      "prompt_tokens":40,
      "total_tokens":157
   }
}
ここからTopic.Var1.choices[0].message.contentとして取り出したいところですが、それではエラーが出ます。
メッセージ送信カードを作成したら、PowerFx式を挿入するをクリックして、以下のように設定してください。PowerFx式ではIndexを使うことでリストの要素を取り出すようです。
Index(Topic.Var1.choices,1).message.content
上記が完了したら、保存をして動かしてみましょう。
実行してみる
トリガーを「今日の晩御飯なんにしよう」に設定し、トリガーの通りに入力してみます。

きちんとレスポンスを受け取ることができました。
まとめ
いかがだったでしょうか。Copilot Studioは、PowerFx式が一癖あって使いづらいですが、簡単にTeamsボットが作成できる点はとてもいいですよね。トリガーをOn Unknown Intentにすることでさまざまな入力を受け取れるようになるので、そこにこのHTTP要求の流れを作ると良いかもしれません。