目的
- CentOS 6 の環境に、今話題のPHP7をインストールする
- Webアクセスをしてからphpinfo()の画面を確認する。
- 自身の備忘録のため
参考
前提
- CentOS 6
- PHPはまだ何もインストールされていない状態
準備
PHP7はまだリリースはされていないので、ソースからのビルドとなります
PHPの開発リポジトリからソースを取得し、必要なモジュールをそろえます
ビルド用のライブラリを揃える
yumで可能なものはyumで一気に
$ yum -y install gcc gcc-c++ git wget tar m4 autoconf httpd vim
$ yum -y install httpd-devel gd-devel libxml2-devel mysql-devel t1lib-devel
$ yum -y install bzip2-devel curl-devel gmp-devel aspell-devel recode-devel
libmcryptのインストール(epelリポジトリにある)
$ wget http://ftp-srv2.kddilabs.jp/Linux/distributions/fedora/epel/6/x86_64/epel-release-6-8.noarch.rpm
$ rpm -ivh epel-release-6-8.noarch.rpm
$ yum -y install libmcrypt-devel
bison-2.7 のインストール
$ wget http://ftp.gnu.org/gnu/bison/bison-2.7.tar.gz
$ tar zxvf bison-2.7.tar.gz
$ cd bison-2.7
$ ./configure
$ make
$ make install
re2c のインストール
$ wget http://downloads.sourceforge.net/project/re2c/re2c/0.14.3/re2c-0.14.3.tar.gz
$ tar zxvf re2c-0.14.3.tar.gz
$ cd re2c-0.14.3
$ ./configure
$ make
$ make install
PHP7 のビルド
ソースをチェックアウトして準備
$ git clone https://git.php.net/repository/php-src.git
$ cd php-src
$ ./buildconf
ビルド
ビルドは公式のWikiを参考に行いました。
必要に応じて削ったり増やしたりしてください。
./configure --help でオプション閲覧可能
今回は、ホームディレクトリにtmpというディレクトリを作って
そこにインストールしています。
以下の説明もそれを前提に記述しているので、
インストールパスを変えたい人は適宜読み替えてください
# 上記の ./buildconf の続きから
$ ./configure \
    --prefix=$HOME/tmp/usr \
    --with-config-file-path=$HOME/tmp/usr/etc \
    --enable-mbstring \
    --enable-zip \
    --enable-bcmath \
    --enable-pcntl \
    --enable-ftp \
    --enable-exif \
    --enable-calendar \
    --enable-sysvmsg \
    --enable-sysvsem \
    --enable-sysvshm \
    --enable-wddx \
    --with-curl \
    --with-mcrypt \
    --with-iconv \
    --with-gmp \
    --with-pspell \
    --with-gd \
    --with-jpeg-dir=/usr \
    --with-png-dir=/usr \
    --with-zlib-dir=/usr \
    --with-xpm-dir=/usr \
    --with-freetype-dir=/usr \
    --with-t1lib=/usr \
    --enable-gd-native-ttf \
    --enable-gd-jis-conv \
    --with-openssl \
    --with-mysql=/usr \
    --with-pdo-mysql=/usr \
    --with-gettext=/usr \
    --with-zlib=/usr \
    --with-bz2=/usr \
    --with-recode=/usr \
    --with-mysqli=/usr/bin/mysql_config \
    --with-apxs2=/usr/sbin/apxs # これがないとApacheから使えないので注意
※最後の --with-apxs2オプションを指定しないと、
Apache用のモジュール「libphp7.so」を生成してくれません
configureに成功すると、画面に
Thank you for using PHP.
と表示されます。
エラーやWarningが出た場合は必要なモジュールが足りてない場合があるので、
それを追加でインストールします。
「あれ?入れたはずなのに?」と思った場合は、
そのモジュールの名前に「-devel」をつけて yum install してみましょう。
例えば、「curl」をインストールしたのにエラーになったら、
「curl-devel」をインストールしてみる、といった具合に。
configureが終わったら、makeします
$ make
$ make test # testは長いけど、やった方がいい
$ make install
php.iniの設定
上記の通りビルドを行うと、
カレントディレクトリに「tmp」という名のディレクトリができています。
(rootだと/root/tmp)
その中の入り、「~/tmp/usr/etc」の場所にphp.iniを作成します
$ vim ~/tmp/usr/etc/php.ini
中身はお好みで設定
max_execution_time=600
memory_limit=128M
error_reporting=0
display_errors=0
log_errors=0
user_ini.filename=
realpath_cache_size=2M
cgi.check_shebang_line=0

zend_extension=opcache.so
opcache.enable_cli=1
opcache.save_comments=0
opcache.fast_shutdown=1
opcache.validate_timestamps=1
opcache.revalidate_freq=60
opcache.use_cwd=1
opcache.max_accelerated_files=100000
opcache.max_wasted_percentage=5
opcache.memory_consumption=128
opcache.consistency_checks=0
PHP7の実行
PHP7 の旨が表示されればビルド成功です
$ ~/tmp/usr/bin/php -v
PHP 7.0.0-dev (cli) (built: Jun  4 2015 05:59:18)
Copyright (c) 1997-2015 The PHP Group
Zend Engine v3.0.0-dev, Copyright (c) 1998-2015 Zend Technologies
Apacheの設定
設定ファイルの記述
make install が完了すると、
/usr/lib64/httpd/modules/libphp7.so が作成されているはずなので確認します。
ない場合は、locateやfindなどのコマンドを使って探しましょう。
それでも見つからない場合は、ビルド時のオプションが間違っている可能性があります。
もう一度、見直してみましょう。
あるのが確認できたら、Apache用の設定ファイルを作成します。
$ vim /etc/httpd/conf.d/php7.conf
下記の内容を記述
※make installをした時点で/etc/httpd/conf/httpd.confに
LoadModuleの記述が自動でされている場合もあるので注意します
(ファイルを分けるのが嫌なら/etc/httpd/conf/httpd.confに全て記述してもOKです)
# ApacheにPHP7のモジュールを読み込ませる記述
LoadModule php7_module   /usr/lib64/httpd/modules/libphp7.so

# .phpファイルにアクセスした場合PHPスクリプトとして扱う記述
AddType application/x-httpd-php .php

# デフォルトファイルの追加
DirectoryIndex index.php
Apacheを起動(再起動)させる
$ /etc/init.d/httpd start # 再起動の場合は restart
PHPの表示を確認
phpinfoを表示するファイルを作成します
$ echo "<?php phpinfo();" > /var/www/html/info.php
Webブラウザから、DocumentRootのアドレスにアクセスして表示を確認!!
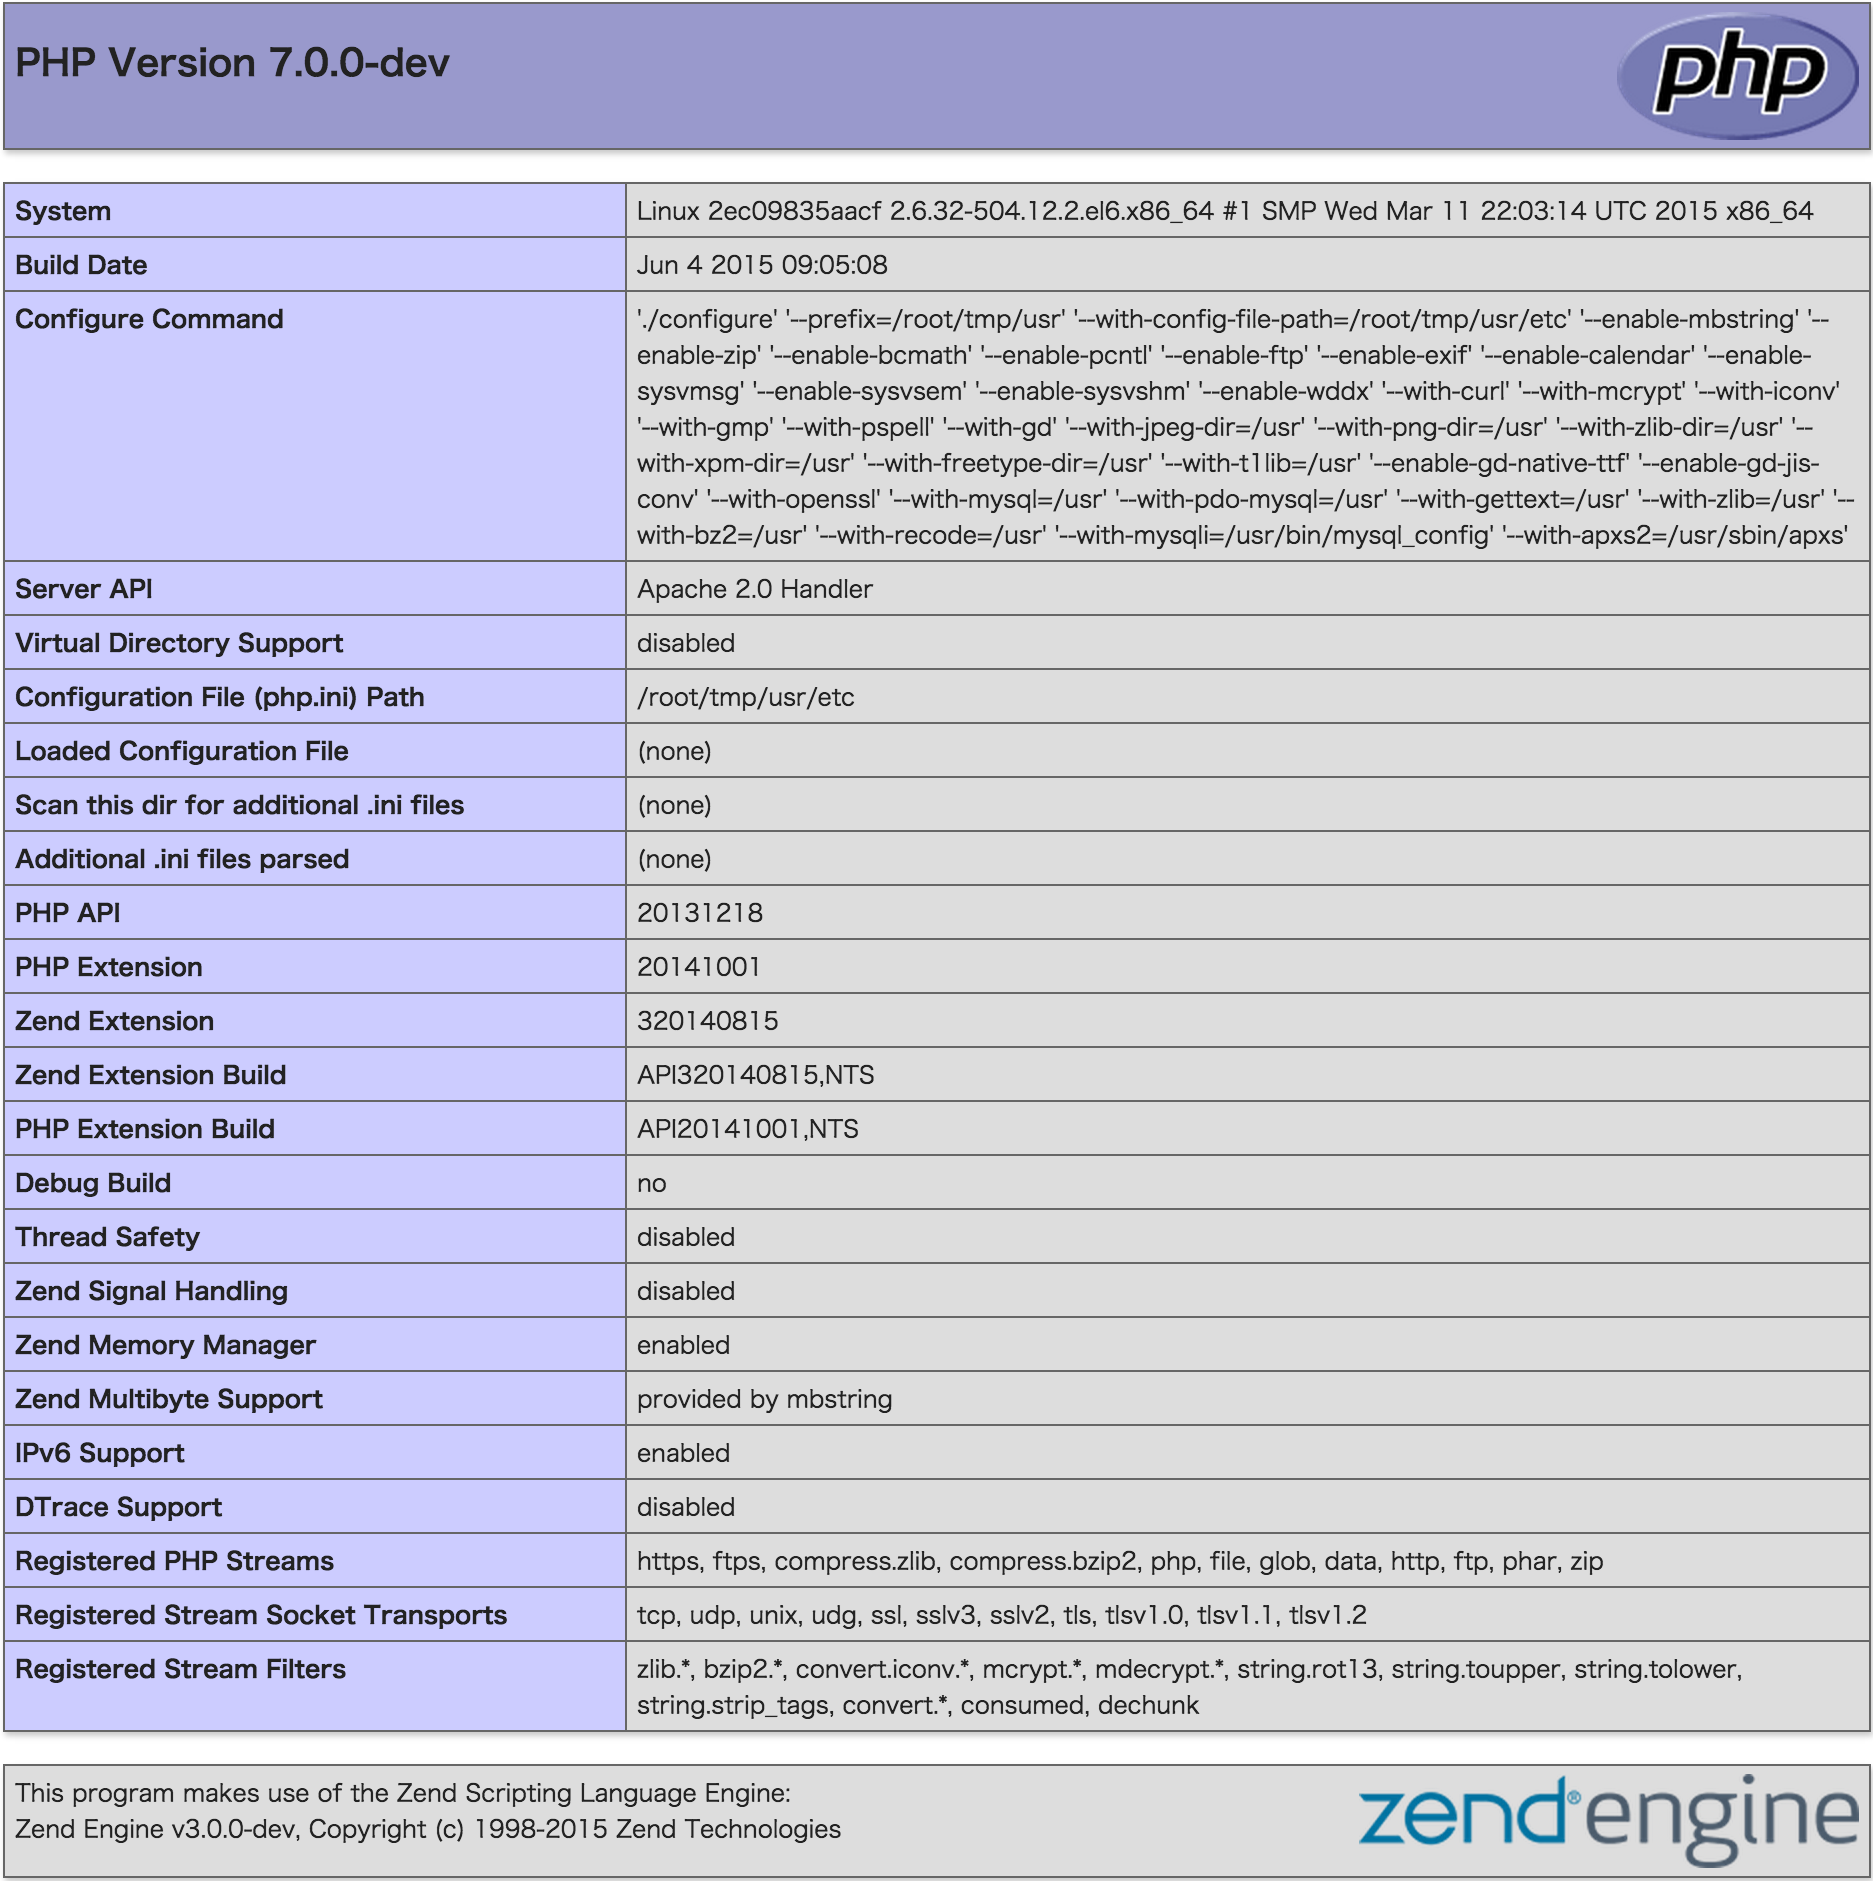
7.0.0の画面が!やったね!!
余談
dockerがインストールされている環境の場合、
php7用のコンテナを立ち上げて、適当にhttpをポートマッピングをする設定にして起動。
その後、上記のインストール手順を行うことで
80番ポートの通常アクセスはホスト側のPHPの環境(PHP5.5等)、
50080番ポートはコンテナ側のPHP7の環境、
といった具合に使い分けることができます。
$ docker run -t -i --name php7-test -p 50080:80 centos:centos6 /bin/bash