こんにちは!!!
python、djangoにGoogleAnariticsを導入することに成功しました!!
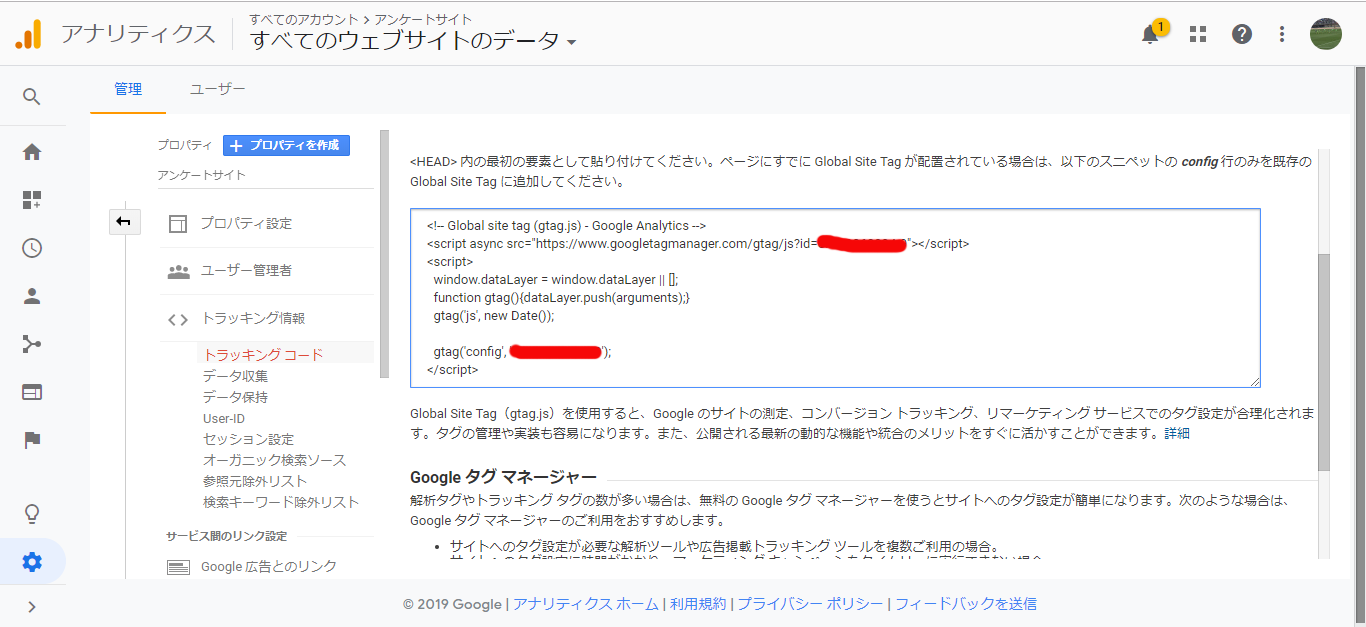
前提条件としてGoogleAnariticsはすでに登録していてこの画面を出せていること。
はっきり言ってこれを見ればできます。
https://qiita.com/chatrate/items/43c3e581c0c8d632cdc5
たださらに初心者向けに補足解説しようと思いここに書くことにしました。
アプリケーション内のviews.pyとかapps.pyとかがある場所に
context_processors.py
という名前でファイルを作りましょう。
ちなみに僕は1つのdjangoプロジェクトにpollsアプリケーションとboardアプリケーションの2つのアプリケーションを作っていたのでcontext_processors.pyは2つ作りました。
中身はこう書きます。
from django.conf import settings

def google_analytics(request):
    ga_tracking_id = getattr(settings, 'GOOGLE_ANALYTICS_TRACKING_ID', False)

    if not settings.DEBUG and ga_tracking_id:
        return {
            'GOOGLE_ANALYTICS_TRACKING_ID': ga_tracking_id,
        }
    return {}
https://qiita.com/chatrate/items/43c3e581c0c8d632cdc5
僕のコードより元サイトのコードの方が解説もついていていいと思います!
ひとつ補足するなら
settings
と書いている部分。僕はローカル環境とサーバー環境でpro_settingsとsettings.pyを使い分けているのですが、別にpro_settings.pyと書き換えなくてもきちんと動作します。
pro_settings.pyはsetting.pyから変更したいところだけ上書きしていて他はそのまま読み込んでいるだけなので当然ですが・・・。
ではそのsetting.pyの設定を変更
TEMPLATES = [
    {
        'BACKEND': 'django.template.backends.django.DjangoTemplates',
        'DIRS': [os.path.join(BASE_DIR, 'templates')], # 404ページ用に記載
        'APP_DIRS': True,
        'OPTIONS': {
            'context_processors': [
                'django.template.context_processors.debug',
                'django.template.context_processors.request',
                'django.contrib.auth.context_processors.auth',
                'django.contrib.messages.context_processors.messages',
                'polls.context_processors.google_analytics',←追加
         'board.context_processors.google_analytics',←追加
            ],
        },
    },
]
追加の部分は
アプリケーション名.context_processors.google_analytics'
としてアプリケーションでgoogle_anariticsが使えるようにします。
先ほども言いましたが僕はプロジェクト内にアプリケーションが2つあるので2つ書きました。
さらにsettings.pyのどこかに以下を追加
GOOGLE_ANALYTICS_TRACKING_ID = 'トラッキングID'
トラッキングIDとはこの画像の赤で隠している部分ですよ。

次にhtmlが格納されているディレクトリにga.htmlというファイルを作成します。 中身はこう。
<!-- Global site tag (gtag.js) - Google Analytics -->
<script async src="https://www.googletagmanager.com/gtag/js?id=トラッキングID"></script>
<script>
  window.dataLayer = window.dataLayer || [];
  function gtag(){dataLayer.push(arguments);}
  gtag('js', new Date());

  gtag('config', 'トラッキングID');
</script>
というかこれは

ここに書かれているコードと全く同じです。
つまりGoogleAnariticsを読み込むのに与えられたコードをga.htmlに記載しているんですね。
ただしこれではga.htmlでしかこのコードは反映されていないのでそのほかにページでも使えるように設定をします。
base.htmlの
{% if GOOGLE_ANALYTICS_TRACKING_ID %}
    {% include 'アプリケーション名/ga.html' %}
{% endif %}
1.もしGOOGLE_ANALYTICS_TRACKING_IDがTrueならば
2.ga.htmlを読み込む
1.GOOGLE_ANALYTICS_TRACKING_IDはsettings.pyで
GOOGLE_ANALYTICS_TRACKING_ID = 'トラッキングID'
と設定しましたし、
2.ga.htmlも先ほど作りましたね。
あっ!当たり前の話ですが実際にいろいろ動かしたいhtmlの一番上にちゃんと
{% extends 'アプリケーション名/base.html' %}
と書かないとbase.htmlが読み込まれないのでga.htmlも読み込まれずにGoogleAnaritics出来ませんので。
分かると思いますが。
サーバー環境ではDEBUGはFalseになっているはずなのでこれでデプロイをすれば、GoogleAnariticsが読み込めるはず。