初期費用無料、月額990円から、高速・多機能・高安定レンタルサーバー『エックスサーバー』
WordPressのインストールの前に、
https://qiita.com/sqoot610/items/fdd7c7659d258ec49a75
https://qiita.com/sqoot610/items/3c1bbbb49fe4ef49b2b6
を設定しておいてください。
taisuke@ubuntuserver:~$ sudo apt -y install php-common php-gd php-mysql php-enchant hunspell
taisuke@ubuntuserver:~$ sudo vi /etc/php/8.3/fpm/pool.d/www.conf
最終行に追記
サーバースペックや WordPress の使用状況に応じて要調整
php_value[max_execution_time] = 600
php_value[memory_limit] = 2G
php_value[post_max_size] = 2G
php_value[upload_max_filesize] = 2G
php_value[max_input_time] = 600
php_value[max_input_vars] = 2000
php_value[date.timezone] = Asia/Tokyo
taisuke@ubuntuserver:~$ sudo systemctl reload php8.3-fpm
taisuke@ubuntuserver:~$ sudo mysql
Welcome to the MariaDB monitor. Commands end with ; or \g.
Your MariaDB connection id is 37
Server version: 10.11.7-MariaDB-2ubuntu2 Ubuntu 24.04
Copyright (c) 2000, 2018, Oracle, MariaDB Corporation Ab and others.
Type 'help;' or '\h' for help. Type '\c' to clear the current input statement.
MariaDB [(none)]> create database wordpress;
Query OK, 1 row affected (0.00 sec)
MariaDB [(none)]> grant all privileges on wordpress.* to wordpress@'localhost' identified by 'password';
Query OK, 0 rows affected (0.00 sec)
MariaDB [(none)]> exit
Bye
#WordPress ダウンロード
taisuke@ubuntuserver:~$ sudo wget https://wordpress.org/latest.tar.gz
taisuke@ubuntuserver:~$ sudo tar zxvf latest.tar.gz -C /var/www/
taisuke@ubuntuserver:~$ sudo chown -R www-data:www-data /var/www/wordpress
taisuke@ubuntuserver:~$ sudo vi /etc/apache2/conf-available/wordpress.conf
#新規作成
Timeout 600
ProxyTimeout 600
Alias /wordpress "/var/www/wordpress/"
DirectoryIndex index.php index.html index.htm
Options FollowSymLinks
AllowOverride All
Require all granted
SetHandler "proxy:unix:/var/run/php/php8.3-fpm.sock|fcgi://localhost/"
taisuke@ubuntuserver:~$ sudo a2enconf wordpress
Enabling conf wordpress.
To activate the new configuration, you need to run:
systemctl reload apache2
taisuke@ubuntuserver:~$ sudo systemctl reload apache2
クライアントコンピューターから Web ブラウザーで [(サーバーのホスト名 または IP アドレス)/wordpress/] へアクセスすると以下のような画面が表示されます。 [Let's go!] をクリックして初期セットアップを実行します。

データベース接続の設定をします。 [4] で作成した MariaDB データベースとユーザーを指定します。 テーブル接頭辞は特別な要件がなければデフォルトのままで OK です。

[Run the installation] をクリックします。

サイトのタイトルや、任意の WordPress 管理者ユーザー名とパスワードを設定します。

[Success!] と表示されればセットアップ完了です。[Log In] をクリックして次へ進みます。

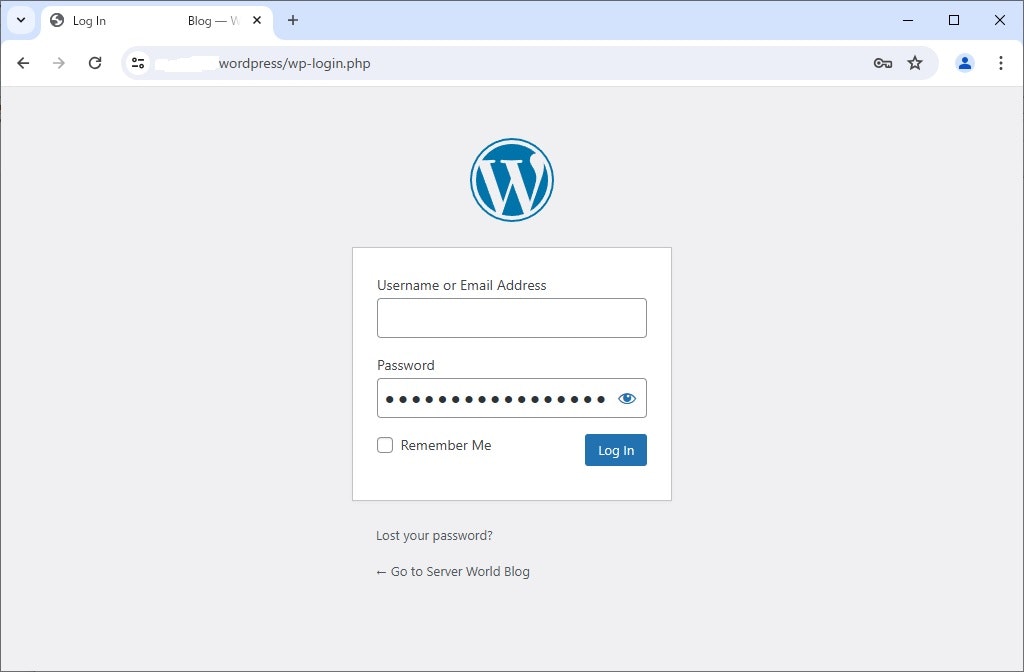
設定した管理者ユーザーでログインします。

WordPress の管理画面です。ここから日々の投稿等の管理作業が実行可能です。

ブログのトップページは、当サイトのように設定した場合は、[(サーバーのホスト名 または IP アドレス)/wordpress/] となります。 テスト投稿をしてみて、正常に表示されることを確認しておくとよいでしょう。

初期費用無料、月額990円から、高速・多機能・高安定レンタルサーバー『エックスサーバー』
ubuntu 24.04 LTSで自宅サーバー構築(WordPressの設定)
Last updated at Posted at 2024-08-12
Register as a new user and use Qiita more conveniently
- You get articles that match your needs
- You can efficiently read back useful information
- You can use dark theme