やりたいこと
メール確認時などで送られるメールに「アクションURL」が貼られているが、これのパラメータとしてURLをもたせたい。このURLに、確認後のリンク先から遷移させたい。
まとめ
firebase.auth().sendEmailVerification()の引数にactionCodeSettingsを渡す。
このときのurlの値だけ使う。ただし、このurlは、Firebase Authentication側でホワイトリストに入ってなければならない。
手順
Eメール確認用のメールは、firebase.auth().sendEmailVerification()でとばせる。
以下のコードはガイド参照。
firebase.auth().currentUser.sendEmailVerification()
  .then(function() {
    // Verification email sent.
  })
  .catch(function(error) {
    // Error occurred. Inspect error.code.
  });
このときに引数でactionCodeSettingsを渡すことができる。
詳細はガイドにも書いてある。
https://firebase.google.com/docs/auth/web/passing-state-in-email-actions?hl=ja
var actionCodeSettings = {
  url: 'https://www.example.com/?email=' + firebase.auth().currentUser.email,
  iOS: {
    bundleId: 'com.example.ios'
  },
  android: {
    packageName: 'com.example.android',
    installApp: true,
    minimumVersion: '12'
  },
  handleCodeInApp: true,
  // When multiple custom dynamic link domains are defined, specify which
  // one to use.
  dynamicLinkDomain: "example.page.link"
};
firebase.auth().currentUser.sendEmailVerification(actionCodeSettings)
  .then(function() {
    // Verification email sent.
  })
  .catch(function(error) {
    // Error occurred. Inspect error.code.
  });
actionCodeSettingsのurlに、あとで使いたいURLをもたせる。
var actionCodeSettings = {
  url: 'https://redirect.com/',
};
firebase.auth().currentUser.sendEmailVerification(actionCodeSettings)
  .then(function() {
    // Verification email sent.
  })
  .catch(function(error) {
    // Error occurred. Inspect error.code.
  });
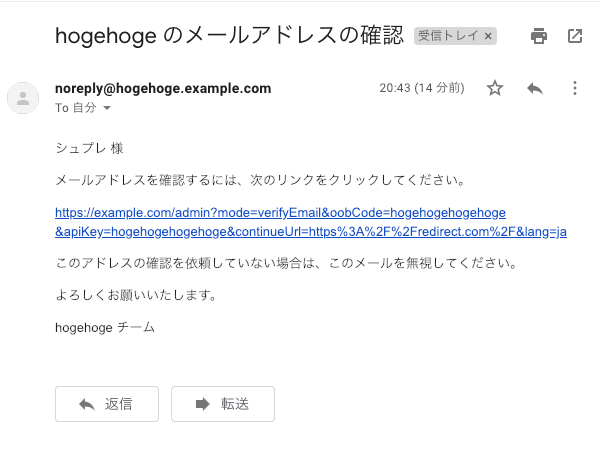
実際に動作させて来るメールをみると、
continueUrlが設定されていることがわかる。
この値を使えば、アクションURLのリンク先でも使いたいURLが取り回せる。
注意点としては、actionCodeSettingsのurlの値は、Firebase Authentication側で、ホワイトリストに入っているホストでなければならない。
